Advertisement
DUSK.C OM
I
LIVING
BEDROOM
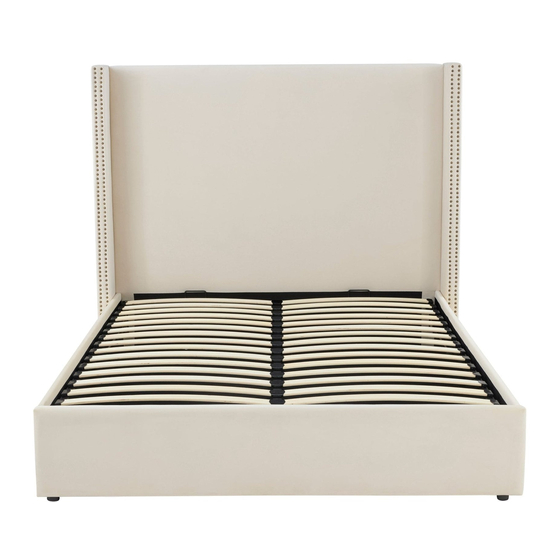
Austin Ottoman Bed Frame
Up to 2 hour approx
assembly time
V1.0
I
DINING
Double/King size
0
丿
勹
门
Two person
assembly
Box dimensions: double bed: L 146 x W142 x H11.5. box 2: L 197 x W33 x H17.5 (cm)
King bed: L 161 x W142 x H11.5. box 2: L207 x W33 x H17.5 (cm)
0
勹
勹
Page 1
Advertisement
Table of Contents

Subscribe to Our Youtube Channel
Related Manuals for DUSK Austin Ottoman Bed Frame


Summary of Contents for DUSK Austin Ottoman Bed Frame
- Page 1 Box dimensions: double bed: L 146 x W142 x H11.5. box 2: L 197 x W33 x H17.5 (cm) DUSK.C OM King bed: L 161 x W142 x H11.5. box 2: L207 x W33 x H17.5 (cm) LIVING BEDROOM DINING Austin Ottoman Bed Frame Double/King size 丿 勹 勹 门...
-
Page 2: Safety And Care
lmQortant Assembly Tip Before you begin, it's best to identify all of the parts and fittings to build your ottoman bed frame. We advise laying these out on the floor to check you have everything, and to familiarise yourself with all of the parts and fittings before building. To p T ip We recommend that you build your new ottoman bed frame in the room you'd like it to be located. - Page 3 • Caution, this ottoman bed frame uses a pressurised mechanism. • Please ensure children and animals are kept away from the ottoman bed frame when operating the mechanism. • Use caution when operating, and always use two hands at arm's length. •...
- Page 4 Parts Before you begin building your ottoman bed frame, please take a moment to read through the instructions and make sure that you have all the relevant parts listed on the parts check list. Page 4...
-
Page 5: Part Check List
PART CHECK LIST NO. I Part list Box No Part list Box No Stra p Headboard Box 1 Box2 Slat Double/King 28/30 pc s I Footboard Box2 Box 1 Angle Corner Bra c ket 2 pc s 3L I Side Rail-LH Box2 Box2 1 3 I Side Slat Cap Double/King I 28/30 pc s I Box2... - Page 6 Step 1: Open the zipper behind the headboard and take out the left and righ t w ings (4L ) (4R ),(1 1) Step 2: Attaching the Angle Irons to the Headboard & Footboard ©妒泄 4pcs @尸p Headboard Ensure that the Angle Irons are attached to the Headboard and the Footboard with...
- Page 7 Step 3: Attaching the Headboard & Footboard to the Side Rails Headboard end @帜醴鄱 8pcs @尸p NB: Side Rail Angle Irons are pre- attached NB:Attach the bottom Bolt first CORRECT WRONG NB: Before tightening the bolts, please ensure the bed frame is square Step 4: Attaching the Central Support Rail &...
- Page 8 Step 5: Fabric Base Attachment With an assistant, carefully lift both the Headboard & Footboard at the same time, do not let the bed frame twist. Lift and turn the bed frame on its side holding the bed upright for safety. Attach the Fabric Base (16) to bottom of the Side Rails, Headboard &...
- Page 9 Ste p 7: Screw the Ottoman Metal Frame to each Lift Mechanism 6pcs @佥 6pcs @芍 6pcs @ 尸 三 。 。 。 Insert both Mattress 、 Positioning Handles (15). Step 8: Attaching the Slat Caps to the Ottoman Bed Frame 问心...
- Page 10 Step 9: Attach the Strap (10) to the Center Ottoman Metal Frame, at the @令 2pcs Footboard end. 它苍 匝竺走圭1pc 。 。 Attaching the Gas Stuts to Lift Mechanisms If you are experiencing problems closing with your gas struts please refer to the last page for gas strut trouble shooting. Step 10: 6pcs @尸...
-
Page 11: Care And Maintenance
Care and Maintenance Here are some good tips to keep your new ottoman bed frame in tip-top condition. Cleaning To clean your new ottoman bed frame, we advise using a damp cloth if the fabric is dusty or a low suction vacuum. Do not use abrasive chemicals or bleach as this may damage the product.
Need help?
Do you have a question about the Austin Ottoman Bed Frame and is the answer not in the manual?
Questions and answers