SMC Networks SMC7904WBRA-N2 - User Manual
Adsl2 barricade n 11n wireless 4-port adsl2/2+ modem router
Hide thumbs
Also See for SMC7904WBRA-N2 -:
- Specifications (2 pages) ,
- Quick installation manual (1 page)

Related Manuals for SMC Networks SMC7904WBRA-N2 -


Summary of Contents for SMC Networks SMC7904WBRA-N2 -
-
Page 1: User Manual
USER MANUAL ADSL2 Barricade 11n Wireless 4-Port ADSL2/2+ Modem Router SMC7904WBRA-N2... - Page 2 SMC7904WBRA-N2 User Manual...
-
Page 3: Table Of Contents
User Manual Contents Compliances ...................... 1 Europe – EU Declaration of Conformity ............1 Safety Precautions ..................... 5 Précautions de sécurité ..................6 Sicherheitsmaßnahmen ..................7 Precauciones de seguridad................8 Precauções de Segurança ................. 9 Overview ......................10 Packing List ....................10 Application .................... - Page 4 User Manual 10.2.4 Security ....................76 10.2.5 Parental Control ................... 80 10.2.6 Quality of Service ................82 10.2.7 Routing ....................86 10.2.8 DNS ..................... 90 10.2.9 DSL ...................... 91 10.2.10 UPnP ....................92 10.2.11 DNS Proxy ................... 93 10.2.12 Storage Service ................... 94 10.2.13 Interface Grouping ................
-
Page 5: Compliances
User Manual 1 Compliances 1.1 Europe – EU Declaration of Conformity This device complies with the essential requirements of the R&TTE Directive 1999/5/EC. The following test methods have been applied in order to prove presumption of conformity with the essential requirements of the R&TTE Directive 1999/5/EC: EN 60950-1:2006 + A11: 2009 Safety of Information Technology Equipment. - Page 6 С настоящето, SMC Networks декларира, че това безжично устройство е в съответствие със съществените изисквания и [Bulgarian] другите приложими разпоредби на Директива 1999/5/EC. SMC tímto prohlašuje, že tento Router je ve shodě se základními Česky požadavky a dalšími příslušnými ustanoveními směrnice [Czech] 1999/5/ES.
- Page 7 és az 1999/5/EC irányelv egyéb Magyar elõírásainak. Italian Con la presente SMC dichiara che questo Router è conforme ai requisiti essenziali ed alle altre disposizioni pertinenti stabilite Italiano dalla direttiva 1999/5/CE. Ar šo SMC deklarē, ka Router atbilst Direktīvas 1999/5/EK Latviski būtiskajām prasībām un citiem ar to saistītajiem noteikumiem.
- Page 8 SMC týmto vyhlasuje, že Router spĺňa základné požiadavky a všetky príslušné ustanovenia Smernice 1999/5/ES. Slovensky Slovenian SMC izjavlja, da je ta Router v skladu z bistvenimi zahtevami in ostalimi relevantnimi določili direktive 1999/5/ES. Slovensko Spanish Por medio de la presente SMC declara que el Router cumple con los requisitos esenciales y cualesquiera otras disposiciones Español...
-
Page 9: Safety Precautions
User Manual 2 Safety Precautions Read the following information carefully before operating the device. Please follow the following precaution items to protect the device from risks and damage caused by fire and electric power: Use the power adapter that is included with the device package. ... -
Page 10: Précautions De Sécurité
User Manual 3 Précautions de sécurité Lisez attentivement les informations suivantes avant d’utiliser votre appareil. Respectez toutes les précautions afin de protéger l’appareil des risques et dégâts provoqués par un incendie et l’alimentation électrique : • Utilisez exclusivement l’adaptateur d’alimentation fourni avec cet appareil. •... -
Page 11: Sicherheitsmaßnahmen
User Manual 4 Sicherheitsmaßnahmen Lesen Sie vor der Inbetriebnahme des Gerätes aufmerksam die nachstehenden Informationen. Bitte befolgen Sie die nachstehenden Sicherheitsmaßnahmen, damit das Gerät nicht beschädigt wird oder Gefahren durch Brand oder elektrische Energie entstehen: • Verwenden Sie nur das beim Gerät mitgelieferte Netzteil. •... -
Page 12: Precauciones De Seguridad
User Manual 5 Precauciones de seguridad Lea la siguiente información detenidamente antes de utilizar el dispositivo. Siga las indicaciones de precaución que se mencionan a continuación para proteger el dispositivo contra riesgos y daños causados por el fuego y la energía eléctrica: •... -
Page 13: Precauções De Segurança
User Manual 6 Precauções de Segurança Leia atentamente as seguintes informações antes de utilizar o dispositivo. Respeite as seguintes indicações de segurança para proteger o dispositivo contra riscos e danos causados por fogo e energia eléctrica: • Utilize o transformador incluído na embalagem do dispositivo. •... -
Page 14: Overview
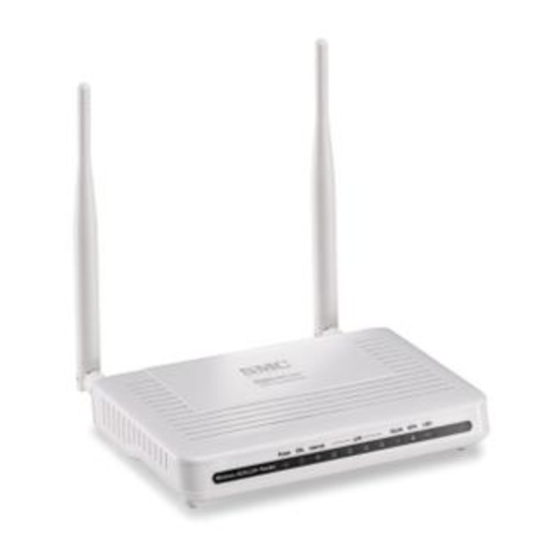
User Manual 7 Overview The SMC7904WBRA-N2 Router is an ADSL2+ Integrated Access Device. It provides four 10/100Base-TX Ethernet interfaces at the user end. The Router provides a high-speed ADSL broadband connection to the Internet or Intranet for high-end users, such as net bars and office users. It provides high-performance access to the Internet, with downstream speeds up to 24 Mbps. -
Page 15: Features
User Manual 7.3 Features User-friendly GUI for web configuration Several pre-configured popular games. Just enable the game support and the port settings are automatically configured. Compatible with all standard Internet applications Industry-standard and interoperable DSL interface Simple web-based status page displays a snapshot of system configuration, ... -
Page 16: Standards Compatibility And Compliance
User Manual 7.4 Standards Compatibility and Compliance Support s application level gateway (ALG) ITU G.992.1 (G.dmt) ITU G.992.2 (G.lite) ITU G.994.1 (G.hs) ITU G.992.3 (ADSL2) ITU G.992.5 (ADSL2+) ANSI T1.413 Issue 2 IEEE 802.3 ... - Page 17 User Manual Indicator Color Status Description There is a connection to the Internet (PPP is up). Green Blink Data is being transmitted. Internet Authentication has failed. No PPP connection or the PPP connection is down. An Ethernet link is established. Green Transmitting or receiving data over the Ethernet Blink...
-
Page 18: Rear Panel
User Manual 8.1.2 Rear Panel Figure 2 Rear panel The following table describes the interfaces and buttons on the rear panel. Interface Description RJ-11 port for connecting to the ADSL interface or a splitter through a Line telephone cable. WLAN WLAN switch for enabling or disabling the WLAN function. -
Page 19: Hardware Installation
User Manual 8.2 Hardware Installation 8.2.1 Choosing the Best Location for Wireless Operation Many environmental factors may affect the effective wireless function of the DSL Router. If this is the first time that you have set up a wireless network device, read the following information: The access point can be placed on a shelf or desktop, ideally you should be able to see the LED indicators in the front, as you may need to view them for troubleshooting. - Page 20 User Manual Figure 3 Connection diagram (Without connecting telephone sets before the splitter) Connection 2 Figure 4 displays the connection when the splitter is installed close to the router. Figure 4 Connection diagram (Connecting a telephone set before the splitter) Note: When connection 2 is used, the filter must be installed close to the telephone cable.
-
Page 21: Pc Network Configuration And Login
User Manual 9 PC Network Configuration and Login 9.1 PC Network Configuration Each network interface on the PC should either be configured with a statically defined IP address and DNS address, or be instructed to automatically obtain an IP address using the network DHCP server. - Page 22 User Manual Figure 5 IP and DNS configuration TCP/IP configuration steps for Windows XP are as follows: Step1 Choose Start > Control Panel > Network Connections. Step2 Right-click the Ethernet connection icon and choose Properties. Step3 On the General tab, select the Internet Protocol (TCP/IP) component and click Properties.
-
Page 23: Logging In To The Dsl Router
User Manual Step6 Select the Obtain DNS server address automatically radio button. Step7 Click OK to save the settings. 9.2 Logging In to the DSL Router To log in to the DSL router, follow these steps: Step1 Open a Web browser on your computer. Step2 Enter http://192.168.2.1 (the default IP address of the DSL router) in the address bar. -
Page 24: Web-Based Management
User Manual 10 Web-Based Management This chapter describes how to use Web-based management of the DSL router, which allows you to configure and control all of DSL router features and system parameters through a user-friendly GUI. After logging in to the DSL router successfully, the following page appears. Setup Wizard: Select this option to display the following page. - Page 25 User Manual Advanced Setup: Select this option to display the following page. For configuration details, refer to the following section.
-
Page 26: Start
User Manual 10.1 Start Choose Start and the submenus of Start are shown as below: 10.1.1 Wizard Setup Wizard helps you to fast and accurately configure Internet connection and other important parameters. The following sections describe these various configuration parameters. Step1 Choose Wizard in the main page and the page as shown in the following figure appears. - Page 27 User Manual Step3 After proper setting wireless, click Next and the Times settings page appears. In this page, you can automatically maintain the system time on your ADSL router by synchronizing with a public time server over the Internet.
- Page 28 User Manual Step4 After proper setting time, click Next and the ADSL settings page appears. Select the country and ISP provider. Set the VPI and VCI. If you fail to find the country and ISP from the drop-down lists, select Others. Protocol: You can select the protocol from the drop-down list.
- Page 29 User Manual subnet mask, default gateway and DNS provided by your ISP. Encapsulation Mode: You can select the encapsulation mode from the drop-down list. VPI (Virtual Path Identifier): The virtual path between two points in an ATM network, and its valid value is from 0 to 255. VCI (Virtual Channel Identifier): The virtual channel between two points in ...
-
Page 30: Wireless
User Manual 10.1.2 Wireless 10.1.2.1 Basic Settings Choose Start > Wireless > Basic to display the following page. - Page 31 User Manual This page allows you to configure the basic features of the wireless LAN interface. Enable Wireless: Enable or disable the wireless function. Hide Access Point: if you want to hide any access point for your router, select this option, and then a station cannot obtain the SSID through the passive scanning.
- Page 32 User Manual Country: The name of the country with which your gateway is configured. This parameter further specifies your wireless connection. For example, The channel will adjust according to nations to adapt to each nation's frequency provision. Max Clients: Specify the maximum wireless client stations to be enabled to ...
- Page 33 User Manual This page allows you to configure the security features of the wireless LAN interface. In this page, you can configure the network security settings by the Wi-Fi Protected Setup (WPS) method or setting the network authentication mode.
- Page 34 User Manual WPS Setup There are 2 primary methods used in the Wi-Fi Protected Setup: - PIN entry, a mandatory method of setup for all WPS certified devices. - Push button configuration (PBC), an actual push button on the hardware or through a simulated push button in the software.
- Page 35 User Manual - Open Mode...
- Page 36 User Manual Select SSID: Select a SSID for configuring the security settings. Network Authentication: Select the Open mode. WEP Encryption: Enable or disable WEP encryption. After enabling this function, you can set the encryption strength, current network key, and network keys.
- Page 37 User Manual The parameters’ description of shared mode, please refer to the Open Mode. - 802.1x...
- Page 38 User Manual Select SSID: Select a SSID for configuring the security settings. Network Authentication: Select the 802.1X in the drop-down list. RADIUS Server IP Address: Enter the IP address of the RADIUS server. RADIUS server is used to authenticate the hosts on the wireless network. RADIUS Port: The port number that the RADIUS server uses.
- Page 39 User Manual Network Key1/2/3/4: Set the network key. If it is 128-bit key, you need to enter 13 ASCII characters or 26 hexadecimal digits. For the 64-bit key, you need to enter 5 ASCII characters or 10 hexadecimal digits. - WPA Mode Select SSID: Select a SSID for configuring the security settings.
- Page 40 User Manual Select SSID: Select a SSID for configuring the security settings. Network Authentication: Select the WPA-PSK mode. WPA/WAPI passphrase: The key for WPA encryption. Click the Click here to display button to display the current key. The default key is 87654321. WPA Group Rekey Interval: Setting the interval for renewing key.
- Page 41 User Manual Select SSID: Select a SSID for configuring the security settings. Network Authentication: Select the WPA2 mode. WPA2 Preauthentication: Enable or disable pre-authentication. Network Re-auth Interval: Set the network re-auth interval. WPA Group Rekey Interval: Setting the interval for renewing key. ...
- Page 42 User Manual The parameters’ description of WPA2-PSK mode, please refer to the WPA-PSK mode. - Mixed WPA2/WPA...
- Page 43 User Manual The parameters’ description of Mixed WPA2/WPA mode, please refer to the WPA2 mode. - Mixed WPA2/WPA-PSK...
-
Page 44: Lan
User Manual The parameters’ description of Mixed WPA2/WPA-PSK mode, please refer to the WPA-PSK mode. 10.1.3 10.1.4 LAN Configuration Choose Advanced Setup > LAN, and the following page appears. - Page 45 User Manual...
-
Page 46: Enabling Igmp Snooping
User Manual In this page, you can configure an IP address for the DSL router, enable IGMP snooping, enable or disable the DHCP server, and edit the DHCP option. Configuring the Private IP Address for the DSL Router In this page, you can modify the IP address of the device. The preset IP address is 192.168.2.1. -
Page 47: Configuring The Dhcp Server
User Manual Configuring the DHCP Server If you enable the DHCP sever, the clients will automatically acquire the IP address from the DHCP server. If the DHCP server is disabled, you need to manually set the start IP address, end IP address and the lease time for the clients in the LAN. Editing the DHCP Option Click the DHCP Option button in the Local Area Network (LAN) Setup page to display the DHCP Option Setup page. - Page 48 User Manual In this page, you can add, edit or delete the DHCP60 options. Configuring the DHCP Static IP Lease List The lease list of static IP address can reserve the static IP addresses for the hosts with the specific MAC addresses. When a host whose MAC address is in the lease list of static IP address requests the DHCP server for an IP address, the DHCP server assigns the reserved IP address to the host.
-
Page 49: Advanced Setup
User Manual After enabling Configure the second IP Address and Subnet Mask for LAN interface, enter an IP address and a subnet mask for the LAN interface. Ethernet Media Type In the Local Area Network (LAN) Setup page, you can select the media type from the drop-down list. -
Page 50: Layer2 Interface
User Manual 10.2.1 Layer2 Interface ATM Interface Choose Advanced Setup > ATM Interface , and the following page appears. - Page 51 User Manual In this page, you can add or remove the DSL ATM Interfaces. Click the Add button to display the following page. In this page, you can set the VPI and VCI values, and select the DSL latency, link type (EoA is for PPPoE, IPoE, and Bridge.), connection mode, encapsulation mode, service category, and IP QoS scheduler algorithm.
-
Page 52: Wan Service
User Manual Select DSL Link Type: You may select EoA (it is for PPPoE, IPoE, and Bridge), PPPoA, or IPoA. Select Connection Mode: You may select the Default Mode or the VLAN MUX Mode. Encapsulation Mode: You may select LLC/SNAP-BRIDGING or VC/MUX in ... - Page 53 User Manual In this page, you are allowed to add, remove, or edit a WAN service. Adding a PPPoE WAN Service This section describes the steps for adding the PPPoE service. Step1 In the Wide Area Network (WAN) Service Setup page, click the Add button to display the following page.
- Page 54 User Manual Step3 In this page, select the WAN service type to be PPP over Ethernet (PPPoE). Click Next to display the following page.
- Page 55 User Manual Step4 In this page, you can modify the PPP username, PPP password, PPPoE service name and authentication method. PPP Username: The correct user name provided by your ISP. PPP Password: The correct password provided by your ISP. ...
- Page 56 User Manual Enable Fullcone NAT:. NAT is one where all requests from the same internal IP address and port are mapped to the same external IP address and port. Furthermore, any external host can send a packet to the internal host, by sending a packet to the mapped external address.
- Page 57 User Manual Step6 In this page, select a preferred WAN interface as the system default gateway, and then click Next to display the following page.
- Page 58 User Manual Step7 In this page, you may obtain the DNS server addresses from the selected WAN interface or manually enter the static DNS server addresses. If only a PVC with IPoA or static MER protocol is configured, you must manually enter the static DNS server addresses.
- Page 59 User Manual Step2 Select an ATM Interface, for example, atm1/(0_0_36), and then click Next to display the following page.
- Page 60 User Manual Step3 In this page, select the WAN service type to be IP over Ethernet and enter the service description. After finishing setting, click Next to display the following page. Step4 In this page, you can select obtain an IP address automatically or manually enter the IP address provided by your ISP.
- Page 61 User Manual Step5 In this page, you can set the network address translation settings,for example, enabling NAT, enabling firewall, and.enabling IGMP multicast. After finishing setting, click Next and the following page appears. Step6 In this page, select a preferred WAN interface as the system default gateway and then click Next to display the following page.
- Page 62 User Manual Step7 In this page, you may obtain the DNS server addresses from the selected WAN interface or manually enter static DNS server addresses. If only a PVC with IPoA or static MER protocol is configured, you must enter the static DNS server addresses.
- Page 63 User Manual Step8 In this page, it displays the information about the IPoE settngs.Click Apply/Save to save and apply the settings. You can modify the settings by clicking the Back button if necessary. Adding a PPPoA WAN service This section describes the steps for adding the PPPoA WAN service. Step1 Choose Advanced Setup >...
- Page 64 User Manual Step2 Select the DSL link type to be PPPoA, and select the encapsulation mode to be VC/MUX (according to the uplink equipment). After finishing setting, click the Apply/Save button to apply the setings, and the following page appears.
- Page 65 User Manual Step3 Choose WAN Service and click Add to display the following page. Step4 Select the proper interface for the WAN service, and then click Next to display the following page. Step5 In this page, you may modify the service description. Click Next to display the following page.
- Page 66 User Manual PPP Username: The correct user name provided by your ISP. PPP Password: The correct password provided by your ISP. Authentication Method: The value can be AUTO, PAP, CHAP, or MSCHAP. Usually, you can select AUTO. Enable Fullcone NAT:.
- Page 67 User Manual does not stop, unless the modem is powered off and DSLAM or uplink equipment is abnormal. PPP IP extension: If you want to configure DMZ Host, you should enable it first. Use Static IPv4 Address: If this function is disabled, the modem obtains an ...
- Page 68 User Manual Step8 In this page, you can obtain the DNS server addresses from the selected WAN interface or manually enter the static DNS server addresses. If only a PVC with IPoA or static MER protocol is configured, you must enter the static DNS server addresses.
- Page 69 User Manual Step9 In this page, it displays the information about the PPPoA settngs.Click Apply/Save to apply the settings. You can modify the settings by clicking the Back button if necessary. Adding an IPoA WAN service This section describes the steps for adding the IPoA WAN service. Step1 Choose Advanced Setup >...
- Page 70 User Manual finishing setting, click the Apply/Save button to display the following page. Step3 Choose WAN Service and click Add to display the following page. Step4 Select the proper interface for the WAN service ,and then click Next to display the following page.
- Page 71 User Manual Step5 In this page, you may modify the service description. Click Next to display the following page. Step6 In this page, enter the WAN IP address and the WAN subnet mask provided by your ISP and then click Next to display the following page.
- Page 72 User Manual In this page, Network Address Translation (NAT) allows you to share one Wide Area Network (WAN) IP address for multiple computers on your Local Area Network (LAN). If you do not want to enable NAT, and wish the user of modem to access the Internet normally, you need to add a route on the uplink equipment.
- Page 73 User Manual Step9 In this page, you can select DNS server interface from available WAN interface or enter static DNS server IP addresses fro the system. Click Next to display the following page.
- Page 74 User Manual Step10 In this page, it displays the information about the IPoA settngs. Click Apply/Save to save and apply the settings. You can modify the settings by clicking the Back button if necessary. Adding a Bridge WAN service This section describes the steps for adding the Bridge WAN service. Step1 In the Wide Area Network (WAN) Service Setup page, click the Add button to display the following page.
- Page 75 User Manual Step3 In this page, you can select the WAN service type, and modify the service description. After finishing setting, click Next to display the following page. Step4 In this page, it displays the information about the bridge settngs. Click Apply/Save to save and apply the settings.
-
Page 76: Nat
User Manual 10.2.3 Virtual Servers Firewall can prevent unexpected traffic on the Internet from your host on the LAN. The virtual server can create a channel that can pass through the firewall. In that case, the host on the Internet can communicate with a host on your LAN within certain port range. - Page 77 User Manual Use interface: Select an interface that you want to configure. Select a Service: Select a proper service in the drop-down list. Custom Server: Enter a new service name to establish a user service type. Server IP Address: Assign an IP address to virtual server. ...
-
Page 78: Port Triggering
User Manual Protocol: You may select TCP/UDP, TCP, or UDP in the drop-down list. Internal Port Start: When selecting a service, the port number will automatically be displayed. You can modify it if necessary. Internal Port End: When selecting a service, the port number will ... - Page 79 User Manual Use interface: Select an interface that you want to configure. Select an application: Select a proper application in the drop-down list. Custom application: Manually define an application. Trigger port Start: The start port number that LAN uses to trigger the open ...
-
Page 80: Security
User Manual Note: You can use a single port number, several port numbers separated by commas, port blocks consisting of two port numbers separated by a dash, or any combination of these, for example 80, 90-140, 180. DMZ Host DMZ allows all the ports of a PC on your LAN to be exposed to the Internet. Set the IP address of the PC to be DMZ host, so that the DMZ host will not be blocked by firewall. - Page 81 User Manual Click Add Firewall, and the following page appears. name: The name of firewall. Interface: You can select the interface from the drop-down list. Type: You can select In or Out from the drop-down list. Default action: You can select Permit or Drop from the drop-down list. ...
-
Page 82: Mac Filtering Setup
User Manual Firewall Name: Select it from the drop-down list. Protocol: You can select UDP, TCP, or ICMP from the drop-down list. Action: You can select Permit, Drop, or Reject from the drop-down list. After finishing setting, click Save/Apply to save and activate the rule. MAC Filtering Setup In some cases, you may want to manage Layer2 MAC address to block or permit a computer within the home network. - Page 83 User Manual In this page, you can add or remove the MAC filtering rule. You may change the MAC filtering policy from FORWARDED to BLOCKED by clicking the Change Policy button. Click the Add button to display the following page. Protocol Type: Select the proper protocol type.
-
Page 84: Parental Control
User Manual Source MAC Address: Enter the source MAC address. Frame Direction: The direction of transmission frame. WAN Interface (Configured in bridge mode only): Select the proper WAN interface in the drop-down list. After finishing setting, click Apply/Save to save and apply the filtering rule. Choose Security >... -
Page 85: Url Filter
User Manual Click the Add button to display the following page. This page is used to control the time restriction to a special LAN device that connects to the DSL router. In this page, se the user name and configure the time settings. After finishing setting, click the click Apply/Save to save and apply the settings. -
Page 86: Quality Of Service
User Manual Thisp age is used to prevent the LAN users from accessing some Websites in the WAN. In this page, you may select the Exlude URL list type or the Include URL list type. If you select the Exlude URL list type, it means that the URLs in the list are not accessible. - Page 87 User Manual Select Enable QoS to enable QoS and configure the default DSCP mark. In this page, enable the QoS function and select the default DSCP mark. After finishing setting, click Apply/Save to save and apply the settings. Note: If the Enable Qos checkbox is not selected, all QoS will be disabled for all interfaces. The default DSCP mark is used to mark all egress packets that do not match any classification rules.
- Page 88 User Manual Queue Configuration Choose Advanced Setup > Quality of Service > Queue Configuration, and the following page appears. In this page, you can enable, add or remove a QoS rule. Note: The lower integer value for precedence indicates the higher priority. Click the Add button to display the following page.
-
Page 89: Qos Classification
User Manual Enable: Enable or disable the QoS queue. Interface: Select the proper interface for the QoS queue. After finishing setting, click Apply/Save to save and apply the settings. QoS Classification Choose Advanced Setup > Quality of Service > Qos Classification and the following page appears. -
Page 90: Routing
User Manual In this page, enter the traffic name, select the rule order and the rule status, and specify the classification criteria and the classification results. After finishing setting, click Apply/Save to save and apply the settings. 10.2.7 Routing Default Gateway Choose Advanced Setup >... -
Page 91: Static Route
User Manual In this page, you can modify the default gateway settings. After finishing setting, click Apply/Save to save and apply the settings. Static Route Choose Advanced Setup > Routing > Static Route and the following page appears. Click the Add button to display the following page. -
Page 92: Policy Routing
User Manual IP Version: Select the IP version to be IPv4. Destination IP address/prefix length: Enter the destination IP address. Interface: select the proper interface for the rule. Gateway IP Address: The next-hop IP address. Metric: The metric value of routing. ... - Page 93 User Manual In this page, enter the policy name, source IP and default gateway, and select the physical LAN port and interface. After finishing setting, click Apply/Save to save and apply the settings. Choose Advanced Setup > Routing > RIP and the following page appears. In this page, if you want to configure an individual interface, select the desired RIP version and operation, and then select the Enabled checkbox for the interface.
-
Page 94: Dns
User Manual 10.2.8 DNS Server Choose Advanced Setup > DNS > DNS Server and the following page appears. In this page, you can select a DNS server interface from the available interfaces, or manually enter the DNS server addresses. After finishing setting, click Apply/Save to save and apply the settings. Dynamic DNS Choose Advanced Setup >... -
Page 95: Dsl
User Manual In this page, you are allowed to modify the DDNS settings. Click the Add button to display the following page. D-DNS provider: Select a proper DDNS server in the drop-down list. Hostname: It is the domain name and it can be modified. ... -
Page 96: Upnp
User Manual In this page, you can set the DSL settings. Usually, you do not need to modify the factory default settings. After finishing setting, click Apply/Save to save and apply the settings. 10.2.10 UPnP Choose Advanced Setup > UPnP and the following page appears. -
Page 97: Dns Proxy
User Manual In this page, you can enable or disable the UPnP function. After finishing setting, click Apply/Save to save and apply the settings. 10.2.11 DNS Proxy Choose Advanced Setup > DNS Proxy and the following page appears. In this page, you can enable or disable the DNS proxy function. After enabling the DNS proxy function, enter the host name of the broadband router and the domain name of the LAN network, and then click Apply/Save to save and apply the settings. -
Page 98: Storage Service
User Manual 10.2.12 Storage Service Storage Device Info Choose Advanced Setup > Storage Service > Storage Device Info and the following page appears. This page is used to display the information of the storage device that connects to the DSL router. FTP Configuration Choose Advanced Setup >... -
Page 99: Interface Grouping
User Manual In this page, you can enable or disable writing operation from WAN or LAN side. After proper configuration, click Apply/Save to apply the settings. 10.2.13 Interface Grouping Choose Advanced Setup > Interface Grouping and the following page appears. Interface grouping supports multiple ports to PVC and bridging groups. - Page 100 User Manual Click the Add button to display the following page.
- Page 101 User Manual...
-
Page 102: Multicast
User Manual In this page, please follow the on-screen configuration steps to configure the parameters of the interface grouping. After finishing setting, click Apply/Save to save and apply the settings. 10.2.14 Multicast Choose Advanced Setup > Multicast and the following page appears. In this page, you can configure the multicast parameters. -
Page 103: Mac Filter
User Manual 10.2.15.1 MAC Filter Choose Wireless > MAC Filter to display the following page. This page is used to allow or reject the wireless clients to access the wireless network of the wireless router. In this page, you can add or remove the MAC filters. The MAC restrict modes include Disabled, Allow, and Deny. -
Page 104: Wireless Bridge
User Manual Deny: Reject the wireless clients with the MAC addresses in the MAC Address list to access the wireless network of the wireless router. Click the Add button to display the following page. In this page, enter the MAC address of the wireless client, and then click the Apply/Save button to add the MAC address to the MAC address list. -
Page 105: Advanced Settings
User Manual 10.2.15.3 Advanced Settings Choose Wireless > Advanced to display the following page. This page allows you to configure the advanced features of the wireless LAN interface. Usually, you do not need to change the settings in this page. - Page 106 User Manual...
- Page 107 User Manual Band: The radio frequency remains at 2.4GHz. Channel: Fill in the appropriate channel to correspond with your network settings. All devices in your wireless network must use the same channel in order to work correctly. This router supports auto channeling functionality. Auto Channel Timer(min): Specifies the timer of auto channelling.
-
Page 108: Station Info
User Manual an RTS, the wireless station responds with a Clear to Send (CTS) frame to acknowledge the right to begin transmission. The RTS Threshold value should remain at its default value of 2347. DTIM Interval: (Delivery Traffic Indication Message) Enter a value between ... -
Page 109: Management
User Manual This page shows the authenticated wireless stations and their status. 10.3 Management Choose Management and the submenus of Management are shown as below: 10.3.1 Passwords Settings Choose Management > Passwords Settings, and the following page appears. -
Page 110: Internet Time
User Manual In the page, you can modify the password of different users. The default password of the admin user is smcadmin. After finishing setting, click the Apply/Save button to save and apply the settings. 10.3.2 Internet Time Choose Management > Internet Time to display the following page. -
Page 111: Diagnostics
User Manual In this page, you may configure the router to synchronize its time with the Internet time servers, and then click the Apply/Save button to save and apply the settings. 10.3.3 Diagnostics Choose Management > Diagnostics, and the following page appears. -
Page 112: Settings
User Manual This page is used to test the connection to your local network, the connection to your DSL service provider, and the connection to your Internet service provider. You may diagnose the connection by clicking the Test button or click the Test With OAM F4 button. -
Page 113: System Log
User Manual Update Choose Management > Settings > Update, and the following page appears. In this page, click the Browse… button to select the correct new settings file, and then click the Update Settings button to update the router’s settings. Restore Default Choose Management >... -
Page 114: Snmp Agent
User Manual View System Log: Click this button to view the system log. View Firewall Log: Click this button to view the firewall log. Configuring the System Log: Click this button to display the following page. In this page, you can set 3 types of system log modes, including Local, Remote, and Both. -
Page 115: Client
User Manual Simple Network Management Protocol (SNMP) allows a management application to retrieve statistics and status from the SNMP agent in this device. In this page, you may enable or disable the SNMP agent and set the parameters such as the read community, system name and trap manager IP. After finishing setting, click the Save/Apply button to save and apply the settings. -
Page 116: Access Control- Services
User Manual WAN Management Protocol (TR-069) allows a Auto-Configuration Server (ACS) to perform auto-configuration, provision, collection, and diagnostics to this device. In this page, you may configure the parameters such as the ACS URL, ACS password, and connection request user name. After finishing setting, click the Apply/Save button to save and apply the settings. - Page 117 User Manual In this page, you can enable or disable the different types of services. After finishing setting, click the Apply/Save button to save and apply the settings.
-
Page 118: Update Software
User Manual 10.3.9 Update Software Choose Management > Update Software, and the following page appears. If you want to upload the software, click the Browse… button to choose the new software, and then click the Update Software button. Note: When software update is in progress, do not shut down the router. After software update completes, the router automatically reboots. -
Page 119: Device Information
User Manual 10.4 Device Information Choose Device Info, and the submenus of Device Info are shown as below: 10.4.1 Summary Choose Device Info > Summary, and the following page appears. - Page 120 User Manual This page displays the device information such as the board ID, software version, and the information of your WAN connection such as the upstream rate and the LAN IPv4 address.
-
Page 121: Wan
User Manual 10.4.2 Choose Device Info > WAN and the following page appears. This page displays the information of the WAN interface, such as the connection status, and IPv4 address. 10.4.3 Statistics 10.4.4 Choose Device Info > Statistics > LAN and the following page appears. In this page, you can view the statistical information about the recevied and transmitted data packets of the Ethernet and wireless interfaces. -
Page 122: Wan Service
User Manual 10.4.5 WAN Service Choose Device Info > Statistics > WAN Service and the following page appears. In this page, you can view the statistical information about the recevied and transmitted data packets of the WAN interface. Click Reset Statistics to restore the values to zero and recount them. 10.4.6 Choose Device Info >... - Page 123 User Manual...
-
Page 124: Route
User Manual In this page, you can view the statistical information about the recevied and transmitted data packets of the xDSL interfaces. Click xDSL BER Test to test the xDSL Bit Error Rate. Click Reset Statistics to restore the values to zero and recount them. 10.4.8 Route Choose Device Info >... - Page 125 User Manual In this page, you can view the host name, the IP address assigned by the DHCP server, the MAC address which is corresponding to the IP address, and the DHCP lease time.
- Page 126 User Manual 11 Q&A (1) Q: Why all the indicators are off? A: Check the following: The connection between the power adaptor and the power socket. The status of the power switch. (2) Q: Why the LAN indicator is off? A: Check the following: ...
- Page 127 SMC7904WBRA-N2...
Need help?
Do you have a question about the SMC7904WBRA-N2 - and is the answer not in the manual?
Questions and answers