Table of Contents
Advertisement
Quick Links
Advertisement
Table of Contents

Subscribe to Our Youtube Channel
Related Manuals for SAJ eManager-C1 Pro


Summary of Contents for SAJ eManager-C1 Pro
- Page 1 Pro eManager-C1 Pro SMART COMMUNICATION BOX USER MANUAL Tel: (86)20 66608588 Fax: (86)20 66608589 Web: www.saj-electric.com GUANGZHOU SANJING ELECTRIC CO.,LTD Add: SAJ Innovation Park, No.9, Lizhishan Road,Science City, Guangzhou High-tech Zone , Guangdong, P.R.China V1.1...
- Page 2 Pro Preface Thank you for choosing SAJ products. We are pleased to provide you first-class products and exceptional service. This manual provides information about installation, operation, maintenance, troubleshooting and safety. Please follow the instructions of this manual so that we can ensure delivery of our professional guidance and whole-hearted service.
-
Page 3: Table Of Contents
Pro TABLE OF Electrical Connection ........................................ 23 CONTENTS 4.1. Unlocking the Box ......................................... 24 4.2. Assembling the Communication Connection ................................ 24 SAFETY PRECAUTIONS ......................................1 4.2.1. To the Smart Meter ....................................... 24 1.1. Application Scope ..........................................2 4.2.2. To the EMS Control Module ..................................25 1.2. - Page 4 Pro Appendix ............................................. 61 8.1. Recycling and Disposal ........................................ 62 8.2. Transportation ..........................................62 8.3. Warranty ............................................62 8.4. Contacting Support ........................................62 8.5. Trademark ............................................62...
-
Page 5: Application Scope
Pro 1.1. Application Scope This user manual provides instructions and detailed procedures for installing, operating, and maintaining the SAJ product: eManager-C1 Pro 1.2. Safety CAUTION: ONLY qualified and trained electricians who have read and fully understood all safety regulations contained in this manual can install, maintain, and repair the equipment. -
Page 6: Symbol Explanation
Dangerous electrical voltage damage. This will void the limit warranty and SAJ will not be responsible for the loss caused by those behaviors. This device is directly connected to public grid, thus all work to the device shall only be carried out by qualified personnel. -
Page 7: Main Features
PRODUCT Application typology diagram 2.2. Main Features SAJ eManager-C1 Pro smart communication box (hereinafter called the eManager) is applied to the photovoltaic (PV) energy storage system (ESS). It is a comprehensive solution that integrates the following components: Energy management system (EMS) controller ⚫... -
Page 8: Port Introduction
Pro 2.4. Port Introduction The eManager-C1 Pro provides the following functions: ⚫ All-in-one compact design ⚫ Smart and flexible support Support for RS485, Ethernet, 4G, and Bluetooth communication Support for data collection/transmission/storage for energy meters, conditioners, fire protection devices, sensors, and other equipment Support for communication and monitoring on a maximum of 10 inverters ⚫... -
Page 9: Internal Structure
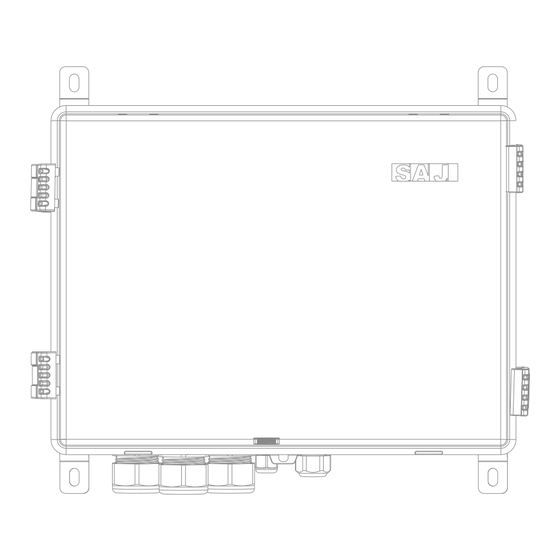
Pro 2.6. Internal Structure Input frequency 50/60 Hz Max. power 50 W Operating temperature range -25℃ to +60℃ (-13℉ to +140℉) Ambient humidity 5% – 95% (non-condensing) Dimension (H x W x D) (mm) 300 x 400 x 170... -
Page 10: Front View
Pro 2.7. EMS Control Module (eManager-C1-1) NET1 and NET2 The two FE ports use RJ45 physical ports and 10 Mbps/100 Mbps self-adaption. Each port has two LED 2.7.1. Front view indicators on the left and right sides, as listed in the following table. -
Page 11: Rear View
Pro RS485_3 reserved - DO5 – DO8: Solid-state relay (passive) Power status indicator RS485_4 reserved System running status indicator Note:RS485_1: fixedly connected to the export Limit meter, the address is 1; RS485_2: fixedly connected to System error indicator the energy storage meter and photovoltaic meter, the energy storage meter address is 2, the photovoltaic Wireless module status indicator meter address is 10;... - Page 12 Pro Silkscreen Description Silkscreen Description Voltage collector-to-collector. Same LSD1- Low side driver TF-Card as the system power supply voltage. The eManager-C1-1 provides a standard TF card slot. A TF card is used for system debugging, firmware read LSD2- Low side driver Ground and write, startup and update.
-
Page 13: Smart Meter
Pro Antenna terminal Silkscreen Description Power status indicator POWER AC_IN Power supply port System running status indicator DRED/RCR DRED/RCR function terminal DC/OUT (+24 GND) DC output terminals. The two will be connected to the POWER port of the EMS 2.9. -
Page 14: Unpacking And Inspection
ST4.8 screw*8 Document*1 Table 4. 1 Package content 3.2. Installation Environment Requirements Install the eManager-C1 Pro in a place without vibration or shock and avoid exposure to direct sunlight, ⚫ rain, and snow erosion. INSTALLATION ⚫ Keep the eManager-C1 Pro away from explosive chemicals, any gas which might corrode the metal, or any conducting dust which might destroy the insulation. -
Page 15: Installation Location Requirements
Pro 3.3. Installation Location Requirements 3.4. Installation Procedure ⚫ Reserve enough clearance around the box to ensure a good air circulation at the installation area. Use the ST4.8 screws to secure the four mounting plugs on the four corners of the eManager. -
Page 16: Electrical Connection
Pro 4.1. Unlocking the Box Hold the two tabs and lift it upwards. Then, lift the cover up. Figure 6. 1 Unlocking the box 4.2. Assembling the Communication Connection 4.2.1. To the Smart Meter About this task ELECTRICAL To locate the smart meter, refer to Section 2.6 “Internal Structure”. -
Page 17: To The Ems Control Module
Pro 4.2.2. To the EMS Control Module 3. Remove the seals from the cable gland. Use a knife to cut through a hole in the seals. 4. Insert the cable through the seals hole and then the cable gland. -
Page 18: Rcr Connection (Germany)
Pro 4.4.2. RCR Connection (Germany) The circuit breaker is in OFF position. Procedure The RCR signal controlling ports are provided to meet the power dispatching requirements in Germany and other countries and regions. 1. Prepare the AC power cables by using the provided cable terminals. -
Page 19: Grounding
Pro 4.6. Grounding To locate the DC-DC power module, refer to Section 2.6 “Internal Structure”. 12 V DC power supply is connected to the DC-DC power module within the eManager. Procedure Procedure 1. Insert the grounding cable through the cable gland POWER AC_IN at the bottom of the eManager. -
Page 20: Connecting The Smart Meter
Pro 4.7. Connecting the Smart Meter 4.8. Turning on the Circuit Breaker About this task Turn on the circuit breaker by toggling down the switch. To locate the smart meter, refer to Section 2.6 “Internal Structure”. 4.9. Locking the Box Procedure 1. -
Page 21: Commissioning By App
Pro The Elekeeper App can be sued for both nearby and remote monitoring. It supports Bluetooth/4G or Bluetooth/Wi-Fi to communicate with the device. 5.1. Downloading the Elekeeper App On your mobile phone, search for “Elekeeper” in the App store and download the App. -
Page 22: Completing The Initialization Settings
Pro If you do not have an account, register first. Set the network connection. Then, click Save. Click Register. Choose whether you are an owner, installer, or distributor. Example: Follow the instructions on the screen to complete the registration. - Page 23 Pro After the message “Network normal” is displayed, click Next. Add the required deices to connect to the eManager. Then, click Next. Example:...
- Page 24 Pro Set the meter connection type. Then, click Next. Set the strategy. Then, click Next. Example: To set a new strategy, click template on the top right corner. Example:...
- Page 25 Pro Select your country and set the device time. Then, click Next. Example: View the eManager information that you have just set to make sure that all settings are proper. ⚫ To restart the device, choose More configuration > Restart device.
-
Page 26: Configuring Other Devices Connected To The Emanager
Example: 5.5. Creating a plant You can also create a plan through the SAJ Web portal. For details, refer to Chapter 6 “CONFIGURATIONS BY WEB”. On the Management tab, click the icon on the top right corner. Select Create Plant for Me. - Page 27 Pro Configure the plant settings. Then, click Create Plant.
-
Page 28: Smart Meter
Pro The eSAJ All-In-One Smart EMS Web platform is a smart family energy management system which can monitor the power production and consumption statistics. Most of the configuration functions can be completed in the Elekeeper App; however, some data, such as the smart meter, air conditioning, fire protection, and power curve, can only be viewed on the Web platform. -
Page 29: Creating A Plant
Pro 6.2. Creating a Plant On the Plant Info pane, enter the plant name and longitude and set Province/Autonomous region/Municipality according to your needs. Then, configure the plant details, such as the address, On the Home page, choose Monitoring > Plants on the left navigation pane. Then, click Add plant on the type, and capacity. -
Page 30: View The Plant Statistics
Pro 6.3. View the Plant Statistics On the Alarm push pane, enable the Alarm push function. Configure the Alarm level, Push channel, and Push users (up to 5 users). Then, click Next Step. On the Home page, choose Monitoring > Plants on the left navigation pane. - Page 31 Pro Open: Current alarm Closed: History alarms ⚫ On the Device page, you can view statistics of the EMS, Inverter, Battery, Air conditioning, and Fire Protection. ⚫ On the Alarm page, you can view the alarm details by severity or status.
-
Page 32: Operations By Lan (Near End)
Pro On this local Web, the real-time device data will be updated once two seconds. 7.1. Connecting the EMS to the Computer Procedure 1. Prepare an RJ45 cable. 2. Open the EMS box. 3. Connect one end of the cable to either of the following ports in the EMS: ⚫... -
Page 33: Viewing The Device Information
Pro Select the Ethernet network. Locate More adapter options and click Edit. In the displayed dialog box, select the Internet protocol version and click properties. In the displayed dialog box, select Use the following IP address and set as follows: Open the browser and enter the following IP address in the address bar. - Page 34 Pro To check the reported alarms, click the Device tab to view them in different status. ⚫ Open: Current alarm Closed: History alarms ⚫ To view and configure the strategy, click the Strategy tab. Local strategy: View the current strategy.
-
Page 35: Recycling And Disposal
Check the product warranty conditions and terms on the SAJ website: https://www.saj-electric.com/ 8.4. Contacting Support Guangzhou Sanjing Electric Co., Ltd. Address: SAJ Innovation Park, No.9, Lizhishan Road, Guangzhou Science City, Guangdong, P.R.China. Postcode: 510663 Website: https://www.saj-electric.com/ Technical Support & Service...
Need help?
Do you have a question about the eManager-C1 Pro and is the answer not in the manual?
Questions and answers