Midtronics Ford DCA-8000 User Manual
Diagnostic battery analyzer
Hide thumbs
Also See for Ford DCA-8000:
- User manual (56 pages) ,
- Instruction manual (36 pages) ,
- Quick start manual (4 pages)
Table of Contents
Advertisement
Quick Links
Advertisement
Table of Contents

Related Manuals for Midtronics Ford DCA-8000


Summary of Contents for Midtronics Ford DCA-8000
- Page 1 November, 2024 167-001154EN Ford DCA-8000 Diagnostic Battery Analyzer User Guide...
- Page 2 DCA-8000 Midtronics EMEA | Hoofdveste 6-8 | 3992 DG Houten | The Netherlands...
-
Page 3: Table Of Contents
3 – Diagnostic Charge Out of Vehicle 25 Test Result Language Email Language Battery Test Print Language Battery Test Results Display Settings 4 – PDI to Dealer Brightness Auto Brightness Battery Test Sleep Time Battery Test Results Dim Time www.midtronics.com... - Page 4 Definitions Appendix C: Test Results Decision Tables Battery Test Results Battery Test Results (cont’d.) Starter Test Results Alternator Test Results Diode Test Results Patents / Warranty / Service Midtronics EMEA | Hoofdveste 6-8 | 3992 DG Houten | The Netherlands...
- Page 5 DCA-8000 www.midtronics.com...
-
Page 6: General Safety Precautions
1.12 An extension cord should not be used unless absolutely necessary. (See paragraph 4.2) 1.13 Have a damaged cord or plug replaced immediately. 1.14 Do not expose the analyzer to rain or snow. Midtronics EMEA | Hoofdveste 6-8 | 3992 DG Houten | The Netherlands... -
Page 7: Personal Precautions
If the analyzer has an adjust- able charge rate, charge the battery initially at lowest rate. If the analyzer has only one voltage, verify that the battery voltage matches the voltage of analyzer. www.midtronics.com... -
Page 8: Grounding & Power Cord Connections
AC input rating Amps AWG* size of cord Length of cord, feet (m) Equal or greater But less than: than: 25 (7.6) 50 (15.2) 100 (30.5) 150 (45.6) *American Wire Gauge Midtronics EMEA | Hoofdveste 6-8 | 3992 DG Houten | The Netherlands... -
Page 9: Analyzer Location
The clamps should be kept clean. Hazardous voltage. Can cause death or serious personal injury. Setting the switches to “OFF” does not always dis- connect the analyzer electrical circuit from the AC power cord or the DC analyzer clamps. www.midtronics.com... -
Page 10: Installing The Battery
8.5 When disconnecting the analyzer, always do so in the reverse sequence of the connecting procedure; break the first connection while staying as far away from the battery as practical. Midtronics EMEA | Hoofdveste 6-8 | 3992 DG Houten | The Netherlands... -
Page 11: Maintenance & Storage
The operation of this equipment is subject to the following two conditions. This equipment or device may not cause harmful interference. This equipment or device must accept any interference. Including interference that may cause undesired operation. SAVE THESE INSTRUCTIONS www.midtronics.com... -
Page 12: Product Specifications
; 70A maximum • Intuitive charge cycle feedback • 5” Touch Screen Humidity • 15% to 85% R.H., non-condensing Dimensions (without handle or base) • Weight: 15.45 kg (34 lbs) Midtronics EMEA | Hoofdveste 6-8 | 3992 DG Houten | The Netherlands... -
Page 13: Introduction & Overview
The wrench symbol indicates procedural notes and helpful information. These symbols indicate which arrow keys on the keypad to press for a given function. The text for screen options are in Bold letters. Bold Letters www.midtronics.com... -
Page 14: Front View
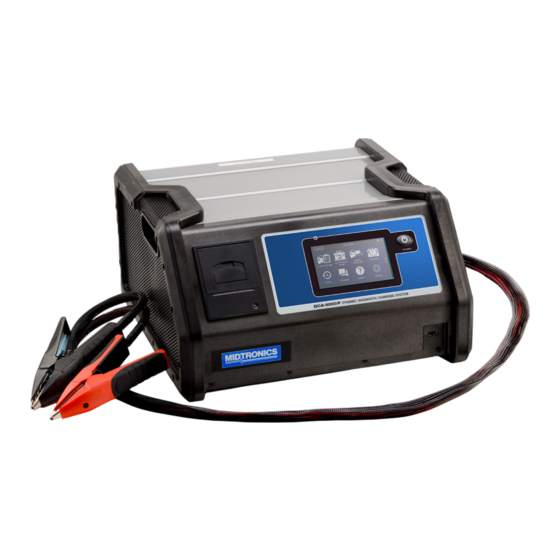
Circuit Breaker Reset Connection Charge Cable Connections Power Cord Socket VIN Scanner Connection (DB-9) F or Analyzer Cart Mounting Bolts Midtronics EMEA | Hoofdveste 6-8 | 3992 DG Houten | The Netherlands... -
Page 15: Connections
Pull back on the red tab on the side of the connector to release/remove the power cord from the analyzer’s power socket. Pull Back To Release Scanner Cable (Optional Accesory) Use the screws on the connector to secure the cable to the analyzer. www.midtronics.com... -
Page 16: Charging Out-Of-Vehicle (Battery Test)
Tap Next to continue. IMPORTANT: By default, the first user created is assigned Administrator rights. Tap Add User to add additional users. See Chapter 10 - Settings to change these defaults. Midtronics EMEA | Hoofdveste 6-8 | 3992 DG Houten | The Netherlands... - Page 17 If necessary, enter the WiFi network password. Tap Next when finished. A confirmation screen is displayed when the analyzer has successfully connected to the WiFi network. To delete a network: Tap a displayed network to select it. Tap trash can icon ( ) to delete it. www.midtronics.com...
- Page 18 State 60527 Zipcode 1-630-323-2800 Phone # 10. The login screen is displayed. Select User Guest admin Add User 11. Tap a user name to access the Main Menu. Midtronics EMEA | Hoofdveste 6-8 | 3992 DG Houten | The Netherlands...
-
Page 19: Main Menu
Use your finger to swipe horizontally left, right, up or down across the Controller screen to view all of the results. Screen 1 Screen 1 Screen 2 Screen 3 Screen 2 Swipe Swipe Horizontally Vertically www.midtronics.com... -
Page 20: Main Menu Icons
• Low electrolyte level. If the electrolyte level is low, add distilled water to fill up to ½ above the top of the plates and fully charge the battery. Do not overfill. • Corroded or loose battery tray and hold-down fixture. Tighten or replace as needed. Midtronics EMEA | Hoofdveste 6-8 | 3992 DG Houten | The Netherlands... -
Page 21: Diagnostic Charge In Vehicle
In the Battery Information screen, you can choose the battery location. Please note that if you test the battery connecting to the Jump Posts, you need to select the specific vehicle you are testing to ensure an accurate measurement. NOTE: See Appendix B for complete parameter descriptions. www.midtronics.com... -
Page 22: Battery Test Results
In the results screen, choose Press for Code, to view the DTC code to be used to claim warranty. An example is shown here below. This code will also be included on the printed and emailed results. Midtronics EMEA | Hoofdveste 6-8 | 3992 DG Houten | The Netherlands... - Page 23 Send Results and select an option. To return to the Home Screen, tap Done or System Test to continue with the System Test. NOTE: Refer to Appendix C: Test Result Decision Tables for a complete explanation of possible test results. www.midtronics.com...
-
Page 24: System Test
To send the test results to a configured printer or via email tap Send Results and select an option. To return to the Home Screen, tap Done or to return to the Main Menu. Midtronics EMEA | Hoofdveste 6-8 | 3992 DG Houten | The Netherlands... -
Page 25: Diagnostic Charge Out Of Vehicle
To print the results using the integrated printer, or send the test results to a configured printer or via email tap Send Results and select an option. To return to the Home Screen, tap Done or return to the Main Menu. www.midtronics.com... -
Page 26: Pdi To Dealer
To print the results using the integrated printer, or send the test results to a configured printer or via email tap Send Results and select an option. To return to the Home Screen, tap Done or to return to the Main Menu. Midtronics EMEA | Hoofdveste 6-8 | 3992 DG Houten | The Netherlands... -
Page 27: Battery Test Only
To print the results using the integrated printer, or send the test results to a configured printer or via email tap Send Results and select an option. To return to the Home Screen, tap Done or to return to the Main Menu. www.midtronics.com... -
Page 28: Manual Charge
To send the test results to a configured printer or via email tap Send Results and select an option. To return to the Home Screen, tap Done or to return to the Main Menu. Midtronics EMEA | Hoofdveste 6-8 | 3992 DG Houten | The Netherlands... -
Page 29: Power Supply
The test results are displayed on the analyzer screen. To send the test results to a configured printer or via email tap Send Results and select an option. To return to the Home Screen, tap Done or to return to the Main Menu. www.midtronics.com... -
Page 30: Messages
Tap to collapse a list of messages or to expand the list. Message Types Critical: An important action cannot be performed and may require user action. Notifications: Indicates an action has been performed or data has been sent. Midtronics EMEA | Hoofdveste 6-8 | 3992 DG Houten | The Netherlands... -
Page 31: History
Tap Done to return to the Tool History screen. Totals By Test Decision Good Battery Charge & Retest Good Recharge Replace Battery Aborted Badcell Short Replace Totals By Charge Decision Good Battery Replace Battery Good Recharge Badcell Short Replace Aborted NO DECISION www.midtronics.com... -
Page 32: Totals By Test Type
Out Of Vehicle Charge Battery Replacement In Vehicle Charge Manual Charge Jump Start Totals By Date And Location Last 7 Days In Vehicle Last 30 Days Out Vehicle Last 90 Days Midtronics EMEA | Hoofdveste 6-8 | 3992 DG Houten | The Netherlands... -
Page 33: 10 - Settings
Once the network has been successfully configured, tap to return to the list of available configured networks. A indicates the selected network. Deleting A Network Tap a displayed network. to delete the network and tap Yes to confirm. www.midtronics.com... -
Page 34: Printer Settings
Tap > to return to the printer list. Deleting A Printer (Admin Only) to access the Printer Setup functions. Tap a displayed printer. to delete the printer and tap Yes to confirm. Midtronics EMEA | Hoofdveste 6-8 | 3992 DG Houten | The Netherlands... -
Page 35: Email
Host, Port, Login, Password, SMTP Authorization, Enable TLS and From Email Address information. to clear all server settings. to return to the Email Address Book. www.midtronics.com... -
Page 36: User Settings (Admin Only)
Select the default standard language for the analyzer to use for all tests and results sent via email. Print Language Select the default standard language for the analyzer to use for all tests and results printed using a networked printer. Midtronics EMEA | Hoofdveste 6-8 | 3992 DG Houten | The Netherlands... -
Page 37: Display Settings
Adjust the amount of elapsed time before the analyzer goes into a power saving (Dim) mode. Default = 1 minute. BMIS (Admin Only) View the BMIS login information the tool uses to connect with Midtronics BMIS as well as the connection status. This information is not editable. www.midtronics.com... -
Page 38: Shop Information (Admin Only)
Use the onscreen keypad to enter the store name, address, and phone number. Midtronics Store Name 7000 Monroe Street Address Street Address 2 Willowbrook City State 60527 Zipcode 1-630-323-2800 Phone # Midtronics EMEA | Hoofdveste 6-8 | 3992 DG Houten | The Netherlands... -
Page 39: Test Settings
Default temperature units used when measuring battery temperature. Decimal Separator Default number display using commas or periods separators. Create MDCA Log File The MDCA function is used by Midtronics technical support. to return to the Shop Information screen. Date/Time Settings to access the Date/Time setting defaults. -
Page 40: Version Information
IMPORTANT: All previous modifications to the original settings will be overwritten. Legal Information Displays software attribution information via the Midtronics website. The analyzer must be connected to the Internet. Check for Updates Use this function to check via the internet connection for any updates to the analyzer software. - Page 41 10 – Settings DCA-8000 www.midtronics.com...
-
Page 42: Appendix A: Recommended Scanning Procedure
• Lighting/Glare: The built-in flashlight will automatically turn on In low light situations. If the flashlight, or sunlight, is shining directly onto the barcode, try pivoting the camera up or down slightly to reduce any glare. Midtronics EMEA | Hoofdveste 6-8 | 3992 DG Houten | The Netherlands... -
Page 43: Appendix B: Battery Information Definitions
Time Type Timed (10 to 120 minutes) or Continuous Time Value Length (In Minutes) of Manual Timed Charge (Timed Charge Only) Vehicle Identification Mandatory to enter at least 5 digits, reflecting the last (VID) digits of the vehicle chassis number. www.midtronics.com... -
Page 44: Appendix C: Test Results Decision Tables
No result displayed. Pass (only in “Battery test only” app) Fail Fail Replace Battery Pass Pass Fail Fail Pass Fail No Test No Test Bad Cell Replace Battery Midtronics EMEA | Hoofdveste 6-8 | 3992 DG Houten | The Netherlands... -
Page 45: Battery Test Results (Cont'd.)
Battery fails to meet industry Test not performed Test not performed accepted standards. www.midtronics.com... -
Page 46: Starter Test Results
The normal high limit of a typical automotive regulator is 14.5 volts +/–0.5. Refer to the manufacturer specifications for the correct limit, which may vary by vehicle type. Midtronics EMEA | Hoofdveste 6-8 | 3992 DG Houten | The Netherlands... -
Page 47: Diode Test Results
RIPPLE √ Make sure the alternator mounting is sturdy and that the belts are in good shape and functioning properly. If the mounting and belts are good, replace the alternator. OPEN PHASE Replace the alternator. OPEN DIODE SHORTED DIODE www.midtronics.com... -
Page 48: Patents / Warranty / Service
DCA-8000 Patents / Warranty / Service This product is made by Midtronics, Inc., and is protected by one or more U.S. and foreign patents. For speci c patent information, contact Midtronics, Inc. at +1 630 323-2800. Midtronics products are warranted to be free of defects in materials and workmanship for a period for a period of two (2) years for the unit and one (1) year for the cables from date of purchase.
Need help?
Do you have a question about the Ford DCA-8000 and is the answer not in the manual?
Questions and answers