Table of Contents
Advertisement
Quick Links
Advertisement
Table of Contents
Troubleshooting

Related Manuals for Phcbi MDF-DU700ZHA


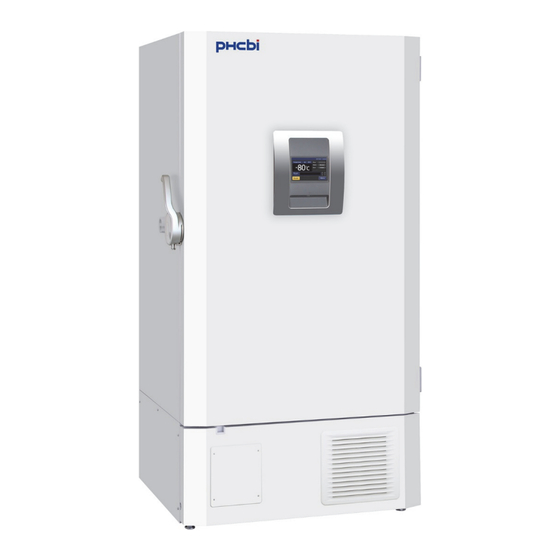
Summary of Contents for Phcbi MDF-DU700ZHA
- Page 1 Operating Instructions Ultra-Low Temperature Freezer MDF-DU700ZHA MDF-DU500ZHA MDF-DU700ZHA Please read the operating instructions carefully before using this product, and keep the operating instructions for future use. See page 58 for the model number.
-
Page 2: Table Of Contents
CONTENTS 1. BEFORE USING INTRODUCTION ........................4 SAFETY PRECAUTIONS ......................5 SYMBOLS ON UNIT ......................... 9 FOR SAFELY STORING SAMPLES ..................10 About backup cooling system ....................10 In the event of emergency ....................11 INSTALLATION SITE ......................12 INSTALLATION ........................13 FREEZER COMPONENTS ..................... - Page 3 4. MAINTENANCE & TROUBLESHOOTING ALARMS AND SELF-DIAGNOSIS ..................46 Warning messages ......................46 Alarm messages ........................47 Status messages ......................... 47 Alarm and Buzzer button ..................... 48 ROUTINE MAINTENANCE ..................... 49 Cleaning the exterior, interior, and accessories ..............49 Cleaning the condenser filter ....................49 Defrosting the chamber .......................
-
Page 4: Before Using
1. BEFORE USING INTRODUCTION ■ Read the operating instructions carefully before using the product and follow the instructions for safe operation. ■ PHC Corporation takes no responsibility for safety if the product is not used as intended or is used with any procedures other than those given in the operating instructions. -
Page 5: Safety Precautions
1. BEFORE USING SAFETY PRECAUTIONS Be sure to observe the operating instructions as they contain important safety advice. For correct and safe use of the product, follow the precautions and procedures in these operating instructions carefully. Failure to do so could result in injury or damage to the product. - Page 6 SAFETY PRECAUTIONS WARNING Installation Do not use the unit outdoors. Exposure to rain may cause an electric leakage and/or an electric shock. Do not install the unit in a location where flammable or volatile substances are present. ...
- Page 7 1. BEFORE USING WARNING Power supply plug and cord Never damage the power supply cord or power supply plug (by breaking, adapting, placing near a source of heat, bending with force, twisting, pulling, adding weight, or binding).
- Page 8 SAFETY PRECAUTIONS WARNING When using the unit Never put containers with liquid on top of the unit. This may cause an electric shock or short circuit if the liquid is spilled. Never insert metal objects such as pins and wires into any vent, gap, or outlet on the ...
-
Page 9: Symbols On Unit
1. BEFORE USING CAUTION Do not touch stored samples in the chamber or inner walls of the chamber with bare hands. Frostbite can occur at low temperatures. Wear insulated gloves when reaching into the chamber. -
Page 10: For Safely Storing Samples
The following graphs show examples of the duration. [Example] Duration of time for which a full 30 kg liquid CO cylinder can keep the chamber at -70°C (no load) MDF-DU500ZHA MDF-DU700ZHA Ambient temperature ( ° C) Ambient temperature ( ° C) Notes: ●... -
Page 11: In The Event Of Emergency
To keep MDF-DU700ZHA (inner capacity: 725 L) to -70°C, firstly, put at least 35 kg of dry ice into the chamber. Then, add 3.5 kg of dry ice every hour. Wrap dry ice with paper such as newspaper and put it on each shelf equally. -
Page 12: Installation Site
INSTALLATION SITE To run the freezer unit properly, the unit must be installed in a location which meets all the conditions described below. If the location does not meet these conditions, the specified performance of the unit may not be achieved or malfunctions and accidents may occur. ■... -
Page 13: Installation
1. BEFORE USING INSTALLATION When installing the unit, follow the steps below to secure the unit properly. Preparations after unpacking Remove all the tape used to secure the doors and interior parts, and leave the doors open for a short while for ventilation. -
Page 14: Freezer Components
FREEZER COMPONENTS Main body The model below shows MDF-DU700ZHA (MDF-DU500ZHA also has an equivalent structure). Door gasket Key slot (→ page 17) Outer door Inner door Space for temperature recorder (option) (→ page 55) 6 (Inside) Control panel LCD touch panel (→page 22) - Page 15 1. BEFORE USING 1. Inner door latch: The inner door can be securely closed using this inner door latch. When closing the inner door, make sure to engage the latch. Otherwise, the samples in the chamber may be damaged due to the temperature changes in the chamber.
-
Page 16: Accessories
FREEZER COMPONENTS Accessories Check that following accessories are included with this unit. If any accessories are missing, contact our sales representative or agent. Name Appearance Usage For locking and unlocking the outer door 1 set (page 17). Scraper For removing frost in the chamber (page 50). Stick for air intake For removing the frost in the air intake port port cleaning... -
Page 17: Locking/Unlocking The Outer Door
1. BEFORE USING Locking/unlocking the outer door The outer door can be locked using the accessory key and the lock system at the bottom of the outer door handle. 1. Locking the door Insert the key into the key slot and turn it 45 degrees clockwise (to the position marked with ). -
Page 18: Start-Up Procedure
START-UP PROCEDURE Follow the procedure below to start test run or start operation of this product. Lower right side of the unit Check that the following switches at the lower right side of the unit Backup power switch* are turned off: power switch, battery switch for power failure alarm, backup power switch (if the optional backup cooling system is installed). -
Page 19: During/After Power Failure
1. BEFORE USING DURING/AFTER POWER FAILURE Operation during power failure When the battery switch for power failure alarm is ON, the unit behaves as follows even during a power failure. ● The power failure alarm activates (page 46).* Tap the Buzzer button to silence the sound of the power failure alarm. If the ring back function is turned ON, the audible alarm sounds again when the power failure still continues after the set ring back time has elapsed (page 25). -
Page 20: Touch Panel Operation
2. TOUCH PANEL OPERATION USING THE TOUCH PANEL For controlling the freezer, the LCD touch panel is provided at the front of the freezer. Basic Operation Tap Slide Long tap Lightly touch the screen with your With lightly touching the screen with Lightly touch the screen for a few finger and immediately release your finger, move to the destination and... -
Page 21: Other Operations
2. TOUCH PANEL OPERATION Entering alphanumeric characters and symbols: Tap the alphanumeric input field. ►The alphanumeric input window is displayed. Alphanumeric input field Tap the alphabetic keys, numeric keys, or symbol keys to [Uppercase letters, numbers] enter alphanumeric characters and symbols. *You can switch the uppercase letters/numbers window to lower case letters/symbols window by tapping the button. -
Page 22: Top Screen
TOP SCREEN The following screen is displayed on the LCD display after turning on the power switch for the freezer. This screen is called as “Top screen” and shows basic information about the status of the freezer. It will take about 20 seconds before the Top screen is displayed after turning on the power switch. -
Page 23: Menu Screen
2. TOUCH PANEL OPERATION MENU SCREEN Tapping the Menu button on the Top screen displays the Menu screen where you can select one of the buttons for configuring setting or using log function (chart view or log data export). <Top screen> <Menu screen>... -
Page 24: Settings And Operation
3. SETTINGS AND OPERATION SETTING FOR BASIC OPERATION Setting temperature and high/low alarms The chamber temperature, high temperature alarm, and low temperature alarm can be set by following the steps below. On the Top Screen, tap the Menu button. ►The Menu screen is displayed. Tap the Set button on the Menu screen. -
Page 25: Configuring Alarm Settings
3. SETTINGS AND OPERATION Configuring alarm settings On the Alarm Setting window, the alarm delay time, door delay time, ring back function, and remote alarm can be configured. On the Top Screen, tap the Menu button. ►The Menu screen is displayed. Tap the Tools button on the Menu screen. -
Page 26: About Alarm Test
SETTING FOR BASIC OPERATION Settable Default Item Details range value Selects behavior of the remote alarm when the Buzzer button is tapped to stop the audible alarm sound of the freezer unit. When "ON" (not linked with the Buzzer button) is selected by sliding the button to the right, the alarm indication by the remote alarm device Remote Alarm ON/OFF... -
Page 27: Setting Compressor Delay Time
3. SETTINGS AND OPERATION Setting compressor delay time Compressor delay time is the time from when the freezer is turned ON or the power comes back in the event of a power failure until when the compressor starts up. This unit requires a large amount of electric power at the instant of compressor start-up. -
Page 28: Key Lock
KEY LOCK Key lock function prevents unauthorized changes to the freezer setting by prompting the user to enter a password when the Menu button is tapped. Setting key lock The key lock function can be turned ON as follows. On the Top Screen, tap the Menu button. ►The Menu screen is displayed. - Page 29 3. SETTINGS AND OPERATION Tap the Apply buton. ►The confirm message asking if you set the second password or not. Yes: The Key Lock screen for setting the password #2 will be displayed. →Proceed to Step 5. The display returns to the Menu screen (in this case, only one password is registered).
-
Page 30: Operation When Key Lock Is On
KEY LOCK Operation when key lock is ON When the key lock is set to ON, if you try to tap the Menu button on the Top screen, you are asked to enter a password. On the Top screen, tap the Menu button. ►The Password input window is displayed. - Page 31 3. SETTINGS AND OPERATION Enter the password and tap the OK button. ►The Menu screen is displayed. Tap the Key Lock button on the Menu screen. ►The Key Lock screen is displayed. Slide the Key Lock slide button to the left. ►The key lock is set to OFF.
-
Page 32: Other Settings
OTHER SETTINGS Setting date and time You can set date and time for the freezer. On the Top Screen, tap the Menu button. ►The Menu screen is displayed. Tap the Tools button on the Menu screen. ►The Tools screen is displayed. Tap the Date &... -
Page 33: Setting Brightness And Sleep
3. SETTINGS AND OPERATION Setting brightness and sleep You can configure the brightness of the LCD touch panel and the sleep function. On the Top Screen, tap the Menu button. ►The Menu screen is displayed. Tap the Tools button on the Menu screen. ►The Tools screen is displayed. -
Page 34: Setting Daq
OTHER SETTINGS Setting DAQ The DAQ setting is required when the optional interface board is installed (page 56). For installing the interface board, contact our sales representative or agent. On the Top Screen, tap the Menu button. ►The Menu screen is displayed. Tap the Tools button on the Menu screen. -
Page 35: Operation Log
The unique ID entered in this field is shown at the beginning of the exported log file (.csv) following the product name. 8 alphanumeric Unique ID e.g. Product name: MDF-DU700ZHA, Unique ID: ABC00001 characters →MDF-DU700ZH, ABC00001 Tap the Apply button. -
Page 36: Operation Log
OPERATION LOG Displaying operation log chart Operation log data (chamber temperature and outer door open/close status) stored in the freezer can be displayed in chart format on the LCD touch panel. On the Top Screen, tap the Menu button. ►The Menu screen is displayed. Tap the Log button on the Menu screen. -
Page 37: Exporting The Operation Log Data Displayed On The Screen
3. SETTINGS AND OPERATION Actual Temp.: Chamber temperature log chart Door Opening: Outer door open/close status log chart Item Details Title of the selected chart is displayed here. Chart title Actual Temp.: Chamber temperature log chart Door Opening: Outer door open/close status log chart Indicates the day when the operation log data was recorded. - Page 38 OPERATION LOG Tap the OK button when the Information message notifying the completion of the export is displayed. ►The screen returns to the Chart screen. A folder named “log” is created in the USB flash drive and the exported data file is saved in the folder in CSV format. The file name consists of the date (YYYY/MM/DD or DD/MM/YYYY) and data name (Temp or Door).
-
Page 39: Exporting Operation Log Data
3. SETTINGS AND OPERATION Exporting operation log data Operation log data stored in the freezer can be exported to a USB flash drive inserted into the USB port in CSV format. The data can be exported all together or separately by selecting the log type (chamber temperature or outer door open/close status). - Page 40 OPERATION LOG Tap the OK button when the Information message notifying the completion of the export is displayed. ►The screen returns to the Export screen. A folder named “log” is created in the USB flash drive and the exported data file is saved in the folder in CSV format. The file name consists of the specified date period (YYYY/MM/DD- YYYY/MM/DD or DD/MM/YYYY-DD/MM/YYYY) and data name (Temp, Door, or AllCh).
-
Page 41: Alarm Log
3. SETTINGS AND OPERATION ALARM LOG This product is equipped with a function to store alarm log data. ● Up to about 256 logs can be stored. When the number of logs exceeds the maximum number, the oldest log data is overwritten with the new data. ●... -
Page 42: Exporting Alarm Log Data When Referring To The Data
ALARM LOG Tap the Number of days input field. ►Numeric input window for entering number is displayed. Enter desired number of days and tap the OK button. ►Alarm log data during the specified period is displayed. Note: When logs during the specified period are more than 6, tapping the scroll button shows the upper or lower log. - Page 43 3. SETTINGS AND OPERATION Examples of exported file names when “14” is input in the number of days field on March 18 in 2023 (in this case, the days correspond to the period from March 5 in 2023 to March 18 in 2023). Year/Month/Day 20230305-20230318_AlarmLog.csv 05Mar2023-18Mar2023_AlarmLog.csv...
-
Page 44: Exporting Alarm Log Data
ALARM LOG Exporting alarm log data Alarm log data stored in the freezer can be exported to a USB flash drive inserted into the USB port in CSV format. Insert a USB flash drive into the USB port. For supported USB flash drives, refer to “10. USB port” on page 15. On the Top Screen, tap the Menu button. - Page 45 3. SETTINGS AND OPERATION Tap the OK button when the Information message notifying the completion of the export is displayed. ►The screen returns to the Alarm Export screen. A folder named “log” is created in the USB flash drive and the exported data file is saved in the folder in CSV format.
-
Page 46: Maintenance & Troubleshooting Alarms And Self-Diagnosis
4. MAINTENANCE & TROUBLESHOOTING ALARMS AND SELF-DIAGNOSIS Warning messages The cooling performance has been significantly degraded. Thus, the chamber temperature may get considerably higher. Take some measures to protect the stored samples immediately (e.g. transferring the stored samples to another freezer) except when the cause is apparent and the chamber temperature can recover soon. -
Page 47: Alarm Messages
4. MAINTENANCE & TROUBLESHOOTING Alarm messages Cooling performance may degrade and the chamber temperature may rise. When the temperature change is temporary due to user operation, wait for the recovery of chamber temperature. In other cases, if this status continues, failure or chamber temperature rise may occur. Take some measures to protect the stored samples. -
Page 48: Alarm And Buzzer Button
ALARMS AND SELF-DIAGNOSIS Alarm and Buzzer button 1. The behaviors of the alarm indication and the ring back function when tapping the Buzzer button are as follows. In the cases other than the door alarm and communication error <Setting of the freezer> <Alarm behavior>... -
Page 49: Routine Maintenance
4. MAINTENANCE & TROUBLESHOOTING ROUTINE MAINTENANCE Cleaning the exterior, interior, and accessories • Clean the unit once a month. Regular cleaning keeps the unit in good condition. • Use a dry cloth to wipe down the outside and inside of the unit and all accessories. If the outside panels are dirty, clean them with a diluted neutral dish-washing detergent (using an undiluted solution of detergent may cause the unit’s plastic areas to crack. -
Page 50: Defrosting The Chamber
ROUTINE MAINTENANCE Defrosting the chamber Never damage the chamber wall when removing frost. WARNING It may cause explosions and/or a fire in case of refrigerant leakage. Wear protective gloves when handling frozen items or cleaning the chamber. Without gloves, you may get frostbite or get injured by the corners of interior parts. Also, ... -
Page 51: Replacement Of Consumable Parts
4. MAINTENANCE & TROUBLESHOOTING REPLACEMENT OF CONSUMABLE PARTS The replacement of the battery for power failure alarm and battery for backup cooling system should be performed by a qualified engineer or service WARNING personnel only. The replacement of the battery involves the risk of electric shock. «Important»... -
Page 52: Troubleshooting
TROUBLESHOOTING If the freezer does not seem to be working properly, check the following solutions before making a service call. <Attention> If the problem is not resolved by checking the following causes/solutions or if the problem is not shown in the table below, contact our sales representative or agent. If the chamber temperature rose due to the freezer failure, move the samples following the tips on page 11. - Page 53 4. MAINTENANCE & TROUBLESHOOTING Cause/Solution Problem The chamber does not ■ A large amount of warm materials has been put in the chamber. cool down enough. ■ There is a large amount of frost built up on the door gasket or inner side of the inner door.
-
Page 54: Disposal Of Unit
DISPOSAL OF UNIT Before disposing of the freezer unit with biohazardous danger, decontaminate the unit to the extent possible by the user. If the unit is to be stored unused in an unsupervised area for a long period, ensure that children do not have access to the unit and that doors cannot be closed completely. -
Page 55: Options & Specifications Etc
5. OPTIONS & SPECIFICATIONS etc. 5. OPTIONS & SPECIFICATIONS etc. OPTIONAL COMPONENTS Temperature recorder (MTR-85H, MTR-G85A) The chamber temperature can be recorded and checked by installing the optional temperature recorder MTR-85H or MTR-G85A. Contact our sales representative or agent for the purchase of the temperature recorder. Main specifications of temperature recorder MTR-85H MTR-G85A... -
Page 56: Setting Of Shelf Stoppers When Using Inventory Racks
(marked with ○) Inventory rack IR-220U Inventory rack IR-224U Bores above and below No.1 under the second 〇 screw from the top. 〇 (marked with ○) MDF-DU500ZHA Inventory rack IR-220U Inventory rack IR-224U MDF-DU700ZHA... -
Page 57: Specifications
5. OPTIONS & SPECIFICATIONS etc. SPECIFICATIONS Ultra-Low Temperature Freezer Ultra-Low Temperature Freezer Product name MDF-DU500ZHA MDF-DU700ZHA Width 790 mm (31.1 in.) 1,030 mm (40.6 in.) External Depth 882 mm (34.7 in.) 882 mm (34.7 in.) dimensions Height 1,993 mm (78.5 in.) 1,993 mm (78.5 in.) -
Page 58: Performance
PERFORMANCE Ultra-Low Temperature Freezer Ultra-Low Temperature Freezer Product name MDF-DU500ZHA MDF-DU700ZHA MDF-DU500ZHA-PA MDF-DU700ZHA-PA Model number Cooling performance -86°C at the center of the chamber (ambient temperature; 30°C, no load)* -90°C to -40°C Temperature settable range -86°C to -40°C (ambient temperature; 30°C, no load) -
Page 59: Safety Environmental Conditions
5. OPTIONS & SPECIFICATIONS etc. SAFETY ENVIRONMENTAL CONDITIONS This equipment is designed to be safe at least under the following conditions (based on the IEC 61010-1): ■ Indoor use; ■ Altitude up to 2,000 m; ■ Temperature 5°C to 40°C; ■... -
Page 60: Safety Check Sheet
SAFETY CHECK SHEET Please copy and fill out this form before servicing. CAUTION Hand over this form to the service engineer for their and your safety. Safety check sheet 1. Stored material □ □ □ Risk of infection: Maybe □ □... - Page 61 MEMO...
- Page 62 MEMO...
- Page 64 1-1-1 Sakada, Oizumi-machi, Ora-gun, Gunma 370-0596, Japan Printed in Japan LDCL078100-1 © PHC Corporation 2023 J0123-10523...
Need help?
Do you have a question about the MDF-DU700ZHA and is the answer not in the manual?
Questions and answers