
Related Manuals for Phcbi MLR-352


Summary of Contents for Phcbi MLR-352
- Page 1 Service Manual Versatile Environmental Test Chamber PHC Corporation Biomedical Div. ©2018 PHC Corporation All rights reserved. Unauthorized copying and distribution is a violation of law...
- Page 2 Effective models This service manual is effective for the following models. Model Model code Voltage and Frequency MLR-352 823-643-52 220V 50Hz 823-643-53 220V 60Hz 823-643-54 230V 50Hz 823-643-55 220V 50Hz MLR-352H 823-644-51 110V 60Hz 823-644-52 220V 50Hz 823-644-53 220V 60Hz...
-
Page 3: Table Of Contents
Contents P a g e S p e c i f i c a t i o n s - - - - - - - - - - - - - - - - - - - - - - - - - - - - - - - - - - - - - - - - - - - - - - - - - - - - - - - D i m e n s i o n s - - - - - - - - - - - - - - - - - - - - - - - - - - - - - - - - - - - - - - - - - - - - - - - - - - - - - - - C o o l i n g u n i t p a r t s... -
Page 4: Specifi Cations
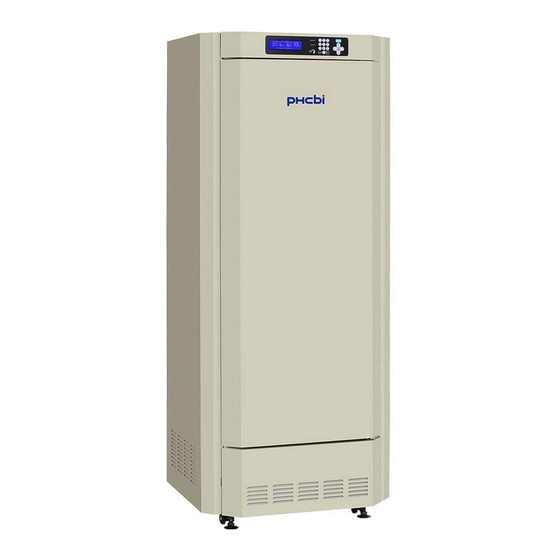
Specifi cations <Structural specifications> Item MLR-352 MLR-352H Model Versatile Environmental Test Chamber External dimensions W760 × D700 × H1835 (mm) Internal dimensions W520 × D490 × H1135 (mm) Effective capacity 294 L Exterior Painted steel Interior Stainless steel, left and right side paired glass window (370x1110 mm) - Page 5 <Control specifications> Item MLR-352 MLR-352H Temperature controller Electric heat apparatus: PID control, Compressor: ON-OFF control Temperature display Digital display Humidity control None Electronic expansion valve: PID control Humidifier: PI control Humidity display None Digital display Temperature, illuminance Temperature, illuminance, humidity...
- Page 6 <Performance specifications> Item MLR-352 MLR-352H Temperature control to 50 (light ON) to 50 (light ON) range to 50 (light OFF) to 50 (light OFF) Usable ambient 5 to 35 , less than 80% RH temperature Temperature ±2.5 (light ON), ±1.0...
-
Page 7: Dimensions
Dimensions < MLR-352 > Power cord - 4 -... - Page 8 < MLR-352H > Power cord - 5 -...
-
Page 9: Cooling Unit Parts
Cooling unit parts MLR-352/352(H) Components Specifications Compressor 115V,60Hz * 220~240V,50Hz 220V,60Hz Model RL2557-PB RL2557-SA RL2557-RA Parts code 7FB-0-M101-008-02 7FB-0-M101-008-03 7FB-0-M101-008-04 Rated power supply 110/115V, 60Hz 220-240V, 50Hz 220V, 60Hz Refrigerant oil SL32D1 Charged q’ty:290ml Cooling method Air cooling by fan... -
Page 10: Cooling Circuit
Cooling circuit < MLR-352 >... - Page 11 < MLR-352H >...
- Page 12 Airfl ow in chamber Polyurethane isolation Airflow Evaporator Nozzle for humidifier (MLR-352H only) Humidifier (MLR-352H only) - 9 -...
-
Page 13: C O M P O N E N T S O N P C
Components on PCB CN12 CN20 CN17 Temp. sensor Humidity sensor MTR-480 Filter sensor Defrost sensor CN13 (MLR-352H only) (Option) Limit sensor Remote alarm terminal Dehumidity DEF sensor CN15 Door switch Humidifying CN14 LCD PCB CN16 Valve motor LCD PCB CN10 Fan motor relay Cooling fan motor Condensing fan... -
Page 14: C O N N E C T I O N S O N P C
Connections on PCB The following shows connections of connectors (CN) on temp. control PCB. Connector Connects to Usage Switching power supply 1 12VDC Power supply to PCB. 3 GND LCD board To connect with LCD board. Control board (CN200) To connect with Control board. Overheat relay To check abnormal temperature rising. -
Page 15: E L E C T R I C P A R T
Electric parts MLR-352/MLR-352H AC115V,60Hz AC220V,60Hz AC220/230V/240V,50Hz Type RL2557-PB RL2557-RA RL2557-SA Compressor Code 7FB-0-M101-008-02 7FB-0-M101-008-04 7FB-0-M101-008-03 Rated voltage (50/60Hz) 110-120V, 60Hz 220V, 60Hz 220-240V, 50Hz Winding resistance C-S(Aux) 6.41 13.5 16.8 C-R(Main) C-R(Main) 1 32 1.32 7 55 7.55 9 27 9.27... -
Page 16: Specifi Cations Of Sensor
Specifi cations of sensor Temperatures and resistance values of thermistor (Type:103AT-1) Temperature Resistance Temperature Resistance Temperature Resistance value (k ) value (k ) value (k ) 27.28 8.94 3.43 26.13 8.64 3.32 25.03 8.31 3.22 23.99 8.02 3.12 22.99 7.73 3.02 22.05 7.46... -
Page 17: W I R I N G D I A G R A
Wiring diagram - 14 -... -
Page 18: C I R C U I T D I A G R A
Circuit diagram - 15 -... -
Page 19: Control Specifi Cations
Control specifi cations Temperature control Settable range ~52.0 Ex) Setting temperature will be fixed at 50.0 even if you input a value between 50.1 and 99.8 . Settable time 00:00 ~ 99:59 (If you input ’99:99’, setting time will be limitless.) Chamber temperature -50.0 ~ 70.0... - Page 20 Alarms, safety functions (1) Error codes E01: Temperature sensor is open circuited When temp. sensor voltage is more than 4900mV (or temp. sensor temperature is lower than approx. -50 ), it diagnoses that temp. sensor is open circuited and ‘Error 01:Temp Sensor is opened’ will be displayed. E02: Temperature sensor is short circuited When temp.
- Page 21 E11: Filter sensor is open circuited When detected filter sensor voltage is higher than 4900mV (or detected temperature is lower than approx. -50 ), it diagnoses that filter sensor temperature is open circuited and ‘Error 11: Filter sensor is opened’ will be displayed.
- Page 22 (5) Door alarm Delay time: 0~15 minutes (Default setting: 2 minutes) Ring back time: 0~99 minutes (Default setting: 0 minutes = Not ring back) Situation: When a door is open over than setting time, door alarm will be emit. Action: Buzzer will sound intermittently and “Door”...
- Page 23 <Table of alarm & safety functions> Remote alarm Alarm & safety Situation Indication Buzzer Safety operation contact Automatic set Chamber temp. exceeds set Digits on Intermittent Activates after H side; Heater temperature temp. +/-2.5 temperature display tone after 15min. of alarm (+/-1.0~10.0 changeable)
- Page 24 Remote alarm Alarm & safety Situation Indication Buzzer Safety operation contact Door alarm Door opens for 2 min. ‘Door’ flashes Intermittent Cooling tone motor during door open Fuse for outlet Current is over than 3A Outlet OFF Auto MENU There is no key operation Disappear erase for 1minute in Top screen...
- Page 25 Defrost in sub-evaporator Automatic defrosting will be performed at both 3 a.m. and 3 p.m. even if a unit is running by program. You can also start defrosting manually. The relay will be switched the position from valve side to heater side during defrosting. When a unit detects that defrost S.
- Page 26 Fault detection Fault detection Fault detection 3min 3min 3min Model code How to set model code: In “Calibration 1” screen, input selectable model code to the “Model Code” column. Select “OK” in MENU bar. 0: MLR-352 1: MLR-352H - 23 -...
-
Page 27: O P E R A T I O N S O N L C D P A N E
Operations on LCD panel *Note) The functions used for service are explained in this chapter. The other functions excepting them will be referred to the Instruction Manual. 1. Displays of temperature/humidity calibration and function numbers 1. Top screen 2. Select Tools S t a n d - b y T o p S c r e e n... - Page 28 2. Display of ROM version Operation Turn the power on. Topscreen will be displayed. Select “Tools” on MENU bar. Select Tools screen will be displayed. Select “Svc” on MENU bar. Password screen will be displayed. Input service code 384 and press OK on MENU bar.
- Page 29 3. Temperature zero calibration Ex) When set temperature is 25.0 and displayed temperature for temp. sensor is 26.5 ; Operation Place temp. sensor in the center of the chamber and set light step to LS0 . Set chamber temperature to 25.0 and leave the unit until the temperature is stabilized.
- Page 30 4. Humidity zero calibration Ex) When set temperature is 25.0 and set humidity is 55%RH and displayed humidity for humidity sensor is 58%RH; Operation Place humidity sensor in the center of the chamber and set light step to “LS0”. Set chamber temperature to 25.0 and set chamber humidity to 55%RH and leave the unit until temperature and humidity are stabilized.
- Page 31 5. Temperature span calibration Ex) When set temperature is 45.0 and displayed temperature for temp. sensor is 46.5 ; Operation Place temp. sensor in the center of the chamber and set light step to LS0 . Set chamber temperature to 45.0 (40 to 50 , recommended) and leave the unit until the temperature is stabilized.
- Page 32 6. Humidity span calibration Operation Place humidity sensor in the center of the chamber and set light step to “LS0”. Set chamber temperature to 25.0 and set chamber humidity to 85%RH (80~90%RH, recommended) and leave the unit until temperature and humidity are stabilized. In Stand-by Top screen, select “Tools”...
- Page 33 7. Various functions 1.Top screen 2. Select Tools S e l e c t T o o l s M L R - 3 5 2 H S t a n d - b y T o p S c r e e n M E N U M E N U T e m p...
- Page 34 (Note) 1. Customer’s program will be deleted all at once if you perform “Delete All User Data” (Function #925) on Select Tools Svc screen, but calibration value will not be initialized. 2. How to perform “Delete All User Data” (Function #925) (1) In Top screen, select “Tools”...
- Page 35 8. Test programming run Operation In Stand-by Top screen, select Tools on MENU bar to display Select Tools screen. Select Svc on MENU bar to display Password screen. Input Service code “384” and select “OK” on MENU bar. In Select Tools Svc screen, select Test Program with reversal characters. Select OK on MENU bar.
-
Page 36: O F F S E T P R O C E D U R E F O R E L E C T R I C E X P A N S I O N V A L V
Offset procedure for Electric expansion valve When replacing an electric expansion valve (EV), following procedure should be performed to control chamber temperature and humidity correctly. Preparation: Set thermocouple at the center (1/2H) of the chamber before commence operation. Ex) Using 230V/50Hz supplied unit In Top Screen, select “Std-by”... - Page 37 Move curser to “Hardware Status” column after temperature is stabilized. Select “OK” in the MENU bar and press ENTER key to display Hardware Status screen. Write down values besides “Def” column and “Filter” column. Select “OK” in the MENU bar and press ENTER key to display Hardware Status screen.
- Page 38 If the value is in the range, write down an offset value. Offset value is obtained by subtracting “43” from the displayed value besides “EV” column. Ex) 55 – 43 = 12 Select “OK” in the MENU bar and press ENTER key to display Select Tools Svc screen.
- Page 39 In Stand-by Setting screen, move curser to a column besides “Temperature” column. Change the value from “99.9” to “20.0”. Set “0”LS besides “Light Step” column and set “90”% besides “Humidity” column. Select “OK” in the MENU bar and press ENTER key.
- Page 40 Table of corresponding values between Def temperature display and Electric valve offset <For 220-240V/50Hz> Filter temperature: 18.1 19.0 Filter temperature: 19.1 20.0 Filter temperature: 20.1 21.0 Filter temperature: 21.1 22.0 Filter temperature: 22.1 23.0 Def temperature display ( ) EV offset Def temperature display EV offset Def temperature display...
- Page 41 Table of corresponding values between Def temperature display and Electric valve offset <For 220V/60Hz> Filter temperature: 18.1 19.0 Filter temperature: 19.1 20.0 Filter temperature: 20.1 21.0 Filter temperature: 21.1 22.0 Filter temperature: 22.1 23.0 Def temperature display Def temperature display Def temperature display Def temperature display Def temperature display ( )
-
Page 42: H I G H F R E Q U E N C Y V I B R A T I O N U N I
High frequency vibration unit - 39 -... -
Page 43: Maintenance For Humidifi Er
Maintenance for humidifi er 1.Prior to performing maintenance (1) Turn off main power switch and close water feed service valve before maintenance operation. (2) High frequency vibration unit should be delicate, so do not make some scratch upon it with driver. - Page 44 3 Normal maintenance (a)Clean-up strainer 1) Arrange equipments. 2) Turn off main power switch and close water feed service valve. 3) Disconnect cupper tube and make sure to secure strainer with 2pcs. of adjustable wrench. 4) Remove cover from strainer and make sure to secure valve joint with 2pcs.
- Page 45 (b)Clean-up water tank Power cord 1) Arrange equipments. 2) Turn off main power switch and close water feed service valve. 3) Disconnect cupper tube from strainer. 4) Remove power cable wire from transformer terminal. Fixed screw Outlet for mist tube 5) Disconnect mist tube from humidifier.
- Page 46 (d) Replace high frequency vibration unit 1) Follow (b) Clean-up water tank, 1)~7) to remove Lead wire (orange) cover from water tank. High frequency 2) Cut the tie band. vibration unit 3) Disconnect lead wires (yellow and orange wires) from PCB. 4) Loosen and remove 2 screws that secure high frequency vibration unit and take high frequency vibration unit out.
-
Page 47: Part S L A Y O U
<Inner ceiling> <Inner ceiling> Power transformer Humidity sensor Temp. sensor Control panel Door switch Limit sensor Thermal fuse Evaporator for de-humidity <MLR-352H> Limit sensor Thermal fuse Power switch with circuit breaker Power switch with circuit breaker <MLR-352> - 44 -... - Page 48 <Upper back side> <Front bottom side> Remote alarm terminal Circulation fan motor Filter Humidifier (WM-FN400HG) MLR-352H only MLR-352H only Solenoid valve <Ballasts at right and left lower sides> <Lower-rear> Ballast for fluorescent lamp Compressor Solenoid valve Tray drain for de-humidity - 45 -...
-
Page 49: T E S T D A T
Test data Note) Following data are the reference only. AT20 , 50 AT20 , 50 Pull-down and Pull-up temperature Pull-down and Pull-up temperature 15 fluorescent lamps are illuminating 15 fluorescent lamps are not illuminating Time[h] Permissible heat loading dose Chamber arrival temperature (Fluorescent lamp: OFF) Chamber arrival temperature 10 (15 fluorescent lamps turn on... - Page 50 Pressure performance Pull-down with all 15 fluorescent lamps illuminate 60Hz Pd 60Hz Pd 50Hz Pd Condition RT 35 SV +50 SV +50 50Hz Ps Time (hour) Current and power consumption performance Current and power consumption performance 1500 Pull-down with all 15 fluorescent lamps illuminate Condition 1400 RT 35...
- Page 51 "99", it repeats set program times cycle. infinitely. * Parts code of PCB assembly is not changed. MLR-352: 624 233 9427 / PCB ASSY MLR-352H: 624 233 9434 / PCB ASSY <Additional information> In order to change the program, please replace following IC.
- Page 52 FOR RoHs PRODUCT IMPROVEMET Please add the following NOTICE to the Manuals listed below. Versatile Environmental Test Chamber Oct. 21, 2015 Category: Date: MLR-352/352H Model: SM9910266 E276 Ref No: Issued No. NOTICE This is the correction notice that there are wrong descriptions about the rating of "Condensing fan motor"...
- Page 53 The improvement of specifications for the system reset during the program operation No effect on the product performance due to this change * Parts code of PCB assembly is not changed. MLR-352: 624 233 9427 / PCB ASSY Loss of data MLR-352H: 624 233 9434 / PCB ASSY <Caution>...
- Page 54 FOR RoHS PRODUCT IMPROVEMET Please add the following NOTICE to the Manuals listed below. Category: Versatile Environmental Test Chamber Date: Dec. 16, 2016 Model: MLR-352/352H Ref No: SM9910266 Issued No. E408 NOTICE Fan motor has been changed because of parts discontinuance.
- Page 55 Notice PRODUCTION CHANGE CORRECTION FILE NO. ADD INFORMATION SERVICE FOR RoHS PRODUCT IMPROVEMET Please add the following NOTICE to the Manuals listed below. Products charged Fluorinated gas Jul. 12, 2017 Category: Date: Refer to separate sheet PE model Model: Destination: E432 Ref No: Issued No.
- Page 56 SS7210150-02 MBR-506DH-PE 17010001~ SM9910226-04 MBR-305GR-PE 16100122~ SM9910288-06 MBR-705GR-PE 16100121~ SM9910230-07 MBR-1405GR-PE 16100070~ MIR-154-PE 16100520~ SM9910168-06 MIR-254-PE 16100356~ SM9910224-05 MIR-554-PE 16090248~ MLR-352-PE 16100148~ SM9910266-06 MLR-352H-PE 16100287~ SM9910202-06 MDF-137-PE 16100040~ SM9910209-06 MDF-237-PE 16100017~ SM9910279-03 MDF-437-PE 16100036~ SM9910273-10 MDF-U334-PE 16110486~ SM9910241-10 MDF-U5312-PE 16110581~...
- Page 57 Change the program due to PCB mounted parts (Diode) change by EOL. No effect on the product performance due to this change. * Parts code of PCB assembly is not changed. MLR-352: 624 233 9427 / PCB ASSY MLR-352H: 624 233 9434 / PCB ASSY 3 Action to take For information only <Caution>...
- Page 58 *Service manual revision history Revision # Date of revision Reason of revision SM9910266-01 Jun.06, 2014 To modify program running failure (update ROM version). SM9910266-01 To modify program running failure (update ROM version). (Rev.01) Oct.22, 2014 Added parts code of IC. SM9910266-02 Jul.31, 2015 Notice relating to service manual for Panasonic brand products.
Need help?
Do you have a question about the MLR-352 and is the answer not in the manual?
Questions and answers