
Related Manuals for LEGRAND CHIEF AS3LD AS3A101


Summary of Contents for LEGRAND CHIEF AS3LD AS3A101
- Page 1 I N S T A L L A T I O N I N S T R U C T I O N S AS3LD Video Soundbar Mount Spanish Product Description German Product Description Portuguese Product Description Italian Product Description Dutch Product Description French Product Description AS3A101...
- Page 2 The information contained in this document is subject to change without notice or obligation of any kind. Legrand makes no representation of warranty, expressed or implied, regarding the information contained herein. Legrand assumes no responsibility for accuracy, completeness or sufficiency of the information contained in this document.
- Page 3 Installation Instructions AS3A101 DIMENSIONS DIMENSIONS: INCHES [MILLIMETERS] 22.96 583.1 M AX HEIGHT...
- Page 4 AS3A101 Installation Instructions DIMENSIONS (CONTINUED)
- Page 5 Installation Instructions AS3A101 LEGEND Tighten Fastener Pencil Mark Apretar elemento de fijación Marcar con lápiz Befestigungsteil festziehen Stiftmarkierung Apertar fixador Marcar com lápis Serrare il fissaggio Segno a matita Bevestiging vastdraaien Potloodmerkteken Serrez les fixations Marquage au crayon Loosen Fastener Drill Hole Aflojar elemento de fijación Perforar...
- Page 6 AS3A101 Installation Instructions TOOLS REQUIRED FOR INSTALLATION 3/8" (9.5mm) 1/4" (included) 3/16" (4.5" length) (included) PARTS C (1) [Adapter bracket] B (2) [Speaker adapter] Hardware Bag H (1) E (2) 1/4" D (2) #10-24 1/4-20 x 1/4" A (1) [Height-adjustable bracket] J (1) G (2) F (2)
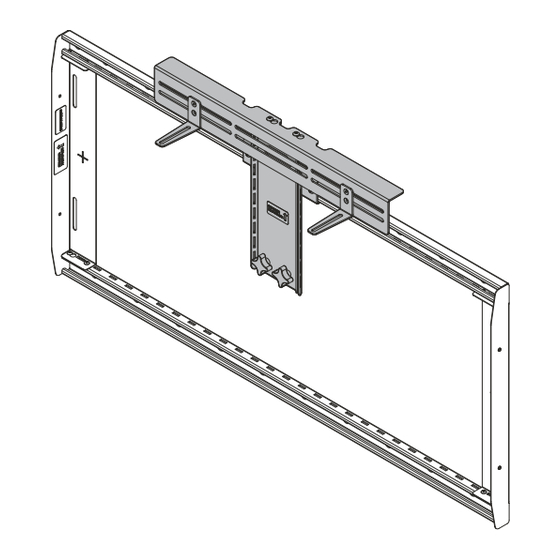
- Page 7 Installation Instructions AS3A101 Assembly And Installation Loosen two strut nuts on back of height-adjustable bracket (A) and rotate until they are in a horizontal position. (See Figure 3) IMPORTANT ! : If installing to displays larger than 65", height-adjustable bracket (A) will need to be disassembled and reassembled in order to achieve a longer length.
- Page 8 AS3A101 Installation Instructions Rotate strut nuts until they are back in a vertical position and tighten button head cap screws. (See Figure 5) (above installation) (above installation) strut nut horizontal (D) x 2 tighten tighten Figure 5 NOTE: Figure 7 If speaker adapters (B) are not needed, proceed to Step 7.
- Page 9 Installation Instructions AS3A101...
- Page 10 AS3A101 Installation Instructions...
- Page 11 Installation Instructions AS3A101...
- Page 12 P +31 (0) 495 580 852 F +31 (0) 495 580 845 Asia Pacific A Office No. 918 on 9/F, Shatin Galleria 8800-003397 Rev00 18-24 Shan Mei Street 2023 Legrand Fotan, Shatin, Hong Kong www.legrandav.com P 852 2145 4099 10/2024 F 852 2145 4477...
Need help?
Do you have a question about the CHIEF AS3LD AS3A101 and is the answer not in the manual?
Questions and answers