
Subscribe to Our Youtube Channel
Related Manuals for DeDietrich EASYLIFE ESSENCIO CFU 36


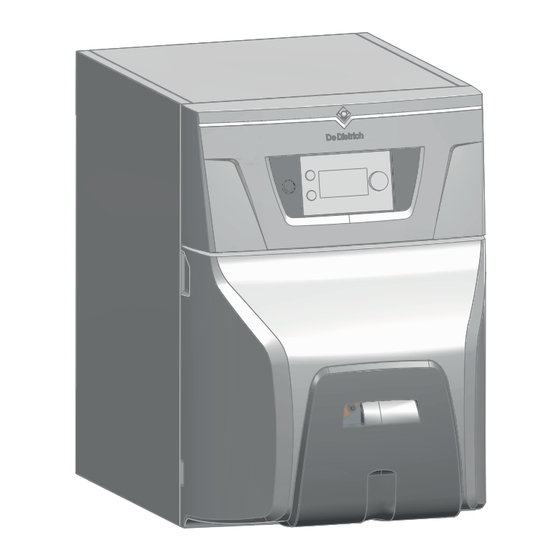
Summary of Contents for DeDietrich EASYLIFE ESSENCIO CFU 36
- Page 1 EASYLIFE Installation and Service Manual Oil-fired boiler ESSENCIO CFU 36 CFU 46 S U S T A I N A B L E C O M F O R T ®...
- Page 2 Contents Contents Safety ................... . 5 General safety instructions .
- Page 3 Contents 6.8.2 Determining the flue gas pipe ............37 6.8.3 Type B connections .
- Page 4 Contents 10.5 Venting the heating system ..............77 10.6 Draining the heating system .
- Page 5 1 Safety Safety General safety instructions Tab.1 Operation Danger This appliance can be used by children aged from 8 years and above and persons with reduced physical, sensory or mental capabilities or lack of experience and knowledge if they have been given supervision or instruction concerning use of the ap...
- Page 6 1 Safety Specific safety instructions Tab.2 Electrical Danger of electric shock Before any work, switch off the mains supply to the boiler. Caution A disconnection method must be allowed in the fixed pipes in accordance with the rules on installation in force in the country. Caution The boiler must always be connected to the protective earthing.
- Page 7 1 Safety Installation Caution The installation must comply in all matters with the standards and rules (DTU, EN and others) which govern works and interventions in individual homes, blocks of flats and other constructions. Important Only qualified professionals are permitted to install the boiler, in accordance with prevailing local and national regulations.
- Page 8 1 Safety Recommendations Important Keep this document close to the place where the appliance is installed. Important This manual can also be found on our internet site. Tab.4 Casing compo Remove the casing only to perform maintenance and repair work. Put the casing back in place after main nents tenance and repair work.
- Page 9 2 Symbols used Symbols used Symbols used in the manual This manual uses various danger levels to draw attention to special instructions. We do this to improve user safety, to prevent problems and to guarantee correct operation of the appliance. Danger Risk of dangerous situations that may result in serious personal injury.
- Page 10 3 Technical specifications Technical specifications Homologations 3.1.1 Certifications Tab.6 Certifications CE identification number 0085CQ0004 Chimney connection Connection type: 3.1.2 Oil categories Tab.7 Type of oil that can be used Maximum viscosity Non-road or off-road diesel (NRD) 6 mm /s at 20 °C Non-road diesel with a maximum EMAG content of 7 % Important To be used exclusively for a boiler fitted with a burner with a preheater.
- Page 11 3 Technical specifications Supplements or subsequent regulations and guidelines that are valid at the time of installation shall apply to all regulations and guidelines specified in this manual. Technical data Tab.8 Technical parameters for boiler space heaters Product name CFU 36 CFU 46 Condensing boiler Low-temperature boiler...
- Page 12 3 Technical specifications Tab.10 Hydraulic specifications Unit CFU 36 CFU 46 Water content (excluding expansion vessel) litre 35.5 Minimum operating pressure MPa (bar) 0.05 (0.5) 0.05 (0.5) Maximum operating pressure MPa (bar) 0.3 (3) 0.3 (3) Maximum water temperature °C Pressure loss of hydraulic circuit at Δt = 10K mbar Pressure loss of hydraulic circuit at Δt = 15K...
- Page 13 3 Technical specifications 3.2.1 Specifications for NTC 10 kilo ohm type sensors Tab.16 Flow and return sensors Temperature °C Resistance Ω 32014 19691 12474 10000 8080 5372 3661 2535 1791 1290 (Ohm) Dimensions and connections Fig.2 Boiler only CFU 36 1372 MW-5000962-1 1 Flue gas outlet, diameter 153 mm...
- Page 14 3 Technical specifications Fig.4 1 2 3 4 5 1 2 3 4 5 1 2 3 4 5 6 7 1 3 2 1 2 4 3 5 6 GN/YW 1 2 3 4 5 1 2 3 4 5 1 2 3 4 5 ZG1a X8 (SCB-04)
- Page 15 3 Technical specifications 3.4.2 Burner electrical diagram Fig.5 1x230V AC MW-5000978-1 A1 Control and safety box STB Safety thermostat B1 Flame detector ST1 Thermostat stage 1 E1 Not available T11 Ignition transformer H1 Burner fault X1 7-pin connector M1 Fan motor Y1 Oil solenoid valve P1 Hour run meter 7740569 - v01 - 12122019...
- Page 16 4 Description of the product Description of the product Main components 4.1.1 Boiler Fig.6 MW-2001019-1 1 Control panel 5 Burner 2 On/Off switch 6 Position of the CU-OH-04 main PCB 3 Burner manual reset button 7 Safety thermostat manual reset button 4 Heating body 8 Flue gas outlet 4.1.2...
- Page 17 4 Description of the product Fig.8 A Wired connection to the E-Pilot control panel PCB MW-5000942-1 4.1.4 Burner Fig.9 1 Wiring base frame and control and safety control box 2 Ignition transformer 4 5 6 7 8 3 Component plate 4 N/A 5 Nozzle line 6 Ignition electrode...
- Page 18 4 Description of the product Operating principle 4.2.1 Operating cycle of the burner without preheater Fig.11 F Flame detection Z Ignition M Burner motor FT N/A V Solenoid valve OV N/A SA External breakdown indicator ta N/A tv Pre-ignition and pre-ventilation time: 12 seconds ts Safety time: 10 seconds tn Post-ignition time: 20 seconds MW-6000619-1...
- Page 19 4 Description of the product Icons Description Burner on Chimney-sweeping mode activated Installer level activated 4.3.3 Description of the home screen (direct access) The home screen has several pages. Each page enables direct access to a zone. Display the home screen by turning the selector to the right.
- Page 20 4 Description of the product 4.3.4 Description of the carousel (quick access) Fig.18 The carousel is used to quickly access the main control panel menu. Display the carousel by pressing the Main menu key Scroll through the menu from right to left by turning the selector Installer MW-5000948-1 Tab.19...
- Page 21 4 Description of the product an oil boiler equipped with a control panel, (to be assembled for model CFU 46) a preset 1-stage oil burner (mounted), One installation and service manual; One user manual. Accessories and options Various options are available, depending on the configuration of the installation and the country: Tab.20 List of options...
- Page 22 5 Connecting diagrams Connecting diagrams One direct heating circuit with kit Fig.19 20°C ZONE 1 230V 50Hz MW-5000952-2 A1 Programmable room thermostat 18 Heating circuit fill point B Return temperature sensor France: with disconnector in accordance with 1 Heating flow direct circuit prevailing regulations 2 Heating return 21 Outdoor temperature sensor...
- Page 23 5 Connecting diagrams Fig.20 20°C ZONE 1 230V 50Hz CU-OH-04 MW-5000953-2 A1 Room thermostat 11a Pump power supply B Return temperature sensor 11b Pump control 21 Outdoor temperature sensor 99 Bridging Tab.21 Optional equipment required Pump + 18 L heating expansion vessel kit MY445 7740569 - v01 - 12122019...
- Page 24 5 Connecting diagrams One direct heating circuit with mixing valve + one domestic hot water tank Important For underfloor heating, the connection must be made via a mixing valve. Direct connection is prohibited. Fig.21 ZONE 2 230V 50Hz 230V 50Hz 17 33 MW-5000954-1 A2 Programmable room thermostat: SmartTC°...
- Page 25 5 Connecting diagrams France: 0.7 MPa (7 bar) with release valve with Other countries: Safety device to safeguard against indicator light overheating of the underfloor heating system, in 32 Domestic hot water loop pump (looping optional with accordance with prevailing regulations. programmer) 50 Disconnector 33 Domestic hot water temperature sensor...
- Page 26 5 Connecting diagrams Two heating circuits including one with a mixing valve + one domestic hot water tank Important For underfloor heating, the connection must be made via a mixing valve. Direct connection is prohibited. Fig.23 ZONE 1 ZONE 2 230V 50Hz 230V...
- Page 27 5 Connecting diagrams 25 Domestic hot water tank exchanger primary outlet Other countries: Safety device to safeguard against 26 DHW booster pump overheating of the underfloor heating system, in 27 Non-return valve accordance with prevailing regulations. 28 Domestic cold water inlet 50 Disconnector 29 Pressure reducer - if the supply pressure exceeds 80 51 Thermostatic valve...
- Page 28 5 Connecting diagrams Two heating circuits with a three-way valve + a domestic hot water tank Fig.25 ZONE 1 ZONE 2 ZONE 3 230V 50Hz 230V 50Hz 30 29 MW-2001041-01 A2 Programmable room thermostat: SmartTC° France: with disconnector in accordance with A3 Programmable room thermostat: SmartTC°...
- Page 29 5 Connecting diagrams 64 Direct heating circuit (radiators) 65 Heating circuit with mixing valve, may be low temperature heating circuit (underfloor heating or radiators) Fig.26 230V Zone1 SCB-04 ON/OFF OT/RU S DEP S EXT Zone2 Zone2 Zone2 CU-OH-04 SCB-04 ON/OFF OT/RU S DEP S EXT...
- Page 30 5 Connecting diagrams Tab.24 Optional equipment required Pump + 18 L heating expansion vessel kit MY445 Domestic hot water tank ER590 (110 l) or ER592 (160 l) Boiler connection kit MY925 7740569 - v01 - 12122019...
- Page 31 6 Installation Installation Installation regulations Caution Installation of the boiler must be done by a qualified professional in accordance with prevailing local and national regulations. Tab.25 Residential buildings France Order of 23 February 2018 amending the Order of 27 April 2009: Order of 23 February 2018 on the technical and safety regulations applicable to combustible gas installa...
- Page 32 6 Installation 6.2.1 Data plate Fig.27 The data plate identifies the product and provides the following information: Type of product Date of manufacture (Year - Week) Serial number Electrical power supply Operating pressure Electrical power IP rating CN1 and CN2 boiler configuration number Important If the data plate cannot be accessed, a second self-adhesive data plate is provided in the documentation bag.
- Page 33 6 Installation Important Do not stock chloride or fluoride compounds close to the boiler. They are particularly corrosive and may contaminate the combustion air. Chloride and fluoride compounds are present in aerosol sprays, paints, solvents, cleaning products, washing products, detergents, glues, snow clearing salts. Important Do not block the air inlets, combustion product evacuation or condensation water flow pipes (even partially).
- Page 34 6 Installation Fig.32 3. Remove the front transport bracket. MW-2000957-1 Fig.33 4. Remove the rear transport bracket. MW-2000958-2 Fig.34 MW-5000121-04 MW-2000971-01 5. Lower the boiler from the transport pallet using lifting bars Use steel tubes 1/2" in diameter and 1400 mm in length. It is not necessary to remove the burner to insert the lifting bars.
- Page 35 6 Installation Fig.35 7. Level the boiler using the adjustable feet. Adjustable feet Factory setting: 30 mm - adjustment range: 20 to 40 mm MW-2000959-1 Assembly Depending on the configuration of the installation, respect the following order of assembly: 1. Put the domestic hot water tank in place. 2.
- Page 36 6 Installation 6.6.2 Connecting the domestic hot water circuit For the connection of a domestic hot water tank, refer to the instructions that come with the connection kit. 6.6.3 Connecting the expansion vessel 1. Determine the volume of the expansion vessel depending on the volume of the installation.
- Page 37 6 Installation 2. Connect the oil supply tube to the filter, ensuring that the diameters recommended by the manufacturer in the manual supplied with the filter are observed. Boiler model Oil flow rate CFU 36 2.69 kg/h CFU 46 2.69 kg/h Important If a deaerator filter is used, this will require a single-pipe oil supply (a single pipe between the tank and the oil filter), with a smaller...
- Page 38 6 Installation 6.8.3 Type B connections Fig.36 Rigid type B connection - Flue gas pipes (combustion air taken from the boiler room) x mini ø 3/8" 3° MW-2000291-4 Square cross-section: 140 x 140 mm minimum Round flue: 160 mm minimum 7740569 - v01 - 12122019...
- Page 39 6 Installation Caution The flue gas temperature may be lower than 160 °C. You must always use flue gas pipes capable of withstanding periods of condensation. Fig.37 Flexible type B connection - Flue gas pipes (combustion air taken from the boiler room) ø...
- Page 40 6 Installation The mains supply is made via the connection cable pre-wired in the appliance. If the power cable is damaged, it must be replaced by the manufacturer, its after sales service or persons with similar qualifications in order to obviate any danger.
- Page 41 6 Installation Caution Please ensure the polarities shown on the terminals are followed, i.e live (L), neutral (N) and earth ( When the boiler switch is in the Off position, the current still circulates inside the appliance. The boiler's power supply must be switched off at the circuit breaker before any work is carried out.
- Page 42 6 Installation Fig.42 6. Access the PCB housing. Marker Description CU-OH-04 main PCB SCB-04 optional PCB if connected 7. Perform a reset when the PCB is replaced. Return to the factory settings MW-5000109-4 Fig.43 230V 230V MW-5000188-1 8. When replacing the PCB, secure the cable(s) with traction arrester devices.
- Page 43 6 Installation Tab.32 Heating water specifications Total output of the installation (kW) Specification Unit ≤ 70 70 - 200 200 - 550 > 550 Degree of acidity 6.5 - 8.5 7.5 - 9.5 7.5 - 9.5 7.5 - 9.5 (untreated water) Degree of acidity 7.0 - 9.0 7.5 - 9.5...
- Page 44 6 Installation 4. Tidy away or scrap the various packaging items. 5. Hand over all manuals to the end user. 7740569 - v01 - 12122019...
- Page 45 7 Commissioning Commissioning General Commissioning the boiler is done for first time use, after a prolonged shut- down (more than 28 days) or after any event that would require complete re-installation of the boiler. Commissioning of the boiler allows the user to review the various settings and checks to be made to start up the boiler in complete safety.
- Page 46 7 Commissioning 7.3.2 Configuring the installation via the control panel 1. Go to the menu: Zone Function. Tab.33 Type of access Access path Direct access: from the main home screen Not available Quick access: from any screen → Press the →...
- Page 47 7 Commissioning 7.4.3 Setting the position of the ignition electrodes Fig.47 MW-5000218-1 1. Check the position of the ignition electrodes. Unit CFU 36 CFU 46 Number of rings multi 1 x 1 mm 1 x 1 mm plied by the ring thick ness Nozzle Danfoss...
- Page 48 7 Commissioning 4. Fill in the table below with the values measured. Tab.36 Measured values Unit Measured values Burner output Fuel oil pressure (bar) Air pressure at the head mbar Vacuum Number of rings (1) This value is not measured, but defined by the boiler model 5.
- Page 49 8 Operation Operation Browsing in the menus Fig.49 Standby screen Press any key or turn the selector to turn on the backlight for the control panel screen. SYSTEME OK Important If no key is pressed within 3 minutes, the control panel backlight 3.8°...
- Page 50 8 Operation Tab.38 Display Available parameters Chapter Main home screen System holiday mode Periods of absence or going on holiday User guide CH function on Switching the central heating on/off User guide DHW function on Switching domestic hot water production on/off User guide Forced summer On/Off Personalising the control panel...
- Page 51 8 Operation Accessible Description menus Chapter Water temperature Modifying the domestic hot water set point temperatures User guide DHW comfort setpoint DHW reduced setpoint Temporary heating temperature change Changing the room temperature temporarily User guide Zone1 Zone2 (only if the SCB-04 optional PCB is con nected) Hot water boost Forcing domestic hot water production (override)
- Page 52 8 Operation Shutting down the boiler The boiler must be shut down in certain situations, for example during any intervention on the equipment. In other situations, such as an extended absence period, we recommend that the System holiday mode operating mode is used in order to benefit from the boiler anti-blocking function and to protect the installation from frost.
- Page 53 9 Settings Settings Definition of the term "zone" Zone: term given to the different hydraulic circuits (Zone1, Zone2). It indicates several rooms served by the same circuit. Fig.54 Zone1 Zone2 (only if the SCB-04 optional PCB is connected) All the zone symbols and names can be changed. Tab.42 Available symbols Symbol...
- Page 54 9 Settings Fig.55 Tab.44 Example Start of the activity Activity Set point temperature °C 6:30 20 °C Morning 9:00 19 °C Sleep 17:00 20 °C Home 20:00 22 °C Evening 06:30 09:00 17:00 20:00 23:00 MW-1001144-2 23:00 16 °C Away Accessing the Installer level Certain parameters, which may affect the operation of the appliance, are protected by an access code.
- Page 55 9 Settings Sub-menu Parameter Description Chapter Signals Zone1 Reading out measured values Zone2 (only if the SCB-04 optional PCB is connected) Domestic Hot Water Outdoor temperature Parameters and variables releated to outdoor temperature sensors Oil boiler Parameters and variables related to oil boiler Counters Zone1 List of Meter menu parameters...
- Page 56 9 Settings Tab.48 Type of access Access path Direct access: from the main home screen Not available Quick access: from any screen → Press the → Select: Installer → Select: Installation setup → Select: Zone1 Tab.49 Sub-menu Parameter Description Factory setting Zone Function CP020...
- Page 57 9 Settings Sub-menu Parameter Description Factory setting Advanced menu CP750 Maximum zone preheat time CP520 Power setpoint per zone CP670 Configuration of pairing room unit per zone Commercial name of the appliance Zone2 sub-menu These parameters are found on the SCB-04 optional PCB. Only if the SCB-04 optional PCB is connected.
- Page 58 9 Settings Sub-menu Parameter Description Factory setting Heat curve CP230 Heating curve temperature gradient of the zone CP210 Comfort footpoint of the temperature of heat curve of the circuit CP220 Reduced footpoint of the temperature of heat curve of the circuit Chapter: CP000 Maximum Flow Temperature setpoint zone...
- Page 59 9 Settings Tab.53 Sub-menu Parameter Description Factory setting Set heating DP070 DHW comfort setpoint: Comfort temperature setpoint from the Domestic Hot temperatures Water tank DP080 DHW reduced setpoint: Reduced temperature setpoint from the Domestic Hot Water tank DHW mode DP200 DHW primary mode current working setting 0 =Scheduling 1 = Manual...
- Page 60 9 Settings Tab.54 Type of access Access path Direct access: from the main home screen Not available Quick access: from any screen → Press the → Select: Installer → Select: Installation setup → Select: Outdoor temperature Tab.55 Parameter name Parameter Description Factory setting Force summer...
- Page 61 9 Settings Tab.57 Sub-menu Description General Refer to the following tables Water flow and pressure Refer to the following tables Blocking input Refer to the following tables Manual heat demand Refer to the following tables Service settings Refer to the following tables Advanced Refer to the following tables Tab.58...
- Page 62 9 Settings Parameter name Parameter Description Factory setting Water press AP097 Enable/Disable presence of water pressure sensor sensor 0 =No 1 =Yes De-aeration cycle AP101 De-air cycle settings 0 =No deair at power up 1 =Always deair at pwr 2 =Deair only at 1 pwr Tab.60 Blocking input BL input >...
- Page 63 9 Settings Tab.64 Type of access Access path Direct access: from the main home screen Not available Quick access: from any screen → Press the → Select: Installer → Select: Counters → Select: Oil boiler Tab.65 Sub-menu Parameter Description Zone1 Zone2 (only if the CC001 Zone Pump Run Hours : Numbers of pump operating hours of the zone...
- Page 64 9 Settings Tab.67 Available information CU-OH-04 PCB Software version Hardware version Version OBD Serial number Reference SCB-04PCB Software version Hardware version Version OBD Serial number Reference Display E-Pilot Software version Hardware version Version OBD Serial number Reference Setting the parameters 9.5.1 Setting the heating curve The relationship between the outdoor temperature and the central heating...
- Page 65 9 Settings Every day at midnight, the set point temperature is recalculated and the number of days is decreased. 1. Go to the menu: Screed drying. Tab.70 Type of access Access path Direct access: from the main home screen Not available Quick access: from any screen →...
- Page 66 9 Settings Auto-detecting options and accessories This function should be used after replacing a boiler PCB in order to detect all the devices connected to the CAN local bus. 1. Go to the menu: Set configuration code. Tab.74 Type of access Access path Direct access: from the main home screen Not available...
- Page 67 9 Settings Reading out measured values Tab.77 Type of access Access path Direct access: from the main home screen Not available Quick access: from any screen → Go to level Installer → Select: Signals Tab.78 Sub-menu Parameter Description of the parameters Zone1 CM190 Zone Troom setpoint: Wished room temperature setpoint of the zone...
- Page 68 9 Settings Sub-menu Parameter Description of the parameters Oil boiler AM012 Status Appliance: Current main status of the appliance. AM014 Sub status Appliance: Current sub status of the appliance. ChimneyModeStatus: Status of the Chimney mode AM101 Internal setpoint: Internal system flow temperature setpoint AM016 System Flow Temp: Flow temperature of appliance.
- Page 69 10 Maintenance 10 Maintenance 10.1 General instructions Maintenance operations are important for the following reasons: To guarantee optimum performance; Extend the boiler's service life; To provide an installation which offers the customer optimum comfort over time. Caution Have an inspection carried out and the flues swept at least once a year or more, depending on the regulations in force in your country.
- Page 70 10 Maintenance 10.3 Standard inspection and maintenance operations An annual inspection with tightness check is obligatory. 1. Check the combustion each time the flues are swept. 2. Check the hydraulic pressure. 3. Check the leak-tightness of the flue gas discharge and the air inlet. 4.
- Page 71 10 Maintenance 10.3.4 Check the leak-tightness of the flue gas discharge and the air inlet 1. Check the leak-tightness of the flue gas discharge and air inlet connections. 2. Check that the grate guard over the boiler room air inlet is not fouled. 10.3.5 Checking the boiler's automatic air vent 1.
- Page 72 10 Maintenance Fig.60 4. Remove the burner to open the combustion chamber door. MW-2001034-1 Fig.61 5. Unscrew the 4 screws in the combustion chamber door (13 mm spanner). MW-2001029-01 Fig.62 6. Remove the baffle plates. 7. Carefully sweep the flue ways with the brush supplied for that purpose.
- Page 73 10 Maintenance Important A major increase in the flue gas temperature indicates that the boiler is clogged and it should be cleaned. 1. Switch off the main switch on the heating system. 2. Disconnect the burner from the electrical installation. 3.
- Page 74 10 Maintenance Putting the burner in the maintenance position Fig.64 MW-6000626-2 1. Disconnect the burner cable. 2. Unscrew the screws in the 2 bolts by a maximum of 2 turns (4-mm Allen key) 3. Move the right hand bolt down and the left hand bolt up. 4.
- Page 75 10 Maintenance Cleaning the fan Fig.66 1. Clean the fan and the inside of the suction box using a suitable brush and compressed air. 2. Check and, if necessary, modify the setting of the air shutter according to the information in the chapter "Adjusting the air shutter". 3.
- Page 76 10 Maintenance Fig.68 1. Remove the control panel by pressing with your fingers. MW-2001031-1 Fig.69 2. Remove the battery by pushing it gently forwards. 3. Insert a new battery. Important Battery type: CR2032, 3V Do not use rechargeable batteries Do not discard used batteries in the dustbin. Take them to an appropriate collection place.
- Page 77 10 Maintenance 10.5 Venting the heating system Fig.70 Any air in the boiler, pipes or valves must be vented in order to prevent annoying noises that may be generated during heating or when drawing water. 1. Open the valves of all the radiators and/or underfloor heating circuits connected to the system.
- Page 78 10 Maintenance 10.6 Draining the heating system Fig.71 It may be necessary to drain the central heating system if radiators need to be replaced, if there is a major water leak or if there is a risk of freezing. 1. Open the valves on all the radiators connected to the system. 2.
- Page 79 11 Troubleshooting 11 Troubleshooting 11.1 Resolving operating errors If the boiler malfunctions, a code is displayed on the main screen of the control panel. This code is important for the correct and rapid diagnosis of the type of malfunction and for any technical assistance that may be needed.
- Page 80 11 Troubleshooting Error code Message Description Code Code linked to linked to the CU- OH-04 SCB-04 H00.17 DHW sensor Closed Domestic Hot Water tank temperature sensor is either shorted or measures a temperature above range Check the wiring between the main PCB and the sensor Check that the sensor has been correctly fitted Check the Ohmic value of the sensor Replace the sensor if necessary...
- Page 81 11 Troubleshooting Error code Message Description Code Code linked to linked to the CU- OH-04 SCB-04 H02.05 CSU CU mismatch CSU does not match CU type Memory error: Software change (software number or version parameter in consistent with the memory) H02.09 Partial block Partial blocking of the device recognized...
- Page 82 11 Troubleshooting Error code Message Description Code Code linked to linked to the CU- OH-04 SCB-04 H02.60 Unsupported function The zone doesn't support the selected function Function not supported by the zone H07.01 Burner fault Burner fault has occured Chapter: List of burner faults No ignition arc: Check the ignition transformer Check the ignition electrodes...
- Page 83 11 Troubleshooting Tab.85 List of fault codes Error code Message Description Code Code linked to linked to the CU- OH-04 SCB-04 E00.00 TFlow Open Flow temperature sensor is either removed or measures a temperature below range Poor sensor connection: Check the wiring between the main PCB and the sensor Check that the sensor has been correctly fitted Sensor failure: Check the Ohmic value of the sensor...
- Page 84 11 Troubleshooting Tab.86 List of alarm codes Alarm Message Description Code Code code linked to linked to the CU- OH-04 SCB-04 A00.32 TOutside Open Outside temperature sensor is either removed or measures a temperature below range Check the wiring between the main PCB and the sensor Check that the sensor has been correctly fitted Check the Ohmic value of the sensor Replace the sensor if necessary...
- Page 85 11 Troubleshooting Fig.72 1. Remove the lower front panel. MW-5000864-1 Fig.73 2. Lift up the upper front panel slightly and tilt it downwards. MW-5000865-1 Fig.74 3. Remove the protection from the reset button using a flat screwdriver. 4. Press the reset button on the safety thermostat. 5.
- Page 86 11 Troubleshooting Tab.88 List of burner faults Faults Description The burner does not start. No voltage: burner fault. Reset the safety thermostat. Check the fuses and the switches. Increase the setpoint of the thermostats or the regulator (set it above the boiler temperature). No continuity between L1 and T1: Green LED on the control box off while there is a thermostatic demand.
- Page 87 11 Troubleshooting Faults Description The pump does not draw in oil. Damaged pump/motor coupling. Replace the coupling. Strainer, pipework or oil leak. Replace the strainer. Oil inlet/flow connection fitted the wrong way round. Change the connection. Stop valves closed. Open the valves. Filter or strainer on the tank clogged.
- Page 88 11 Troubleshooting Fig.75 1. Reset the burner safety unit by pressing and holding the reset button for one second. Important To reset the safety unit, the burner must be switched on. MW-5000917-2 7740569 - v01 - 12122019...
- Page 89 12 Decommissioning 12 Decommissioning 12.1 Decommissioning procedure Fig.76 If you need to decommission the boiler, either temporarily or permanently, proceed as follows: 1. Switch the on/off switch to off. 2. Switch off the power supply to the boiler. 3. Close the oil inlet. 4.
- Page 90 13 Spare parts 13 Spare parts 13.1 General If inspection or maintenance work bring to light the need to replace a component in the boiler: Provide the reference number given in the spare parts list when ordering a spare part. Caution Only genuine spare parts may be used.
- Page 91 13 Spare parts Marker Reference Description CFU 36 CFU 46 300025136 Nozzle gasket 7619918 Nozzle 7613788 Burner door 7626744 Burner door flap 7609824 Front door insulation 7610487 Back door insulation 95086032 Silicon cord 7617996 Insulation spring 7615044 Top hinge 81990204 Bottom hinge 81998983 Body screws bag...
- Page 92 13 Spare parts 13.4 Casing Fig.81 MW-5000878-2 Tab.91 Marker Reference Description CFU 36 CFU 46 7743929 Side panel 7626746 Screw bag 7729758 Top panel 7724144 Front panel 200019786 Spring kit 7727148 Control panel support 7675263 Grey switch 7743847 E-Pilot control panel 7732476 E-Pilot cable 7608040...
- Page 93 13 Spare parts Marker Reference Description CFU 36 CFU 46 7728924 Oil hose mounting 7723176 Electronic spacer V508482 Allen key 3 mm 65x20 97949451 Allen key 4 mm 240x40 7659874 Ignition electrode checking tool Not applica Not applica 13.5 PCB box Fig.82 MW-2001104-1 Tab.92...
- Page 94 13 Spare parts 13.6 Burner Fig.83 Burner 34 35 MW-6000634-2 Tab.93 Marker Reference Description CFU 36 CFU 46 7638513 F10S2–1.40_P burner 7618761 F10S2–1.50_C burner 97902600 Motor coupling 97955489 Capacitor for motor 97955487 90-W motor 97955622 120-W motor 300027692 Turbine 97955490 Motor spacer 97955623 Motor spacer...
- Page 95 13 Spare parts Marker Reference Description CFU 36 CFU 46 97955504 Supply pipe for Suntec fuel oil pump 97903064 Fuel oil pump filter for Danfoss pump 97941728 Oil pump filter for Suntec pump 97909075 Danfoss solenoid valve coil 97940058 Suntec solenoid valve coil 97955485 1.20-m flexible fuel oil pipe 97955556...
- Page 96 13 Spare parts 7740569 - v01 - 12122019...
- Page 97 13 Spare parts 7740569 - v01 - 12122019...
- Page 98 13 Spare parts 7740569 - v01 - 12122019...
- Page 99 © Copyright All technical and technological information contained in these technical instructions, as well as any drawings and technical descriptions supplied, remain our property and shall not be multiplied without our prior consent in writing. Subject to alterations.
- Page 100 DE DIETRICH FRANCE Direction de la Marque 57, rue de la Gare - F-67580 Mertzwiller 03 88 80 27 00 03 88 80 27 99 www.dedietrich-thermique.fr VAN MARCKE 000 «БДP T » EPМ�� 129164, Россия, г. Москва Weggevoerdenlaan 5 Зубарев переулок, д. 15/1 B- 8500 KORTRIJK Бизнес-центр...
Need help?
Do you have a question about the EASYLIFE ESSENCIO CFU 36 and is the answer not in the manual?
Questions and answers