Table of Contents
Advertisement
Quick Links
Bellows I
Installation Guide
For Model:
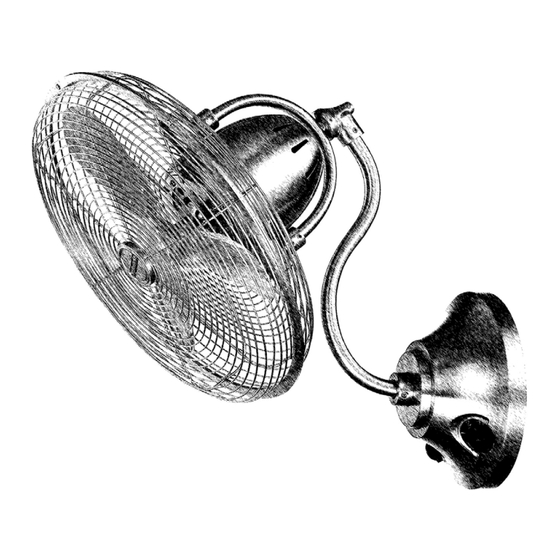
BW116-HW
APPROVED FOR USE
IN DAMP LOCATIONS
net weight of fan: 14.33 lb (6.5 kg)
READ THESE INSTRUCTIONS AND
SAVE THEM FOR FUTURE USE
Table of Contents:
Safety Tips. pg. 2
Unpacking Your Fan. pg. 3
Parts Inventory. pg. 3
Installation Preparation. pg. 4
Wiring. pg. 6
Installation of Fan. pg. 7
Wall Control Operation. pg. 7
Testing Your Fan. pg. 8
Troubleshooting. pg. 8
Warranty. pg. 8
Parts Replacement. pg. 8
page 1
PRINTED IN CHINA
Advertisement
Table of Contents

Related Manuals for Craftmade BW116FB3-HW


Summary of Contents for Craftmade BW116FB3-HW
-
Page 1: Table Of Contents
READ THESE INSTRUCTIONS AND SAVE THEM FOR FUTURE USE Bellows I Installation Guide For Model: BW116-HW Table of Contents: Safety Tips. pg. 2 Unpacking Your Fan. pg. 3 Parts Inventory. pg. 3 Installation Preparation. pg. 4 Installation of Wall Bracket. pgs. 4 - 5 Wiring. -
Page 2: Safety Tips
WARNING: To reduce the risk of personal injury, use only parts provided with this fan. The use of parts OTHER than those provided with this fan will void the warranty. Distributed by: Craftmade, 650 S. Royal Lane, Coppell, TX, 75019; 1-800-486-4892 NOTE: The important safety precautions and instructions appearing in the manual are not meant to cover all possible conditions and situations that may occur. -
Page 3: Unpacking Your Fan
1. Unpacking Your Fan. Carefully open the packaging. Remove items from Styrofoam inserts. Remove fan assembly and place on carpet or Styrofoam to avoid damage to finish. Do not discard fan carton or Styrofoam inserts should this fan need to be returned for repairs. -
Page 4: Installation Preparation
3. Installation Preparation. To prevent personal injury and damage, ensure that the hanging location allows the fan a clearance of 7 feet (2.13m) from the floor to 7 feet prevent accidental contact with the fan blades. (2.13m) This fan can only be mounted on an INDOOR wall or on an ENCLOSED porch or ENCLOSED patio wall. - Page 5 4. Installation of Wall Bracket. (cont.) First determine the approximate position of stud where you want the fan to be located on the wall. [Remember that the fan must be mounted at least 7 feet (2.13m) from the stud 1/4" floor.] pilot holes (6.5mm)
-
Page 6: Wiring
5. Wiring. Make sure all electrical connections comply with Local Codes or Ordinances and the National Electrical Code (or the Canadian Electric Code). If you are unfamiliar with electrical wiring or if the house/building wires are different colors than those wire wall connector... -
Page 7: Installation Of Fan
6. Installation of Fan. wall Tip: Seek the help of another person to hold hooks bracket the stepladder in place and to help lift the fan fan assembly up to you once you are set on the ladder. Remove set screw at bottom of fan assembly. With the wall bracket secured to the wall and able to support the fan, you are now ready to hang the fan. -
Page 8: Testing Your Fan
ON/OFF button. Service at 1-800-486-4892 to arrange for return of fan. Return fan, shipping prepaid, to Craftmade. We will repair or ship you a replacement fan, and we will pay the return If fan does not function properly, please refer to shipping cost.
Need help?
Do you have a question about the BW116FB3-HW and is the answer not in the manual?
Questions and answers