Table of Contents
Advertisement
Available languages
Available languages
Quick Links
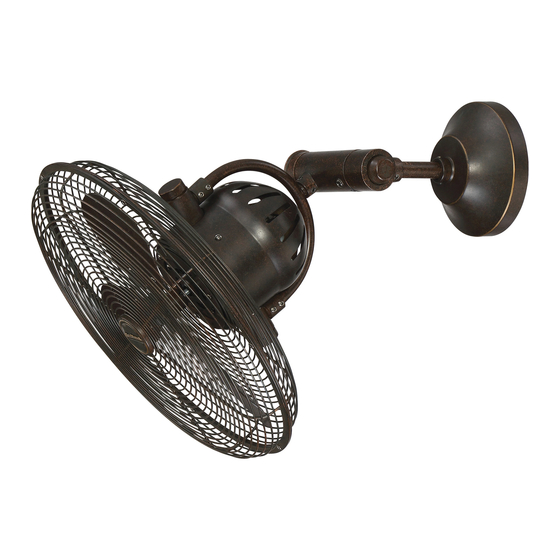
Bellows IV
Installation Guide
For Models:
BW414SS3
BW414AG3
3170356
APPROVED FOR USE
IN DAMP LOCATIONS
net weight of fan: 14.52 lb (6.6 kg)
READ THESE INSTRUCTIONS AND
SAVE THEM FOR FUTURE USE
Table of Contents:
Safety Tips. pg. 1
Unpacking Your Fan. pg. 2
Parts Inventory. pg. 2
Installation Preparation. pg. 3
Fan Assembly. pgs. 3 - 4
Wiring. pg. 4
Fan Installation. pg. 5
Wall Control Wiring. pg.5
Wall Control Operation. pg. 6
Testing Your Fan. pg. 6
Troubleshooting. pg. 7
Parts Replacement. pg. 7
Warranty. pg. 7
PRINTED IN CHINA
Advertisement
Table of Contents

Related Manuals for Craftmade Bellows IV


Summary of Contents for Craftmade Bellows IV
-
Page 1: Table Of Contents
READ THESE INSTRUCTIONS AND SAVE THEM FOR FUTURE USE Bellows IV Installation Guide For Models: BW414SS3 BW414AG3 Table of Contents: Safety Tips. pg. 1 Unpacking Your Fan. pg. 2 Parts Inventory. pg. 2 Installation Preparation. pg. 3 Fan Assembly. pgs. 3 - 4 Wiring. -
Page 2: Safety Tips
SAFETY TIPS. WARNING: To reduce the risk of electrical shock, turn off the electricity to the fan at the main fuse box or circuit panel before you begin the fan installation or before servicing the fan or installing accessories. READ ALL INSTRUCTIONS AND SAFETY INFORMATION CAREFULLY BEFORE INSTALLING YOUR FAN AND SAVE THESE INSTRUCTIONS. -
Page 3: Unpacking Your Fan
1. Unpacking Your Fan. Carefully open the packaging. Remove items from Styrofoam inserts. Remove fan assembly and place on carpet or Styrofoam to avoid damage to finish. Do not discard fan carton or Styrofoam inserts should this fan need to be returned for repairs. -
Page 4: Installation Preparation
3. Installation Preparation. Determine the approximate position where you want the fan to be located on the wall. Note: To prevent personal injury and damage, this fan must be mounted at least 7 feet (2.13m) from the floor. 7 feet (2.13m) This fan can only be mounted on an INDOOR wall or on an ENCLOSED porch or ENCLOSED patio wall. -
Page 5: Wiring
4. Fan Assembly. (cont.) canopy Thread electrical wires through the canopy. Pull wiring extra wire slack completely through the canopy. Next, thread electrical wires through the wall bracket. Pull extra wire slack completely through wall bracket the wall bracket. 5. Wiring. Make sure all electrical connections comply with Local Codes or Ordinances and the National Electrical Code (or the Canadian Electric Code). -
Page 6: Fan Installation
6. Fan Installation. allen wrench Secure fan to wall bracket by inserting the wall bracket tube into the wall bracket, then tighten the tube four set screws on the wall bracket with the Allen wrench provided in one of the hardware packs. -
Page 7: Wall Control Operation
8. Wall Control Operation. 0 - turns fan OFF 1 - turns fan to HIGH speed 2 - turns fan to MEDIUM speed 3 - turns fan to LOW speed ON - turns oscillation ON OFF - turns oscillation OFF 9. -
Page 8: Troubleshooting
Service at 1-800-486-4892 to arrange for return of fan. 1. Check power to wall switch. Return fan, shipping prepaid, to Craftmade. We will repair 2. Check to be sure wall control is wired or ship you a replacement fan, and we will pay the return properly. - Page 9 LEER ESTAS INSTRUCCIONES Y GUARDARLAS PARA UTILIZACION FUTURA Bellows IV Guía de instalación Para modelos: BW414SS3 BW414AG3 Indice de materias: Sugerencias de seguridad. Pág. 1 Desempaquetado del ventilador. Pág. 2 Inventario de piezas. Pág. 2 Preparación para la instalación. Pág. 3 Ensamblaje del ventilador.
- Page 10 SUGERENCIAS DE SEGURIDAD. ADVERTENCIA: Para evitar la posibilidad de una descarga eléctrica, desconectar la corriente en la caja de fusibles principal o el interruptor protector antes de iniciar la instalación del ventilador o antes de repararlo o instalar accesorios. LEER TODAS LAS INSTRUCCIONES E INFORMACION DE SEGURIDAD CUIDADOSAMENTE ANTES DE INSTALAR SU VENTILADOR Y GUARDAR ESTAS INSTRUCCIONES.
- Page 11 1. Desempaquetado del ventilador. Abrir el empaque cuidadosamente. Sacar los artículos del embalaje. Sacar la unidad del ventilador y ponerlo en una alfombra o en el embalaje para evitar rayar el acabado. Guardar la caja de cartón o el empaquetamiento original en caso de que tenga que mandar el ventilador para alguna reparación.
- Page 12 3. Preparación para la instalación. Determinar la posición aproximada de dónde va a querer ubicar el ventilador en la pared. Nota: Para prevenir daño corporal y otros daños, este ventilador se debe instalar por lo 2,13m menos a 2,13 m (7 pies) arriba del nivel del piso. (7 pies) Se puede colgar este ventilador solamente en la pared INTERIOR de una vivienda o en un patio...
- Page 13 4. Ensamblaje del ventilador. (cont.) cubierta decorativa Pasar los cables por la cubierta decorativa. Jalar cableado completamente el cableado en exceso a través de la cubierta decorativa. Luego, pasar los cables por la abrazadera de pared. Jalar completamente el cableado en abrazadera exceso a través de la abrazadera de pared.
- Page 14 llave allen 6. Instalación del ventilador. abrazadera de pared Sujetar el ventilador a la abrazadera de tubo pared introduciendo el tubo en la abrazadera de pared, luego apretar bien los cuatro tornillos de fijación en la abrazadera de pared con la llave Allen localizada en uno de los paquetes de tornillo de artículos de ferretería.
- Page 15 8. Operación del control de pared. 0 - APAGA el ventilador 1 - pone el ventilador en velocidad ALTA 2 - pone el ventilador en velocidad MEDIA 3 - pone el ventilador en velocidad BAJA ON - ENCIENDE la función de oscilación OFF - APAGA la función de oscilación 9.
- Page 16 Problema: El ventilador no funciona. debido a defectos en los materiales o trabajo manual. Soluciones: Comunicarse con el Servicio al cliente de CRAFTMADE al 1. Inspeccionar el interruptor de pared del ventilador. 1-800-486-4892 para acordar el reenvío del ventilador. 2. Verificar la instalación eléctrica del control de Devolver el ventilador, con los gastos de envío...
Need help?
Do you have a question about the Bellows IV and is the answer not in the manual?
Questions and answers
How do I adjust the height of the fan or the direction? It is mounted to wall and works well its just facing the ground
The Craftmade IV wall-mounted fan must be mounted at least 7 feet (2.13 meters) from the floor and directly supported by a stud or wood beam, not drywall. The manual does not provide information about adjusting the height or direction after installation, so the height and direction are fixed based on how and where it is mounted during installation.
This answer is automatically generated