Advertisement
Available languages
Available languages
Quick Links
Advertisement

Subscribe to Our Youtube Channel
Related Manuals for Gorenje BOGX6632E05BG


Summary of Contents for Gorenje BOGX6632E05BG
- Page 1 ﺗﻌﻠﯾﻣﺎت اﻻﺳﺗﺧدام دﺳﺗوراﻟﻌﻣل اﺳﺗﻔﺎده www.gorenje.com www.gorenje.com...
- Page 2 Instructions for use..................3 Instalare - Utilizare - Întreţinere..............25 47....................ﺗﻌﻠﯾﻣﺎت اﻻﺳﺗﺧدام 73....................دﺳﺗوراﻟﻌﻣل اﺳﺗﻔﺎده...
- Page 3 GAS OVEN Installation - Use - Maintenance...
- Page 4 Dear costumer, We thank you and congradulate you on you choice. THE MANUFACTURER !! IMPORTANT !! The appliance must be connected by qualified technician in accordance with the applicable regulations. The data plate (a) of the oven is still visible after the appliance has been installed. This plate, which is visible when the oven door is open, contains all the identification data of the appliance, as well the type of gas and service pressure for which it has been calibrated.
- Page 5 CONTENTS INSTRUCTIONS FOR THE INSTALLER INSTRUCTIONS FOR INSTALLATION OF THE APPLIANCE POSITIONING VENTILATION GAS CONNECTION RIGID PIPE CONNECTION CONVERSION TO A DIFFERENT TYPE OF GAS NOZZLE TABLE ADJUSTMENT OF THE MINIMUM SETTING FOLLOWING CONVERSION TO A DIFFERENT GAS TYPE FLUSH FITTING ELECTRICAL CONNECTIONS INSTRUCTIONS FOR THE USER THE FIRST TIME YOU USE THE OVEN...
- Page 6 INSTRUCTIONS FOR THE INSTALLER INSTRUCTIONS FOR INSTALLATION OF THE APPLIANCE (positioning and ventilation requirements) The regulations covering the installation, maintenance and operation of gas appliances for domestic use are applicable regulations. An extract of these regulations appears below. For all indications not covered, refer to the above-mentioned regulations.
- Page 7 GAS CONNECTION The oven is designed to operate with both natural gas (methane) and liquid gas (LPG), and can be easily converted from one type to another following the instructions given in the relative section of this booklet. Connection to the gas supply must be carried out by qualified technicians and in conformance with the requirements.
- Page 8 CONVERSION TO A DIFFERENT TYPE OF GAS Before converting the appliance for operation with a different gas type, check which type of gas it is currently set to operate with (adhesive label (picture) on appliance). Disconnect the electrical power supply to the appliance; For the correct nozzle diameter, refer to the relative table in this booklet.
- Page 9 ADJUSTMENTS OF THE MINIMUM SETTING FOLLOWING CONVERSION TO A DIFFERENT GAS TYPE Proceed to disassemble the front panel: - for the front panel, unscrew the two rear fixing screws - for glass fronts, unscrew the two lock rings under the knob. Conversion from natural gas to liquid gas After removing the front panel, insert the screwdriver in the hole in the front wall of the instrument panel and turn regulation screw A clockwise.
- Page 10 FLUSH FITTING The oven can be installed under a work top or in a cooking column. The dimensions of the housing for the oven are given in the picture. Make sure that surrounding materials are heat resistant. Align the oven centrally with respect to the side walls of the units surrounding it and fix it in place with the screws and Allen screws provided.
- Page 11 ELECTRICAL CONNECTIONS Before connecting the oven to the mains power supply, make sure that: - The supply voltage corresponds to the specifications on the data plate on the front of the oven. - The mains supply has an efficient earth (ground) connection complying with all applicable laws and regulations.
- Page 12 INSTRUCTIONS FOR THE USER THE FIRST TIME YOU USE THE OVEN Clean the oven thoroughly with soapy water and rinse well. To remove the lateral frames from smooth-walled ovens, proceed as shown in the picture. Operate the oven for about 20 minutes at maximum temperature to burn off all traces of grease which might otherwise create unpleasant smells when cooking.
- Page 13 SELF-CLEANING CATALYTIC PANELS Our smooth walled ovens can be fitted with selfcleaning panels to cover the inside walls. These special panels are simply hooked on to the walls before the side frames are fitted. They are coated in a special, micro-porous catalytic enamel which oxidises and gradually vaporises splashes of grease and oil at cooking temperatures above 200°C.
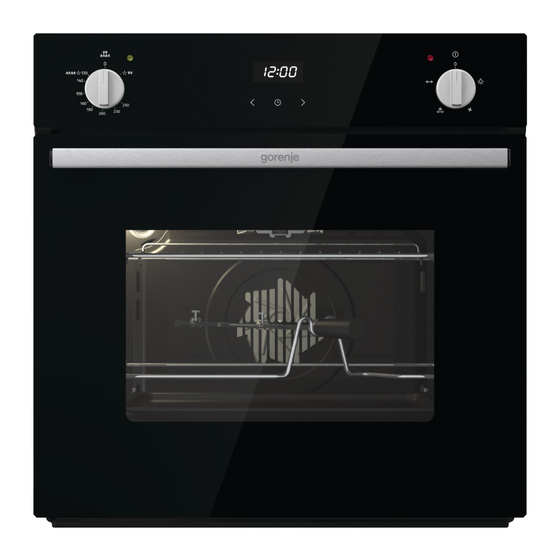
- Page 14 DESCRIPTION OF THE FRONT CONTROL PANEL GAS OVEN WITH ELECTRIC GRILL CONTROLS 1. Gas oven temperature control 2. Grill, spit roaster and oven light knob 3. Gas oven indicator light 4. Mechanical timer 5. Grill indicator light OVEN TEMPERATURE CONTROL The temperature control knob serves to set the desired oven temperature and is equipped with a safety valve.
- Page 15 ELECTRIC GRILL Infrared grill: equipped with an energy regulator. The heat intensity of the grill can be set from 1 to MAX using the relative control knob (picture). When the grill is in operation, the grill indicator light and the oven interior light will be illuminated. To operate the spit roaster motor, turn the knob to the symbol until you feel a click.
- Page 16 TIMER 3 BUTTONS Setting the clock “Auto” and “0:00” will start flashing when the unit is switched on for the first time. To set the clock, press the central button; when appears, press “+” or “-“ to set the correct time. After 5 seconds the symbol stop lighting and the hour is set.
- Page 17 DESCRIPTION OF THE FRONT CONTROL PANEL GAS OVEN WITH GAS GRILL CONTROLS 1. Lower burner and gas grill temperature control knob 2. Oven and spit roaster control knob light 3. Gas oven indicator light 4. Mechanical timer 5. Electrical indicator light OVEN TEMPERATURE CONTROL The temperature control knob serves to set the desired oven temperature and is equipped with a safety valve.
- Page 18 GAS GRILL The gas grill MUST only be operated with oven door slightly open and the heat shield (supplied) inserted in the slots under the control panel. To turn on the grill, turn the knob clockwise to the position and hold it pressed in for 5-10 seconds.
- Page 19 VENTILATED VERSION Our 60cm gas ovens, also have the various functions in the ventilated version. By turning on the ventilator alone, cold air (room temperature) circulates inside the oven thus helping to rapidly thaw frozen foods. The ventilator function turned on together with the strong heat coming from the bottom burner makes it possible to cook foods more evenly and delicately than with the bottom burner alone.
- Page 20 COOLING FAN (if supplied) The fan is positioned on the upper part of the oven and create a circle of cooling air on the inside of the furni-ture and through the door of the oven. It is turned on when the temperature of the outer shell of the oven reaches 60°C.
- Page 21 COOKING IN THE OVEN With this cooking method, you can operate the oven in the normal way and follow the instructions in recipe books. The food to be cooked should preferably be placed on the middle shelf of the oven. GRILL COOKING Use the grill to grill or brown foods.
- Page 22 MAIN COURSE TEMPERATURE (C) COOKING TIME (min) PREHEAT 15-20 GENOESE SPONGE (SWISS ROLL) 10-12 SHORT PASTRY (BISCUITS) DOUGH WITH RAISING AGENT 25-30 20-25 SPONGE CAKE (SMALL PAPER PASTRY CASES) 40-50 LEAVENED DOUGH (STRUDEL) 20-30 PUFF PASTRY (TARTLETS) 35-40 SOUFFLÉ 55-60 SACHERTORTE 160-180 FRUIT PIE...
- Page 23 REPLACING THE OVEN LIGHT IMPORTANT: The oven light must have these precise features: a) it must be able to resist high temperatures (up to 300°C) b) power supply: see V/Hz indicated on data plate. c) power 25W. d) E 14 connection. Before proceeding, disconnect the appliance from the main electricity supply.
- Page 24 RESPECT FOR THE ENVIRONMENT The documentation provided with this oven has been printed on chlorine free bleached paper or recycled paper to show respect for the environment. The packaging has also been designed to avoid environmental impact. Packaging material is ecological and can be re-used or recycled.
- Page 25 CUPTOR PE GAZ Instalare - Utilizare - Întreţinere...
- Page 26 Stimate Client, Vă mulţumim şi vă felicităm pentru alegerea făcută. PRODUCĂTORUL !! IMPORTANT!! Aparatul trebuie conectat de către o persoană calificată, în conformitate cu reglementările în vigoare. Tăbliţa cu date tehnice (a) a cuptorului este încă vizibilă după ce aparatul a fost instalat. Această...
- Page 27 CUPRINS INSTRUCŢIUNI PENTRU INSTALATOR INSTRUCŢIUNI DE INSTALARE A APARATULUI POZIŢIONAREA VENTILAŢIA RACORDURILE LA GAZ RACORDUL LA CONDUCTA RIGIDĂ CONVERSIA LA UN TIP DIFERIT DE GAZ TABEL DUZĂ AJUSTAREA REGLĂRII MINIME CA URMARE A CONVERSIEI LA UN TIP DIFERIT DE GAZ AJUSTAREA PENTRU ÎNCASTRARE CONEXIUNILE ELECTRICE INSTRUCŢIUNI PENTRU UTILIZATOR...
- Page 28 INSTRUCŢIUNI PENTRU INSTALATOR INSTRUCŢIUNI DE INSTALARE A APARATULUI (cerinţe pentru poziţionare şi ventilaţie) Reglementările privind instalarea, întreţinerea şi operarea aparatelor pe gaz, pentru uz casnic, sunt reglementările în vigoare. Mai jos apare un extras din aceste reglementări. Pentru indicaţiile neacoperite, consultaţi reglementările mai sus menţionate. POZIŢIONAREA: Produşii rezultaţi în urma combustiei de la aparatele de gătit trebuie evacuaţi întotdeauna cu ajutorul unei hote conectate la...
- Page 29 RACORDUL LA CONDUCTA RIGIDĂ Racordul la sursa de alimentare cu gaz poate fi făcut printr-o ţeavă rigidă fixată bine la fitting-ul "G" (imagine), sau printr-o ţeavă metalică flexibilă prinsă în totalitate de perete, respectând o lungime maximă de 2 metri. Fitting-ul "G" şi garnitura "C" sunt furnizate împreună cu aparatul, şi respectă...
- Page 30 CONVERSIA LA UN TIP DIFERIT DE GAZ Înainte de a face conversia aparatului pentru a funcţiona cu un alt tip de gaz, verificaţi cu ce tip de gaz este selectat să funcţioneze acesta (etichetă lipită pe aparat (imagine)). Deconectaţi aparatul de la sursa de alimentare cu curent electric;...
- Page 31 AJUSTAREA REGLĂRII MINIME CA URMARE A CONVERSIEI LA UN TIP DIFERIT DE GAZ Începeţi să demontaţi panoul frontal: - pentru panoul frontal, deşurubaţi cele două şuruburi de fixare din spate - pentru fronturile din sticlă, deşurubaţi cele două inele de blocare de sub buton. Conversia de la gaz natural la gaz lichid După...
- Page 32 AJUSTARE PENTRU ÎNCASTRARE Cuptorul poate fi instalat sub un blat de lucru sau tip coloană. Dimensiunile cadrului pentru cuptor se găsesc în tabel. Asiguraţi-vă că obiectele din jur sunt rezistente la căldură puternică. Centraţi cuptorul în funcţie de pereţii laterali ai unităţilor din jurul lui şi fixaţi-l în locul lui cu şuruburile simple şi cu şuruburile cu locaş...
- Page 33 CONEXIUNILE ELECTRICE Înainte de conectarea cuptorului la sursa principală de alimentare cu curent electric, asiguraţi-vă că: - Tensiunea de alimentare corespunde cu specificaţiile de pe tăbliţa cu date tehnice de pe partea frontală a cuptorului. - Sursa principală de alimentare are o împământare corespunzătoare respectând legile şi reglementările în vigoare.
- Page 34 INSTRUCŢIUNI PENTRU UTILIZATOR PRIMA DATĂ CÂND UTILIZAŢI CUPTORUL Spălaţi bine cuptorul cu apă cu săpun şi clătiţi bine. Pentru a îndepărta cadrele laterale din cuptoarele cu pereţi netezi, procedaţi ca în imagine. Lăsaţi cuptorul să funcţioneze aproximativ 20 de minute la temperatura maximă pentru a arde toate urmele de grăsime care altfel ar emana un miros neplăcut la gătit.
- Page 35 PANOURI CATALITICE CU AUTOCURĂŢARE Cuptoarele noastre cu pereţi netezi pot fi echipate cu panouri cu auto-curăţare care acoperă pereţii interiori. Aceste panouri speciale sunt prinse simplu pe pereţi înainte de a fi fixate cadrele laterale. Sunt învelite într-un smalţ special, micro-poros catalitic care oxidează şi evaporă treptat petele de grăsime şi ulei la temperaturi de gătit de peste 200°C.
- Page 36 DESCRIEREA PANOULUI DE CONTROL FRONTAL - CUPTOR PE GAZ CU REGLARE A GRILL-ULUI ELECTRIC 1. Controlul temperaturii din cuptorul pe gaz 2. Grill, rotisor şi butonul de lumină a cuptorului 3. Lumina de indicare a cuptorului pe gaz 4. Temporizatorul mecanic 5.
- Page 37 GRILL ELECTRIC Grill cu radiaţii infraroşii: echipat cu regulator de energie. Intensitatea căldurii grill-ului poate fi fixată de la 1 până la MAX folosind butonul de control relativ (imagine). Când grill-ul este în funcţiune, lumina de indicare a grill-ului şi lumina interioară a cuptorului se vor aprinde. Pentru a pune în funcţiune motorul rotisorului, răsuciţi butonul până...
- Page 38 TEMPORIZATOR 3 BUTOANE Fixarea ceasului “Auto” şi “0:00” vor începe să licărească când unitatea este pornită pentru prima dată. Pentru a fixa ceasul, apăsaţi pe butonul central; când apare, apăsaţi “+” sau “-“pentru a seta corect timpul. După 5 secunde simbolul nu mai clipeşte, iar ora este setată.
- Page 39 DESCRIEREA PANOULUI DE CONTROL FRONTAL CUPTOR PE GAZ CU REGLAREA GRILL-ULUI PE GAZ 1. Arzătorul inferior şi butonul de control al temperaturii grill-ului pe gaz 2. Grill şi butonul de lumină a cuptorului corespunzător rotisorului 3. Lumina de indicare a cuptorului pe gaz 4.
- Page 40 GRILL PE GAZ Grill-ul pe gaz TREBUIE să funcţioneze numai cu uşa cuptorului uşor deschisă şi ecranul termic (furnizat) inserat în spaţiile de sub panoul de control. Pentru a porni grill-ul, răsuciţi butonul în sensul acelor de ceasornic până la poziţia şi ţineţi-l apăsat 5-10 secunde.
- Page 41 VERSIUNEA CU VENTILAŢIE Cuptoarele noastre pe gaz, de 60 cm au, de asemenea, diferite funcţii în varianta cu ventilaţie. Deschizând doar ventilatorul, aerul rece (temperatura camerei) circulă în interiorul cuptorului ajutându-vă astfel să dezgheţaţi rapid alimentele congelate. Funcţia ventilatorului activată împreună...
- Page 42 VENTILATOR DE RĂCIRE (dacă a fost furnizat) Ventilatorul este poziţionat pe partea superioară a cuptorului şi creează un cerc de aer rece în interiorul mobilierului şi prin uşa cuptorului. Se aprinde atunci când temperatura carcasei exterioare a cuptorului atinge 60°C. Pornind cuptorul cu termostatul la 200°C ventilatorul porneşte după...
- Page 43 GĂTIREA ÎN CUPTOR Cu această metodă de gătit, puteţi folosi cuptorul în modul normal şi urmaţi instrucţiunile din cartea de gătit. Alimentele care trebuie gătite ar trebui amplasate, de preferat, pe raftul din mijloc al cuptorului. GĂTIREA LA GRILL Folosiţi grill-ul pentru a frige sau a pârli alimente. Unele cuptoare pot fi echipate cu un motor electric, frigărui şi suport pentru așezarea frigăruilor.
- Page 44 FELUL PRINCIPAL TEMPERATURA TIMPUL DE PREÎNCĂLZIREA GĂTIRE (min) 15-20 PANDIȘPAN GENOVEZ (RULADĂ ELVEȚIANĂ) 10-12 BISCUIŢI 25-30 ALUAT CU AGENT DE CREŞTERE 20-25 PANDIȘPAN (FOIETAJ PENTRU PRODUSE DE PATISERIE) 40-50 ȘTRUDEL TARTE 20-30 SUFLEU 35-40 55-60 SACHERTORTE 160-180 PLĂCINTĂ CU FRUCTE 35-40 ALUAT ECLERE FRIPTURĂ...
- Page 45 ÎNLOCUIREA LUMINII DIN CUPTOR IMPORTANT: Lumina cuptorului trebuie să aibă următoarele caracteristici specifice: a) trebuie să reziste la temperaturi ridicate (până la 300°C) b) alimentarea cu curent electric : a se vedea V/Hz indicat pe plăcuţa cu date tehnice. c) putere 25W d) conexiune E 14.
- Page 46 RESPECT FAŢĂ DE MEDIU Documentaţia furnizată o dată cu acest cuptor a fost tipărită pe hârtie albită fără clor sau pe hârtie reciclată pentru a arăta respect faţă de mediul înconjurător. Pachetul a fost proiectat să evite impactul asupra mediului înconjurător. Materialul pachetului este ecologic şi poate fi refolosit sau reciclat.
- Page 73 ﻣﺸﺘﺮی ﮔﺮاﻣﯽ از ﺧﺮﯾﺪ ﺷﻤﺎ ﮐﻤﺎل ﺗﺸﮑﺮ را داﺷﺘﮫ و ﺑﮫ ﺷﻤﺎ ﺑﺮای اﯾﻦ اﻧﺘﺨﺎب ﺗﺒﺮﯾﮏ ﻋﺮض ﻣﯽ .ﻧﻤﺎﯾﯿﻢ ﺷﺮﮐﺖ ﺗﻮﻟﯿﺪ ﮐﻨﻨﺪه ﻣﮭﻢ .دﺳﺘﮕﺎه ﺑﺎﯾﺪ ﺗﻮﺳﻂ ﺳﺮوﯾﺴﮑﺎر ﻣﺠﺎز و ﺑﺮ اﺳﺎس ﻗﻮاﻧﯿﻦ ﻣﺨﺼﻮص دﺳﺘﮕﺎه ﻧﺼﺐ ﮔﺮدد در زﻣﺎن ﺑﺎز و ﭘﻼک...
- Page 74 ﻓﮭﺮﺳﺖ دﺳﺘﻮراﻟﻌﻤﻞ ﻧﺼﺐ ﺑﺮای ﻧﺼﺎب دﺳﺘﮕﺎه دﺳﺘﻮراﻟﻌﻤﻞ ﻧﺼﺐ دﺳﺘﮕﺎه ﺟﺎﻧﻤﺎﯾﯽ ﺗﮭﻮﯾﮫ اﺗﺼﺎل ﮔﺎز اﺗﺼﺎﻻت ﻟﻮﻟﮫ ھﺎ ﺗﺒﺪﯾﻞ ﺑﺮای اﺳﺘﻔﺎده از ﻧﻮع دﯾﮕﺮ ﮔﺎز ﺟﺪول ﻧﺎزل ھﺎ ﺗﻨﻈﯿﻢ ﮐﺮدن ﺣﺪاﻗﻞ ﺗﻨﻈﯿﻤﺎت ﺑﺮای ﺗﺒﺪﯾﻞ ﮔﺎز ﻧﻮع ﮔﺎز ﺗﺮاز ﮐﺮدن اﺗﺼﺎل ﺑﮫ ﺑﺮق ﻨﺪه...
- Page 75 دﺳﺘﻮراﻟﻌﻞ ﻧﺼﺐ ﺑﺮای ﻧﺼﺎب دﺳﺘﮕﺎه دﺳﺘﻮراﻟﻌﻤﻞ ﻧﺼﺐ دﺳﺘﮕﺎه ()ﻣﻮارد ﻻزم ﺑﺮای ﺟﺎﻧﻤﺎﯾﯽ و ﺗﮭﻮﯾﮫ ﻗﻮاﻋﺪ ﻣﺮﺑﻮط ﺑﮫ ﻧﺼﺐ، ﻧﮕﮭﺪاری و ﮐﺎرﮐﺮد دﺳﺘﮕﺎه ﮔﺎزی ﺑﺮای ﻣﺼﺎرف ﺧﺎﻧﮕﯽ ﯾﻦ ﮔﺰﯾﺪه ای از اﯾﻦ ﻗﻮاﻋﺪ در زﯾﺮ ذﮐﺮ ﺷﺪه اﺳﺖ. ا .ﻗﻮاﻋﺪ ﻗﺎﺑﻞ اﺟﺮا ھﺴﺘﻨﺪ .ﻦ...
- Page 76 اﺗﺼﺎل ﮔﺎز ﻃﺮاﺣﯽ ﺷﺪه اﺳﺖ و (LPG) اﯾﻦ ﻓﺮ ﺑﺮای ﮐﺎرﮐﺮد ﺑﺎ ﮔﺎز ﻃﺒﯿﻌﯽ)ﻣﺘﺎن( و ﮔﺎز ﻣﺎﯾﻊ ﺑﮫ راﺣﺘﯽ ﻗﺎﺑﻞ ﺗﺒﺪﯾﻞ از ﯾﮏ ﻧﻮع ﺑﮫ ﻧﻮع دﯾﮕﺮ از ﻃﺮﯾﻖ دﺳﺘﻮراﻟﻌﻤﻞ ھﺎی اراﺋﮫ ﺷﺪه در ﺑﺨﺶ ﻣﺮﺑﻮﻃﮫ اﺳﺖ. اﺗﺼﺎل دﺳﺘﮕﺎه ﺑﮫ ﮔﺎز ﺑﺎﯾﺪ ﺗﻮﺳﻂ ﺳﺮوﯾﺴﮑﺎران ﻣﺠﺎز و ﺑﺮ...
- Page 77 ﺗﺒﺪﯾﻞ ﺑﮫ ﻧﻮع دﯾﮕﺮ ﮔﺎز ﻠﮑﺮد ﻣﯽ ﻗﺒﻞ از ﺗﻐﯿﯿﺮ ﻧﻮع ﮔﺎز دﺳﺘﮕﺎه ﮔﺎز ﻓﻌﻠﯽ ﮐﮫ دﺳﺘﮕﺎه ﺑﺎ آن در ﺣﺎل ﻋﻤ آﮔﺎھﯽ از اﺗﺼﺎل دﺳﺘﮕﺎه از ﺑﺮق را ﺟﺪا ﮐﻨﯿﺪ. ﺑﺮای .ﺑﺎﺷﺪ را ﺑﺮرﺳﯽ ﻧﻤﺎﯾﯿﺪ .اﻧﺪازه دﻗﯿﻖ ﻧﺎزل ھﺎ ﺑﮫ ﺟﺪول اراﺋﮫ ﺷﺪه در دﻓﺘﺮﭼﮫ ﻣﺮاﺟﻌﮫ ﻧﻤﺎﯾﯿﺪ ﺗﻌﻮﯾﺾ...
- Page 78 ﺗﻨﻈﯿﻢ ﺣﺪاﻗﻞ ﺗﻨﻈﯿﻤﺎت ﺑﺮای ﺗﻐﯿﯿﺮ ﻧﻮع ﮔﺎز :زﯾﺮ اﻗﺪام ﻧﻤﺎﯾﯿﺪ ﺻﻔﺤﮫ ﺟﻠﻮﯾﯽ ﺑﮫ روش ﺑﺮای ﺟﺪاﮐﺮدن دو ﻋﺪد ﭘﯿﭻ ﭘﺸﺘﯽ را ﺑﺎز ﮐﻨﯿﺪ .ﺑﺮای ﺻﻔﺤﮫ ﺷﯿﺸﮫ ای دو ﻋﺪد ﺣﻠﻘﮫ ﻗﻔﻞ ﮐﻨﻨﺪه در ﭘﺸﺖ ﭘﯿﭻ را ﺑﺎز ﮐﻨﯿﺪ ﺗﺒﺪﯾﻞ از ﮔﺎز ﻃﺒﯿﻌﯽ ﺑﮫ ﮔﺎز ﻣﺎﯾﻊ ﺑﻌﺪ...
- Page 79 ﺗﺮاز ﮐﺮدن .ﺷﭙﺰی ﻧﺼﺐ ﮐﺮد ﮫ ﮐﺎر و ﯾﺎ در ﺳﺘﻮن ﻣﺨﺼﻮص ﻟﻮازم آ ﻓﺮ را ﻣﯽ ﺗﻮان زﯾﺮ ﯾﮏ ﺻﻔﺤ اﺳﺖ. اﻃﻤﯿﻨﺎن ﺣﺎﺻﻞ اﻧﺪازه ﻣﺤﻞ ﻣﻮرد ﻧﯿﺎز ﺑﺮای ﻧﺼﺐ ﻓﺮ در ﺗﺼﻮﯾﺮ اراﺋﮫ ﺷﺪه ﮐﻨﯿﺪ ﮐﮫ ﻣﺼﺎﻟﺢ اﺳﺘﻔﺎده ﺷﺪه در اﻃﺮاف ﻣﺤﻞ ﻧﺼﺐ ﻓﺮ در ﺑﺮاﺑﺮ ﺣﺮارت ﻣﻘﺎوم ھﺴﺘﻨﺪ.
- Page 80 اﺗﺼﺎﻻت ﺑﺮﻗﯽ :ﻗﺒﻞ از اﺗﺼﺎل دﺳﺘﮕﺎه ﺑﮫ ﺑﺮق اﻃﻤﯿﻨﺎن ﺣﺎﺻﻞ ﻧﻤﺎﯾﯿﺪ ﮐﮫ وﻟﺘﺎژ ﻣﻨﺒﻊ ﺑﺮق ﺑﺎ ﻣﺸﺨﺼﺎت درج ﺷﺪه روی ﭘﻼک دﺳﺘﮕﺎه ﺗﻄﺎﺑﻖ داﺷﺘﮫ ﺑﺎﺷﺪ ﻣﻨﺒﻊ ﺑﺮق ، اﺗﺼﺎل ﺑﮫ زﻣﯿﻦ ﻣﻨﺎﺳﺐ را داﺷﺘﮫ ﺑﺎﺷﺪ. اﺗﺼﺎل ﺑﮫ زﻣﯿﻦ ﯾﮏ ﻧﯿﺎز ﻗﺎﻧﻮﻧﯽ اﺳﺖ. ﺳﯿﻢ ﺑﺮق اﺳﺘﻔﺎده ﺷﺪه ﻧﺒﺎﯾﺪ ﺑﮫ دﻣﺎﯾﯽ ﺑﺎﻻﺗﺮ از درﺟﮫ...
- Page 81 دﺳﺘﻮراﻟﻌﻤﻞ ﻣﺼﺮف ﮐﻨﻨﺪه اﺳﺘﻔﺎده از ﻓﺮ ﺑﺮای اوﻟﯿﻦ ﺑﺎر ﺎرج ﮐﺮدن ﻓﺮﯾﻢ دوم در ﻓﺮ را ﺑﺎ آب و ﺻﺎﺑﻮن ﻧﻈﺎﻓﺖ ﮐﺮده و ﭘﺎک ﮐﻨﯿﺪ. ﺑﺮای ﺧ .ﻧﺸﺎن داده ﺷﺪه اﺳﺖ ﻋﻤﻞ ﻧﻤﺎﯾﯿﺪ دﯾﻮاره ﻧﺮم ﺑﮫ روﺷﯽ ﮐﮫ در ﺗﺼﻮﯾﺮ ﻓﺮ...
- Page 82 ﻨﻞ ﮐﺎﺗﺎﻟﯿﺰور ﻧﻈﺎﻓﺖ ﺧﻮدﮐﺎر ﭘ ﻓﺮھﺎ ﺑﺎ دﯾﻮاره ﻧﺮم ﻣﺠﮭﺰ ﺑﮫ ﭘﻨﻞ ھﺎی ﻧﻈﺎﻓﺖ ﺧﻮدﮐﺎر ﺑﺮای ﭘﻮﺷﺶ دادن دﯾﻮاره ﺎرﭼﻮب ھﺎ ﺑﮫ ﺳﺎدﮔﯽ روی . اﯾﻦ ﭘﻨﻞ ھﺎ ﻗﺒﻞ از ﻧﺼﺐ ﭼ ھﺎی داﺧﻠﯽ ﻣﯽ ﺑﺎﺷﻨﺪ دﯾﻮاره ﻓﺮ ﻧﺼﺐ ﻣﯽ ﺷﻮﻧﺪ. اﯾﻦ ﭘﻨﻞ ھﺎ دارای ﭘﻮﺷﺶ ﻟﻌﺎﺑﯽ ﮐﺎﺗﺎﻟﯿﺴﺖ ھﻤﺮاه ﺑﺎ وﻏﻦ...
- Page 83 ﺗﻮﺿﯿﺤﺎت ﺻﻔﺤﮫ ﮐﻨﺘﺮل ﺟﻠﻮﯾﯽ ﻓﺮ ﮔﺎزی ﺑﮫ ھﻤﺮاه ﮐﻨﺘﺮل ﮐﺒﺎب ﭘﺰ ﺑﺮﻗﯽ ﮐﻨﺘﺮل دﻣﺎی ﻓﺮ ﮔﺎزی ﮐﺒﺎب ﭘﺰ، ﺟﻮﺟﮫ ﮔﺮدان و ﭘﯿﭻ روﺷﻨﺎﯾﯽ ﻓﺮ ﭼﺮاغ ﻧﺸﺎﻧﮕﺮ ﻓﺮ ﮔﺎزی زﻣﺎن ﺳﻨﺞ ﻣﮑﺎﻧﯿﮑﯽ ﭼﺮاغ ﻧﺸﺎﻧﮕﺮ ﮐﺒﺎب ﭘﺰ ﮐﻨﺘﺮل دﻣﺎی ﻓﺮ ی دﻟﺨﻮاه اﺳﺘﻔﺎده ﻣﯽ ﺷﻮد ﮐﮫ ﻣﺠﮭﺰ ﺑﮫ ﯾﮏ ﭘﯿﭻ...
- Page 84 ﮐﺒﺎب ﭘﺰ ﺑﺮﻗﯽ ﻣﯽ ﺑﺎﺷﺪ. ﻣﯿﺰان ﮔﺮﻣﺎی ﻓﺮ ﻣﯽ ﮐﺒﺎب ﭘﺰ ﻣﺎدون ﻗﺮﻣﺰ: ﻣﺠﮭﺰ ﺑﮫ ﯾﮏ رﮔﻼﺗﻮر اﻧﺮژی ﺗﻨﻈﯿﻢ ﺷﻮد. وﻗﺘﯽ ﻓﺮ در ﺣﺎل ﮐﺎر ﺑﺎﺷﺪ ﺗﺎ از ﻃﺮﯾﻖ ﭘﯿﭻ ﮐﻨﺘﺮل از ﺪ ﺗﻮاﻧ ﻧﺸﺎﻧﮕﺮ ﮐﺒﺎب ﭘﺰ و ﻻﻣﭗ داﺧﻞ ﻓﺮ روﺷﻦ ﺧﻮاھﺪ ﺑﻮد. ﺑﺮای ﻓﻌﺎل ﮐﺮدن ﺟﻮﺟﮫ ﮔﺮدان .ﻗﺮار...
- Page 85 دﮐﻤﮫ زﻣﺎن ﺳﻨﺞ ﺳﮫ ﺗﻨﻈﯿﻢ ﺳﺎﻋﺖ وﻗﺘﯽ دﺳﺘﮕﺎه ﺑﺮای اوﻟﯿﻦ ﺑﺎر روﺷﻦ ﺷﻮد ﺑﮫ 0:00 و Auto ﺣﺎﻟﺖ ﺣﺎﻟﺖ ﭼﺸﻤﮏ زن ﻓﻌﺎل ﺧﻮاھﻨﺪ ﮔﺮدﯾﺪ. ﺑﺮای ﺗﻨﻈﯿﻢ ﺳﺎﻋﺖ دﮐﻤﮫ – و وﺳﻄﯽ را ﻓﺸﺎر داده و وﻗﺘﯽ زﻣﺎن ﻇﺎھﺮ ﺷﺪ ﺑﺎ اﺳﺘﻔﺎده از ﺛﺎﻧﯿﮫ...
- Page 86 ﺗﻮﺿﯿﺤﺎت ﺻﻔﺤﮫ ﮐﻨﺘﺮل ﺟﻠﻮﯾﯽ ﻓﺮ ﮔﺎزی ﺑﮫ ھﻤﺮاه ﮐﻨﺘﺮل ﮐﺒﺎب ﭘﺰ ﺑﺮﻗﯽ ﮐﻨﺘﺮل دﻣﺎی ﻓﺮ ﮔﺎزی ﮐﺒﺎب ﭘﺰ، ﺟﻮﺟﮫ ﮔﺮدان و ﭘﯿﭻ روﺷﻨﺎﯾﯽ ﻓﺮ ﭼﺮاغ ﻧﺸﺎﻧﮕﺮ ﻓﺮ ﮔﺎزی زﻣﺎن ﺳﻨﺞ ﻣﮑﺎﻧﯿﮑﯽ ﭼﺮاغ ﻧﺸﺎﻧﮕﺮ ﮐﺒﺎب ﭘﺰ ﮐﻨﺘﺮل دﻣﺎی ﻓﺮ ﭘﯿﭻ ﮐﻨﺘﺮل دﻣﺎ ﺑﮫ ﻣﻨﻈﻮر ﺗﻨﻈﯿﻢ دﻣﺎی دﻟﺨﻮاه اﺳﺘﻔﺎده ﻣﯽ ﺷﻮد ﮐﮫ ﻣﺠﮭﺰ ﺑﮫ ﯾﮏ .ﺷﯿﺮ...
- Page 87 ﮐﺒﺎب ﭘﺰ ﮔﺎزی ﮐﺒﺎب ﭘﺰ ﮔﺎزی را زﻣﺎﻧﯽ اﺳﺘﻔﺎده ﻧﻤﺎﯾﯿﺪ ﮐﮫ درب ﻓﺮ ﮐﻤﯽ ﺑﺎز ﺑﺎﺷﺪ و ﻣﺤﺎﻓﻆ .داﺷﺘﮫ ﺑﺎﺷﺪ ﮔﺮﻣﺎ در ﻣﺤﻞ ﺧﻮد ﻗﺮار ﺑﺮای روﺷﻦ ﮐﺮدن ﮐﺒﺎب ﭘﺰ ﭘﯿﭻ را در ﺟﮭﺖ ﻋﻘﺮﺑﮫ ھﺎی ﺳﺎﻋﺖ ﺑﭽﺮﺧﺎﻧﯿﺪ ﺗﺎ در ﮕﮫ...
- Page 88 ﻣﺪل ﻓﻦ دار .ﺳﺎﻧﺘﯿﻤﺘﺮی ﻣﺎ در ﺣﺎﻟﺖ ﻓﻦ دار دارای ﻋﻤﻠﮑﺮد ھﺎی ﻣﺨﺘﻠﻔﯽ ﻣﯽ ﺑﺎﺷﺪ ﻓﺮ ﮔﺎزی ﺑﺎ روﺷﻦ ﮐﺮدن ﻓﺮ ﺑﮫ ﺗﻨﮭﺎﯾﯽ ھﻮای ﺳﺮد )دﻣﺎی اﺗﺎق( در داﺧﻞ ﻓﺮ ﺟﺮﯾﺎن ﺧﻮاھﺪ ﯾﺎﻓﺖ ﮐﮫ ﺑﮫ ﺷﻤﺎ ﮐﻤﮏ ﻣﯽ ﮐﻨﺪ ﺗﺎ ﻏﺬای ﻣﻨﺠﻤﺪ را ﺑﺎ ﺳﺮﻋﺖ ﺑﯿﺸﺘﺮی ﯾﺦ زداﯾﯽ ﻌﻠﮫ...
- Page 89 ﻓﻦ ﺧﻨﮏ ﮐﻨﻨﺪه درب و داﺧﻞ ﻓﺮ ﻣﯽ و ﺑﺎﻋﺚ ﮔﺮدش ھﻮای ﺧﻨﮏ در ﻓﻦ در ﻗﺴﻤﺖ ﺑﺎﻻﯾﯽ ﻓﺮ ﻗﺮار دارد درﺟﮫ ﺷﻮد. اﯾﻦ ﻓﻦ زﻣﺎﻧﯽ ﻓﻌﺎل ﻣﯽ ﺷﻮد ﮐﮫ دﻣﺎی دﯾﻮاره ﺧﺎرﺟﯽ ﻓﺮ ﺑﮫ .ﺳﺎﻧﺘﯿﮕﺮاد ﺑﺮﺳﺪ دﻗﯿﻘﮫ درﺟﮫ ﻓﻦ ﺑﻌﺪ از ﺑﺎ...
- Page 90 ﭘﺨﺖ ﺑﺎ ﻓﺮ ﺑﺎ اﯾﻦ روش ﻣﯽ ﺗﻮاﻧﯿﺪ ﻓﻦ را در ﺣﺎﻟﺖ ﻣﻌﻤﻮﻟﯽ ﻓﻌﺎل ﮐﻨﯿﺪ ﺑﺮای اﯾﻦ ﮐﺎر از دﻓﺘﺮﭼﮫ راھﻨﻤﺎ ﮐﻤﮏ ﺑﮕﯿﺮﯾﺪ. ﺑﺮای ﭘﺨﺖ ﻏﺬا ﺑﺎﯾﺪ ﻋﻤﻞ ﭘﺨﺖ را در ﺳﻄﻮح ﻣﯿﺎﻧﯽ .ﻓﺮ اﻧﺠﺎم دھﯿﺪ ﭘﺨﺖ ﮐﺒﺎب ﻤﮑﻦ ﺑﺮای ﻏﺬاھﺎی ﮐﺒﺎﺑﯽ و ﯾﺎ ﻃﻼﯾﯽ ﮐﺮدن ﻏﺬا اﺳﺘﻔﺎده ﻧﻤﺎﯾﯿﺪ. ﺑﺮﺧﯽ ﻣﺪل ھﺎ ﻣ از...
- Page 91 ﭘﯿﺶ زﻣﺎن ﭘﺨﺖ دﻣﺎ ﻏﺬا ﮔﺮﻣﺎﯾﺶ ()دﻗﯿﻘﮫ ﺑﻠﮫ روﻟﺖ ﺳﻮﺋﯿﺴﯽ 15-20 ﺑﻠﮫ (ﺷﯿﺮﯾﻨﯽ ﮐﻮﭼﮏ )ﺑﯿﺴﮑﻮﺋﯿﺖ 10-12 ﺑﻠﮫ ﺧﻤﯿﺮ ﭘﻒ دار 25-30 ﺑﻠﮫ ﮐﯿﮏ اﺳﻨﻔﺠﯽ 20-25 ﺑﻠﮫ ﺧﻤﯿﺮ 40-50 ﺑﻠﮫ ﺷﯿﺮﯾﻨﯽ ﭘﻔﯽ 20-30 ﺑﻠﮫ ﺳﻮﻓﻠﮫ 35-40 ﺑﻠﮫ ﺳﺎﮐﺮت 55-60 ﺑﻠﮫ ﮐﯿﮏ ﻣﯿﻮه 160-180 ﺑﻠﮫ...
- Page 92 ﺗﻌﻮﯾﺾ ﻻﻣﭗ ﻓﺮ :ﻣﮭﻢ :ﻻﻣﭗ ﻓﺮ ﺑﺎﯾﺪ ﻣﺸﺨﺼﺎت زﯾﺮ را دارا ﺑﺎﺷﺪ (درﺟﮫ ) ﺑﺎﯾﺪ در ﺑﺮاﺑﺮ ﮔﺮﻣﺎ ﻣﻘﺎوم ﺑﺎﺷﺪ .ﻣﯿﺰان وﻟﺘﺎژ آن ﺑﺎ ﭘﻼک ﻣﺸﺨﺼﺎت ﺗﻄﺎﺑﻖ داﺷﺘﮫ ﺑﺎﺷﺪ وات اﺗﺼﺎل ﻗﺒﻞ از ﺗﻌﻮﯾﺾ ﻻﻣﭗ دﺳﺘﮕﺎه را از ﺑﺮق ﺧﺎرج ﮐﻨﯿﺪ .ﺑﺮای...
- Page 93 ﺣﻔﻆ ﻣﺤﯿﻂ زﯾﺴﺖ ﺘﯽ ﭼﺎپ ﺷﺪه و ﮐﺎﻏﺬ ھﺎی ﺑﺎزﯾﺎﻓ ﺑﺪون ﮐﻠﺮ ھﺎی ﮐﺎﻏﺬ ﺑﺮﮔﮫ ھﺎی ھﻤﺮاه ﺑﺎ ﻓﺮ روی .اﻧﺪ ﺗﺎ ﺗﻮﺟﮫ ﻣﺎ ﺑﮫ ﻣﺤﯿﻂ زﯾﺴﺖ ﻧﺸﺎن داده ﺷﻮد ھﻤﭽﻨﯿﻦ ﺑﺴﺘﮫ ﺑﻨﺪی اﯾﻦ ﻣﺤﺼﻮل ﺑﮫ ﮔﻮﻧﮫ ای ﻃﺮاﺣﯽ ﺷﺪه اﺳﺖ ﮐﮫ ﺗﺎﺛﯿﺮی روی ﻣﺤﯿﻂ زﯾﺴﺖ...
- Page 94 NOTES...
- Page 95 NOTES...
- Page 96 2.005.85.2.2'ed. www.gorenje.com...
Need help?
Do you have a question about the BOGX6632E05BG and is the answer not in the manual?
Questions and answers