Advertisement
Quick Links
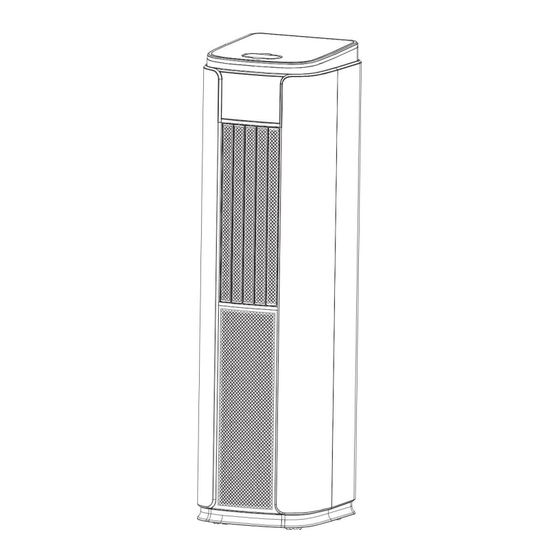
PORTABLE LOCAL AIR CONDITIONER
Please read this user manual before using this innovative Air Conditioner and keep it safe for future reference.
Visit our page, www.electriQ.co.uk, for our entire range of Intelligent Electricals.
USER MANUAL
WITH HEAP PUMP AND SMART APP
SC10HPW
SC14HPW
SC16HPW
Thank you for choosing electriQ.
10,000 BTU
14,000 BTU
16,000 BTU
Advertisement

Related Manuals for ElectrIQ SC10HPW


Summary of Contents for ElectrIQ SC10HPW
- Page 1 SC14HPW 14,000 BTU SC16HPW 16,000 BTU Thank you for choosing electriQ. Please read this user manual before using this innovative Air Conditioner and keep it safe for future reference. Visit our page, www.electriQ.co.uk, for our entire range of Intelligent Electricals.
- Page 3 CONTENTS SAFETY WARNINGS FEATURES PARTS INSTALLATION OPERATION REMOTE CONTROL WIFI APP CONTROL SETTING UP THE APP CONNECTING THE AIR CONDITIONER CONTROLLING YOUR DEVICE SMART SCENES CLEANING AND MAINTENANCE EMPTYING THE INTERNAL WATER TANK TROUBLESHOOTING ERROR CODES SUPPORT TECHNICAL SPECIFICATION...
- Page 4 SAFETY INSTRUCTIONS Important! • Carefully read the instructions before operating the unit. • This appliance is for indoor use only. • Rating: This unit must be only connected to a 220-240 V / 50 Hz earthed outlet. The fuse rating can be found on the plug itself. •...
- Page 5 • R290 refrigerant gas complies with European environmental directives. • R290 has a low GWP (Global Warming Potential) of 3. • The air conditioners contain the following quantity of refrigerant gas: SC10HPW 160g SC14HPW 210g SC16HPW 230g • Do not install or store in an unventilated space with an area smaller than shown in the table below per system.
- Page 6 WARNING: This appliance contains flammable refrigerant. If this leaks and comes into contact with an external ignition source, there is a fire risk. CAUTION: The operation manual should be read thoroughly. CAUTION: Any service personnel working on the unit should read the service manual prior.
- Page 7 FEATURES • 4 in 1 cooling, heating, fan, and dehumidifier. • 5-speed fan: Balancing quiet operation with performance. • 24 Hours Start/Stop Timer • Digital Thermostat: Set the temperature between 16°C and 32 °C. • Remote Control. • Castors and Handle for Enhanced Portability. •...
- Page 8 INSTALLATION WARNING: Before using this unit, please keep it upright for at least 3-4 hours. This unit can easily be moved from one room to another. While moving the unit, please note that it must always be kept upright and placed on an even surface. 1.
- Page 9 INSTALLATION OF WINDOW KIT The window kit (slide bar and fishtail adaptor) can be used with sliding windows and doors. For other types of windows, the fishtail adaptor should be used on its own. 1. Slide the rear section of the slide bar onto the front section, lining up the plate so it runs within the groove.
- Page 10 IMPORTANT SAFEGUARDS The length of the soft hose extends from approximately 30 cm to 180 cm. If the hose is extended above this length, the unit may malfunction, which can invalidate the warranty. The outlet vent must be well- ventilated and not obstructed, as this will cause the unit to overheat.
- Page 11 OPERATION Press the POWER button to turn the unit ON or OFF. Press the MODE button to cycle between the 4 modes, and the indicator for the selected mode will be illuminated. COOL: The room is cooled with the cold air expelled through the front air outlet while hot air is expelled through the vent pipe.
- Page 12 Press to enter sleep mode. The sleep indicator will be illuminated, and all other indicators will be turned off. In sleep mode, the appliance works at low fan speed. Press SLEEP again to exit sleep mode. The timer functions cannot be combined or repeated. POWER ON TIMER With the appliance on standby, press the TIMER button to set the power-on timer.
- Page 13 Scenario Adjustment Example Desired temperature reached Fan speed decreases The desired temperature is 22; the Current by one level. room temperature is 22. The current temperature has risen in the Fan speed increases by The desired temperature is 22; the room last 20 minutes.
- Page 14 MULTI PROTECTIVE FUNCTIONS FROST PROTECTION In COOL, DRY or SMART COOL modes, if the temperature of the exhaust is too low, the machine will automatically stop operating until the temperature has risen. OVERFLOW PROTECTION When the water in the internal water tank exceeds the warning level, the machine will stop operating and sound an alarm with the LCD showing "E4".
- Page 15 WIFI SMART CONTROL BEFORE YOU START • Ensure your router provides a standard 2.4ghz connection. • If your router is dual band ensure that both networks have different network names (SSID). The provider of your router / Internet service provider will be able to provide advice specific to your router.
- Page 16 REGISTER THE APP 1. Press on the Sign Up 2. Read the Privacy policy 3. Enter your email address button at the bottom of the and press the Agree or phone number and screen. Button. press continue to register. 4. A verification code will be 5.
- Page 17 CONNECTING USING EZ (QUICK CONNECTION) MODE Before initiating the connection, make sure the unit is in standby mode, with the WIFI light flashing twice per second. If not follow the instructions for changing the connection mode. Also ensure your phone is connected to the WIFI network. (We advise turning mobile data off during setup) 3.
- Page 18 CONNECTING USING AP MODE (ALTERNATIVE METHOD) Before initiating the connection, make sure the unit is in standby mode, with the WIFI light flashing once per second. If not follow the instructions for changing the WIFI connection mode. Ensure your phone is connected to the WIFI network. (We advise turning mobile data off during setup) 1.
- Page 19 CONTROLLING YOUR DEVICE THROUGH THE APP Add Device: Add a device THE HOME SCREEN to the app, and go through the setup process. Voice Control: Use to give verbal instructions to Your Device: Press the app. to enter the device screen.
- Page 20 DEVICE SCREEN The device screen is the main control screen for the air conditioner, providing access to the controls to amend the functions and settings Edit Name: Use to change the name of Back: Returns to the the air conditioner. Home Screen Current Room Temperature: Displays...
- Page 21 CREATING ROOMS 1. ON THE HOME SCREEN Type in a name for your home, Press on Home Management Press on the location button button to select the location of your home. (See SETTING YOUR LOCATION below) New rooms can be added by pressing the ADD ANOTHER ROOM option at the bottom.
- Page 22 SMART SCENES Smart Scenes is a powerful tool providing the option to customise the operation of the air conditioner based both on conditions within the room and outside influences. This gives the user the option of specifying much more intelligent actions. These are split into two categories Scene and Automation.
- Page 23 AUTOMATION Automation allows an automatic action to be set up for the device. This can be triggered by the Time, indoor temperature, humidity of the room, weather conditions, and a range of other influences. 1. Press on the Smart Scene 2.
- Page 24 PROFILE TAB The profile tab gives you the option to edit both your detail, and use the added features of the unit. CHANGING THE NAME OF YOUR DEVICE When in any of the device screens further settings for the device can be accessed, by pressing on the three dots in the top right hand corner.
- Page 25 CLEANING AND MAINTENANCE PLEASE SHUT OFF THE UNIT AND UNPLUG FROM THE MAINS BEFORE CLEANING OR PERFORMING ANY MAINTENANCE CLEAN THE SURFACE Clean the machine's surface with a wet, soft cloth. Do not use chemicals such as benzene, alcohol or gasoline as acidic, corrosive, and alkaline substances may cause damage to the surface and or the internal workings of the machine.
- Page 26 EMPTYING THE INTERNAL WATER TANK When the internal water tank is full, the unit will stop working and display E4. There are 3 options of how to drain the internal water tank: 1) PUMP ASSISTED DRAINAGE Remove the rubber stopper from the upper drain port.
- Page 27 TROUBLESHOOTING Do not repair or disassemble the air conditioning. Unqualified repair will invalidate the warranty and may lead to failure, causing injuries and property damage. Only use it as directed in this user manual and only perform operations advised here. Problems Reasons Solutions...
- Page 28 Please get in touch with the local council for details of your local household waste recycling centres. electriQ UK SUPPORT www.electriQ.co.uk/support Please, for your own convenience, make these simple checks before calling the service line. Call the number below if the unit fails to operate or complete the online form.
- Page 29 LITHIUM / COIN BATTERIES: BATTERY WARNING KEEP OUT OF REACH OF CHILDREN Swallowing can lead to chemical burns, perforation of soft tissue, and death. Severe burns can occur within 2 hours of ingestion. Seek medical attention immediately. • If the battery compartment (if applicable) does not close securely, stop using the product and keep it away from children.
- Page 30 65dB(A) sound energy. EU DECLARATION OF CONFORMITY Hereby, electriQ declares that these air conditioners are in compliance with Directive 2014/53/EU. The full text of the EU declaration of conformity is available at the following internet addresses: https://www.electriq.co.uk/content/DOC/EU/SC10HPW.pdf...
- Page 31 SD: kWh/h Sound power level dB(A) Global warming potential kgCO electriQ, Unit 2A, Trident Business Park, Neptune Way, Leeds Road, Contact details for obtaining further Huddersfield, HD2 1UA. information Buy It Direct, The Black Church, St Mary’s Place, Dublin V20240417...
Need help?
Do you have a question about the SC10HPW and is the answer not in the manual?
Questions and answers