Subscribe to Our Youtube Channel
Summary of Contents for Rinnai HSNCJ35B1
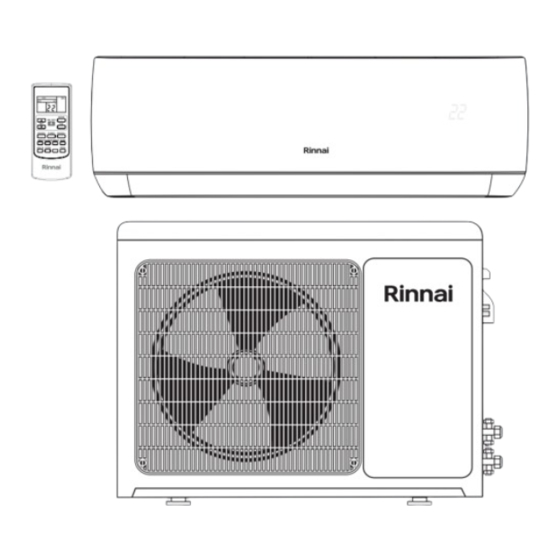
- Page 1 MODELS REFRIGERANT System | HSNCJ26B1 | HSNCJ35B1 | HSNCJ52B1 | HSNCJ70B1 Indoor | HINCJ26B1 | HINCJ35B1 | HINCJ52B1 | HINCJ70B1 Outdoor | HONCJ26B1 | HONCJ35B1 | HONCJ52B1 | HONCJ70B1 CJ1 Series Split Type Wall Mounted Air Conditioner Installation Manual...
- Page 2 OH&S requirements This appliance must be installed, maintained and removed only by an Authorised Person. For continued safety of this appliance it must be installed and maintained in accordance with the manufacturer’s instructions. REFRIGERANT Rinnai Split AC IM...
- Page 3 Connecting Vapour / Liquid Pipes To Indoor & Outdoor Units ���������������������������������������������������������������������� 13 Air Purging & Leakage Test �������������������������������������������������������������������������������������������������������������������������� 14 Evacuation Vacuum Method / Leak Test ������������������������������������������������������������������������������������������������������ 14 Adding Refrigerant for Longer Line Length �������������������������������������������������������������������������������������������������� 14 Final Checklist �������������������������������������������������������������������������������������������������������������������������������������������������� 15 CONTACTS Rinnai Split AC IM...
- Page 4 For safety and warranty purposes, appliances that may be damaged or incorrect MUST NOT be installed or operated under any circumstances. Installation of damaged or incorrect appliances may contravene local government regulations. Rinnai disclaims any liability or responsibility whatsoever in relation to the installation or operation of damaged or incorrect appliances.
- Page 5 The circuit breaker must have the functions of magnetic tripping and heat tripping to prevent short circuit and overload. Use a standard circuit breaker and fuse conforming with the rating of the appliances. Model HSNCJ26B1 HSNCJ35B1 HSNCJ52B1 HSNCJ70B1 Circuit Breaker (Amps) The unit must be earthed in accordance with local regulations.
- Page 6 OPERATION RANGE LIMITATIONS The table below indicates the temperature ranges the air conditioner can be operated within. MODE Cool Mode Dry Mode Room Temperature > 17°C > 17°C Outdoor Temperature -15°C ~ 52°C -15°C ~ 52°C Rinnai Split AC IM...
- Page 7 10� Outdoor unit air inlet (on rear & left side of unit) 11� Outdoor unit air discharge and protective grille (on front of unit) WEIGHTS & DIMENSIONS Model HSNCJ26B1 HSNCJ35B1 HSNCJ52B1 HSNCJ70B1 Indoor 12.0 13.5 14.0 Weight (kg) Outdoor 28.0...
- Page 8 Length - X Length - X Height - Y Refrigerant Models inch inch HSNCJ26B1 Ø9.52 Ø6.35 HSNCJ35B1 Ø12.7 Ø6.35 HSNCJ52B1 Ø12.2 Ø6.35 HSNCJ70B1 Ø15.88 Ø6.35 The outdoor unit is supplied already charged for interconnecting pipe lengths of 2 metres up to 10 metres in length.
- Page 9 Drill a Ø70mm wall penetration through the wall with a 2° to 4° fall to the outside wall� INSIDE 2° to 4° fall OUTSIDE Drain Pipe 1� Connect the drain pipe to the drain hose outlet of the indoor unit, 2� Bind the joint with PVC insulation tape (not supplied)� Rinnai Split AC IM...
- Page 10 NOTE 2. Unscrew the rubber plug from the alternate drainage discharge connection point. 3. Clip the drainage hose into the alternate discharge connection point. 4. Screw the rubber plug into the unused drainage discharge connection point. Rinnai Split AC IM...
- Page 11 Remove the wiring cover� 2� Secure the electrical cable(s) and power cable onto the control board with the cable clip� 3� Connect the cables as shown on the drawing below� Wiring cover 4� Re-install the wiring cover� Rinnai Split AC IM...
- Page 12 Insert the barbed elbow into the drainage point of the outdoor unit as shown� A drainage hose (installer to supply) will need to be fitted. Drainage of the condensate must conform with all local regulations and municipal building codes including local OH&S requirements. IMPORTANT Rinnai Split AC IM...
- Page 13 Ø 5/8" 75 Nm Indoor Unit Outdoor Unit Vapour pipe Liquid pipe Ensure the joint nut is tightened firmly to avoid leakage. Ensure that both the connections and the refrigerant pipes are wrapped with insulation material. CAUTION Rinnai Split AC IM...
- Page 14 It is very easy to overcharge, take caution in charging Vacuum refrigerant liquid and keep your eye on the scales to avoid Pump CAUTION overcharging the unit. Take care not to discharge refrigerant into the atmosphere during installation, re-installation, repair or service. Rinnai Split AC IM...
- Page 15 No cooling or heating Is the end user fully aware of the operating procedure? Incorrect operation If you have answered no to any of the above, you must check and correct before appliance hand-over to customer. Rinnai Split AC IM...
- Page 16 Monday to Friday, 8.00 am to 5.00 pm EST. *Cost of a local call may be higher from a mobile phone. (National calls from public phones in Australia are free.) For further information visit www.rinnai.com.au or email enquiry@rinnai.com.au innai has a Service and Spare Parts network with...


Need help?
Do you have a question about the HSNCJ35B1 and is the answer not in the manual?
Questions and answers