dji NEO Manual
- User manual (87 pages) ,
- Quick start manual (2 pages) ,
- User manual (17 pages)
Advertisement
- 1 Using this Manual
- 2 Product Profile
- 3 Flight Safety
- 4 Flight Operation
- 5 DJI Neo
- 6 Documents / Resources
Using this Manual
Legend
 Important
 Hints and Tips
Read Before First Flight
DJI™ provides you with tutorial videos and the following documents:
- Safety Guidelines
- Quick Start Guide
- User Manual
It is recommended to watch all the tutorial videos and read the Safety Guidelines before using for the first time. Prepare for your first flight by reviewing the Quick Start Guide and refer to this User Manual for more information.
Video Tutorials
Go to the address below or scan the QR code to watch the tutorial videos, which demonstrate how to use the product safely.

https://www.dji.com/neo/video
Downloading the DJI Fly App
Make sure to use DJI Fly with this product. Scan the QR code to download the latest version.

- To check the Android and iOS operating system versions supported by DJI Fly, visit https://www.dji.com/downloads/djiapp/dji-fly.
- The interface and functions of DJI Fly may vary as the software version is updated. Actual usage experience is based on the software version used.
[1] For increased safety, flight is restricted to a height of 98.4 ft (30 m) and a range of 164 ft (50 m) when not connected or logged into the app during flight.
[2] For Palm Control and Mobile App Control, takeoff is disabled when DJI Neo is not connected to the app for longer than 90 days or the smartphone with the app has no access to the internet during the period. To enable takeoff, reconnect DJI Neo to the app when the smartphone is connected to the internet.
Downloading DJI Assistant 2
Download DJI ASSISTANT™ 2 at: https://www.dji.com/downloads
The operating temperature of this product is -10° to 40°C. It does not meet the standard operating temperature for military-grade application (-55° to 125°C), which is required to endure greater environmental variability. Operate the product appropriately and only for applications that meet the operating temperature range requirements of that grade.
Product Profile
Using for the First Time
Click the link below or scan the QR code to watch the tutorial video before first time use.

https://www.dji.com/neo/video
Preparing DJI Neo
- Press down to remove the gimbal protector.

- All Intelligent Flight Batteries are in hibernation mode before shipment to ensure safety. Activate the batteries by connecting a USB charger to the USB-C port on DJI Neo. The battery is activated when it begins charging.


![information]() It is recommended to attach the gimbal protector to protect the gimbal when DJI Neo is not in use.
It is recommended to attach the gimbal protector to protect the gimbal when DJI Neo is not in use.
- The maximum charging power supported for the USB-C port on DJI Neo is 15 W.
- Make sure to remove the gimbal protector before powering on DJI Neo. Otherwise, it may affect the system performing self-diagnostics.
Activation
The product must be activated using the DJI Fly app before being used for the first time. An internet connection is required for activation.
Press, then press and hold the power button to power on DJI Neo. Tap Connection Guide on the bottom right corner of the home screen in DJI Fly, select the device model, and then follow the on-screen instructions to complete connection and activation.
Firmware Update
A prompt will appear in DJI Fly when a firmware update is available. Update the firmware whenever prompted to ensure the optimal user experience.
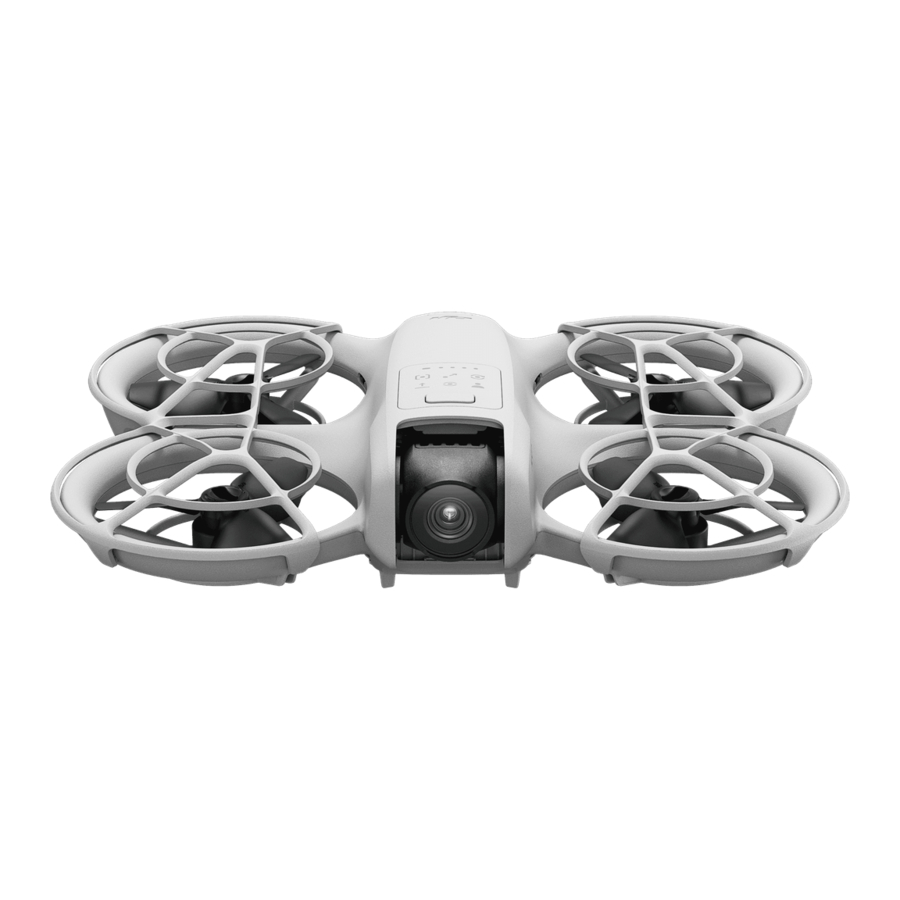
Overview
DJI Neo

- Gimbal and Camera
- Propellers
- Propeller Guard
- Motors
- Mode Button
- Mode Indicators
- Battery Level LEDs
- Status Indicator
- Power Button
- USB-C Port
- Intelligent Flight Battery
- Infrared Sensing System
- Downward Vision System
- Battery Latch
Flight Safety
After completing pre-flight preparations, it is recommended to train your flying skills and practice flying safely. Pick a suitable area to fly in according to the following flight requirements and restrictions. Strictly abide by local laws and regulations when flying. Read the Safety Guidelines before flight to ensure safe use of the product.
Flight Restrictions
GEO (Geospatial Environment Online) System
The DJI Geospatial Environment Online (GEO) System is a global information system that provides real-time information on flight safety and restriction updates and prevents UAVs from flying in restricted airspace. Under exceptional circumstances, restricted areas can be unlocked to allow flights. Prior to that, you must submit an unlocking request based on the current restriction level in the intended flight area. The GEO system may not fully align with local laws and regulations. You are responsible for your own flight safety and must consult with the local authorities on the relevant legal and regulatory requirements before requesting to unlock a restricted area.
Flight Environment Requirements
- DO NOT operate DJI Neo in severe weather conditions including in wind speeds exceeding 8 m/s, snow, rain, and fog.
- Only fly in open areas. Tall buildings, large metal structures, mountains, and wooded areas may obstruct signals and cause electromagnetic wave interference or magnetic interference, which can lead to poor positioning or a positioning error. Therefore, DO NOT take off from a balcony or anywhere within 15 m of buildings. Keep a distance of at least 15 m from buildings during flight.
- Fly DJI Neo in environments that have good lighting and clearly textured surfaces, without strong reflections and dynamic changes. The vision system may not work properly in the following scenarios: in poor lighting conditions, over surfaces without clear textures, surfaces with strong reflections (such as car roofs, monochrome ceramic tiles, and glass), scenes with dynamic changes (such as above water, moving people, swaying shrubs, and grass). Only fly DJI Neo in the daytime.
- Fly DJI Neo within visual line of sight (VLOS). Any flight beyond visual line of sight (BVLOS) can be conducted only when the device performance, the pilot's knowledge and skills, and the operational safety management are compliant with local regulations for BVLOS. Avoid flying near obstacles and crowds. DO NOT fly near airports, highways, railway stations, railway lines, city centers, or other sensitive areas, unless a permit or approval is obtained under local regulations.
- Try to keep a distance of more than 200 m from strong electromagnetic wave interference sites, such as radar stations, microwave relay stations, mobile communication base stations, and communication jamming equipment.
- Minimize interference by avoiding areas with high levels of electromagnetism, such as locations near power lines, base stations, electrical substations, broadcasting towers, Wi-Fi hotspots, routers, and Bluetooth devices. Avoid flying more than one DJI Neo in the area.
- DJI Neo uses only the vision system for positioning in polar regions.
- DO NOT take off from moving objects, such as cars and boats.
- DO NOT take off when there is a significant change in the ground level (such as near cliffs).
- Be careful when taking off in the desert or from a beach to avoid sand entering DJI Neo.
- DO NOT operate DJI Neo in an environment at risk of a fire or explosion.
- Operate DJI Neo, battery, battery charger, and the battery charging hub in a dryenvironment.
- DO NOT use DJI Neo, battery, battery charger, and the battery charging hub near-accidents, fires, explosions, floods, tsunamis, avalanches, landslides, earthquakes, dust, sandstorms, salt spray, or fungus.
- DO NOT operate DJI Neo near bird flocks.
Pre-Flight Checklist
- Make sure the gimbal protector has been removed.
- Make sure the Intelligent Flight Battery and the propellers are mounted correctly and are firmly secure.
- Make sure all the devices are fully charged.
- Make sure the gimbal and camera are functioning normally.
- Make sure that there is nothing obstructing the motors and that they are functioning normally.
- Make sure all camera lenses and sensors are clean.
- When using Palm Control, make sure that DJI Neo has previously connected to DJI Fly on your smartphone via Wi-Fi and the app works properly.
- Only use genuine DJI parts or DJI-authorized parts. Unauthorized parts may cause DJI Neo to malfunction and compromise the safety of the product.
Flight Operation
DJI Neo supports multiple control methods for various scenarios to meet your needs. Make sure you are familiar with the notice and usage for each control method before flight.
- DJI Neo does not feature obstacle sensing. Fly with caution.
- DO NOT touch DJI Neo mid-flight. Otherwise, DJI Neo may drift and a collision may occur.
- DO NOT fly DJI Neo immediately after it has been in a collision or severely knocked or shaken. DJI Neo may not be able to perform stable flight.
Palm Control
In Palm Control, palm takeoff and landing is supported. You can use the mode button on DJI Neo to achieve multiple Smart Snaps. DJI Neo will fly while recording automatically after subject confirmation.* Connect to the DJI Fly app using the Wi-Fi function to adjust the parameters for each mode. Refer to the Mobile App Control section to learn more. The default settings are used as an example.
* Smart Snaps only supports the tracking of people.
Notice
Power off the other devices connected to DJI Neo before using Palm Control.
- Make sure that the flight environment meets the flight requirements and that you can control and retrieve DJI Neo immediately when an issue occurs or in an emergency. In situations where DJI may not be able to analyze the cause of the incident, it may not be possible for DJI to provide warranty and other aftersales services.
- Before using Palm Control, make sure that DJI Neo has previously connected to DJI Fly on your smartphone via Wi-Fi. When using Palm Control without the app, if DJI Neo malfunctions mid-flight, you can choose to connect it to DJI Fly via Wi-Fi and control it manually to avoid an accident.
- Make sure to fly in an open and unobstructed environment without Wi-Fi signal interference.
- When using Palm Control, the max flight altitude of DJI Neo is 30 m and the max flight distance is 50 m.
- Return to Home (RTH) is not supported in Palm Control. Maintain visual line of sight (VLOS) within a controlled area.
- DO NOT fly over water.
- DJI Neo will land automatically in the following situations. Make sure to observe the operating environment to avoid DJI Neo being lost or damaged due to the landing.
- Critical low battery.
- Positioning fails and DJI Neo enters Attitude mode.
- DJI Neo detects a collision but does not crash.
- Observe the following rules when taking off from or landing on the palm of your hand:
- Operate DJI Neo in a windless environment whenever possible.
- Extend your fingers and keep still. DO NOT place your fingers in the propeller guards or the propeller rotation range to avoid injury or damage.
- DO NOT perform takeoff or landing when moving. Otherwise, DJI Neo may drift and a collision may occur. During landing, DJI Neo may fail to stop the motors when your hand is moving.
- DO NOT throw DJI Neo during takeoff.
- DO NOT grab DJI Neo by hand.
- To land on your palm, place your hand right under DJI Neo to prevent it from falling after landing.
- Take off in an environment with sufficient lighting and a richly textured surface. DO NOT fly to an environment that has a significant difference in lighting from the current location.
- If DJI Neo fails to perform palm takeoff or landing, follow the voice prompt of DJI Neo for troubleshooting or connect to the DJI Fly app for details. Voice prompt supports English or Mandarin according to the app language setting for the lastest connection. Other languages are not supported.
Switching Modes
The default mode is Follow Me after powering on the device for the first time. Press the mode button once to switch to Dronie, Circle, Rocket, Spotlight, or Custom.
The default Custom mode is DirectionTrack Me.
* Connect DJI Neo to the mobile app via Wi-Fi to select Helix or Boomerang. You can also adjust the parameters for each mode in the app accordingly before flight.
* Update firmware to the latest version. Otherwise, the function may not be supported.
When using DirectionTrack Me for the first time, connect DJI Neo to the DJI Fly app and follow the tutorial to unlock this mode.
After switching the mode, DJI Neo will voice prompt the selected mode, and the corresponding mode indicator on top of DJI Neo will light up.

![]() Follow Me
Follow Me
DJI Neo will follow the subject from behind while recording automatically. When the subject moves away from DJI Neo, it will follow the subject and fly forward. When the subject moves toward DJI Neo, it will hover in place and does not fly backward. Perform with caution to avoid collision. The max horizontal flight speed in Follow Me mode is 5.5 m/s.
You can set the follow distance and height in the DJI Fly app.
![warning]()
- DJI Neo does not support obstacle sensing. To ensure flight safety, it is recommended to fly within visual line of sight.
- Make sure the flight environment is open and unobstructed with sufficient lighting.
![information]() When the subject is not in the camera field of view, such as when a sharp turn is made or the subject is obstructed by an obstacle, DJI Neo will hover due to losing the subject. The subject should return to the camera field of view for successful subject confirmation.
When the subject is not in the camera field of view, such as when a sharp turn is made or the subject is obstructed by an obstacle, DJI Neo will hover due to losing the subject. The subject should return to the camera field of view for successful subject confirmation.
![]() Dronie
Dronie
DJI Neo will keep the camera facing the original position of the subject, record a video while flying backward, and then record another video while flying forward. It will hover at the takeoff point after recording.
You can set the max distance and height in the DJI Fly app.![]() Circle
Circle
DJI Neo will keep the camera facing the subject, fly backward to the preset distance, and then begin circling the subject once, while recording automatically. It will hover at the takeoff point after recording.
You can set the distance in the DJI Fly app.![]() Rocket
Rocket
DJI Neo will keep the camera facing the original position of the subject, record a video while ascending, and then record another a video while descending. It will hover at the takeoff point after recording.
You can set the max height and enable or disable the rotation of DJI Neo when ascending and descending in the DJI Fly app.![]() Spotlight
Spotlight
DJI Neo will hover after takeoff and record a video with the camera facing the subject.
You can set the camera mode to Photo or Video in the DJI Fly app. When set to Photo, the subject can trigger DJI Neo to take a photo automatically by maintaining a fixed pose for 3 seconds.![]() Custom
Custom
DirectionTrack Me
DJI Neo will fly backward for a distance after takeoff and then determine the movement direction of the subject to confirm the tracking direction. Once confirmed, DJI Neo will follow the subject from the tracking direction relative to the direction of the subject movements while recording.
You can set the follow distance and height in the DJI Fly app.
DJI Neo may switch to following the subject from behind when the movement or direction of the subject changes too fast related to DJI Neo. Once DJI Neo confirms the direction of the subject again, it will switch back to the original tracking direction.
To exit DirectionTrack Me, face DJI Neo and stay still. DJI Neo will fly back to the subject.
![warning]()
- DJI Neo does not support obstacle sensing. To ensure flight safety, it is recommended to fly within visual line of sight.
- Make sure the flight environment is open and unobstructed with sufficient lighting.
![information]() When the subject is not in the camera field of view, such as when a sharp turn is made or the subject is obstructed by an obstacle, DJI Neo will hover due to losing the subject. The subject should return to the camera field of view for successful subject confirmation.
When the subject is not in the camera field of view, such as when a sharp turn is made or the subject is obstructed by an obstacle, DJI Neo will hover due to losing the subject. The subject should return to the camera field of view for successful subject confirmation.
Helix
DJI Neo will keep the camera facing the subject, fly backward to a location 2 m from the takeoff point, and ascend while circling the subject once in a spiral curve while recording automatically. It will hover at the takeoff point after recording. You can set the max distance in the DJI Fly app.
Boomerang
DJI Neo will keep the camera facing the subject and fly around the subject along an oval path while recording automatically. It will ascend and then descend while flying along the oval path and will reach the max height when flying at the farthest point away from the takeoff point. DJI Neo will hover at the takeoff point after recording.
You can set the max distance in the DJI Fly app.
- Mode Button
Press once to switch the mode. Press and hold to perform palm takeoff.
Cancel palm takeoff by pressing the mode button once before the countdown voice prompt ends.

 Rocket
Palm Takeoff/Landing and Smart Snaps
Make sure to follow local privacy laws and regulations when using Smart Snaps.
- Power on DJI Neo. Keep it still and wait for the system self-diagnostics to complete.

- Make sure to leave enough room for maneuvering according to the preset parameters such as distance and height. Press the mode button on top of DJI Neo to select your desired mode.

- Follow the steps below for palm takeoff.
![]()
- Palm takeoff requires subject confirmation. Place DJI Neo on your hand with the camera facing the subject. Make sure that your hand does not block the camera and there are no obstacles obstructing the takeoff.
- Extend your arm, face the camera toward the subject, and keep it steady. Press and hold the mode button. DJI Neo will voice prompt the selected mode and the countdown, and then take off automatically.
![information]()
- When the subject is obstructed by an obstacle or the environment lighting is not suitable, takeoff may fail.
- To cancel palm takeoff, press the mode button once before the countdown voice prompt ends.
- When using palm takeoff, DJI Neo will fly backward for a short distance after takeoff. Pay attention to the rear of DJI Neo to ensure flight safety.
- DJI Neo will start recording or take photos according to the selected mode and its preset parameters.
![]()
![information]() Palm landing:
Palm landing:
In DirectionTrack Me mode, face DJI Neo and keep still. Wait for DJI Neo to fly forward before performing palm landing.
In other modes, make sure that DJI Neo is hovering in place, move toward it, and then perform palm landing.
Follow the instructions below for palm landing.- Make sure that DJI Neo is hovering in place. Move toward DJI Neo, extend your arm, and then place your hand right under it.
- Keep your hand still and extend your fingers. Wait for DJI Neo to land automatically. The effective height range of palm landing is within 0.7 m under DJI Neo.
![information]() During palm landing, DJI Neo may ascend slighty and then land on the palm. Keep your hand still and extend your fingers during the process.
During palm landing, DJI Neo may ascend slighty and then land on the palm. Keep your hand still and extend your fingers during the process.
- Connect DJI Neo to DJI Fly to view the footage and create short videos. Refer to the Mobile App Control section for details.
![information]() In Follow Me, Spotlight, and DirectionTrack Me modes, DJI Neo will hover in place if the camera loses the subject while recording. Run DJI Fly on your smartphone via Wi-Fi to connect to DJI Neo mid-flight. The smartphone must have been connected to DJI Fly previously in order to connect. In the Controls view, make sure that the task has already stopped, select Manual Control from the mode list, and then land DJI Neo using the virtual joysticks.
In Follow Me, Spotlight, and DirectionTrack Me modes, DJI Neo will hover in place if the camera loses the subject while recording. Run DJI Fly on your smartphone via Wi-Fi to connect to DJI Neo mid-flight. The smartphone must have been connected to DJI Fly previously in order to connect. In the Controls view, make sure that the task has already stopped, select Manual Control from the mode list, and then land DJI Neo using the virtual joysticks.


Mobile App Control
To use Mobile App Control, connect DJI Neo to the DJI Fly app on the smartphone via
Wi-Fi and control DJI Neo in the app. In Mobile App Control, all the functions for Palm Control are available. You can set parameters and perform Smart Snaps in the app. More functions such as manual control, audio recording*, and voice control* are also supported.
* Update firmware to the latest version. Otherwise, the function may not be supported.
Notice
Power off the other devices that are connected to DJI Neo before using Mobile App Control. If not powered off, DJI Neo will disconnect from the other devices automatically when the smartphone is connected via Wi-Fi and the Controls view in the app is opened.
- Make sure to fly in an open and unobstructed environment without Wi-Fi signal interference. Otherwise, the app may disconnect from DJI Neo which may affect flight safety.
- When using Mobile App Control, the max flight altitude of DJI Neo is 30 m and the max flight distance is 50 m.
- Return to Home (RTH) is not supported in Mobile App Control. Maintain visual line of sight within a controlled area.
- DO NOT fly over water.
- DJI Neo will land automatically in the following situations. Make sure to observe the operating environment to avoid DJI Neo to be lost or damaged when landing.
- Critical low battery.
- Positioning fails and DJI Neo enters Attitude mode.
- DJI Neo detects a collision but does not crash.
Connecting DJI Neo
- Power on DJI Neo and wait for the system self-diagnostics to complete.
- Enable Bluetooth, Wi-Fi, and location services on the smartphone.
- Tap Connection Guide on the bottom right corner of the home screen in the app, select the device model, and select Connect via Mobile Device.
- Select the desired device in the search results. The Controls view is displayed after connected successfully. When connecting the smartphone to DJI Neo for the first time, press and hold the power button of DJI Neo to confirm.
- You can also tap the QuickTransfer or Wi-Fi Devices panel on the home screen in DJI Fly for Wi-Fi connection.
- To change the smartphone connected to DJI Neo, disable Bluetooth and Wi-Fi on the currently connected smartphone before connecting DJI Neo to the new smartphone.
Smart Snaps
Make sure to follow local privacy laws and regulations when using Smart Snaps.
- Set parameters:
Go to the Settings view. Tap the specific mode to enter the parameter configuration screen. Tap Custom to set to DirectionTrack Me, Helix, or Boomerang and adjust the corresponding parameters.
Tap Camera Settings to set the same camera parameters for all the Smart Snaps modes.
![]()
- Start Smart Snaps:
![]()
- Place DJI Neo stably with the camera facing the subject.
- Go to the Controls view. The current mode is displayed under the live-view. Tap to expand the option list and select your desired mode.
- Tap START. DJI Neo will take off automatically after it confirms the subject successfully and the countdown voice prompt is completed.
![information]()
- When the subject is obstructed by an obstacle or the environment lighting is not suitable, subject confirmation may fail.
- You can also press and hold the mode button on top of DJI Neo to perform palm takeoff. Refer to the Palm Control section for related notices and procedures.
- DJI Neo will fly and record video automatically according to the selected mode and preset parameters. You can check the liveview and video recording duration.
In Spotlight mode, DJI Neo will hover in place and keep the camera facing the subject. When the camera mode is set to Photo, the subject can trigger DJI Neo to take a photo automatically by maintaining a fixed pose for 3 seconds.
- Exit Smart Snaps:
The way to exit Smart Snaps varies for different modes.
Dronie, Circle, Rocket, Helix, Boomerang
DJI Neo will exit Smart Snaps after recording. When the recording task is not completed, you can tap STOP to finish recording. DJI Neo will hover in place.
Follow Me, Spotlight
During recording, tap STOP to exit Smart Snaps. You can also move toward DJI Neo to perform palm landing, and the recording will stop automatically. DJI Neo will hover in place.
DirectionTrack Me
During recording, tap STOP to exit Smart Snaps. DJI Neo will hover in place. The subject can also face DJI Neo and keep still to exit Smart Snaps. DJI Neo will stop recording and fly toward the subject. Palm landing can now be performed.


If you do not land DJI Neo, you can choose to start the same Smart Snaps task again in the app after exiting Smart Snaps. You can also land DJI Neo on your palm by following the instructions in the app. Or, tap ![]() on the left of the mode list, and then tap and hold to land.
on the left of the mode list, and then tap and hold to land.
Refer to the Palm Control section for related notices and procedures of palm landing.
View Album
Tap Album to view the captured footage.
For Dronie, Circle, Rocket, Helix, and Boomerang modes, tap Create QuickShots to preview the video. You can also select from other templates or edit the video manually.
DJI Neo supports ECO mode. When viewing the album in the app via Wi-Fi connection to DJI Neo, in both Mobile App Control mode and QuickTransfer mode, ECO mode will be enabled automatically if DJI Neo rises above a certain temperature. Pay attention to the prompt in the app.
Manual Control

- Place DJI Neo on flat ground.
- In the Controls view, tap the mode list under the liveview, and select Manual Control.
- Tap and hold
![]() . DJI Neo will start the motors and automatically rise to a height of 0.6 m.
. DJI Neo will start the motors and automatically rise to a height of 0.6 m.
You can also perform palm takeoff. Subject confirmation is not required for palm takeoff in manual control, which differs from Palm Control. Refer to the Palm Control section for related notices and procedures. - Control DJI Neo using the virtual joysticks in the app. The left stick controls the flight altitude and orientation. The right stick controls the forward, backward, left, and right movements.
![warning]() DJI Neo does not support obstacle sensing. To ensure flight safety, it is recommended to fly within visual line of sight.
DJI Neo does not support obstacle sensing. To ensure flight safety, it is recommended to fly within visual line of sight.
- View the liveview in the camera view. Tap the photo/video toggle button to switch between photos and videos. Slide the slider on the right of the liveview to control the gimbal pitch.
- In Photo mode, tap the shutter button to take a photo. In Video mode, tap the record button to start recording. Tap again to stop recording.
- Tap and hold
![]() to land DJI Neo. You can also perform palm landing.
to land DJI Neo. You can also perform palm landing.
Recording Audio via App
In the Controls view, tap  on the right of the screen to enable audio recording. The status will change to
  . Allow the microphone permission to record audio following the prompts.
When using Mobile App Control, audio will be recorded by the corresponding audio recording device while DJI Neo is recording a video. The microphone icon will be displayed in liveview.
Supported audio recording devices include the built-in microphone of the smartphone, DJI Mic 2, and Bluetooth earphones. Audio recording compatibility issues may occur when using some Bluetooth earphones. Make sure to test them before recording.
DO NOT turn off the screen or switch to other apps during recording.
- Audio recording can only be enabled or disabled before recording.
- When viewing or downloading the videos in the Album view in DJI Fly, the audio recorded using the audio recording function will be automatically merged into the video file.
Voice Control
In the Controls view, tap ![]() on the right of the screen under the liveview to enable voice control. Use a voice command to control DJI Neo. Tap the corresponding button in the pop-up window to view the common commands.
on the right of the screen under the liveview to enable voice control. Use a voice command to control DJI Neo. Tap the corresponding button in the pop-up window to view the common commands.
You can also enable voice control via voice wake-up. Go to the Settings view, tap More Settings > Control > Voice Control Settings. Enable Voice Wake-up and allow the microphone permission following the prompts. When using Mobile App Control, say Hey Fly to wake up voice control and then control DJI Neo using voice commands. View the common commands in Voice Control Settings.
- Voice control supports English or Mandarin according to the app language.
- Turn up the volume on the phone for the optimal experience when using voice control.
Video Recording Suggestions and Tips
- The pre-flight checklist is designed to help the user fly safely and shoot videos during flight. Go through the full pre-flight checklist before each flight.
- DO NOT fly in bad weather such as on rainy or windy days.
- Choose the camera settings that best suit your needs.
- Perform flight tests to establish flight routes and preview scenes.
- Make sure to control DJI Neo gently to ensure a smooth and stable flight.
- Clear any foreign objects from the air intake on both sides of DJI Neo after flight to prevent a blockage.
DJI Neo
Flight Modes
When using Palm Control and Mobile App Control, DJI Neo does not support the switching of flight modes.
DJI Neo automatically changes to Attitude (ATTI) mode when positioning does not work properly. In ATTI mode, DJI Neo may drift horizontally, and precise hovering and braking are unavailable. You should land DJI Neo as soon as possible to avoid any accidents to occur. Avoid flying in confined spaces or in areas where the lighting is not sufficient. Otherwise, DJI Neo will enter ATTI mode, which may present hazards.
Status Indicator
DJI Neo has one status indicator located on top.

Status Indicator Descriptions
Normal States
 Blinks red, yellow, and green alternately | Powering on and performing self-diagnostic tests |
 Blinks yellow four times | Warming up |
 Blinks green slowly | Positioning functions properly |
Warning States
 Blinks red slowly | Takeoff is disabled (e.g., low battery) [1] |
 Blinks red quickly | Critically low battery |
 Solid red | Critical error |
 Blinks red and yellow alternately | Compass calibration required |
[1] If DJI Neo cannot takeoff while the status indicator is blinking red slowly, view the warning prompt in DJI Fly.
Auto Landing
In some situations, DJI Neo will land automatically with the landing protection function supported.
DO NOT prevent DJI Neo from landing continuously due to a critical low battery. Otherwise, the battery will be damaged or DJI Neo will crash.
Trigger Method
In the following situations, DJI Neo will land automatically:
- DJI Neo has a critical low battery level.
- In Palm Control and Mobile App Control, positioning fails or DJI Neo detects a collision but does not crash.
Landing Protection
Landing Protection activates during auto landing The specific actions of DJI Neo are as follows:
- If the ground is determined suitable for landing, DJI Neo will land directly.
- If the ground is determined unsuitable for landing, DJI Neo will hover and wait for pilot confirmation. You can perform palm landing or land DJI Neo manually.
- If DJI Neo fails to determine whether the ground environment is suitable for landing, DJI Fly or the goggles will display a landing prompt when DJI Neo descends to 0.3 m from the ground. Confirm the landing prompt and DJI Neo will land. You can also perform palm landing or land DJI Neo manually.
![information]()
- Landing Protection only assists in determining the landing environment. Pay attention to the surrounding environment during landing to ensure safety.
- In the following situations, Landing Protection may be unavailable and DJI Neo may land directly on unsuitable ground:
- Flying over monochrome, reflective, or low-light surfaces, a large area of surfaces without clear texture, or surfaces with dynamic texture, such as smooth ceramic tiles, garage floors with insufficient light, and grass blowing in the wind.
- Flying over obstacles without clear texture, such as large rocks, or reflective or monochrome surfaces, such as raised tiles.
- Flying over small or fine obstacles, such as power lines and tree branches.
- Flying over surfaces that resemble flat ground, such as trimmed and flat shrubs, flat tree tops, and hemispherical ground.
- In the following situations, Landing Protection may be triggered by mistake and DJI Neo is unable to land. You can perform palm landing or land DJI Neo manually.
- Flying over surfaces that the vision system may confuse for water, such as wet ground and areas with puddles.
- Flying over flat surfaces, but there are surfaces with clear texture (oblique surfaces or stairs) nearby.
Vision System and Infrared Sensing System
DJI Neo is equipped with both an infrared sensing system and a downward vision system.

- Infrared Sensing System
- Downward Vision System
The effective operating environments for the vision system and infrared sensing system are as follows:
- Surfaces under the sensors are diffuse reflective surfaces with discernible patterns, diffuse reflectivity > 20% (such as concrete pavement).
- The lighting conditions are adequate (>15 lux but no more than 10,000 lux, normal indoor lighting conditions).
![warning]()
- Pay attention to the flight environment. The vision system and infrared sensing system only work in certain scenarios and cannot replace human control and judgment. During flight, always pay attention to the surrounding environment and to the warning prompts in DJI Fly or the goggles, and be responsible for and maintain control of DJI Neo at all times.
- The best positioning altitude range of the vision system is 0.5 to 10 m when using the vision system in an open environment with flat surfaces and clear textures. The vision positioning performance may decrease when flying beyond this range. Fly with caution.
- The downward vision system may not work properly when flying near water. Therefore, DJI Neo may not be able to actively avoid water below it when landing. It is recommended to maintain flight control at all times, make reasonable judgments based on the surrounding environment, and avoid over-relying on the downward vision system.
- The downward vision system and infrared sensing system may not function properly when DJI Neo is flying too fast or at an altitude that is too low.
- The vision system cannot work properly near surfaces without clear pattern variations or where the light is too bright or too dark. The vision system cannot work properly in the following situations:
- Flying near monochrome surfaces (e.g., pure black, white, red, or green surfaces).
- Flying over highly reflective surfaces (e.g., ice, glass, monochrome ceramic tiles).
- Flying near water or transparent surfaces.
- Flying near moving surfaces or objects.
- Flying in an area with frequent and drastic lighting changes.
- Flying near extremely dark (<15 lux) or bright (>10,000 lux) surfaces.
- Flying near surfaces that strongly reflect or absorb infrared waves (e.g., mirrors).
- Flying near surfaces without clear patterns or textures.
- Flying near surfaces with repeating identical patterns or textures (e.g., tiles with the same design).
- Flying near obstacles with small surface areas (e.g., tree branches and power lines).
- Keep the sensors clean at all times. DO NOT scratch or tamper with the sensors. DO NOT use the device in dusty or humid environments.
- DO NOT fly when it is rainy, smoggy, or the visibility is lower than 100 m.
- DO NOT obstruct the infrared sensing system and vision system.
- Check the following each time before takeoff:
- Make sure there are no stickers or any other obstructions over the glass of the infrared sensing system or vision system.
- Use a soft cloth if there is any dirt, dust, or water on the glass of the vision system and infrared sensing system. DO NOT use any cleaning product that contains alcohol.
- Contact DJI Support if there is any damage to the lenses of the infrared sensing and vision system.
Propellers and Propeller Guards
DJI Neo comes with detachable propeller guards, which reduce damage to the propellers caused by collisions. It is required to remove the propeller guards on top of DJI Neo before removing or installing the propellers.
There are spare propellers in the box of DJI Neo. The packaging of the two propeller types are labelled with A and B respectively, together with the mounting position using illustrations. There are marks on the center of propeller A, while propeller B does not have any mark. Make sure to match the propellers and motors by following the instructions.
| Propellers | Marked | Unmarked |
| Illustration |  |  |
| Mounting Position | Attach to the motors of the marked arm | Attach to the motors of the unmarked arm |
Removing and Installing
Propeller Guards
Make sure that DJI Neo is powered off. Remove the propeller guards by following the steps below.
- Release the hooks on the propeller guards.
- Push the propeller guard from the center.
- Remove the other propeller guard in the same way.


Install the propeller guards by following the steps below.
- Push the propeller guard toward the body of DJI Neo until the middle hook snaps into position. Secure the other four hooks by pressing them from above into the holes of DJI Neo.

- Install the other propeller guard in the same way.

Propellers
Use the screwdriver in the box of DJI Neo to install and remove the propellers. It is required to remove the propeller guards before installing and removing the propellers.
- Use the screwdriver to remove the propellers from the motors.

- Install the marked propellers onto the motors of the marked arms and the unmarked propellers onto the motors of the unmarked arms. Use the screws provided in the packaging to secure the propellers. Make sure to tighten the screws.

- Reinstall the propeller guards after installing the propellers.


Notice
- DO NOT install or remove the propeller guard by force to avoid damage.
- Make sure to only use the screwdriver in the box of DJI Neo for installing and removing propellers. Using other screwdrivers may damage the screws.
- DO NOT use the screwdriver to disassemble DJI Neo.
- Make sure to keep the screws vertical while tightening them. The screws should not be at a tilted angle to the installation surface. After installation, check whether the screws are flush and rotate the propellers to check for any abnormal resistance.
- The propeller blades are sharp. Handle with care to avoid personal injury or propeller deformation.
- Make sure that the propellers and motors are installed securely before each flight. Make sure the screws on the propellers are tightened after every 15 hours of flying time (approx. 60 flights).
- If a propeller is broken, remove the propeller and screws on the corresponding motor and discard them.
- Only use official DJI propellers. DO NOT mix propeller types.
- Propellers are consumable components. Purchase additional propellers if necessary.
- Make sure that all propellers are in good condition and clean (without any foreign matter in or on them) before each flight. DO NOT use aged, chipped, or broken propellers. Clean the propellers with a soft, dry cloth if there is any foreign matter attached.
- To avoid injury, stay away from rotating propellers or motors.
- To avoid damaging the propellers, pack the DJI Neo correctly for transportation or storage. DO NOT squeeze or bend the propellers. If the propellers are damaged, the flight performance may be affected.
- Make sure the motors are mounted securely and rotating smoothly. Land DJI Neo immediately if a motor is stuck and unable to rotate freely.
- DO NOT attempt to modify the structure of the motors.
- DO NOT touch or let hands or body parts come in contact with the motors after flight, as they may be hot.
- DO NOT block any of the ventilation holes on the motors or the body of DJI Neo.
- Make sure the ESCs sound normal when DJI Neo is powered on.
Intelligent Flight Battery
DJI Neo uses the DJI Neo Intelligent Flight Battery, model BWX521-1435-7.3.* * The battery chemical system is LiNiMnCoO2.
Notice
Read and strictly follow the instructions in this manual, in the Safety Guidelines and on the battery stickers before using the battery. You shall take full responsibility for all operations and usage.
- DO NOT charge an Intelligent Flight Battery immediately after flight as it may be too hot. Wait for the battery to cool down to the allowable charging temperature before charging again.
- To prevent damage, the battery only charges when the battery temperature is between 5° and 40°C (41° and 104°F). The ideal charging temperature is from 22° to 28°C (71.6° to 82.4°F). Charging at the ideal temperature range can prolong battery life. Charging stops automatically if the temperature of the battery cells exceed 55°C (131°F) during charging.
- Low-Temperature Notice:
- Batteries cannot be used in extremely low-temperature environments of lower than -10°C (14°F).
- Battery capacity is significantly reduced when flying at low temperatures from -10° to 5°C (14° to 41°F). Make sure to fully charge the battery before takeoff. Hover DJI Neo in place for a while to warm up the battery after takeoff.
- It is recommended to warm up the battery to at least 10°C (50°F) before takeoff when flying in low-temperature environments. The ideal temperature to warm up the battery is above 20°C (68°F).
- The reduced battery capacity in low-temperature environments reduces the wind speed resistance performance of DJI Neo. Fly with caution.
- Take extra caution when flying at a high elevation with a low temperature.
- A fully charged battery will automatically discharge when it is idle for a period of time. Note that it is normal for the battery to emit heat during the discharging process.
- Fully charge the battery at least once every three months to maintain battery health. If the battery is not used for an extended period, battery performance may be affected or may even cause permanent battery damage. If a battery has not been charged or discharged for three months or more, the battery will no longer be covered by the warranty.
- For safety purposes, keep the batteries at a low power level in transit. Before transportation, it is recommended to discharge the batteries to 30% or lower.
Inserting and Removing the Battery
Insert the Intelligent Flight Battery as shown below. Make sure to fully insert the battery until you hear a "click", which indicates the battery latch is securely fastened.

Press the textured part of the battery latch and push the battery to the rear of DJI Neo to remove it.

- DO NOT insert or remove the battery while the device is powered on.
- Make sure the battery is inserted with a "click". Otherwise, it may cause poor contact between the battery and DJI Neo after takeoff and present hazards.
Using the Battery
Checking the Battery Level
Press the power button once to check the current battery level.

- Power Button
- Battery Level LEDs
The battery level LEDs display the power level of the battery during discharging. The statuses of the LEDs are defined below:
 LED is on
 LEDs is flashing
 LED is off

Powering On/Off
Press, then press and hold the power button on DJI Neo to power it on or off. The battery level LEDs display the battery level when is powered on. The battery level LEDs turn off when DJI Neo is powered off.
If the two LEDs shown in the picture below blink simultaneously, it indicates the battery is malfunctioning. Remove the battery from the device, insert the battery again and make sure that it is securely mounted.

Updating the Firmware
If an additional battery needs to be updated, insert it into DJI Neo and power it on. A prompt will appear in DJI Fly to update the battery firmware. Make sure to update the battery firmware before takeoff. The table below shows battery information during the update process and corresponding LED blinking patterns.
| Blinking Pattern | Information |
 | Updating battery firmware |
 | Firmware update failed |
If the update fails, reinsert the battery into DJI Neo and power on the device, and retry the firmware update using DJI Assistant 2. Refer to the Firmware Update section in the Appendix for more information.
Charging the Battery
Fully charge the battery before each use. It is recommended to use the charging devices provided by DJI, such as the DJI Neo Two-Way Charging Hub, DJI 65W Portable Charger, or other USB Power Delivery chargers. The DJI Neo Two-Way Charging Hub and the DJI 65W Portable Charger are both optional accessories. Visit the official DJI online store for more information.
Using a Charger

- Make sure the battery has been securely installed in DJI Neo and is powered off.
- Connect a charger to an AC power supply (100-240 V, 50/60 Hz; use a power adapter if necessary).
- Connect the charger to the charging port on DJI Neo using a USB-C cable.
- The battery level LEDs display the current battery level during charging.
- The battery is fully charged when all the battery level LEDs emit a solid light. Remove the charger from DJI Neo when the battery is fully charged.
- The battery cannot be charged if the device is powered on.
- The maximum charging power supported for the USB-C port on DJI Neo is 15 W.
The table below shows the battery level during charging.
| Blinking Pattern | Battery Level |
 | 0-50% |
 | 51-75% |
 | 76-99% |
 | 100% |
Four LEDs blinking simultaneously indicates the battery is damaged.
Using the Charging Hub
When used with a USB charger, the DJI Neo Two-Way Charging Hub can charge up to three DJI Neo Intelligent Flight Batteries. When used with the DJI 65W Portable Charger, the charging hub can fully charge three Intelligent Flight Batteries in approximately 60 minutes.
Insert the Intelligent Flight Batteries into the charging hub and connect an external device to the USB port to charge the device, using the charging hub as a power bank. Refer to the DJI Neo Two-Way Charging Hub User Guide for more details.
- It is recommended to use a DJI 65W Portable Charger or other USB Power Delivery chargers to power the charging hub.
- The environmental temperature affects the charging speed. Charging is faster in a well-ventilated environment at 25°C (77°F).
- The charging hub is only compatible with BWX521-1435-7.3 Intelligent Flight Battery. DO NOT use the charging hub with other battery models.
- Place the charging hub on a flat and stable surface when in use. Make sure the device is properly insulated to prevent fire hazards.
- DO NOT touch the metal terminals on the battery ports. Clean the metal terminals with a clean, dry cloth if there is any noticeable buildup.
- Make sure to charge batteries with low battery power in time. It is recommended to store the batteries in the charging hub.

- Battery Ports
- Status LEDs (LED 1 to LED 4, from right to left in an array)
- Function Button
- USB-C Port
How to Charge

- Insert the batteries into the battery ports of the charging hub until they click into place.
- Connect the charging hub to a power outlet (100-240 V, 50/60 Hz) using a USB charger. The status LEDs indicate the battery status during charging. Refer to the Status LEDs Descriptions for more information about the blinking patterns.
The charging method varies depending on the power of the charger. Refer to the table below for details.
| 10 W ≤ Charger Power <30 W | Charges in sequence from highest to lowest battery level. |
| 30 W ≤ Charger Power <45 W | Charges two batteries simultaneously: First charges the battery with a lower battery level to the same level as the highest one and then charges the two batteries simultaneously. |
| Charger Power ≥45 W | Charges three batteries simultaneously: First charges the two batteries with a lower battery level to the same level as the highest one and then charges the batteries simultaneously. |
- The batteries can be stored in the charging hub after charging.
Status LEDs Descriptions
Charging Status
| Blinking Pattern | Descriptions |
| Status LEDs in an array blink quickly successively | The corresponding battery is being charged using a USB PD charger. |
| Status LEDs in an array blink slowly successively | The corresponding battery is being charged using a normal charger. |
| Status LEDs in an array are solid | The corresponding battery is fully charged. |
| All status LEDs blink in sequence | No battery is inserted. |
Battery Level
Each battery port has its corresponding status LED array, from LED1 to LED4 (right to left). Check the battery levels by pressing the function button once. The battery level LED statuses are the same as those on DJI Neo. For details, refer to the statuses and descriptions for battery level LEDs on DJI Neo in the Using the Battery section.
Abnormal Status
The LED status for battery abnormality is the same as that on DJI Neo. Refer to the Battery Protection Mechanisms section for details.
Battery Protection Mechanisms
The battery level LEDs can display battery protection notifications triggered by abnormal charging conditions.
| LEDs | Blinking Pattern | Status |
 | LED2 blinks twice per second | Overcurrent detected |
 | LED2 blinks three times per second | Short circuit detected |
 | LED3 blinks twice per second | Overcharge detected |
 | LED3 blinks three times per second | Over-voltage charger detected |
 | LED4 blinks twice per second | Charging temperature is too low |
 | LED4 blinks three times per second | Charging temperature is too high |
If any of the battery protection mechanisms are activated, unplug the charger, and plug it in again to resume charging. If the charging temperature is abnormal, wait for it to return to normal. The battery will automatically resume charging without the need to unplug and plug in the charger again.
Gimbal and Camera
Camera Notice
- DO NOT expose the camera lens to an environment with laser beams, such as a laser show, or point the camera at intense light sources for an extended period, such as the sun on a clear day, in order to avoid damaging the sensor.
- Make sure the temperature and humidity are suitable for the camera during use and storage.
- Use a lens cleaner to clean the lens to avoid damage or poor image quality.
- DO NOT block any ventilation holes on the camera as the heat generated may damage the device or cause injury.
- When using goggles with an 4:3 aspect ratio, footage recorded by DJI Neo is not stabilized, but supports offline stabilization with Gyroflow.
Gimbal Notice
- Remove the gimbal protector before powering on the device. Attach the gimbal protector when the device is not in use.
- Make sure there are no stickers or objects on the gimbal before taking off. Take off from a flat surface to protect the gimbal and make sure there are no other objects interfering the gimbal. DO NOT tap or knock the gimbal after the device is powered on.
- Precision components in the gimbal may be damaged by a collision or impact, which may cause the gimbal to function abnormally. Make sure to protect the gimbal from damage.
- Avoid getting dust or sand on the gimbal, especially in the gimbal motors.
- A gimbal motor may enter protection mode if the gimbal is obstructed by other objects when DJI Neo is put on uneven ground or on grass, or if the gimbal experiences an excessive external force, such as during a collision. Wait for the gimbal to recover or restart the device.
- DO NOT apply external force to the gimbal after the device is powered on.
- DO NOT add any extra payload other than an official accessory to the gimbal, as this may cause the gimbal to function abnormally or even lead to permanent motor damage.
- Flying in heavy fog or clouds may make the gimbal wet, leading to temporary failure. The gimbal will recover full functionality once it is dry.
- If there are strong winds, the gimbal may vibrate while recording.
Gimbal Angle
The gimbal has a control tilt range of -90° to +60°.

Gimbal Operation Modes
The gimbal mode will automatically switch according to the flight mode.
Normal/Sport/Cine mode: The gimbal is in attitude stabilization mode. The tilt angle of the gimbal remains stable relative to the horizontal plane, which is suitable for shooting stable images.
Manual mode: The gimbal is in lock mode. The tilt angle of the gimbal remains stable relative to the body of DJI Neo.
Exporting Photos and Videos
Use QuickTransfer to export the footage to a mobile device. Refer to the follow-up section for more information.
QuickTransfer
In Mobile App Control, after the smartphone is connected to DJI Neo, enter QuickTransfer mode by going to the Album view.
When DJI Neo is not connected to the smartphone, you can tap the QuickTransfer or Wi-Fi Devices card on the home screen in DJI Fly to enter QuickTransfer mode. You can also go to Album in DJI Fly on your smartphone, and tap ![]() in the upper right corner to enter QuickTransfer mode.
in the upper right corner to enter QuickTransfer mode.
When connecting the smartphone to DJI Neo for the first time, press and hold the power button of DJI Neo to confirm.
- The maximum download rate can only be achieved in countries and regions where the 5.8 GHz frequency is permitted by laws and regulations, when using devices that support 5.8 GHz frequency band and Wi-Fi connection, and in an environment without interference or obstruction. If 5.8 GHz is not allowed by local regulations (such as in Japan), or your mobile device does not support the 5.8 GHz frequency band, or the environment has severe interference, then QuickTransfer will use the 2.4 GHz frequency band and its maximum download rate will reduce to 6 MB/s.
- When using QuickTransfer, it is not necessary to enter the Wi-Fi password on the settings page of the mobile device in order to connect. Launch DJI Fly and a prompt will appear to connect the device.
- Use QuickTransfer in an unobstructed environment with no interference and stay away from sources of interference such as wireless routers, Bluetooth speakers, or headphones.
![information]() When viewing the album in QuickTransfer mode, ECO mode will be enabled automatically if the temperature of DJI Neo raises above a certain value. Pay attention to the prompt in the app.
When viewing the album in QuickTransfer mode, ECO mode will be enabled automatically if the temperature of DJI Neo raises above a certain value. Pay attention to the prompt in the app.
Documents / Resources
References
Download manual
Here you can download full pdf version of manual, it may contain additional safety instructions, warranty information, FCC rules, etc.
Advertisement


Need help?
Do you have a question about the NEO and is the answer not in the manual?
Questions and answers