Table of Contents
Advertisement
Quick Links
Advertisement
Table of Contents

Related Manuals for Roban RotorScale MD-500E 470


Summary of Contents for Roban RotorScale MD-500E 470
- Page 1 Roban MD-500E 470 User Manual V2.2 2024.10 © 2024 Roban All Rights Reserved.
- Page 2 This document is copyrighted by ROBAN with all rights reserved. Unless otherwise authorized by ROBAN, you are not eligible to use or allow others to use the document or any part of the document by reproducing, transferring or selling the document. Users should only refer to this document and the content thereof as instructions to operate ROBAN UAV.
-
Page 3: Using This Manual
Video Tutorials Go to the address below or scan the QR code to watch the ROBAN MD-500E 470 tutorial videos, links are in the description, which demonstrate how to use the 470 series safely. -
Page 4: Table Of Contents
Switching the equipment on and off ..................23 Turn on the Transmitter ....................... 23 Turn on Helicopter ......................24 Wait for the Controller initialization................... 24 Getting ready to fly in GPS mode ..................25 Arm the helicopter ......................26 © 2024 Roban All Rights Reserved. - Page 5 Adjusting the controller ....................... 41 Helicopter blade tracking and maintenance ................41 Technical support ....................... 41 Warranty and Replacement Process ..................41 Product Compliance and Conformity ..................42 Product Compliance ......................42 Software Licensing and Attribution: ..................43 © 2024 Roban All Rights Reserved.
- Page 6 Appendix A. Mechanical Spare Parts ..................44 Appendix C. Spare parts explosion drawings ................51 Appendix C. Explosion drawings ....................55 © 2024 Roban All Rights Reserved.
-
Page 7: Product Profile
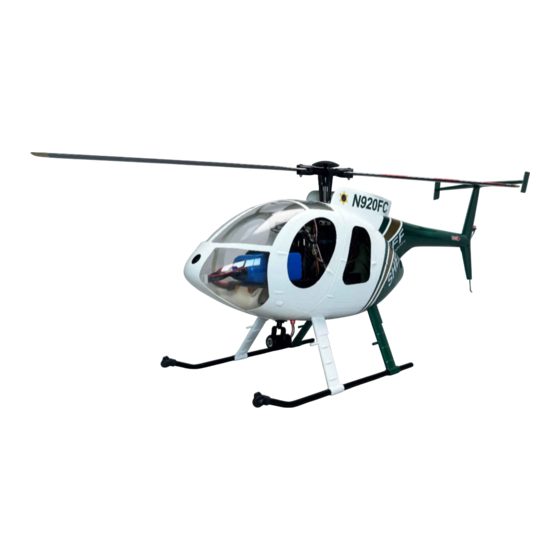
Product profile This section introduces the ROBAN MD-500E 470 and lists the components of the aircraft and remote controller. Introduction ROBAN MD-500E 470 is a remote controlled scale helicopter capable of hovering and flying indoors and outdoors and can automatically Return to Home. The helicopter features an electronic control system that makes flying as easy and intuitive as operating a camera drone. -
Page 8: Product Components
TOOLS, ADHESIVES, additional components • Hexagonal allen key 2.5mm • Screwdriver PH1.5 • Epoxy fast curing adhesive • Transparent tape (for temporarily holding parts in place while glue is setting) • 4pcs AA-Type batteries for transmitter © 2024 Roban All Rights Reserved. -
Page 9: Understanding The Radio Control
Throttle on-off Stick left Up-down/turn left-right Switch B Accessory control Stick right Nick fwd-aft/Bank left-right Switch C Stabilization mode Power left On-off (always press both) Switch D Auto RTH Power right On-off (always press both) © 2024 Roban All Rights Reserved. -
Page 10: Safety Section
Basic mechanical skills are required to operate this product, and you should always use caution and common sense. Do not use incompatible components or make modifications beyond the instructions provided by Roban Model Limited. The manual contains critical information regarding safety, operation, and maintenance, and it is essential to follow all instructions and warnings carefully to avoid injury, property damage, or worse. -
Page 11: In-Flight Safety
Always keep moving parts clean. • Always keep parts dry. • Always let parts cool after use before touching. • Always remove batteries after use. • Never operate aircraft with damaged wiring. • • Never touch moving parts. © 2024 Roban All Rights Reserved. -
Page 12: Lithium Polymer Battery Operating Instructions
LIMITED WARRANTY • Motion RC LLC / Roban Model Limited reserves the right to change or modify this warranty without notice and disclaims all other warranties, express or implied. This warranty is limited to the original purchaser and is not transferable. Third party transactions are not covered by this warranty. Product warranty is limited to original defects in material and workmanship. The warranty does not cover collateral damage. -
Page 13: Quick Start Guide
Quick Start Guide Follow these steps to get your Roban MD-500E 470 ready for flight quickly. For detailed instructions and safety information, refer to the full manual. 1. Unboxing Remove all packaging materials. Ensure all items are present: • Helicopter fuselage •... - Page 14 11. After Flight Step 1: Disconnect the battery from the helicopter. Step 2: Turn off the transmitter by pressing and holding both power buttons. Step 3: Allow the motors and battery to cool down before handling. © 2024 Roban All Rights Reserved.
- Page 15 Safe Flight: Avoid flying in windy conditions and always stay within line of sight. Charging Safety: Never leave the battery unattended while charging. For more details on advanced features, flight modes, or troubleshooting, refer to the full manual. © 2024 Roban All Rights Reserved.
-
Page 16: Preparation
Charge lithium batteries only with appropriate chargers • Use a BAT-SAFE for additional safety on batteries • Don’t store with exposure to sunlight. • Don’t store under humid conditions of 60%RH or above over prolonged periods. © 2024 Roban All Rights Reserved. -
Page 17: Installation Of The Product
A2x14mm into each hole. Tighten the screws securely using a suitable tool to ensure a firm attachment. Make sure to mount them in the proper direction, they are slanted to backwards. © 2024 Roban All Rights Reserved. - Page 18 Immediately remove any excess glue squeezed out of the joint with a toothpick or lint-free cotton swab. After 10 minutes, once the glue has set, carefully remove the tape. © 2024 Roban All Rights Reserved.
-
Page 19: Installation Of Rotor Blades
If the blades are overtightened in the grips, this can cause vibrations when the helicopter spools up. © 2024 Roban All Rights Reserved. -
Page 20: Installation Of The Battery
Velcro by tying it down with a bit of tension. The surface of the tray is rough, providing enough grip to prevent it from moving if tied down properly. © 2024 Roban All Rights Reserved. -
Page 21: Center Of Gravity
Mark the position with a sharpie for your convenience when you exchange batteries on the battery tray. Always secure the battery with the Velcro firmly. It mustn’t come loose and move while in flight. © 2024 Roban All Rights Reserved. -
Page 22: Operation/Use
1A, respectively 15W, so a full charge may take up to 5 hours, depending on the battery's charge level. Please only use chargers specifically designed for RC batteries with balance port (white plug) connectors under any circumstance. For safe charging, it is recommended to use a BAT-SAFE charging enclosure. © 2024 Roban All Rights Reserved. -
Page 23: Switching The Equipment On And Off
In case you receive a warning message regarding the switches, make sure to flip all four switches on the radio into the top position before switching on the transmitter to avoid any startup issues. © 2024 Roban All Rights Reserved. -
Page 24: Turn On Helicopter
(3D) position, you can actually start flying the machine, if you are a seasoned pilot. But let’s get started in the GPS mode. So please make sure the mode switch is in the up (GPS) position. If indoors, you won’t be able to take off in GPS mode. © 2024 Roban All Rights Reserved. -
Page 25: Getting Ready To Fly In Gps Mode
If the sky is blocked by clouds, use droneweather to check conditions. Without a good, high quality GPS signal the machine won’t let you take off in GPS mode, but in both other flight modes. © 2024 Roban All Rights Reserved. -
Page 26: Arm The Helicopter
Do not switch off the motors during flight, unless in emergency situations, as the helicopter will fall to the ground. © 2024 Roban All Rights Reserved. -
Page 27: Fly The Helicopter
3 feet (1 meter) of clearance for safe hovering and maintaining position. Its now up to you to fly and land the helicopter. © 2024 Roban All Rights Reserved. -
Page 28: Flight Maneuvers (Mode 2)
Flight maneuvers (MODE 2) © 2024 Roban All Rights Reserved. -
Page 29: Md-500E Search Light Operation
MD-500E Search Light Operation The MD-500E is equipped with an auxiliary search light. It can be controlled via the accessories flip switch on the radio control (turned on and off). © 2024 Roban All Rights Reserved. -
Page 30: Gps Near Ground Interference
Instructions for using this timer are provided in the radio control section of this manual. It is important to monitor the flight time to avoid activating the automatic landing feature triggered by low battery voltage. © 2024 Roban All Rights Reserved. -
Page 31: Landing The Helicopter
Switch A to the "Motor Off" position. Avoid leaving the helicopter with the blades spinning on the ground, except during take-off or landing. Flight Modes Flight mode chart © 2024 Roban All Rights Reserved. -
Page 32: Controller Flight Mode Description
In angle mode, the helicopter does not use GPS to stay in one place, but stabilizes the helicopter by returning to a level attitude on the roll and pitch axis if you let go of the control sticks. But it doesn’t control the position or height © 2024 Roban All Rights Reserved. -
Page 33: Manual Mode
Once engaged, the aircraft will rise to 15m above the starting point flying height, then turn into the home point heading and then fly towards the © 2024 Roban All Rights Reserved. -
Page 34: Loss Of Signal
RTH. The user can turn on (while being in GPS mode) the RTH mode and off again during the return flight. On Command Return: In the flip is switched into RTH postion (down), the model will also execute the return to home maneuver. RETURN TO HOME © 2024 Roban All Rights Reserved. -
Page 35: Electronic Components And Documentation
Electronic components and documentation Controller ports and description PCB Schematics – APM Roban X2 / F407 © 2024 Roban All Rights Reserved. -
Page 36: Controller Port Wiring And Specifications
Blue, double flash GPS is acquiring position Red, flashing Compass calibration required/Magnets present slow Red, flashing fast No receiver signal present Blue, solid GPS mode ready, armed Blue, flashing GPS mode ready, not armed © 2024 Roban All Rights Reserved. -
Page 37: Gps Sensor
The unit is preinstalled and doesn’t require any maintenance. The unit is automatically configured during bootup of the controller. Nose/Front Aircraft © 2024 Roban All Rights Reserved. -
Page 38: Dual Channel Esc
DC to the servos through the controller’s bridged connectors, spanning channels 1 through 8. Below is the wiring schematic: Main ESC Flight Battery 7.4Vdc Controller Connector Connector Tail ESC Signal Main Motor Tail Motor Connector © 2024 Roban All Rights Reserved. -
Page 39: Swash Servos Designation And Wiring
Swash Servos designation and wiring The swashplate servos are connected to the ports 1-3 of the controller. The servos are HV (7.4Vdc) servos, which are powered by the dual ESC connected on port Ch8. © 2024 Roban All Rights Reserved. -
Page 40: Led Light System
8 different patterns. The position light pattern always starts on the same pattern mode on power up. The controller is separate from the main controller and can be controlled immediately. © 2024 Roban All Rights Reserved. -
Page 41: Troubleshooting, Support And Warranty
If your product is within the warranty period and requires repairs or replacement, follow these steps: • Contact the support team of you point of purchase via email or phone. • Follow shipping instructions provided by their team. © 2024 Roban All Rights Reserved. -
Page 42: Product Compliance And Conformity
Rotor Scale 470 MD-500E (RSH-470-R-MD) Hereby, Roban Model Limited declares that the device is in compliance with the following: EU Low Voltage Directive 2014/35/EU, EU EMC Directive 2014/30/EU , EU Radio Equipment Directive 2014/53/EU, RoHS 2 Directive 2011/65/EU, RoHS 3 Directive -... -
Page 43: Software Licensing And Attribution
Link to Material: You can access the original source of the software and further details about the license at https://ardupilot.org. • Title: ArduCopter Heli For more details on the CC BY-SA 3.0 license, please visit the official Creative Commons website at https://creativecommons.org/licenses/by-sa/3.0/. © 2024 Roban All Rights Reserved. -
Page 44: Appendix A. Mechanical Spare Parts
Sparepart No Description Picture RSH-470-SP001 Main shaft RSH-470-SP002 Feathering shaft RSH-470-SP003V2 Main rotor hub RSH-470-SP004V2 Main blade grip RSH-470-SP005V2 Rotor holder arm RSH-470-SP006V2 Upper swash idler RSH-470-SP007V2 Swash plate 2B RSH-470-SP008 Servo holder 1 © 2024 Roban All Rights Reserved. - Page 45 RSH-470-SP009 Servo holder 2 RSH-470-SP010V2 Main gear RSH-470-SP011 Main shaft bearing block RSH-470-SP012V2 Lower linkages SM-470-SP013 Bearing set RSH-470-SP014 Main shaft lock RSH-470-SP015 Main frame spacer RSH-470-SP016 Main Belt RSH-470-SP017 Lower swash bracket © 2024 Roban All Rights Reserved.
- Page 46 RSH-470-SP019 Main frame bottom RSH-470-SP020 Tail Motor with wire + plug RSH-470-SP021 Main frame set RSH-470-SP023 Servo horn set RSH-470-SP024 Complete rotorhead RSH-470-SP028 Main motor incl mount RSH-470-SP030 ESC combo RSH-470-SP032 Motor belt pulley © 2024 Roban All Rights Reserved.
- Page 47 RSH-470-SP033 Belt tensioner RSH-470-SP034 Tensioner spring RSH-470-SP035 Fastener set RSH-470-SP036 GPS Sensor RSH-470-SP037 Controller RSH-470-SP038 4S 5200mah battery RSH-470-SP029 Balance charger RSH-470-SP040 Rotor cap RSH-470-SP041 Battery vercro © 2024 Roban All Rights Reserved.
- Page 48 RSH-470-SP042 Servo CW RSH-470-SP044 Servo wire RX to Controller RSH-470-SP047 Transmitter / Receiver Set RSH-470-SP048 Receiver standalone © 2024 Roban All Rights Reserved.
-
Page 49: Appendix B. Scale Spare Parts
470L MD500E all window 470L MD500E search MDE470LPJ004 light MDE470LPJ005 470L MD500E tail fins 470L MD500E landing MDE470LPJ006 gear skids 470L MD500E landing MDE470LPJ007 gear 470L MD500E light MDE470LPJ008 control MDE470LPJ009 470L MD500E light caps © 2024 Roban All Rights Reserved. - Page 50 MDE470LPJ010 470L MD500E light kit MDE470LPJ011 470L MD500E tail blades MDE470LPJ014 470L MD500E aft body © 2024 Roban All Rights Reserved.
-
Page 51: Appendix C. Spare Parts Explosion Drawings
Appendix C. Spare parts explosion drawings RSH-470-SP001 RSH-470-SP002 RSH-470-SP003 RSH-470-SP004 RSH-470-SP005 RSH-470-SP007 © 2024 Roban All Rights Reserved. - Page 52 RSH-470-SP010 RSH-470-SP011 RSH-470-SP012 RSH-470-SP014 RSH-470-SP015 © 2024 Roban All Rights Reserved.
- Page 53 RSH-470-SP016 RSH-470-SP017 RSH-470-SP019 RSH-470-SP020 RSH-470-SP020 RSH-470-SP021 © 2024 Roban All Rights Reserved.
- Page 54 RSH-470-SP023 RSH-470-SP027 RSH-470-SP032 RSH-470-SP033 © 2024 Roban All Rights Reserved.
- Page 55 Appendix C. Explosion drawings © 2024 Roban All Rights Reserved.
- Page 56 © 2024 Roban All Rights Reserved.
- Page 57 © 2024 Roban All Rights Reserved.
- Page 58 The end. © 2024 Roban All Rights Reserved.
Need help?
Do you have a question about the RotorScale MD-500E 470 and is the answer not in the manual?
Questions and answers
Belly light stoped working
The belly light on the Roban RotorScale MD-500E 470 may have stopped working due to issues with the LED light system, such as:
1. Power supply failure from the 7.4V BEC supply.
2. Disconnection or fault in the connection to servo port 6.
3. Malfunction in the dedicated LED controller.
4. Incorrect radio control switch settings not cycling to the correct pattern.
5. Damage to the LED light or wiring.
Each of these should be checked to determine the cause.
This answer is automatically generated
Can I fly this helicopter without GPS help. I want to fly it like a normal rc helicopter. Thank you for your help.
Yes, the Roban RotorScale MD-500E 470 can be flown without GPS assistance. In ANGLE Mode, the helicopter does not use GPS to maintain position but stabilizes itself by returning to a level attitude on the roll and pitch axis when the control sticks are released. However, in this mode, the helicopter may drift in position and change altitude, requiring manual control to maintain stability.
This answer is automatically generated