
Related Manuals for LABORIE Flowmaster


Summary of Contents for LABORIE Flowmaster
- Page 1 Flowmaster User’s & Service Manual Flowmaster User’s and Service Manual | LBL-000990 [B]...
- Page 2 Qserve Group UK Ltd. 282 Farnborough Road, Farnborough, GU14 7NA Hampshire, UNITED KINGDOM laborie.com Trademarks Flowmaster is a registered trademark of Medical Measurement Systems B.V., Enschede, the Netherlands. Document Number: LBL-000990 Revision: B Release Date: 2024-05 Laborie Medical Technologies Corp.
-
Page 3: Table Of Contents
Select the Uroflow Procedure ............21 Test the Flowmeter ................ 21 Uroflow Investigation ................22 Introduction ..................22 Connecting the Flowmaster System to an IT-Network ....23 Uroflow Without Database Program ..........23 Uroflow via Database Program ............25 Uroflow Report ..................28 Introduction .................. - Page 4 How to Save Battery Lifetime............49 Patient Data on the Network ..............51 Introduction ..................51 Description Functionality ..............51 Install the Software ................ 52 Disable Network Functionality ............54 Change Network Directory ............. 54 Flowmaster User’s and Service Manual | LBL-000990 [B]...
- Page 5 Investigation Protocol and Flow Scheduler ........60 Diagnostics ..................60 10. HIS Import ....................61 10.1 Introduction ..................61 10.2 Install Flowmaster Software with HIS Interface ......61 10.3 HIS Interface Settings ..............63 10.3.1 Introduction ..............63 10.3.2 Select HIS Interface Settings ........... 63 10.3.3 Select Interface Library ............
- Page 6 Appendix D Electromagnetic Compatibility ..........90 Flowmaster User’s and Service Manual | LBL-000990 [B]...
-
Page 7: Introduction
Figure 1.1 Flowmaster uroflowmeter The flowsensor contains Bluetooth functionality for transferring the uroflow data to the computer without using a cable. To run the Flowmaster software program you will need the operating system Windows 7 Professional Edition (32 or 64 bit), Windows 7 Home Premium Edition (32 or 64 bit), Windows 7 Home Premium Edition (32 or 64 bit), Windows 8 (8.1) Pro (32 or 64 bit), or... -
Page 8: Intended Use
By using the Flowmaster software version 2.0 and higher you can easily save patient data on the network. Backup of the data is guaranteed if the standard backup of the hospital network is made. Intended Use The Laborie Flowmaster is intended for uroflow measurements for the purpose of assisting healthcare professionals in executing urodynamic studies, collecting data, and archiving patient and testing information. -
Page 9: Clinical Benefits
Voiding Summary. Safety Information The Flowmaster User’s & Service Manual is intended for all users of the Flowmaster measurement system. Before working with the system and its manual, please take notice of the safety information as described in appendix A. -
Page 10: Environmental Consideration Of Waste Disposal
All external devices, supplementary equipment, and peripherals that you connect to the FlowMaster system must meet the safety standards defined by IEC/EN 60601-1. This applies to all data input/output ports (e.g., USB, HDMI, serial). -
Page 11: Repairs
Laborie advises to perform preventive maintenance at least once a year. With preventive maintenance, a regular check of the Flowmaster system is meant. This can be done by your service department or you can ask your Laborie representative. When malfunctions are found during the hardware test procedures, you can find additional information in the trouble shooting chapters in this manual. -
Page 12: Block Diagram
Figure 1.3 Block diagram Flowmaster 1.16 About this Manual The Flowmaster User’s & Service Manual is intended for all user’s performing investigations with the system, and for all technical users who install, test and maintain the Flowmaster hardware and software. -
Page 13: Accessing Previous Versions Of This Manual
This manual provides you with detailed information about: • installation of the flowmeter and the Laborie Flowmaster software (chapter • uroflow investigations (chapter 3), • uroflow results and reports (chapter 4), • functionality of the Flowmaster software (chapter 5), • preventive maintenance, testing and cleaning the flowmeter (chapter 6), •... -
Page 14: To Report Product Complaints Or Incidents
Member State where the incident occurred. North American Technical Support: Telephone: 1.800.333.1039 extension 1 or 1.800.522.6743 extension 1 Email: service@laborie.com Outside North America: Telephone: +31 (0) 53.4803777 Email: helpdesk@laborie.com Flowmaster User’s and Service Manual | LBL-000990 [B] Chapter 1... -
Page 15: Installation
• Optionally, an AC power supply to power the flowsensor. System Security To protect patient data and ensure the integrity of your Flowmaster system, you should always employ IT-industry security best practices. The Flowmaster system incorporates data security features that work in conjunction with the security practices in use by your healthcare facility. -
Page 16: Install Your Computer And The Software
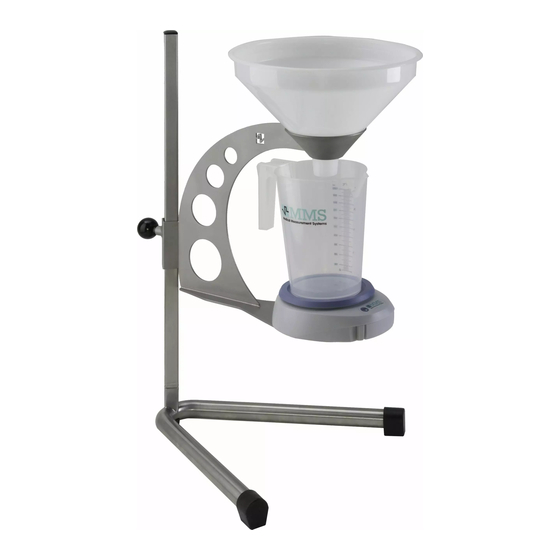
To ensure the integrity and security of patient data and the Flowmaster system, do the following: • Ensure that Windows automatic updates is always turned on. • To comply with applicable standards regarding data privacy and security (e.g., Health Insurance Portability and Accountability Act of 1996 [HIPAA] and General Data Protection Regulation [GDPR]), be sure that BitLocker is active on the Flowmaster system at all times. - Page 17 (see drawing). The flowsensor can be fixed on the flow stand holder with a M4 x 16 mm screw. ▪ Place the urine container [5] onto the flowsensor [1]. Flowmaster User’s and Service Manual | LBL-000990 [B] Installation...
-
Page 18: Register The Flowmeter
A click must be heard at both sides. The green/red LED will flash as an indication that the flowsensor is powered. ▪ When using the power supply of Laborie (F3BT-PS), connect the 5 Volt power supply to the flowsensor [2]. Connect the other end of the power supply to the mains. - Page 19 Figure 2.3 Flow program pop-up ▪ In the pop-up menu select Registered Flowmeter. Figure 2.4 Registered flowmeter ▪ Click on the Add button. Figure 2.5 Start search flowmeter Flowmaster User’s and Service Manual | LBL-000990 [B] Installation...
- Page 20 ▪ Click on the Rename button to give the flowmeter a unique name under the header flowmeter name / location, for example the number of the room in which the flowmeter is placed. ▪ Click on the OK button to finish registration. Flowmaster User’s and Service Manual | LBL-000990 [B] Chapter 2...
-
Page 21: Select The Uroflow Procedure
(e.g. 250 ml) and check if the procedure and results are as expected. You can also use the diagnostic instructions as described in § 6.3 to test the Bluetooth flowmeter. Flowmaster User’s and Service Manual | LBL-000990 [B] Installation... -
Page 22: Uroflow Investigation
Uroflow Investigation Introduction This chapter describes two procedures for performing uroflow investigations with the Flowmaster. Determine the best uroflow procedure for your situation. 1 Uroflow without database program This procedure allows you to perform the uroflow investigation without using the database program. Recording starts automatically the moment that the patients starts voiding. -
Page 23: Connecting The Flowmaster System To An It-Network
Records (EMR) connectivity and to facilitate data transmission to and from the Flowmaster system. For information and guidance on how to set up and configure the Flowmaster system to properly operate on your facility’s IT-Network, contact Laborie service at service@laborie.com. - Page 24 ▪ In the investigation protocol, you can define that the uroflow report will be printed automatically, that a print preview is shown first, or that the report is Flowmaster User’s and Service Manual | LBL-000990 [B] Chapter 3...
-
Page 25: Uroflow Via Database Program
▪ It is always possible to re-print the uroflow report via the database program. Uroflow via Database Program The procedure for the uroflow is as follows: ▪ Double-click on the MMS Flowmaster Database button. Figure 3.4 Database program ▪ Click on the New patient button or select the name from the list. - Page 26 ▪ Ask the patient to void. The moment the flowmeter detects urine, recording starts as displayed below. To start recording immediately you must click on the Start Miction button. Figure 3.7 Uroflow recording Flowmaster User’s and Service Manual | LBL-000990 [B] Chapter 3...
- Page 27 Figure 3.8 Print preview window ▪ Click on the Print button to print the uroflow report. It is off course always possible to re-print the uroflow report via the database program. Flowmaster User’s and Service Manual | LBL-000990 [B] Uroflow Investigation...
-
Page 28: Uroflow Report
• Click on the Print button to print the investigation report. • Click on the Save to PDF or Save to JPG button to save the uroflow report as PDF or JPG document. Flowmaster User’s and Service Manual | LBL-000990 [B] Chapter 4... -
Page 29: Uroflow Results
The average flow rate is voided volume divided by flow time. The average flow rate should be interpreted with caution if flow is interrupted or if there is a terminal dribble. Flowmaster User’s and Service Manual | LBL-000990 [B] Uroflow Report... -
Page 30: Siroky Nomogram
Calculated: Delay time = [A]. Siroky Nomogram Siroky nomograms are used as an aid to diagnose normal or obstructed urinary flow in male patients. Flowmaster User’s and Service Manual | LBL-000990 [B] Chapter 4... -
Page 31: Liverpool Nomogram
The Liverpool flow rate nomogram shows an x-y plot of the flow rate related to the voided volume. It can be used as an aid to diagnose normal or obstructed urinary flow. Flowmaster User’s and Service Manual | LBL-000990 [B] Uroflow Report... -
Page 32: Miskolc Nomogram
The Miskolc flow rate nomogram shows an x-y plot of the flow rate related to the voided volume. It can be used as an aid to diagnose normal or obstructed urinary flow. Flowmaster User’s and Service Manual | LBL-000990 [B] Chapter 4... - Page 33 • Children age 13 or older and younger than 18 Read also: L.Szabo and S.Fegyverneki, Maximum and average urine flow rates in normal children - The Miskolc nomograms, British Journal of Urolygy (1995), 76, 16-20. Flowmaster User’s and Service Manual | LBL-000990 [B] Uroflow Report...
-
Page 34: Flowmaster Software
Flowmaster Software Introduction The Flowmaster software consists out of two programs: (1) the flow program and (2) the database program. The flow program switches the flowmeter on and must be active to record uroflow investigations. The database program allows you to select the patient first and to start the uroflow investigation. See the information in chapter 3 and determine the best uroflow procedure for your situation. -
Page 35: Investigation Protocol
Disable (the program does not work and does not display any messages) or enable the flow program. Exit Stop the flow program. 5.2.3 Investigation Protocol Select Investigation protocol in the flow program to edit the investigation protocol settings. Flowmaster User’s and Service Manual | LBL-000990 [B]... - Page 36 PDF or JPG documents (default c:\mmsFlowmaster\PDF or c:\mmsFlowmaster\JPG). If you disable this function, you can always save reports as PDF documents in the ‘Print preview’ window. Laborie Flowmaster User’s and Service Manual | LBL-000990 [B] Chapter 5...
- Page 37 Automatic selection, Liverpool nomogram, Miskolc nomogram and Siroky nomogram. In the print preview mode, you can always select another nomogram manually. Print orientation Default the print orientation is landscape. You can also print the investigation report in portrait orientation. Flowmaster User’s and Service Manual | LBL-000990 [B]...
-
Page 38: Flow Scheduler
‘personal number’ or ‘personal number and investigator’. 5.2.4 Flow Scheduler Select Flow scheduler in the flow program to define for each day of the week the times that the flowmeter must be on. Laborie Flowmaster User’s and Service Manual | LBL-000990 [B] Chapter 5... -
Page 39: Diagnostics
When the flowmeter is off because of the flow scheduler settings, just select Flowmeter on via the flow program menu to switch on the flowmeter. 5.2.5 Diagnostics Select Diagnostics in the flow program to show status information and to test the flowmeter. Flowmaster User’s and Service Manual | LBL-000990 [B]... -
Page 40: Database Program
§ 7.4. If you have a device which can simulate a constant flow (ml/sec), you can check the flow recording. Database Program 5.3.1 Start the Database Program Double-click on the MMS Flowmaster Database button to start the database program. Laborie Flowmaster User’s and Service Manual | LBL-000990 [B] Chapter 5... -
Page 41: Patient
Delete all the information of the selected patient from the computer hard disk. Cardreader Use a cardreader to obtain for patient information (optional). Read HIS info Import patient demographics (only available with the HIS software option, see chapter 10). Flowmaster User’s and Service Manual | LBL-000990 [B]... -
Page 42: Settings
All will archive the data of all patients into separate SFS files. Restore Restore the Flowmaster SFS data file of one or more patients. Use this item for example when you receive a file from one of your colleagues. 5.3.3 Settings Select Settings in the database program to display the menu-items. -
Page 43: Import Uroflow
Menu Function Reindex file Index the database files automatically. Use this function when the Flowmaster program has stopped without reason, or when patient information is lost. System info Display information about Flowmaster and computer, e.g. program version and Bluetooth information. This information can be printed, saved, e-mailed or printed as fax. - Page 44 ▪ Select the uroflow from the list which belongs to the selected patient. ▪ Click on the Import button to import and save the investigation with the selected patient. Laborie Flowmaster User’s and Service Manual | LBL-000990 [B] Chapter 5...
-
Page 45: Maintenance
Laborie advises to perform preventive maintenance once a year. With preventive maintenance, a regular check of the flowmeter is meant. This can be done by your service department or you can ask your Laborie representative. The procedure is as follows: ▪... -
Page 46: Cleaning The Flowmeter
Cleaning the Flowmeter Laborie advises that cleaning of the flowmeter is performed on a regular base. Some parts need more frequent cleaning to obtain a maximum hygienic system. Below we show the several parts with their cleaning instructions. Before cleaning, mind the following. -
Page 47: Troubleshooting
LED. Check that the Bluetooth dongle is connected to one of the USB ports on your computer. When you are using the Flowmaster network option, check if the network connection is available. Contact your Laborie representative. -
Page 48: Measured Values Are Not Within Limits
When small weights are displayed correctly, but when the weight on the flowsensor is increased and the displayed value is not increasing at a certain weight value anymore (< 2000 gram), contact your Laborie representative. Measured Values Are Not Within Limits... -
Page 49: Uroflow Saved With Wrong Patient Name
This flow program will switch on the Bluetooth flowmeter connection. This implies that when the computer is on between 9.00 AM en 5.00 PM, the batteries will also be used 8 TroubleshootingLaborie Flowmaster User’s and Service Manual | LBL-000990 [B]... - Page 50 The function "Flow scheduler" helps you to save battery lifetime. You can schedule the days and times of the week that the flowmeter Must be activated. See § 5.2.4 more details. Laborie Flowmaster User’s and Service Manual | LBL-000990 [B] Chapter 7...
-
Page 51: Patient Data On The Network
Patient Data on the Network Introduction The Flowmaster software offers you the opportunity to save patient data on the network easily. This way a backup of the investigation data can be made with the standard backup of the hospital network. Read the information in this chapter carefully, before installing and using this functionality. -
Page 52: Install The Software
More than one flowmeter? If you have more than one computer with Flowmaster software, you must define for each computer a separate network directory. It is not possible to save the investigation data of different Flowmaster computers in the same network directory. - Page 53 Flowmaster software installed on this computer, you can select this directory. The existing patient investigation data will be stored on the network automatically, the first time you start the database program. ▪ Click on the Next button to display the window ‘Choose Network Location’.
-
Page 54: Disable Network Functionality
After reinstalling the software, you can restore the patient files as described in § 8.6. Finally, you may remove the old Flowmaster network directory. Archive/Restore of Patient Data In some situations, it might be necessary to archive patient investigation data in a temporarily directory. -
Page 55: Installation On Another Computer
Install the Flowmaster software on the other computer and fill in the network directory in which the data is stored (see § 8.3). After installing the software on the other computer, it is not possible anymore to perform investigations via the old computer. -
Page 56: Multiple Flowmasters
The hospital is responsible for creating a safe situation in which the patient name is always linked to the recorded uroflow of that patient. Therefore, Laborie recommends (1) to use the indication of the Flowmaster serial number and (2) to label each flowmeter in the software with a unique name, which is easy to understand by the patient. -
Page 57: Uroflow Investigation
When using the uroflow procedure without database program, patient information is added (linked) to the flowmeter recording after the flow has been done. Therefore, it is important to know which flowmeter has been used by the patient. Flowmaster User’s and Service Manual | LBL-000990 [B] Multiple Flowmasters... - Page 58 ▪ Recording stops automatically when the post flow time elapsed after the last flow detection. It is also possible to click on the Stop and save button. Figure 9.3 Enter patient information Flowmaster User’s and Service Manual | LBL-000990 [B] Chapter 9...
-
Page 59: Uroflow Via Database Program
The procedure is as follows: ▪ Double-click on the MMS Flowmaster Database button. ▪ Click on the New patient button or select a patient from the list. ▪ Enter patient information and click on the OK button. -
Page 60: Investigation Protocol And Flow Scheduler
Click with the mouse button on the icon of the flowmeter you want to test and choose Diagnostics in the flow program. See § 5.2.5 for more details about the procedure Flowmaster User’s and Service Manual | LBL-000990 [B] Chapter 9... -
Page 61: His Import
(Document Code: LBL-02559). In a standard environment, the Flowmaster system will use the local harddisk of a computer to store patient data. The Flowmaster database contains a table where patient information is stored. Patient information should be entered before or after an investigation is performed. - Page 62 ▪ Windows will detect new hardware and installation is ready. The HIS interface functions will be enabled in the Flowmaster software. ▪ Start the Flowmaster database program by clicking on the Flowmaster database button on the desktop. Choose Patient and check if Read HIS info is available in the menu.
-
Page 63: His Interface Settings
Click the Flow program button in the task bar and choose HIS interface. Note that this dialog window is limited to the selection of the interface library and the Settings button. Figure 10.5 HIS interface settings via flow program Flowmaster User’s and Service Manual | LBL-000990 [B] HIS Import... -
Page 64: Select Interface Library
This setting is only available in the ‘HIS interface settings’ window in the database. It will influence what happens when the imported patient already exists in the Flowmaster database after choosing Patient > Read HIS info in the database program. -
Page 65: His Interface Hl7 Settings
This information will be put in the MSH of the HL7 message. These settings should be supplied by the IT-department of the hospital and are known HL7 terms. Male identification Flowmaster User’s and Service Manual | LBL-000990 [B] HIS Import... -
Page 66: His Interface Gdt Settings
HIS information is as follows: ▪ After the uroflow has been recorded and the Stop and save button is clicked, the following window will be displayed. Flowmaster User’s and Service Manual | LBL-000990 [B] Chapter 10... - Page 67 Patient ID. ▪ Enter the Patient ID (or in some cases you can select from a dropdown list) and click the OK button. The Flowmaster database will request the patient demographics from the server.
-
Page 68: Access His Via Database Program
▪ Start the Flowmaster database program. ▪ Choose Patient > Read HIS info from the database menu. ▪ Enter the Patient ID and click the OK button. The Flowmaster database will request the patient demographics from the server. ▪ When the patient is found and the demographics have been retrieved, the ‘Edit patient’... - Page 69 ▪ Click the Read HIS info button. ▪ Enter the patient ID and click the OK button. The Flowmaster database will request the patient demographics from the server. ▪ When the patient is found and the demographics have been retrieved, the ‘Enter patient’...
-
Page 70: Technical Specifications
• Save report to PDF/JPG (automatically, manually). • Archive and restore patient files. • Backup functionality, save patient data to the network. • Use multiple flowmeters with one PC and one Flowmaster software package simultaneously. • Automatic start/stop. • Manual start/stop. - Page 71 • Range: 0 to 2000 ml. • Maximum weight (capacity): 3000 grams including initial offset. • Mechanical stop: @ ± 3500 gram. • Scaling: 250, 500 or 1000 ml. • Artefact correction. Flowmaster User’s and Service Manual | LBL-000990 [B] Technical Specifications...
-
Page 72: Computer Requirements
• DC cable length: 1,8m. 11.3 Computer Requirements The computer and its peripherals connected to the Flowmaster must comply with the latest version of one of the following standards: the IEC 60950, EN 60950 or UL 60950. The minimum computer requirements for the Laborie Windows software for the Flowmaster system is: •... -
Page 73: Classification/Approval
• IEC 60601-1 • Protection Class II with prescribed power supply • IEC 60601-1-2 • Class I(m) medical device • ANSI/AAMI ES60601-1 • CAN/CSA-C22.2 No. 60601-1 • SGS contract no. 800174 Flowmaster User’s and Service Manual | LBL-000990 [B] Technical Specifications... -
Page 74: Warranty For Flowmaster System
PRODUCT TO THE PLACE WHERE YOU OBTAINED THEM FOR FULL REFUND. To preserve and protect its rights under applicable laws, Laborie does not sell any rights in Laborie software. Rather, Laborie grants the right to use Laborie SOFTWARE by means of a SOFTWARE LICENCE. - Page 75 6. TERMINATION. This Licence is effective until terminated. This Licence will terminate automatically without notice from Laborie if you fail to comply with any provision of this Licence. Upon termination, you shall destroy the written materials and all copies of the SOFTWARE, including modified copies, if any.
- Page 76 THAT IS MADE BY Laborie ON THIS Laborie PRODUCT. NO ORAL OR WRITTEN INFORMATION OR ADVICE GIVEN BY Laborie, ITS DEALERS, DISTRIBUTORS, AGENTS, OR EMPLOYEES SHALL CREATE A WARRANTY OR IN ANY WAY INCREASE THE SCOPE OF THIS WARRANTY AND YOU MAY NOT RELY ON ANY SUCH INFORMATION OR ADVICE.
-
Page 77: Appendix A Safety Information
WML-C30 / WML-C40, with FCC-ID POOWML-C30 / POOWML-C40. The instructions, precautions and warnings in this manual should be followed by the operator to ensure safe operation and to maintain the Flowmaster in a safe condition. Therefore, the use of the Flowmaster should be restricted to qualified personnel only. - Page 78 All repairs, which are not performed by Laborie personnel are for the responsibility of the hospital. Laborie will not give any guarantee or take any responsibility for any part which has been opened, adjusted or replaced by hospital personnel. The Flowmaster may be opened for any adjustment, replacement, maintenance or repair by Laborie-qualified personnel only.
- Page 79 The system consists of delicate equipment. Installation WARNING Safety can be violated if one of the Flowmaster modules shows visible damage. WARNING Do not attempt to open one of the Flowmaster modules. WARNING Do not place any equipment in front of the mains plug, to isolate the system the mains plug must remain easy accessible.
- Page 80 IEC 60950 and/or UL 1950. Flowsensor (Mk III) WARNING Never use another power supply other than the Laborie one. CAUTION Do not drop or throw the flowsensor. Do not apply excessive force on the flowsensor (maximum 3.5 kg) or let things drop on the flowsensor.
- Page 81 Never turn off the computer when the Laborie Flowmaster software program is still active. You may lose data. CAUTION The Flowmaster will record flow only when there is a Bluetooth connection between computer and flowsensor. CAUTION Automatic safeguards built into the software should be seen as an aid.
- Page 82 Before repair always take antistatic precautions. Although precautions have been taken in this apparatus to prevent malfunctions due to abnormal environmental conditions and/or abnormal handling, such malfunction can occur in some circumstances. Flowmaster User’s and Service Manual | LBL-000990 [B] Appendix A...
- Page 83 • handling by unqualified staff. Provided such or similar conditions do not occur, this apparatus will prove to be durable and reliable. NOTE Check the functionality of Flowmaster regularly with the hardware test (diagnostic) program. Safety regulations Module Protection Class...
-
Page 84: Appendix B Explanation Of Symbols
Appendix B Explanation of Symbols This appendix explains the symbols on the Flowmaster system Follow instructions for use Caution, consult instructions of use Consult operating instructions. Caution: Federal law restricts this device to sale by or on the order of a physician Protected against dripping water. - Page 85 UKCA marking Authorized representative in the European Community Authorized representative in Switzerland UK responsible person Nationally Recognized Testing Laboratories Atmospheric pressure range 700 hPa to 1060 hPa. Flowmaster User’s and Service Manual | LBL-000990 [B] Explanation of symbols...
- Page 86 Storage Conditions: Relative humidity range 15% to 90%, non- condensing. Transport Conditions: Temperature range -25°C to + 70°C. Transport Conditions: Relative humidity range ≤ 90%, non- condensing. This device uses a RF transceiver for data transfer purposes. Flowmaster User’s and Service Manual | LBL-000990 [B] Appendix B...
- Page 87 Explanation of SN-number SN YYXXNNNN Serial Number 2 digit manufacturing year number 1 or 2 digit product identification number NNNN 4 digit incrementing unique number Flowmaster User’s and Service Manual | LBL-000990 [B] Explanation of symbols...
- Page 88 Explanation of PE-number PEYY-FXXXXNNNN Peripheral Equipment. 2 digit manufacturing year number. Product group number. XXXX 3 or 4 digit unique module abbreviation. NNNN 4 digit incrementing unique number. Flowmaster User’s and Service Manual | LBL-000990 [B] Appendix B...
-
Page 89: Appendix C Flowmaster Setup
Appendix C Flowmaster Setup Flowmaster User’s and Service Manual | LBL-000990 [B]... -
Page 90: Electromagnetic Compatibility
• The equipment should be visually inspected regularly for damaged cables and connectors. Damaged cables should be replaced. • If the Flowmaster system is used in a location near (e.g. less than 1,5 km from) AM, FM or TV broadcast antennas, it may be necessary to take preventive actions for reducing the EM interfering level (for instance by shielding the investigation room). - Page 91 Guidance and manufacturer’s declaration – electromagnetic immunity The Flowmaster is intended for use in the electromagnetic environment specified below. The customer or the user of the Flowmaster should assure that it is used in such an environment. When the Flowmaster system is exposed to electromagnetic (EM) disturbances, the system may show abnormal behavior.
- Page 92 Guidance and manufacturer’s declaration – electromagnetic immunity The Flowmaster is intended for use in the electromagnetic environment specified below. The customer or the user of the Flowmaster should assure that it is used in such an environment. Flowmaster User’s and Service Manual | LBL-000990 [B]...
- Page 93 When the Flowmaster system is exposed to electromagnetic (EM) disturbances, the system may show abnormal behavior. For instance, the measured traces may be become obscured, the software may crash or, in case of very high level transient voltage events like for instance ESD, parts of the system may even become defective.
- Page 94 WARNING: Portable RF communications equipment (including peripherals such as antenna cables and external antennas) should be used no closer than 30 cm (12 inches) to any part of the Flowmaster system, including cables specified by the manufacturer. Otherwise, degradation of the performance of this equipment could result.
- Page 95 Rated maximum Separation distance in accordance to frequency of output power transmitter of transmitter 150 kHz to 80 80 MHz to 800 800 MHz to 2,5 d = 0,58 d = 0,88 d = 1,75 0.01 0.06 0.09 0.18 0.18 0.28 0.55 0.58...
Need help?
Do you have a question about the Flowmaster and is the answer not in the manual?
Questions and answers