
Related Manuals for Daikin EWAT-B-C


Summary of Contents for Daikin EWAT-B-C
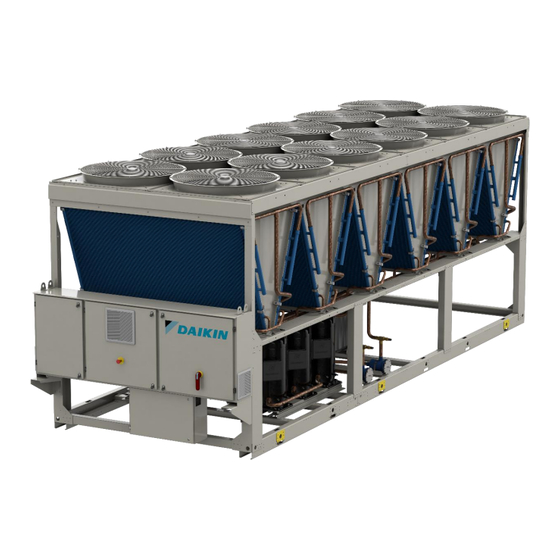
- Page 1 Date 09-2024 Supersedes D-EIMAC01802-23_04EN Installation, Operation and Maintenance Manual D-EIMAC01802-23_05EN Air Cooled Chiller with Scroll Compressors EWAT~B-C EWFT~B-C Original instructions...
-
Page 2: Table Of Contents
Contents INTRODUCTION ..............................9 Precautions against residual risks......................... 9 General description ............................. 10 Information about the refrigerant ......................... 10 Usage ................................. 10 Installation information ............................10 RECEIVING THE UNIT ............................13 OPERATING LIMITS ............................14 Storage ................................14 Operation limits ..............................14 MECHANICAL INSTALLATION ......................... - Page 3 Fig. 2 - Refrigerant circuit diagram (P&ID) standard dual circuit unit ................... 5 Fig. 3–Hydronic freecooling system (P&ID) ......................... 7 Fig. 4– EWAT-B-C Silver Operational limits ........................14 Fig. 5– EWAT-B-C Gold Operational limits ........................15 Fig. 6– EWFT-B-C Silver Operational limits ........................16 Fig.
-
Page 4: Fig. 1- Refrigerant Circuit Diagram (P&Id) Standard Single Circuit Unit
Fig. 1– Refrigerant circuit diagram (P&ID) standard single circuit unit D-EIMAC01802-23_05EN- 4/51... -
Page 5: Fig. 2 - Refrigerant Circuit Diagram (P&Id) Standard Dual Circuit Unit
Fig. 2 - Refrigerant circuit diagram (P&ID) standard dual circuit unit D-EIMAC01802-23_05EN - 5/51... - Page 6 LEGEND DESCRIPTION SCROLL COMPRESSOR (TANDEM CONF.) MICROCHANNEL COIL CONDENSER ANGLE VALVE DRIER FILTER MOISTURE SIGHT GLASS (only for model with ETS12C expansion valve) ELECTRONIC EXPANSION VALVE RECEIVER VALVE (1/4” SAE FLARE) PRESSURE RELIEF VALVE LP 25,5 barg 3/8” PRESSURE RELIEF VALVE HP 45 barg 3/4” ACCESS FITTINGS ¼”...
-
Page 7: Fig. 3-Hydronic Freecooling System (P&Id)
Fig. 3–Hydronic freecooling system (P&ID) D-EIMAC01802-23_05EN - 7/51... - Page 8 LEGEND DESCRIPTION ACCESS FITTING 1/4” NPT VALVE SAFETY VALVE 10 BAR 1/2” MF AIR VENT 3/8” NPT /TBC) DRAIN 1/4” NPT WATER FILTER TWO WAY VALVE MOTORIZED FILTER FREECOOLING COIL FLOWSWITCH FITTING 1/2” or 1”G WATER IN LINE WATER IN MANIFOLD WATER IN COIL WATER OUT COIL (FLEXIBLE) WATR OUT MANIFOLD...
-
Page 9: Introduction
INTRODUCTION This manual is an important supporting document for qualified personnel, but it is not intended to replace such personnel. READ THIS MANUAL CAREFULLY BEFORE INSTALLING AND STARTING UP THE UNIT. IMPROPER INSTALLATION COULD RESULT IN ELECTRIC SHOCK, SHORT-CIRCUIT, LEAKS, FIRE OR OTHER DAMAGE TO THE EQUIPMENT OR INJURE TO PEOPLE. -
Page 10: General Description
EWAT_B units are designed and built for cooling buildings or industrial processes. The first commissioning on the final plant must be carried out by Daikin technicians, specifically trained for this purpose. Failure to follow this start-up procedure affects the warranty of the supply. - Page 11 In paragraph “Additional guidelines for safe use of R32” there are provided additional information that should be added to the requirements of safety standards and building codes. Additional guidelines for safe use of R32 for equipment located in the open air Refrigerating systems sited in the open air shall be positioned to avoid leaked refrigerant flowing into a building or otherwise endangering people and property.
- Page 12 • At least one detector shall be installed in each machinery room or the occupied space being considered and/or at the lowest underground room for refrigerants heavier than air and at the highest point for refrigerants lighter than air. • Detectors shall be continuously monitored for functioning.
-
Page 13: Receiving The Unit
The restitution of the machine is intended as ex-factory Daikin Applied Europe S.p.A. Daikin Applied Europe S.p.A. declines all responsibility for any damage that the machine may suffer during transport to the destination. Use extreme caution when handling the unit to prevent damage to components. -
Page 14: Operating Limits
0÷10 °C lower than the outlet water temperature. Ref.4 Ref.2 Ref.1 Ref.3 ELWT[°C] Fig. 4– EWAT-B-C Silver Operational limits Outside ambient air temperature ELWT Evaporator leaving water temperature Ref 1 Operation with ELWT < 4 °C requires option 08 (brine) and glycol Ref 2 Operation with ELWT >... -
Page 15: Fig. 5- Ewat-B-C Gold Operational Limits
Refer to the CSS selection software for the actual operating limits in the working conditions for each model. Ref.4 Ref.1 Ref.2 Ref.3 ELWT[°C] Fig. 5– EWAT-B-C Gold Operational limits Outside ambient air temperature ELWT Evaporator leaving water temperature Ref 1 Operation with ELWT < 4 °C requires option 08 (brine) and glycol Ref 2 Operation with ELWT >... -
Page 16: Fig. 6- Ewft-B-C Silver Operational Limits
Ref.2 Ref.1 ELWT[°C] Fig. 6– EWFT-B-C Silver Operational limits Outside ambient air temperature ELWT Evaporator leaving water temperature Ref 1 Operation with ELWT > 18 °C requires option 187 (high evaporator leaving water temperature) Ref 2 Operation requires option 142 (High ambient temperature kit) The charts shown above constitute a guideline on operating limits in the range. -
Page 17: Fig. 7- Ewft-B-C Gold Operational Limits
Ref.2 Ref.1 ELWT[°C] Fig. 7– EWFT-B-C Gold Operational limits Outside ambient air temperature ELWT Evaporator leaving water temperature Ref 1 Operation with ELWT > 18 °C requires option 187 (high evaporator leaving water temperature) Ref 2 Operation requires option 142 (High ambient temperature kit) The charts shown above constitute a guideline on operating limits in the range. - Page 18 AAT(2) A(1) AAT(2) B(1) Legend: AAT = Ambient air temperature (°C) (2) A = Ethylene glycol (%) (1) B = Propylene glycol (%) (1) (1) Minimum percentage of glycol to prevent freezing of the water circuit at the indicated ambient air temperature (2) Ambient air temperature that exceeds the operating limits of the unit.
-
Page 19: Mechanical Installation
MECHANICAL INSTALLATION Safety The unit must be firmly secured to the soil. It is essential to observe the following instructions: − The unit can only be lifted using the lifting points marked in red fixed to its base. − It is forbidden to access the electrical components without having opened the unit main switch and switched off the power supply. - Page 20 All units of the series are supplied with lifting points marked in red. Only these points may be used for lifting the unit, as shown in the following figure. Use spacing bars to prevent damage to the condensation bank. Position these above the fan grills at a distance of at least 2.5 meters.
-
Page 21: Safety Hook
Unit with 8 lifting points The drawing shows only the 16 fans version. The lifting mode is the same regardless of the number of fans. Fig. 8– Lifting instructions Consult the dimensional drawing for the hydraulic and electrical connection of the units. The overall dimensions of the machine, as well as the weights described in this manual, are purely indicative. -
Page 22: Lifting Shackles
Fig. 9– Lifting hook characteristics Fig. 10– Lifting hook installation 4.2.2 Lifting shackles In the absence of a suitable lifting hook, lifting shackles can be used. Size Dimensons weght Load 4151 4153 G4151 G4153 Capacity Inches [mm] [mm] [mm] [mm] [mm] [mm] [mm]... -
Page 23: Positioning And Assembly
Fig. 12– Lifting shackles installation Positioning and assembly All units are designed for installation outdoors, i.e. on balconies or on the ground, provided that the installation area is free of obstacles that could reduce air flow to the condensers coil. The unit must be installed on a robust and perfectly level foundation;... -
Page 24: Minimum Space Requirements
Fig. 13– Unit levelling Minimum space requirements It is fundamental to respect minimum distances on all units to ensure optimum ventilation to the condenser coils. When deciding where to position the unit and to ensure a proper air flow, the following factors must be taken into consideration: −... -
Page 25: Fig. 14- Minimum Space Requirements
If h<Hc→ L≥ 3,0 m (multi V) / L≥ 1,8 m (single V); if h>Hc or L is lower than recommended contact your Daikin distributor to evaluate the various possible arrangements. Fig. 14– Minimum space requirements The minimum distances, reported above, ensure functionality of the chiller in most applications. However, there are specific situations which include multiple chiller installation;... -
Page 26: Fig. 15- Multiple Chiller Installation
Fig. 15– Multiple Chiller Installation D-EIMAC01802-23_05EN- 26/51... -
Page 27: Installation Of Hydronic Free-Cooling Piping Shipped Loose
Installation of hydronic free-cooling piping shipped loose EWFT-B-C free cooling units, particularly those with 4 and 6 fans, may have part of the hydronic circuit piping outside the unit footprint (see Fig.16). The piping outside the unit footprint is disassembled after production test and shipped loose (pre-assembled for quick installation) to avoid possible piping breakage and problems during transport of the unit. -
Page 28: Noise And Sound Protection
Noise and sound protection The unit is a source of noise mainly due to rotation of compressors and fans. The noise level for each model size is listed in sales documentation. If the unit is correctly installed, operated and maintained, the noise emission level does not require any special protection device to operate continuously close to the unit without any risk. -
Page 29: Water Circuit For The Connection Of The Unit
Fix the damper with the screw: hold the screw and turn the damper anticlockwise. Fig. 20– Detail of the anti-vibration damper installation. Adjustment: Finish tightening the vibration damper with the nut. For both single and double spring dumpers, the final position of the anti-vibration dumper must be perpendicular to the frame (as shown below). -
Page 30: Installing The Flow Switch
Recommended maximum opening for strainer mesh is: • 1.0 mm (BPHE) • 0.87 mm (DX S&T) • 1.2 mm (Flooded) 9. Evaporator with an electrical heater controlled by the unit logic that ensures protection against water freezing at water temperatures lower than antifreeze setpoint. All the other water piping/devices outside the unit must therefore be protected against freezing. -
Page 31: Heat Recovery
BPHE Model Minimum evap. water flow (l/s) ACK240EQ_AH_170_MONO ACK240EQ_AH_202_MONO ACK240DQ_AH_102_DUAL ACK240DQ_AH_146_DUAL ACK240DQ_AH_202_DUAL ACK240DQ_AH_262_DUAL ACK540DQ_AH_210_DUAL 16.2 ACK540DQ_AH_270_DUAL ACK540DQ_AH_318_DUAL 22.6 DX S&T Model Minimum evap. water flow (l/s) EV.U.50190099/09.D_R32 EV.U.50191212/07.D_R32 13.4 EV.U.50191212/07.D_R32 EV.U.50191212/07.D_R32 4.7.3 Heat recovery Units may be optionally equipped with heat recovery system. This system is made by a water-cooled heat exchanger located on the compressors discharge pipe and a dedicated management of condensing pressure. -
Page 32: Hydronic Freecooling System
capacity. Pressure drop can increase as well, thus reducing water flow. Proper water treatment therefore reduces the risk of corrosion, erosion, scaling, etc. The most appropriate water treatment must be determined locally, according to the type of system and water characteristics. The manufacturer is not responsible for damage to or malfunctioning of equipment caused by failure to treat water or by improperly treated water. -
Page 33: Fig. 24- Closed Loop Hydronic Free Cooling P&Id (Opt. 231)
Fig. 24– Closed loop Hydronic Free cooling P&ID (Opt. 231) LEGEND DESCRIPTION INVERTER DRIVEN PUMP ACCESS FITTING ¼” NPT PLUGGED FITTING ¼” NPT – 6mm PLUGGED FITTING ¼” NPT – 4mm RECEIVER VALVE 1” VALVE SAFETY VALVE 6 BAR 253056 ¾” F AIR VENT 3/8”... -
Page 34: Coolant Quality Requirements
Water inlet and outlet are indicative. Please refer to the machine dimensional diagrams for exact water connections. DESIGN CONDITION LINE PS [bar] TS [°C] CLOSED LOOP L6; L7; L8; L9 -10/+30 EVAPORATOR WATER IN/OUT L1; L2; L3; L4; L5 +4/+30 Table 5 - Legend Closed loop Hydronic Free cooling P&ID 4.9.3 Coolant quality requirements... -
Page 35: First Operations At Unit Commissioning Start
4.9.4 First operations at unit commissioning start Free cooling section is pressurized before shipping up withup to 2 bar of dry air. To do so, it was necessary to disable free cooling by PLC and close manually the valve ”d” (see. Fig. 3); valve ”1” will close automatically when disabling free cooling. When commissioning the unit (both standard and closed loop free-cooling unit), it is necessary to: Open valve ”d”... -
Page 36: Anti-Freeze Protection For Evaporator And Recovery Exchangers
Make sure that appropriate anti-freeze protection is always maintained. Failing to follow the instructions above could result in unit damage. Damage caused by freezing is excluded from the warranty, therefore Daikin Applied Europe S.p.A declines all responsibility... -
Page 37: Electrical Installation
Provide an electrical circuit to connect the unit. It must be connected to the copper cables with an adequate section relative to the plate absorption values and according to the current electrical standards. Daikin Applied Europe S.p.A. declines all responsibility for an inadequate electrical connection. The connections to the terminals must be made with copper terminals and cables, otherwise overheating or corrosion may occur at the connection points with the risk of damaging the unit. -
Page 38: Cable Requirements
Do not apply torque, tension or weight to the main switch terminals. Power line cables must be supported by appropriate systems. To avoid interference, all control wires must be connected separately from the power cables. To do this, use several electrical passage ducts. -
Page 39: Electrical Panel Label Description
Electrical panel label description Fig. 25– Description of labels applied on the electrical panel small Fig. 26– Description of labels applied on the electrical panel medium. Label Identification 1 – Manufacturer logo 5 – Cable tightening warning 2 – Gas type 6 –... -
Page 40: Operator's Reponsibilities
OPERATOR'S REPONSIBILITIES It is essential that the operator is appropriately trained and becomes familiar with the system before operating the unit. In addition to reading this manual, the operator must study the microprocessor operating manual and the wiring diagram to understand start-up sequence, operation, shutdown sequence and operation of all the safety devices. -
Page 41: Maintenance
MAINTENANCE Personnel working on the electrical or the refrigeration components must be authorized, trained and fully qualified. Maintenance and repair requiring the assistance of other skilled personnel should be carried out under the supervision of the person competent in the use of flammable refrigerants. Any person conducting servicing or maintenance on a system or associated parts of the equipment should be competent according to EN 13313. -
Page 42: Pressure / Temperature Table
Pressure / temperature table Table 8– Pressure / Temperature of the R32 °C °C °C °C 2.97 7.62 16.45 31.41 3.22 8.13 17.35 32.89 3.48 8.67 18.30 34.42 3.76 9.23 19.28 36.00 4.06 9.81 20.29 37.64 4.37 10.43 21.35 39.33 4.71 11.07 22.45... -
Page 43: Electrical Maintenance
Clean the surface of free cooling coils, if present, uniformly from top to bottom, by putting the jet in front of the coils with a right angle to the surface (90°). Note: Use of a water stream, such as a garden hose, against a surface loaded coil will drive the fibres and dirt into the coil. This will make cleaning efforts more difficult. - Page 44 Table 9– Standard Routine Maintenance Plan List of Activities Weekly Monthly Half Yearly Annual/Seasonal (Note 1) (Note 2) General: Reading of operating data (Note 3) Visual inspection of unit for any damage and/or loosening Verification of thermal insulation integrity Clean and paint where necessary Analysis of water (4) Check of flow switch operation Electrical Installation:...
- Page 45 Table 10– Routine Maintenance Plan for Critical Application and/or Highly Aggressive Environment List of Activities (Note 8) Weekly Monthly Six-monthly Yearly/Seasonal (Note 1) (Note 2) General: Reading of operating data (Note 3) Visual inspection of unit for any damage and/or loosening Verification of thermal insulation integrity Cleaning Paint where necessary...
-
Page 46: Checks For The First Start-Up
Provide the main voltage and check that it is within ± 10% of the classification given on the nameplate. Note This list must be completed and sent to the local Daikin Service office at least two weeks before the start date. D-EIMAC01802-23_05EN- 46/51... -
Page 47: Important Information On The Refrigerant Used
IMPORTANT INFORMATION ON THE REFRIGERANT USED This product contains fluorinated greenhouse gases. Do not vent gases into the atmosphere. Refrigerant type: GWP Value (global warming potential): Factory and Field charged units instructions. The refrigerant system is charged with fluorinated greenhouse gases and the refrigerant charge is impressed on the plate, shown below, which is applied inside the electrical panel. -
Page 48: 10 Periodic Checks And Commissioning Of Pressure Equipment
10 PERIODIC CHECKS AND COMMISSIONING OF PRESSURE EQUIPMENT The units are included in category III and IV of the classification established by the European Directive 2014/68/EU (PED). For chillers belonging to these categories, some local regulations require a periodic inspection by an authorized person. Please check with your local requirements. -
Page 49: 11 Dismission And Disposal
11 DISMISSION AND DISPOSAL The unit is made of metal, plastic, and electronic parts. All these components must be disposed of in accordance with local disposal laws and if in scope with the national laws implementing the Directive 2012/19/EU (RAEE). Lead batteries must be collected and sent to specific waste collection centres. -
Page 50: 12 Duration
12 DURATION After this period the manufacturer advises to carry out a total control of the whole and above all the integrity check of the pressurized refrigeration circuits, as required by the laws in force in some European Community countries. D-EIMAC01802-23_05EN- 50/51... - Page 51 The present publication is drawn up only for technical support and it does not constitute a binding commitment for Daikin Applied Europe S.p.A.. Its content has been written by Daikin Applied Europe S.p.A. to the best of its knowledge. No explicit or implied warranty is given for the completeness, accuracy, reliability of its contents.
Need help?
Do you have a question about the EWAT-B-C and is the answer not in the manual?
Questions and answers