E-Collar Technologies 300, 302, ZEN-302 - E-Collar Dog Training Manual
- Owner's manual (36 pages)
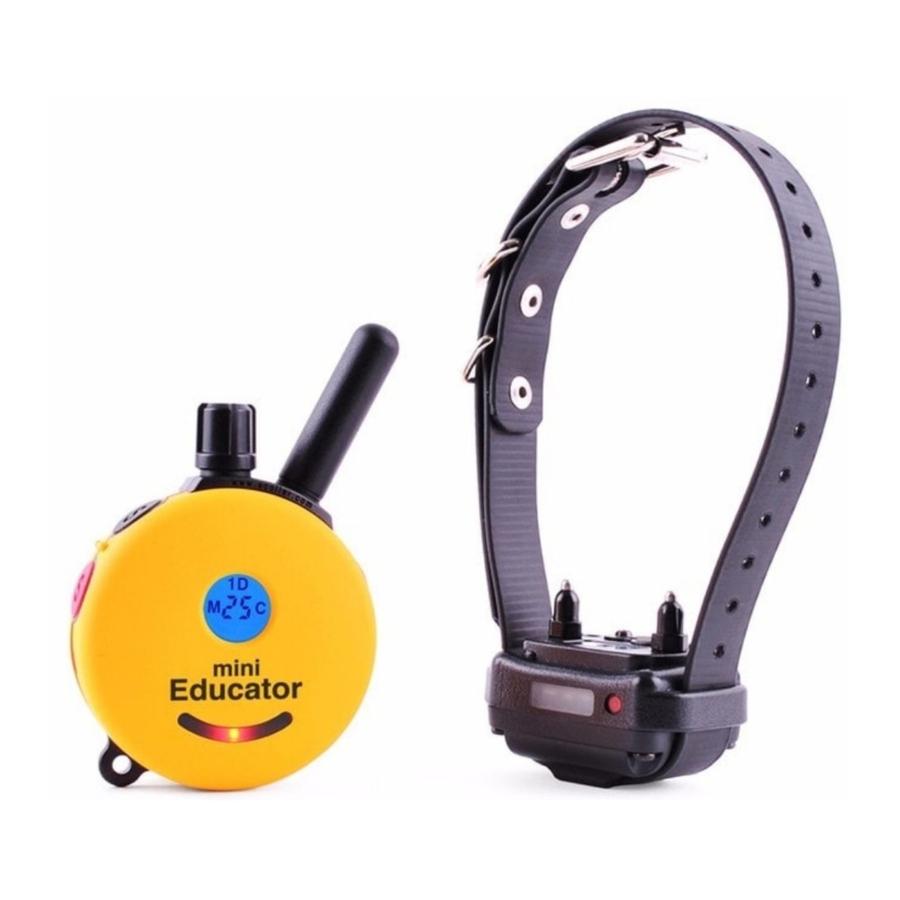
Advertisement
- 1 CHARACTERISTICS
- 2 Package CONTENTS
- 3 DEVICE OPERATION
- 4 CHARGING THE BATTERIES
- 5 TURNING YOUR E-COLLAR ON/OFF
- 6 CORRECTLY FITTING COLLAR
- 7 THE LCD DISPLAY DESCRIPTION
- 8 BUTTON FUNCTIONS
- 9 HOW TO FIND THE PROPER STIMULATION LEVEL
- 10 LOCK/UNLOCK THE STIMULATION LEVEL
- 11 HOW TO SET THE BOOST
- 12 LOST TRANSMITTER MODE
- 13 REPLACE/ADD COLLAR
- 14 302 LCD DESCRIPTION
- 15 302 BUTTON FUNCTIONS
- 16 HOW TO LOCK/UNLOCK THE STIMULATION LEVEL
- 17 302 BOOST LEVEL SETUP
- 18 TESTING YOUR E-COLLAR
- 19 REPLACING THE CONTACT POINTS
- 20 TRAINING TIP
- 21 TROUBLESHOOTING
- 22 ACCESSORIES
- 23 Important Notice
- 24 Documents / Resources
CHARACTERISTICS
- Range: 1/2 Mile
- Three Stimulation Modes Supported
(Momentary, Continuous, and Combo Mode) - Tapping Sensation or Tone Stimulation (Pavlovian Conditioning)
Tapping Sensation: Alternative to Stimulation (give vibration similar to a Cell Phone)
Tone Stimulation: After 1.2 seconds of tone, the collar will send stimulation as long as button is pressed (up to 10 seconds), leads to "Pavlovian Conditioning" whereby the dog responds to the tone. - Quick Charge Li-Polymer Batteries
- Convenient Intensity Dial for Quick Adjustment
- Stimulation Levels Adjustable from 0 to 100
- Collar Receiver Light for Locating Your Dog at Night
- Lock and Set Stimulation Safety Feature
- Stimulation Boosting Mode provides instant control when normal stimulation is ignored - great for emergency situations
- User Adjustable Boosting Levels from 1 to 60 Levels
- Completely Waterproof
- Convertible from 1-Dog model (300) to 2-Dog model (302)
Package CONTENTS

DEVICE OPERATION

CHARGING THE BATTERIES
Indicator Light is Blinking "Green" under normal operation.
Solid "Red" when stimulation is applied.
Blinking "Red" when recharging is required.
Do not allow the batteries to get hot or be fully discharged, store at room temperature and 50% capacity charge.
- Transmitter Battery Charging Receptacle and Rubber Cover
![]()
- Collar Receiver Battery Charging Receptacle and Rubber Cover
![]()
![]()
![]()


The indicator light will turn solid red during charge cycles and turn green if it is fully charged (approximately 2 hours).
Please add this about the batteries:
Your e-collar is outfitted with Li-Polymer batteries which requires specific care to assure longevity. It is best not to let the battery be fully discharged and if it does, recharge immediately or irreversible damage may occur. Keep the units away from extreme heat and cold temperatures.
TURNING YOUR E-COLLAR ON/OFF
- To Turn the Collar Receiver On or Off:
Place the small red dot on the Transmitter to the small red dot on the Collar Receiver.

- To Turn the Transmitter On or Off:
Press the "L" button for more than 1 second.
If the Transmitter is turned on, a short press of the "L" button will activate the tracking light of the collar receiver. Press and hold for 2 seconds to turn Transmitter off.
![]()
- Holding the Transmitter
To obtain the maximum range hold the transmitter like the torch on the Statue of Liberty. Keep the antenna away from your body and fingers at all times, touching the antenna will greatly reduce the range.
![]()


CORRECTLY FITTING COLLAR
The collar should be adjusted to allow the "contact points" to have direct contact with the skin. You should be able to fit a couple of fingers between the collar strap and your dog's skin. Too tight poses the risk of skin irritation and discomfort. Too loose and the contact points will not be able to administer the stimulation reliably and can cause skin irritation due to chafing. Short hair breeds may need the 3/8" microprobes offered as an accessory item, contact customer service for details. The optimal position for the collar receiver is on either side of the dog's windpipe. If the factory installed 5/8" contact points are not making good contact due to thick fur, see "Replacing the Contact Points" for changing contact point.


To prevent the occurrence of skin irritations the Collar Receiver should never be worn for more than 12 hours per day. Should your dog experience skin irritations from over exposure to the contact points remove the collar receiver unit immediately and stop using your e-collar until all skin irritations are completely healed. Antibiotic ointment will aid in the healing process. Some dog breeds have extra thick fur or extra short fur that requires special contact points. Please contact our customer service or visit www.ecollar.com for more information.
THE LCD DISPLAY DESCRIPTION

Momentary/Continuous Button "M/C" - The M/C Button on the backside of the transmitter allows the user to easi y switch between the three stimulation modes. The function of stimulation buttons changes by mode.

To Change the mode: Press and hold the M/C button for 2 seconds to enter change mode indicated by a beep. Then Press and release the M/C button to change from M(Momentary) to C(Continuous) to M+C (Combo-Momentary/Continuous) stopping on the desired mode.
| Stimulation Button | Combo Mode | Momentary Mode | Continuous Mode |
| Display |  |  |  |
| S (Black) | Momentary | Momentary | Continuous |
| S (Red) | Continuous | Momentary Booster | Continuous Booster |
| S (Black) + S (Red) | Momentary Booster | N/A | N/A |
| S (Red) + S (Black) | Continuous Booster | N/A | N/A |
| T | Tapping Sensation or Tone Stimulation | ||
BUTTON FUNCTIONS
Momentary Stimulation
Sends a single pulse of stimulation at the set level when you press stimulation button.
Continuous Stimulation
Sends pulses of stimulation for as long as the button is pressed, timing out after 10 seconds (this is a safety feature designed to prevent accidental over-stimulation of your dog). The stimulation can be increased or decreased while the button is being pressed.
Tapping Sensation
Vibration specifically designed to distract your dog, great for deaf dogs and stimulation sensitive dogs.
Tone followed by Stimulation (Pavlovian Conditioning)
After 1.2 seconds of tone, the collar will administer continuous stimulation for as long as the button is pressed (up to 10 seconds). Release before 1.2 seconds for tone only.
Stimulation Button S (Black)
- Sends momentary or continuous stimulation to the col ar receiver based on the state of Momentary/Continuous Mode.
Stimulation Button S (Red)
- Sends momentary or continuous boosted stimulation.
- If stimulation level is 10, boosted stimulation sends [10 + boost level].
- The default value of the boosted level is 5, it can be adjusted to any value between 1 and 60. Smaller and more sensitive breeds should use levels 1 through 20, larger and/or more stubborn breeds may need a higher boost.
Boosting Stimulation in Combo Mode
Momentary Boosting is accomplished by first sending a momentary stimulation pu se "S (Black)" to the dog and then pressing "S (Red)" button without releasing "S (Black)" button. (PLEASE PRACTICE)
Continuous Boosting is accomplished by first administering continuous stimulation "S (Red)" to the dog and then pressing the "S (Black)" button without releasing the "S (Red)" button.
Tapping Sensation (Vibration)/Tone Stimulation "T"
Sends Tapping Sensation or Tone Stimulation to the collar receiver. (Default setting is tapping sensation)
To toggle between tapping sensation and tone stimulation, press "L" and "T" buttons simultaneously when the intensity level is "0".
- Single beep and "A" icon indicates Tone followed by Stimulation.
- Double beeps and "T" icon indicates Tapping Sensation (Vibration).
![]()

Light Button "L" (ON/OFF Center Button on Back)
Pressing "L" button will change the night tracking light mode.
OFF > Flashing > Solid > OFF
Great for locating your dog after dark. (PLEASE PRACTICE)
HOW TO FIND THE PROPER STIMULATION LEVEL
Rotating clockwise increases the stimulation level, and rotating counter-clockwise lowers the stimulation level.

It is highly recommended that the user practices changing levels and modes before putting the collar receiver on a dog.
Setting the correct stimulation level for your dog is very important. To set your "conditioning" stimulation level, correctly put the collar receiver on your dog. Let the dog get used to the collar receiver for a couple of hours.
While watching your dog, turn the level to "0" and press the continuous stimulation button. Slowly turn the stimulation up at a rate of approximately 2-3 levels per second. When your dog first perceives the stimulation, usually between 5 and 20, release the button. This is your "conditioning" stimulation level. You may need to increase the "conditioning" level a few levels to get your dog to respond at first, some dogs are more stubborn and need more stimulation. The boosted level is typically 5 to 20 levels higher than the "conditioning" level.
LOCK/UNLOCK THE STIMULATION LEVEL
How to Lock/Unlock the Stimulation Level
Set the desired stimulation level and then press on the top of the stimulation dial until you see "1D" light up on the top portion of the LCD display. Flashing "1D" indicates unlocked stimulation and Solid "1D" indicates locked stimulation.
If the stimulation level does not change when you rotate the stimulation knob, you have successfully locked the stimulation level.
To unlock the stimulation level simply press the stimulation knob again and it will unlock the stimulation level.

HOW TO SET THE BOOST
Boosted Stimulation adds the set boost level to the stimulation level, great for those situations when your dog does not respond to the "conditioning" level. Determining the Boosted stimulation level is a little more difficult than stimulation level setting due to the wide differences in temperaments and stimulation tolerance among the many breeds of dogs. On average, it is normally 5 to 20 levels higher than the "conditioning" level. It is important to have it set high enough to get the desired response from your dog.
- Change the mode to Momentary Mode.
(Press M/C button until "M" is displayed) - Change the intensity level to "0".
- Press S (Black) button for more than 5 seconds.
- The intensity level will change from "0" to a flashing "1".
- Rotate the dial to the desired boost level (1 to 60).
- Press S (Black) button again to save and exit the boost level changing mode.
LOST TRANSMITTER MODE
Your 300/302 E-Collar transmitter allows the user to activate a 6 hour timer. After 6 hours, the transmitter will begin to beep providing the ability to locate the transmitter. The LCD displays "AL" during beeping.
Lost transmitter mode is activated by simultaneously pressing the Light (L) button and the stimulation button (Black "S") when the intensity level is set to zero. Three short beeps will sound confirming the activation of the locator timer.
Lost transmitter mode is deactivated by simultaneously pressing the Light (L) button and the red stimulation button (Red "S") when the intensity level is set to zero. Two short beeps will sound confirming the deactivation of the locator timer.
Lost transmitter mode will be cancelled whenever the transmitter is turned off. Make sure to reactivate lost transmitter mode when you turn off transmitter.

REPLACE/ADD COLLAR
Occassionally, it is necessary to pair/sync a transmitter to a collar receiver, the following procedure will accomplish this:
- Turn on the Transmitter
- Turn intensity dial to "0"
- Make sure the collar receiver is turned off.
- Put the Transmitter's Red Dot against the Collar Receiver's Red Dot for more than 5 seconds, green light on Receiver will flash rapidly
- Immediately after, press and hold Black "S" Button followed by the Red "S" Button until you hear confirmation sound from Collar Receiver.
HOW TO CHANGE THE TRANSMITTER TO A 2 DOG TRANSMITTER
The button functions will change. You can change the transmitter back to the 1Dog system (300) at any time.
- Turn on the Transmitter.
- Press the Red "S" followed by the Black "S" followed by the "T" Button simultaneously for more than 2 seconds until you hear the confirmation beeps.
- Repeat step 2 to return back to a 1 dog system.
ADD/REPLACE COLLAR FOR SECOND DOG
- Turn on the Transmitter
- Turn intensity dial to "0"
- Make sure Receiver is turned off.
- Put the Transmitter's Red Dot against the Collar Receiver's Red Dot for more than 5 seconds, green light on Receiver will flash rapidly.
- Immediately after, press and hold Red "S" Button followed by the Black "S" Button until you hear confirmation sound from Collar Receiver.
302 LCD DESCRIPTION

Momentary/Continuous Button "M/C" - M/C Button on the backside of the transmitter allows the user to easily switch between two stimulation modes either momentary or continuous.
| Button | Stimulation (ID or 2D) | TS(Vibration) or Tone Stimulation | |
| M/C Button | Momentary Mode | Continuous Mode | N/A |
| Display |  |  |  |
| S (Black) | Dog 1 Momentary | Dog 1 Continuous | Dog 1 TS (Vib) or Tone Stimulation |
| S (Black) + S (Red) | Dog 1 Momentary Booster | Dog 1 Continuous Booster | N/A |
| S (Red) | Dog 2 Momentary | Dog 2 Continuous | Dog 2 TS (Vib) or Tone Stimulation |
| S (Red) + S (Black) | Dog 2 Momentary Booster | Dog 2 Continuous Booster | N/A |
| L | "L" in Dog 1 set mode will control Dog 1 light "L" in Dog 2 set mode will control Dog 2 light | N/A | |
302 BUTTON FUNCTIONS
Mode Button "T"
Mode button allows the user to change modes as shown in the diagram

1 Dog Set Mode - LCD display shows 1D
2 Dog Set Mode - LCD display shows 2D
Tapping Sensation or Tone Stimulation- LCD display a T
Light Button (On Back) "L"
When the "L" button is pressed, "L" will be displayed.
If you press L while in Dog 1 Mode, Dog 1's Light will activate.
If you press L while in Dog 2 Mode, Dog 2's Light will activate.
Tracking Light will Cycle: Flashing > Solid > OFF when L is pressed.
Tapping Sensation/Tone and Pavlovian Stimulation "T"
To toggle between tapping sensation and pavlovian stimulation press "L" and "T" buttons simultaneously for 2 seconds when the intensity level is "0".
- Single beep and "A" icon indicates pavlovian stimulation.
- Two beeps and "T" icon indicates tapping sensation.
Momentary stimulation
Sends a single pulse of stimulation at the set level when you press the stimulation button.
Continuous stimulation
Sends continuous pulses as long as the stimulation button is pressed, timing out after 10 seconds (this is a safety feature designed to prevent accidental over-stimulation of your dog). The stimulation can be increased or decreased while the button is being pressed.
Tapping Sensation
Vibration specifically designed to distract your dog, great for deaf dogs and stimulation sensitive dogs.
Tone followed by Stimulation (Pavlovian Conditioning)
After 1.2 seconds of tone, the collar will send continuous stimulation for as long as the button is pressed (up to 10 seconds). Release before 1.2 seconds for tone only.
Boosting Stimulation
Sends boosted stimulation until you release buttons.
To boost Dog 1, press "S" (Black) button followed by "S" (Red) button
To boost Dog 2, press "S" (Red) button followed by "S" (Black) button
HOW TO LOCK/UNLOCK THE STIMULATION LEVEL
How to Lock/Unlock the Stimulation Level
See "HOW TO FIND THE PROPER STIMULATION LEVEL" for help finding the proper stimulation level. You can lock each dog to a different level.
In 1Dog Mode, if you see "1D" icon is blinking (unlocked)
Set the desired stimulation level and then press the stimulation dial until you see "1D" icon stop blinking.
In 2Dog Mode, if you see "2D" icon is blinking (unlocked)
Set the desired stimulation level and then press the stimulation dial until you see "2D" icon stop blinking.
If the stimulation level does not change when you rotate the stimulation dial, you have successfully locked the stimulation level. To unlock the stimulation level simply press the stimulation knob again at 1Dog/2Dog mode and it will unlock the stimulation level.

302 BOOST LEVEL SETUP
Boosted Stimulation adds the set boost level to the stimulation level, great for those situations when your dog does not respond to the "conditioning" level. Determining the Boosted stimulation level is a little more difficult than stimulation level setting due to the wide differences in temperaments and stimulation tolerance among the many breeds of dogs. On average, it is normally 5 to 20 levels higher than the "conditioning" level. It is important to have it set high enough to get the desired response from your dog.
How to Setup Boost Level for first dog
- Change the mode to Momentary Mode
(Press M/C button until "M" is displayed) - Change the intensity level to "0"
- Press S(Black) button for more than 5 seconds
- The intensity level will change 0 to 1 and start to blink.
- Rotate the dial to change the boost level (up to 60).
- Press S(Black) button again to save and exit from Boost Level Change Mode. If any other button is pressed or idle for 20 sec, Boost Level Change Mode will be cancelled.
If you want to change boost level for dog 2, Press S (Red) instead of S (Black) on step #3, and #6
TESTING YOUR E-COLLAR
If you need to check your unit, hold the test light against the contact points on the collar receiver. This test will let you know that the collar receiver is generating the proper sensation to the dog, it should brighten in a smooth fashion as the dial is turned up.
Some people find it easier to hold the collar receiver in the palm of their hand and slowly turn the stimulation up using the continuous mode, a typical human feels it between 8 and 25 depending on the dryness of their hand.

Feel free to contact us if you have need help, 1-855-326-5527.
REPLACING THE CONTACT POINTS
The standard 5/8" contact points are used for most dogs. Thicker fur breeds require the longer 3/4" contact points. Replace the 5/8" contact points by following the instructions below using the enclosed contact point tool.
- Loosen both contact points by rotating the contact point counter-clockwise using the contact point tool.

- Install the 3/4" contact points onto the bolt and tighten the contact points by rotating them clockwise with the contact point tool.


* For short haired breeds such as boxers, dachshund, pit bulls, etc, and thick fur breeds please visit our website or contact us to inquire about special contact points for your dog.
TRAINING TIP
IMPORTANT TRAINING TIPS
E-Collars can be used to reinforce commands your dog already knows or as a learning sensation when paired with leash pressure. It is not a replacement for basic leash obedience training, but a tool to allow you to better communicate with your dog. For best results, use the least amount of stimulation required to get the attention of your dog. A calm and consistent approach to training will always produce better long term results. It is highly recommended that aggressive dogs be taken to a professional trainer for evaluation before e-collar use. There are many different e-collar training techniques recommended by a variety of professional trainers. We believe you, the owner of the dog, can best determine the most successful technique for your dog. We recommend first time users to emersed themselves in learning about the proper techniques or seek a professional e-collar trainer.
The technique used in the initial introduction of the e-collar is very important to the success of e-collar training. Search E-Collar Technologies on youtube and subscribe to our channel, new training videos are posted weekly. Also "Like"and subscribe to our Facebook page to receive more training advice and connect with other e-collar users.
TROUBLESHOOTING
- My Receiver/Transmitter is not turning on
A: Make sure the collar receiver is fully charged. Collar receiver light should turn green when the battery is connected to the charger. - My Receiver is not responding
A: Check Receiver's indicator light is blinking green and Transmitter LCD is on. Check to make sure the collar receiver's indicator light is red when the stimulation button is pressed.
A: Try pairing/syncing the transmitter to the receiver. - The receiver doesn't seem to provide stimulation to the dog
A: Remove Contact points from Receiver. Connect Test Light to the receiver and test for stimulation. If the test light is blinking, receiver is providing stimulation. - Max range of device has been decreased
A: Check Transmitter's battery condition. Working range decreases when the battery level is low.
Keep your fingers from touching the antenna. See "TURNING YOUR E-COLLAR ON/OFF" for the proper technique to maximize range. - You cannot change the stimulation level of the Transmitter
A: Make sure 1D or 2D on transmitter LCD is blinking. If 1D or 2D icons are solid, you cannot change stimulation. You can unlock the stimulation at any time by pressing the stimulation knob for 1 second.
ACCESSORIES


Important Notice

This product is intended to be used on DOGS ONLY.
E-Collar Technologies, Inc. is not responsible for any misuse of this product including damages from dog bites and lost items. Seek an evaluation by professional trainer before use on aggressive dogs. It is not uncommon for aggressive dogs to associate the stimulation with the handler and take action against the handler. Sometimes dogs put under e-collar pressure during a fight can exhibit redirected aggression and become more aggressive.
The use of high levels of stimulation should only be used as a last resort and in life-threatening situations.
To prevent giving stimulation to your dog by accident, keep the stimulation level below 5 while not in use.
The range of the 300/302 may vary according to terrain, weather conditions, foliage, and power lines as well as radio transmissions from other devices.
E-Collar Technologies, Inc.
2120 Forrest Park Drive
Garrett, IN 46738-1887
1-260-357-0051 (US & International)
1-855-226-5527 (US Toll Free Fax)
sales@ecollar.com
www.ecollar.com
customerservice@ecollar.com
Documents / Resources
References
Download manual
Here you can download full pdf version of manual, it may contain additional safety instructions, warranty information, FCC rules, etc.
Download E-Collar Technologies 300, 302, ZEN-302 - E-Collar Dog Training Manual
Advertisement


Need help?
Do you have a question about the 300 and is the answer not in the manual?
Questions and answers