Advertisement
SOAPY WATER TEST WARNINGS & PROCEDURES

- Soapy Water Test MUST be performed each time gas cylinder is connected to burner/hose or each time it is used.
- Soapy Water Test MUST be performed outdoors in well ventilated area.
- When performing Soapy Water Test keep smoker away from open flames, sparks or lit cigarettes.
- Smoker is designed to work with propane gas only. Only use gas cylinders marked propane with this unit. This product will NOT operate with natural gas.
- Never use an open flame to test for gas leaks.
PREPARATION:
- Remove any cookware from smoker.
- Make sure regulator and gas cylinder valve to OFF position.
- Prepare soapy water solution: (1) part dish washing liquid (or more if desired), (3) parts water.
- Apply soapy water solution to gas cylinder valve, regulator and hose length up to burner.
Apply solution to gas cylinder valve

Apply solution to hose regulator and the full length of the hose

Apply solution underneath control panel where burner and hose are connected

(Smoker shown on back for clarity only)
Failed test will present bubbles as shown below.

TESTING GAS VALVE:
- Turn gas cylinder valve ON and watch for bubbles. DO NOT LEAVE GAS ON MORE THAN 12 SECONDS. If bubbles appear, stop, turn gas cylinder OFF and retighten fitting. Repeat test.
TESTING REGULATOR AND HOSE:
- AFTER gas cylinder valve has passed Soapy Water Test, turn gas cylinder valve ON, open regulator control valve one full turn and check for bubbles at valve location, along full length of hose and at burner connection. DO NOT LEAVE GAS ON MORE THAN 12 SECONDS. If bubbles appear, stop, turn regulator valve OFF, turn gas cylinder OFF and retighten the connection that is leaking gas. If hose is source of leak, STOP, do not use unit. Hose must be replaced.
- When test is complete, and there are no leaks, wait minimum of 5 minutes for gas fumes to diminish before lighting cooker.
DURING ANY PORTION OF SOAPY WATER TEST IF BUBBLES CONTINUE TO APPEAR, STOP, DO NOT USE UNIT. CONTACT LOCAL PROPANE DEALER OR MASTERBUILT CUSTOMER SERVICE @ 1-800-489-1581.
Note: Use 20LB (9kgs) gas cylinder that has a protective collar with this unit. Cylinder NOT included with this unit.
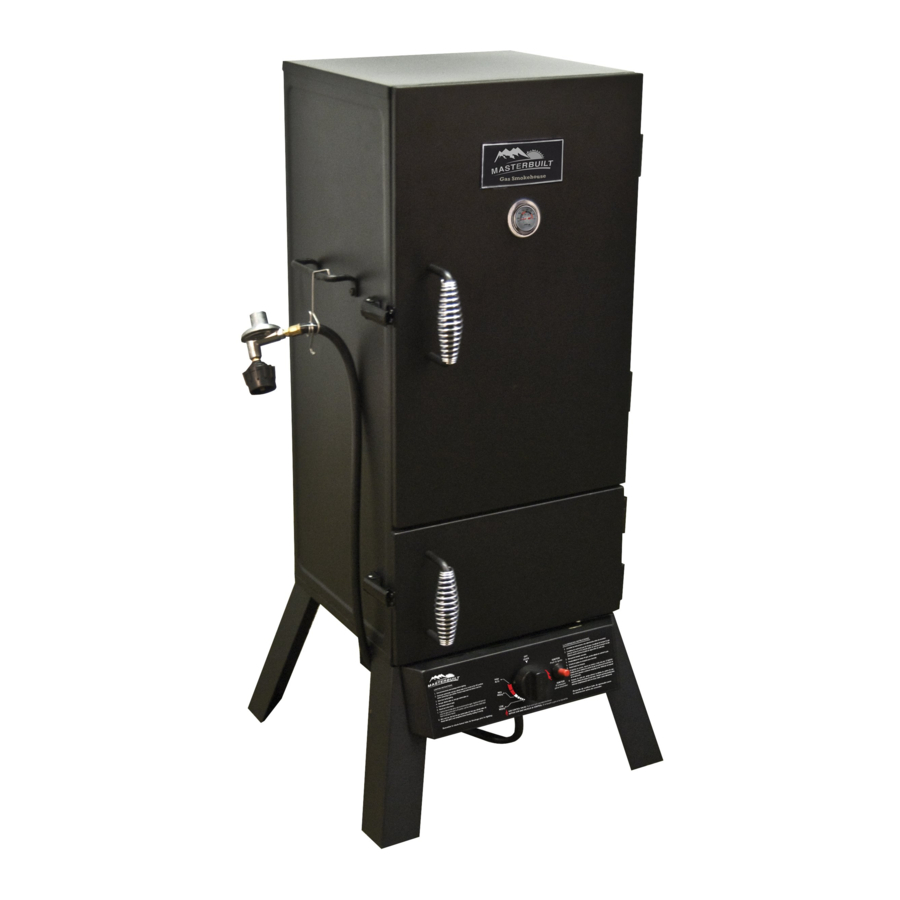
PARTS LIST

| PART NO | QUANTITY | DESCRIPTION |
| 1 | 1 | Smoker Body |
| 2 | 1 | Large Smoker Door w/ Logo Plate |
| 3 | 1 | Air Damper (pre-assembled) |
| 4 | 2 | Rear Legs |
| 5 | 1 | Control Panel |
| 6 | 1 | Burner Box |
| 7 | 2 | Door Handle |
| 8 | 2 | Body Handle |
| 9 | 1 | Flame Disk Bowl |
| 10 | 1 | Water Bowl |
| 11 | 1 | Water Bowl Holder |
| 12 | 4 | Cooking Grate |
| 13 | 1 | Temperature Gauge w/ Beauty Ring |
| 14 | 1 | Valve (pre-assembled) |
| 15 | 1 | Ignitor (pre-assembled) |
| 16 | 1 | Control Knob (pre-assembled) |
| 17 | 1 | Burner (pre-assembled) |
| 18 | 1 | Grease Clip |
| 19 | 2 | Door Latch (pre-assembled) |
| 20 | 1 | Heat Shield |
| 21 | 10 | Cooking Grate Support |
| 22 | 1 | Matchstick w/Chain (pre-assembled) |
| 23 | 1 | Regulator/Hose |
| 24 | 1 | Grease Cup |
| 25 | 1 | Right Front Leg |
| 26 | 1 | Left Front Leg |
| 27 | 1 | Small Smoker Door |
ASSEMBLY
- BEFORE ASSEMBLY READ ALL INSTRUCTIONS CAREFULLY.
- ASSEMBLE UNIT ON A CLEAN, FLAT SURFACE.
- TOOLS NEEDED: ADJUSTABLE WRENCH, PHILLIPS HEAD SCREWDRIVER
Carefully position grill as shown.
Do not tighten screws all the way. Leg frames may need to be adjusted during assembly.
- Attach rear legs (4), right front leg (25) and left front leg (26) to bottom of smoker body (1) using phillips screws (A).
Do not fully tighten screws yet.

- Attach control panel (5) to right front leg (25) as shown using phillips screws (A).
Repeat on opposite side attaching control panel (5) to left front leg (26).

- Mount body handle (8) to smoker body (1) using phillips screws (A).
![]()
- Insert temperature gauge w/ beauty ring(13) into smoker door (2). Secure in place with wing nut (D).
![]()
- Slide cooking grates (12), onto cooking grate supports (21).
![]()
- Insert water bowl (10) into water bowl holder (11) and slide water bowl holder onto cooking grate support (21).
Place flame disk bowl (9) into smoker as shown.
![]()
- When not in use, hang regulator/hose (23) on body handle (8) as shown.
![]()


PRESEASON INSTRUCTIONS
Curing your smoker will rid the unit of chemicals and oils left over by the manufacturing process allowing them to burn off. Preseason smoker prior to first use.
- Perform soapy water test.
- Using a napkin or cloth, rub a light coat of cooking oil on cooking grates and inside smoker doors. Make sure water pan is in place with NO WATER.
- Fill flame disk bowl with 2 cups (0.56l) of wood chips and light smoker. Close door.
- Let the smoker burn for about 30 minutes. Make sure temperature gets up to 400°F (204°C).
- Allow unit to cool completely.
- Reapply light coat of cooking oil on the grilling surface and inside of smoker door.
- Relight smoker and burn the oil for 20 minutes.
- Cure your smoker periodically to prevent excessive rust.
SMOKER IS READY FOR USE
| WOOD SMOKING GUIDE FOR MEATS | ||||||
| WOOD FLAVOR | POULTRY | FISH | HAM | BEEF | PORK | LAMB |
| Hickory Pungent, smoky, bacon-like flavor |  | | | | | |
| Mesquite Sweet and delicate flavor | | | | |||
| Alder Delicate, wood smoke flavor | | | | |||
| Pecan Bold and hearty flavor | | | | |||
| Maple Sweet, subtle flavor | | | ||||
| Apple Sweet, delicate flavor | | | | |||
| Cherry Sweet, delicate flavor | | | ||||
COMBUSTION BY-PRODUCT PRODUCED WHEN USING THIS PRODUCT CONTAINS CHEMICALS KNOWN TO THE STATE OF CALIFORNIA TO CAUSE BIRTH DEFECTS, OTHER REPRODUCTIVE HARM, OR CANCER.
CALIFORNIA PROP 65
THIS PRODUCT CONTAINS CHEMICALS, INCLUDING LEAD, KNOWN TO THE STATE OF CALIFORNIA TO CAUSE BIRTH DEFECTS OR OTHER REPRODUCTIVE HARM. WASH HANDS AFTER HANDLING.
RECIPES
PORK OR BABY BACK RIBS
2-4 lbs Pork or Baby Back Ribs
½ tbsp Salt
¼ cup Brown sugar
2½ tbsp Chili powder
1½ tbsp Ground cumin
2 tsp Cayenne pepper
2 tsp Black pepper (freshly ground)
2 tsp Garlic Powder
2 tsp Onion Powder
Hickory Chips
Mix ingredients and rub mixture on meat for 2 hours before cooking. Allow meat to reach room temperature.
Cook ribs for 3 hours at 225°F (107°C) in preheated smoker using hickory chips during the first 2 hours.
After 3 hours remove the ribs and wrap in heavy foil.
Cook for an additional 1- 1½ hours.
MAPLE GLAZED HAM
5-7 lbs Ham Shank or Butt (Fully cooked, bone in)
1½ cup Maple syrup
1 tsp Ginger
¼ tsp Nutmeg
½ tsp Allspice
16 whole Cloves
1 can Pineapple slices (canned)
1 jar Maraschino Cherries
Hickory or Mesquite Chips
Remove thick skin and trim fat leaving no more than ½" thick covering on ham. Score ham. Combine syrup, ginger, nutmeg, and allspice in a small bowl. Place ham in large dish and baste with syrup mixture. Let ham stand in syrup mixture for 1 or 2 hours basting frequently until at room temperature.
When ready to smoke remove ham from dish and stud with cloves. Place ham in preheated 225°F (107°C) smoker. Cook for about 2-3 hours. Baste with syrup mixture at least 2 times during cooking time. Before last hour of smoking decorate ham with canned pineapple and cherries and baste. Internal temperature of ham should be at 130°F-140°F (54°C-60°C) when heated.
FOR MORE TANTALIZING RECIPES AND COOKING TIPS VISIT US ONLINE AT WWW.MASTERBUILT.COM


If you smell gas:
- Shut off gas to the appliance.
- Extinguish any open flame.
- Open/remove door.
- If odor continues, keep away from the appliance and immediately call your Fire Department.
- Never operate this appliance unattended.
- Never operate this appliance within 10 feet (3m) of any structure, combustible material or other gas cylinder.
- Never operate this appliance within 25 feet (7.5m) of flammable liquids.
- If fire should occur keep away from appliance and immediately call your fire department. Do not attempt to extinguish an oil/grease fire with water.
FAILURE TO FOLLOW THESE INSTRUCTIONS COULD RESULT IN FIRE, EXPLOSION OR BURN HAZARD, WHICH COULD CAUSE PROPERTY DAMAGE, PERSONAL INJURY OR DEATH.
GENERAL WARNINGS AND SAFETY INFORMATION
- Unit is for outdoor use only.
- Never use inside enclosed areas such as patios, garages, buildings or tents.
- Never use inside recreational vehicles or on boats.
- Never operate unit under overhead construction such as roof coverings, carports, awnings, or overhangs.
- Never use unit as a heater.
- Maintain a minimum distance of 10ft (3m) from overhead construction, walls, rails or other structures.
- Keep a minimum 10ft (3m) clearance of all combustible materials such as wood, dry plants, grass, brush, paper, or canvas.
- Keep appliance clear and free from combustible materials such as gasoline and other flammable vapors and liquids.
- Use unit on a level, non-combustible, stable surface such as dirt, concrete, brick or rock.
- Keep children and pets away from unit at all times. Do NOT allow children to use unit.
- Unit has an open flame. Keep hands, hair, and face away from burner flame. Do NOT lean over burner when lighting. Loose hair and clothing may catch fire.
- Allow unit to cool below 115°F (46°C) before moving or storing.
- Avoid bumping or impacting unit.
- This unit is HOT while in use and during cooling process. Wear protective gloves/mitts.
- Use of alcohol, prescription or non-prescription drugs may impair user's ability to properly assemble or safely operate unit.
- Never use glass, plastic or ceramic cookware in unit.
- Do NOT allow anyone to conduct activities around unit during or following its use until it has cooled.
- Accessory attachments not supplied by Masterbuilt Manufacturing, Inc. are not recommended.
- Never use unit for anything other than its intended use. This unit is NOT for commercial use.
- Use in accordance with local, state and federal fire codes.
Masterbuilt Manufacturing, Inc.
1 Masterbuilt Ct.
Columbus, GA 31907
Customer Service 1-800-489-1581
www.masterbuilt.com
Documents / Resources
References
Download manual
Here you can download full pdf version of manual, it may contain additional safety instructions, warranty information, FCC rules, etc.
Advertisement


Need help?
Do you have a question about the 20051311 and is the answer not in the manual?
Questions and answers