Table of Contents
Advertisement
Advertisement
Table of Contents

Subscribe to Our Youtube Channel
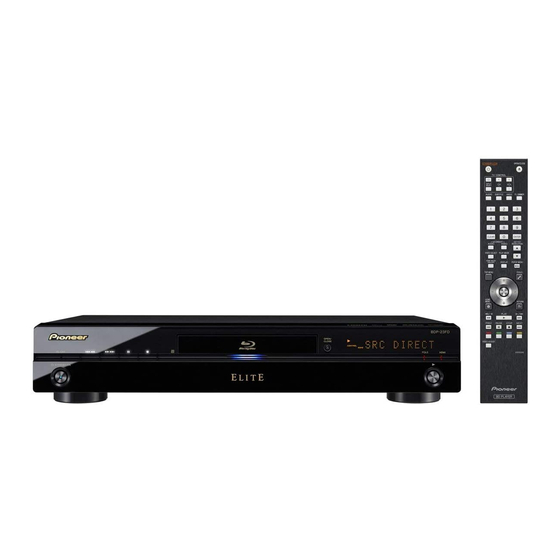
Related Manuals for Pioneer Elite BDP-23FD


Summary of Contents for Pioneer Elite BDP-23FD
- Page 1 Operating Instructions Blu-ray Disc PLAYER...
- Page 2 Thank you for buying this Pioneer product. Please read through these operating instructions so you will know how to operate your model properly. After you have finished reading the instructions, put them away in a safe place for future reference.
-
Page 3: Operating Environment
Read these instructions. Only use attachments/accessories specified by the Keep these instructions. manufacturer. Heed all warnings. Use only with the cart, stand, tripod, bracket, or Follow all instructions. table specified by the manufacturer, or sold with the Do not use this apparatus near water. apparatus. - Page 4 If you find it damaged, the AC outlet to shut down all power. Therefore, contact the Pioneer service center on the back cover, or make sure the unit has been installed so that the your dealer for a replacement.
- Page 5 We Want You Listening For A Lifetime Since hearing damage from loud noise is often undetectable until it is too late, this manufacturer and the Electronic Industries Association’s Consumer Electronics Group recommend you avoid prolonged exposure to excessive noise. This list of sound levels is included for your protection.
-
Page 6: Table Of Contents
Contents 01 Before you start Playing from the Home Media Gallery ....31 Playing discs ....... . . 31 What’s in the box . -
Page 7: Before You Start
Chapter 1 Before you start What’s in the box • When loading the batteries into the remote control, set them in the proper direction, as indicated by the polarity marks ( and ). • Remote control x 1 • Do not heat batteries, disassemble them, or throw them into flames or water. -
Page 8: Types Of Discs/Files That Can Be Played
Types of discs/files that can be played Playable discs Discs with the logo marks below indicated on the disc label, package or jacket can be played. Application format Disc type Logo CD-DA BDAV DVD-Video DVD VR BDMV DATA-DISC DTS-CD ... -
Page 9: Discs That Cannot Be Played
Discs that cannot be played – Blu-ray Disc Read-Only (ROM) Format Version 2 – Blu-ray Disc Recordable (R) Format Version 2 • HD DVDs – Blu-ray Disc Rewritable (RE) Format Version 3 • DVD Audio discs • DVD-RAM discs This player supports BD-ROM Profile 2. -
Page 10: Playable Files
Playing DVDs Playing discs created on computers or BD/DVD recorders • It may not be possible to play discs recorded using a computer due to the application settings or computer’s environment settings. Record discs in a This label indicates playback compatibility with DVD-RW format playable on this player. -
Page 11: Part Names And Functions
Part Names and VIDEO SELECT – (page 22) HOME MEDIA GALLERY – (page 31) Functions TOP MENU – Press to display the top menu of the BD- ROM or DVD-Video. Remote Control 10 /// – Use to select items, change settings and move the cursor. -
Page 12: Front Panel
Front Panel STANDBY/ON – Press to turn the power on and Remote control sensor – Point the remote control to off. When the power is on, the indicator is lit. this, then operate it within approximately 23 feet (7 m). FL OFF indicator –... -
Page 13: Rear Panel
AC IN – (page 18) RS-232C terminal – This terminal is not used. CONTROL IN terminal – Use to control this player from the remote sensor of another Pioneer component with a CONTROL OUT terminal and bearing the mark. Connect the CONTROL OUT... -
Page 14: Connecting Up
Chapter 2 Connecting up Be sure to turn off the power and unplug the power cord capabilities, allowing natural colors to be reproduced from the power outlet whenever making or changing more faithfully than ever. connections. “x.v.Color” is a promotion name given to the products that have the capability to realize a wide-gamut color space After connecting, make the settings at the Setup based on the international standard specifications... -
Page 15: About Kuro Link Function
About KURO LINK function referred to as “HDMI Control”. • The Simultaneous power function is activated when The functions listed below work when a Pioneer KURO the player is set as follows (page 39): LINK-compatible Flat Panel TV or AV system (AV receiver Display Power On: On or amplifier, etc.) is connected to the player using an... -
Page 16: Connecting A Tv
AUDIO OUT(7.1 ch) • Also refer to the operating instructions of AV receiver or amplifier. • Please see the Pioneer website for AV receivers or Match the direction of the plug to the terminal amplifiers that support the PQLS function. -
Page 17: Connecting Video And Audio Cables
Connecting video and Connecting an AV receiver or amplifier using audio cables audio cables When connecting to a 7.1-channel compatible AV receiver or amplifier – Connect using 4 audio cables Note (diagram below). • Make the settings in the Setup Navigator menu When connecting to a 5.1-channel compatible AV according to the type of cable connected (page 19). -
Page 18: Connecting The Usb (External Storage) Device
43. • When a USB memory device or external hard disk is • Pioneer is not responsible for any malfunction of the connected and the player’s power is turned on, do not player due to communication error/malfunctions unplug the power cord. -
Page 19: Getting Started
KURO LINK is connected to this player’s HDMI OUT power. terminal, language settings are imported from the • When using a Pioneer Flat Panel TV or front projector Pioneer Flat Panel TV’s language settings before Setup compatible with the KURO LINK function, set KURO Navigator begins. -
Page 20: Operating The Tv With The Player's Remote Control
• When ANALOG AUDIO is selected at Audio, no If a Pioneer Flat Panel TV or projector is connected to the audio signals are output from the HDMI OUT or player and HDMI is selected for Video in step 4, the DIGITAL OUT terminals. -
Page 21: Tv Preset Code List
SONY 04 Manufacturer Code(s) NEC 59 SOUNDWAVE 07 NECKERMANN 31, 07 STANDARD 41, 44 PIONEER 00, 31, 32, 07, 36, 42, 51, ERRES 07 NEI 07, 42 STERN 31 FERGUSON 07, 36, 51 NIKKAI 05, 07, 41, 46, 48 SUSUMU 41... -
Page 22: Switching The Video Output Terminal To Be Viewed
Switching the video Display the TOOLS menu. Press TOOLS. output terminal to be BD PLAYER Angle viewed TOOLS Audio Subtitle Audio Adjust Use the procedure below to switch the video output signal Video Adjust to be viewed between the HDMI OUT terminal and an analog output terminal (COMPONENT VIDEO or VIDEO Select and set the item. - Page 23 About Film material • The picture may not be displayed for a while when the resolution is switched. The film material is a video signal with a frame rate of 24 frames/second. For example, these materials include CLEAR ENTER 1080/24p, 720/24p, etc.
-
Page 24: Playback
Chapter 4 Playback Playing discs or files Note • Some discs start playing automatically when the disc This section describes the player’s main operations. tray is closed. For the types of discs that can be played, see Playable • DVD-Video discs have parental lock features. Input discs on page 8. -
Page 25: Forward And Reverse Scanning
Forward and reverse Switching the camera angles scanning For BD-ROM and DVD-Video discs on which multiple angles are recorded, the angles can be switched during During playback, press or . playback. • The scanning speed switches each time the button is ... -
Page 26: Switching The Audio And Secondary Audio
Turning the Secondary Video off Switching the audio and Press SECONDARY VIDEO, then press CLEAR. secondary audio Displaying the disc For discs or files on which multiple audio streams/ channels are recorded, audio streams/channels can be information switched during playback. Also use this procedure to switch the secondary audio for BD-ROMs on which ... -
Page 27: Playback Functions
Playback functions The functions that can be used differ according to the type of disc and file. In some cases, some of the functions cannot be used. Check the usable functions on the table below. Disc/file type DVD-R Function BD-R DVD- Image Audio... -
Page 28: Using The Play Mode Functions
Using the Play Mode Playing a specific title, chapter or track (Search) functions Press PLAY MODE to display the Play Mode screen. The Play Mode screen can also be displayed by selecting Play Mode from the TOOLS menu. Select the type of search. CLEAR ENTER Use /... -
Page 29: Playing Repeatedly (Repeat Play)
• During playback, press STOP or CLEAR. Note • A-B Repeat play is canceled in the following cases: Note – When the angle is switched (for BD-ROM and DVD- • Random Play is canceled in the following cases: Video discs only). –... -
Page 30: En About Play Mode Types
About Play Mode types The functions that can be used differ according to the type of disc and file. In some cases, some of the functions cannot be used. Check the usable functions on the table below. Disc/file type DVD-R Play Mode type Mark DVD-... -
Page 31: Playing From The Home Media Gallery
Playing from the Note Home Media Gallery • When playing an audio CD (CD-DA or DTS-CD), the Now Playing screen is displayed. The Home Media Gallery lets you display a list of the titles, • Some BD-R/-RE discs have playback protection. To tracks or files recorded on the disc. -
Page 32: Playing Audio Files
Rotating images Adding tracks/files Press ANGLE while playing a slideshow. Use this procedure to add tracks and files, and create the • The image rotates each time the button is pressed HMG Playlist. (90° 180° 270° 0° ... ). Press HOME MEDIA GALLERY to display the The image can also be rotated by selecting Rotate from Home Media Gallery. -
Page 33: Playing The Hmg Playlist
Playing the HMG Playlist Press HOME MEDIA GALLERY to display the Home Media Gallery. The Home Media Gallery can also be displayed by selecting Home Media Gallery from the Home Menu pressing ENTER. Select HMG Playlist. Use / to select, then press ENTER. Select the track/file to be played. -
Page 34: Adjusting Audio And Video
Auto 2, On or Off Adjustments (page 35). • Pioneer PDP – Select this when connected to a • YNR – Reduces noise in the luminance (Y) signal. Pioneer plasma TV. • CNR – Reduces noise in the chroma (C) signal. -
Page 35: Adjusting The Audio
• Prog.Motion is disabled when Pure Cinema is set to Note • This only affects the Dolby TrueHD, Dolby Digital Plus • Black Setup has the effect only for pictures output and Dolby Digital audio signals of BDs and DVDs. from the VIDEO output terminals. -
Page 36: Adjusting The Audio Delay (Lip Sync)
– Channel Level is set to Fix (page 38). Closing the Channel Level screen Press HOME MENU. Adjusting the audio delay (Lip Sync) Adjust the audio delay for the selected video output terminal if the video and audio are not synchronized. During playback, display the TOOLS menu. -
Page 37: Advanced Settings
Chapter 6 Advanced settings Changing the settings Operating the Initial Setup screen When playback is stopped, display the Home Menu screen. HOME MENU. Press CLEAR ENTER Select and set Initial Setup. SECONDARY OUTPUT RESOLUTION AUDIO VIDEO Use / to select, then press ENTER. VIDEO SELECT PLAY MODE Select the item and change the setting. - Page 38 Setting Options Explanation Dolby Digital Out Dolby Digital 1 Dolby Digital audio signals are output. With BD-ROMs, the secondary audio and interactive audio are mixed for output. * Only valid for the DIGITAL OUT terminal. Dolby Digital 2 Dolby Digital audio signals are output. With BD-ROMs, the signals are output without mixing the secondary audio and interactive audio signals.
- Page 39 Setting Options Explanation HDMI High Speed Select this when connected with a High Speed HDMI™ cable (page 14). Transmission Select this when connected with a Standard HDMI™ cable (page 14). The player’s setting screen is closed if the output video resolution is switched by changing the HDMI High Speed Transmission setting.
- Page 40 Setting Options Explanation OSD Language English Select this to set the language of the on-screen displays to English. available languages Choose a language for the on-screen displays from the listed languages. Audio Language English Select this to set both the BD-ROM and DVD-Video default audio language to English.
- Page 41 Setting Options Explanation Still Picture Field This eliminates instability of the picture when playback is paused. Frame This makes pictures clear when playback is paused, but instability may be observed. Auto Field or Frame is switched automatically according to the disc or file being played.
- Page 42 Changing the speaker setup Adjusting the distance of the different speakers Set whether or not speakers are connected to an AV receiver or amplifier, etc., their size and their crossover Adjust the distance between you and the different frequency.
-
Page 43: Setting The Proxy Server
Select and set the method for switching the Off – The player’s IP address must be set manually. speaker to be adjusted. Use the number buttons (0 to 9) to input the IP Use / to select, then press ENTER. address, subnet mask and default gateway. -
Page 44: Testing The Network Connection
• If you want to enter two characters in succession that Change the language. Use / to change, then press ENTER. are both on the same button (for example a P and an R), press after inputting the first character then Initial Setup input the second character. - Page 45 Select and set Parental Lock DVD-Video When a disc name is selected, the data downloaded Parental Lock Next Screen. with the BD-LIVE function and data used with the Use / to select, then press ENTER. BONUSVIEW is erased. When Shared Data is selected, all the data Input the password.
-
Page 46: Software Updating
Setting the output terminals Select and set Options Software Update Start. Set the terminals from which the player’s video and audio Use / to select, then press ENTER. signals are to be output. • If the player is already running the latest software, the Select and set Options ... -
Page 47: About The Audio Output Settings
About the audio output settings The audio signals that are output differ according to the audio format recorded on the disc and the player’s settings. Check on the table below. Caution • When ANALOG AUDIO is selected at Output Terminal, no audio signals are output from the HDMI OUT terminal or DIGITAL OUT terminal (pages 19 and 46). - Page 48 9. When the output video resolution is set to 480i or 480p, the signals may be output in linear PCM (2 channels) or Dolby Digital bitstream, depending on HDMI High Speed Transmission setting and/or the connected HDMI device (page 14). 10.
-
Page 49: Language Code Table And Country/Area Code
Language Code Table and Country/Area Code Table Language Code Table Language name, language code, input code Abkhazian, ab/abk, 0102 French, fr/fra, 0618 Malagasy, mg/mlg, 1307 Slovenian, sl/slv, 1912 Afar, aa/aar, 0101 Galician, gl/glg, 0712 Somali, so/som, 1915 Malay, ms/msa, 1319 Afrikaans, af/afr, 0106 Georgian, ka/kat, 1101 Malayalam, ml/mal, 1312... -
Page 50: Additional Information
Chapter 7 Additional information Licenses This product includes cryptographic software written by • We don’t promise that this software works. However, we Eric Young (eay@cryptsoft.com).This product includes will be interested in any kind of bug reports.(‘as is’ software written by Tim Hudson (tjh@cryptsoft.com). distribution) Original SSLeay License •... - Page 51 copyrighted material, only this license, or another one product, acknowledgment is not required but would be aren’t implemented yet. For legal reasons, we are not contracted with the authors, grants you the right to use, appreciated. distributing code for the arithmetic-coding variants of distribute, and modify it.
-
Page 52: Gnu General Public License
It appears that the arithmetic coding option of the JPEG text version at ftp://ftp.uu.net/graphics/jpeg/jfif.txt.gz, but it this point it is unclear whether SPIFF will supersede JFIF or spec is covered by patents owned by IBM, AT&T, and is missing the figures. whether JFIF will remain the de-facto standard. - Page 53 designed to make sure that you have the freedom to License, and its terms, do not apply to those sections license would not permit royalty-free redistribution of the distribute copies of free software (and charge for this when you distribute them as separate works. But when Program by all those who receive copies directly or service if you wish), that you receive source code or can get you distribute the same sections as part of a whole which...
- Page 54 should have at least the “copyright” line and a pointer to We protect your rights with a two-step method: (1) we Library is not restricted, and output from such a program where the full notice is found. copyright the library, and (2) we offer you this license, is covered only if its contents constitute a work based on <one line to give the program’s name and a brief idea of which gives you legal permission to copy, distribute and/or...
- Page 55 (in either source or binary form) with the address new problems or concerns. To obtain a copy, contact your local Pioneer Customer major components (compiler, kernel, and so on) of the Each version is given a distinguishing version number. If Support Center.
-
Page 56: Cautions On Use
Pioneer authorized service center. Although lens cleaners for players are Turn the power off when not... -
Page 57: Troubleshooting
Do not glue paper or put stickers onto the disc, or use a Do not use benzene, thinner or other volatile chemicals. pencil, ball-point pen or other sharp-tipped writing Also do not use record spray or antistatic agents. instrument. These could all damage the disc. For tough dirt, apply some water to a soft cloth, wring out thoroughly, wipe off the dirt, then wipe off the moisture with a dry cloth. - Page 58 Problem Check Remedy No picture is displayed or the Is the video cable properly • Connect the cable properly according to the connected devices picture is not displayed connected? (page 14). properly. • Insert the cable firmly and all the way in. Is the video cable damaged? If the cable is damaged, replace it with a new one.
- Page 59 Problem Check Remedy Sound and picture are not Is Output Terminal properly Set Output Terminal properly (pages 19 and 46). synchronized. set? Is Lip Sync properly set? Adjust the amount of audio delay with the Lip Sync setting (page 36). •...
- Page 60 Digital Out to Dolby Digital 1, DTS Out to DTS 1 (page 38). Sound is fast or slow. When an HDMI cable is When a Pioneer AV receiver or amplifier compatible with the PQLS connected, are audio signals function is connected directly to the player’s HDMI OUT terminal using being output from devices an HDMI cable, the PQLS function is activated when playing discs.
-
Page 61: Kuro Link
• See About connections to components of other makes supporting the KURO LINK function on page 16. • Even when connected to a Pioneer product compatible with the KURO LINK function, some of the functions may not work. Also refer to the operating instructions of the connected device. -
Page 62: Others
TV and AV system (AV receiver or amplifier, etc.) to switch automatically, set KURO LINK to Off (page 39). “Processing failed.” is If the message appears repeatedly, please ask your nearest Pioneer displayed. authorized service center or your dealer to carry out repair work. -
Page 63: Glossary
Problem Check Remedy Always press STANDBY/ON on the player’s front panel or Settings you have made have • Have you disconnected the STANDBY/ON on the remote control and check that POWER OFF been cleared. power cord while the player’s power was on? has turned off from the player’s front panel display before disconnecting the power cord. -
Page 64: Parental Lock
Dolby TrueHD MPEG (Moving Picture Experts Group) Dolby TrueHD is an audio format using lossless coding. With BD- The name of a family of standards used to encode video and ROMs, up to 8 channels can be recorded at 96 kHz/24 bits, or up audio signals in a digital compressed format. -
Page 65: Specifications
Specifications Model BDP-23FD Type Blu-ray Disc PLAYER Rated voltage AC 120 V Rated frequency 60 Hz Power consumption 32 W Power consumption (standby) 0.3 W Weight 8 lb 3 oz (3.7 kg) External dimensions (including projecting parts) in. (W) x 3 in. - Page 66 Should this product require service in the U.S.A. and you wish to locate the nearest Pioneer Authorized Independent Service Company, or if you wish to purchase replacement parts, operating instructions, service manuals, or accessories, please call the number shown below.
Need help?
Do you have a question about the Elite BDP-23FD and is the answer not in the manual?
Questions and answers