Advertisement
Quick Links
Advertisement

Related Manuals for Hisense H60STES


Summary of Contents for Hisense H60STES
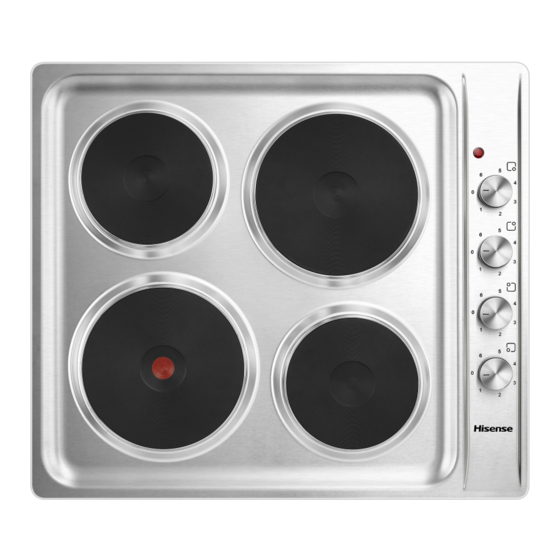
- Page 1 User and Installation Manual Built-in Electric Hob MODEL NO.: H60STES H60STEB...
- Page 3 DEAR CUSTOMER Thank you for purchasing this Homark appliance. Before using the appliance, please read these instructions carefully and keep them in a safe place for future reference. Caution! Do not use the appliance until you have read this instruction manual. The hob is intended for household use only.
-
Page 4: Table Of Contents
CONTENTS IMPORTANT SAFETY INFORMATION…………………………..……………1 SPECIFICATION…..…………….……..……………………………..…...4 USING THE HOB………………………….…….…….………………………5 CLEANING AND MAINTENANCE………………………………………7 INSTALLATION……………………………………………………………..……8 TROUBLESHOOTING…………………………………………………………..…12... -
Page 5: Important Safety Information
IMPORTANT SAFETY INFORMATION Your safety is of the utmost importance to us. Please make sure that you read this instruction booklet before attempting to install or use the appliance. If you are unsure about any of the information contained in this booklet, please contact the retailer where you purchased your unit. - Page 6 General Safety o The appliance should only be installed and connected by a suitably qualified person. o Care should be taken to ensure that the units and work surfaces that you build the appliance into, meet with the relevant standards. o If you notice any scratches, splits or cracks in the hob surface, you should immediately switch off the appliance and disconnect it from your mains supply.
- Page 7 Declaration of conformity o The manufacturer declares that the hob is built using certified materials and requires the appliance to be installed in accordance with the standards currently in force. This appliance must be used by a trained person for domestic purposes only. To avoid damaging your appliance o The hob surface can be damaged by objects falling onto it.
-
Page 8: Specification
SPECIFICATION Product dimensions: Aperture dimensions: Depth: 510 mm Depth: 490 mm Width: 580 mm Width: 560 mm Height: 75 mm Product specification: o 1 x 2kW rapid plate (Ø 188 mm) o 1 x 1.5kW standard plate (Ø 188 mm) o 2 x 1kW standard plate (Ø... -
Page 9: Using The Hob
Electrical details 220-240V~/380-415V 2N~ 50/60Hz 5.50 kW Max Rated Inputs: Mains Supply Lead: 220-240V ~; 3 corex2.5mm² (no supplied) 380-415V 2N~; 5 core x 1.5 mm² (no supplied) 4 core x 2.5mm² (no supplied) For future reference please record the following information which can be found on the rating plate together with the date of purchase from your sales invoice. - Page 10 o Turn the control knob of the zone that you wish to cook on clockwise or anticlockwise until it reaches the power level that you desire. o Each cooking zone can be adjusted between 1 and 6, one being the coolest zone setting and six being the hottest zone setting.
-
Page 11: Cleaning And Maintenance
CLEANING AND MAINTENANCE Cleaning and maintenance operations must only be carried out when the hob is cool. The appliance should be disconnected from your mains supply before commencing any cleaning process. Cleaning the Hob Any residues that are left on the cooktop surface from cleaning agents will damage it. -
Page 12: Installation
INSTALLATION The installation must be carried out by a suitably qualified person, in accordance with the current version of the following. o AS/NZS 3000: 2007 Wiring Regulations o 2010 Electricity Safety Regulations Positioning The adjacent furniture must be able to withstand a minimum temperature rise of 100°C above ambient temperature of the room it is located in, during periods of use. - Page 13 Installing the Appliance o Cut a hole in the worktop that corresponds with the drawing shown above. o IMPORTANT: You must observe the ventilation requirements shown in the drawing opposite. o IMPORTANT: Do not use a silicon sealant to seal the appliance against the aperture. This will make it difficult to remove the hob from the aperture in future, particularly if it needs to be serviced.
- Page 14 IMPORTANT: There are ventilation holes around the outside of the hob. YOU MUST ensure that these holes are not blocked by the worktop, when you put the hob into position (see drawing opposite). o Carefully turn the hob upside down and place it on a cushioned mat.
- Page 15 Electrical connection YOUR HOB IS INTENDED FOR FITTED AND PERMANENT INSTALLATION. o Before connecting the appliance, make sure that the supply voltage marked on the rating plate corresponds with your mains supply voltage. The installation must be carried out by a suitably qualified person, in accordance with the current regulations.
-
Page 16: Troubleshooting
TROUBLESHOOTING o The cooking zones are not functioning or will not switch on. *Check that the mains electrical supply to the appliance is correct and working. Check the mains fuse. o A humming sound is heard when a cooking zone is selected. *This is normal;...
Need help?
Do you have a question about the H60STES and is the answer not in the manual?
Questions and answers
I connected L1 and N2 only 2plates on the right is working
Only two plates on the right are working because the Hisense H60STES hob requires proper bridging and connection for all zones to function. If only L1 and N2 are connected, the other zones, which rely on L2 or different connections, will not receive power. Ensure the correct bridges are in place (e.g., N1-N2 and L1-L2) and that the connection matches the specified wiring configuration for your voltage setup (e.g., 220-240V single-phase or 380-415V two-phase).
This answer is automatically generated