
Related Manuals for Regada UM 2


Summary of Contents for Regada UM 2
- Page 1 INSTALLATION, SERVICE AND MAINTENANCE INSTRUCTIONS Electric multi-turn actuators UM 2 ® 74 1043 22...
- Page 2 TEST CERTIFICATE ELECTRIC MULTI – TURN ACTUATOR UM 2 Type number ........... Power supply ..........V .....Hz Serial number ..........Set switch-off torque..........Nm Production year ..........Operating speed ............min Wiring diagram ..........Adjusted number of revolutions ........Warranty period ........months Transmitter...............
-
Page 3: Table Of Contents
Maintenance - extent and periodicity ......................34 Troubleshooting............................35 Accessories and Spare Parts ..........................36 List of the Spare Parts ..........................36 Enclosures ...............................37 Wiring diagrams UM 2..........................37 Operation Logic Diagram of switches and relays..................42 Dimensional drawings ..........................43 Guarantee service check report ........................45 Post guarantee service check report......................46 Commercial representation ........................47... -
Page 4: General Data
Electric part-turn actuators (hereinafter EA) types UM 2 designed for direct installations onto controlled devices (regulating bodies -valves, etc.). EA of UM 2 types are provided for remote control in both directions of their movement. They can be equipped with means of measuring and control of technological processes where an unified analogue direct current or voltage signal is an information bearer on their input and/or output. -
Page 5: Warning For Safety Use
Product protection EA UM 2 does not have own short-circuit protection, therefore there must be included suitable protective device into the supply power (circuit breaker, or fuse), which serves at the same time as main switch. For protection, we recommend to use a fuse type "T"... -
Page 6: Under-Guarantee And After-Guarantee Service
UM 2 1.7 Under-guarantee and after-guarantee service Our customers are provided with professional service of our firm in installation, operation, service, maintenance, revision and help in troubleshooting for all our products. Under-guarantee service is performed by the service department of the production plant, or by a contracted service centre according to a written claim. -
Page 7: Power Supply And Duty Cycle
UM 2 1.8.2 Working enviroment According to valid standard IEC 60 721-2-1, there are delivered these versions of electric actuators: 1) Version „standard“ for type climate temperate 2) Version „tropical wet“ for type climate tropical wet 3) Version „cold“ - for type climate cold 4) Version „tropical dry and dry“... -
Page 8: Packing, Transport, Storing And Unpacking
2. Once EA is connected to the external controller unit, also use it as a control EA where the max. load torgue reaches the 0.7 multiple of the maximum loading torgue for remote operated EA UM 2 1.9 Packing, transport, storing and unpacking Surfaces without surface treatment are treated by conservation preparation MOGUL LV 2-3 before packaging . -
Page 9: Assessment Of The Product And Packaging And Removal Of Contamination
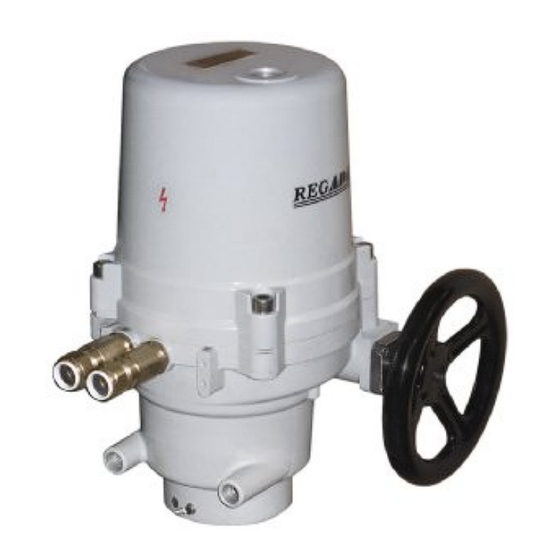
2. Description, function and specifications 2.1 Description and function EA UM 2 are of compact construction. They are composed of two functionally different main parts. linear mechanism The gear part is made up by a flange with a connecting part resp. - Page 10 UM 2 Fig.1...
- Page 11 UM 2 Fig.1a...
-
Page 12: Basic Specifications
UM 2 2.2 Basic specifications Basic EA specifications are given in Table 1. Table 1: Basic EA specifications Electric motor Max. load torque Nominal Current Operating Switching- speed off torque Power supply Capacitor Modu- ±10 [%] ON-OFF voltage capacity. lating... - Page 13 UM 2 Unless the customer specifies the value of the particular working revol., revol. are set to 6st stage of the selected stroke order – see Table 3. Adjustment of the torque switches: If other adjustment not specified the switching torque is set to the maximum value with tolerance of ±10 %.
- Page 14 UM 2 Output signal values at limit positions: “O“..... 20 mA (terminals 81; 82) “Z“ ....4 mA (terminals 81; 82) Values tolerance of output signal of EPV “Z“ .... +0,2 mA “O“ .... ±0,1 mA DCPT3M – current transmitter (B3b) - 2-wire connection without built-in power supply or with built-in power supply Current signal ..............4 ÷...
-
Page 15: Mechanical Connection
UM 2 Electronic position controller (N) „REGADA" ( Valid for the EA version with controller only) Controller software equipment: A) Function and parameters programmable functions: • with functional buttons SW1, SW2 and LED diodes D3, D4 directly placed on controller •... -
Page 16: Electrical Connection
UM 2 2.2.2 Electrical connection The electric connection should be made according to wiring diagrams pasted into the top cover of the EA. To terminal board (X) - max. 32 screw-less terminals with connecting wire cross-section of 0,08 to 2,5 mm Stripping length of wires to screwless terminals is 8 to 9 mm. - Page 17 UM 2 Electric connection: - according to the wiring diagram stuck into the case of the EA. OUTSIDE GROUNDING TERMINAL Obr.1c INSIDE GROUNDING TERMINAL Obr.1d...
-
Page 18: Installation And Dismantling Of Actuator
UM 2 3. Installation and dismantling of actuator Abide by safety measures! Note: Check again if placement of EA reply to chapter "Operation conditions". In case that operation conditions are different from recommended, consultation with producer is needed. Before starting of mounting the EA onto the valve: •... - Page 19 UM 2 • Once electrical services are completed put on the cover and fasten it evenly crosswise by bolts. Fasten the cable glands to ensure specified shielding. Connection to connector: • Check whether the type of current, supply voltage and frequency correspond with data on the nameplate of electric motor.
- Page 20 UM 2 Example of electric motor connection with position and torque switches. Example connection 1 ES with 3-phase electric motor Example connection 2 ES with single - phase electric motor...
-
Page 21: Dismantling
UM 2 Observe the valve manufacturer´s instructions with respect to the requirement to ensure switching-off in limit positions through position or torque switches! Caution: 1. Power supply to the actuator and connections with switching, protective and safety devices may be carried out only by personnel with appropriate qualification, in compliance with the corresponding standards and wiring diagrams, such as those specified in the Instruction Manual.. -
Page 22: Adjustment
UM 2 4. Adjustment Attention! See chapter 1.2 If it is necessary to connect the supply voltage to Electric actuator, make sure by following the mentioned procedure that there is no injury caused by the electric current. Otherwise, disconnect the Electric actuator from the electricity network. -
Page 23: Adjustment Of Position-Signalling Unit (S3(S13),S4(S14)) (Fig.6)
UM 2 Adjustment of position-signalling unit (S3(S13),S4(S14)) (Fig.6) EA is delivered set to a stroke corresponding to 6 according to table 3 or to a stroke required by customer. The procedure for position switches setting, adjustment a new setting is as follows (Fig. 6, 7): •... - Page 24 UM 2 TABLE 3 MAX. REVOLUTIONS OF EA UM 2 if the customer doesn´t specify a producer, EA will be set up to the 6.stage of stroke) STROKE Note: for CPT transmitter maximum revolutions according to RADA II. STAGE STROKE...
- Page 25 UM 2 11. stage 10.stage 8. stage 9. stage 6. stage 7. stage 5. stage 4. stage 3. stage 2.stage 1. stage SLIDING GEAR SCREW SLIDING Fig.7 GEAR...
-
Page 26: Signaling Switches Adjustment (S5,S6) (Fig. 8)
UM 2 4.3 Signaling switches adjustment (S5,S6) (Fig. 8) The signaling switches of EA are at producer preset to switch on about 10% before end positions provided the customer not specified otherwise. Before proceeding with signaling switches adjustment, S3, S4 end position switches must be adjusted according to the previous chapter if necessary. -
Page 27: Adjustment Of Resistant Transmitter (Fig.9)
UM 2 4.5 Adjustment of resistant transmitter (Fig.9) The resistant transmitter is in the EA used to function as a remote position indicator. Before the resistant transmitter adjustment the position switches have adjusted (S3,S4). Adjustment consists in setting of the... -
Page 28: Adjustment Of The Electronic Position Transmitter (Epv) - The Resistive Transmitter (Potentiometer) With The Converter Ptk 1
UM 2 4.6 Adjustment of the Electronic Position Transmitter (EPV) - the Resistive Transmitter (Potentiometer) with the Converter PTK 1 4.6.1 EPV – the 2-wire version (Fig. 10) The position transmitter with the converter PTK1 is in the plant adjusted to have the output current signal... -
Page 29: Adjustment Of Capacitive Transmitter Cpt1/A (Fig.12)
UM 2 4.7 Adjustment of Capacitive Transmitter CPT1/A (Fig.12) The chapter describes adjustment of the capacitive transmitter to the specified parameters (standard values of output signals) in case they are reset. The capacitive transmitter serves as a position transmitter of electric actuators with unified output signal of 4÷20 mA... -
Page 30: Adjustment Of The Dcpt3M Transmitter
UM 2 • Having the transmitter adjusted put the jumper again on the terminals 81 and 82 in case that the output signal wont be used (the circuit through the terminals 81 and 82 should be closed). • Connect the control signal to the terminals 86 and 88 The user has to arrange grounding of the 2-wire circuit of the capacitive transmitter to the electrical ground of a joined controller, computer, etc. -
Page 31: Calibration Menu
UM 2 If necessary, please change the characteristic of the output signal from descending to ascending or vice versa, according to the following chapter. Setting of the ascending/descending characteristic of the output signal When the characteristic of the transmitter output signal is changed, the set limit positions "4 mA" and "20 mA"... - Page 32 UM 2 Leaving calibration mode: • After 10 sec. not working in calibration mode, LED will go out as a signal of leaving calibration mode. If LED is blining, error appears. Transmitter errors: In case of error LED starts blinking. Number of LED blinking means number of error in table No. 4. After longer pause blinking process repeats.
-
Page 33: Adjustment Of Position Controller (Fig. 14)
Setting of the controller is performed using buttons and LED diodes. Adjust the position and torque switches and the position transmitter before adjustment of the controller. Laying of adjusters and signaling elements on the board of the REGADA controller is shown on Fig. 14: SW1 button... -
Page 34: Watching Operation And Error States
UM 2 Controller setting procedure: The initialization routine starts at the switched-on controller, zero system deviation and short pressing of the SW1 button for ca 2 sec (i.e. until the diode D3 got on). Loosing the button some of the default menus starts (usually control signal) what is shown with 1 blink on the D3 diode as well as one of the default parameters (usually control signal of 4-20mA) what is shown with 1 blink on the D4 diode. -
Page 35: Electric Local Control (Fig.15)
UM 2 4.10 Electric local control (Fig.15) -additional equipment In case of need (during adjusting, function checking etc.), but power supply must be provided, is possible to readjust actuator by electric local control. After switching the mode switch to the mode “LOCAL” it is possible by the direction switch to control motion of the output part to setting direction. -
Page 36: Service And Maintenance
UM 2 5. Service and Maintenance 5.1 Service In general it is supposed that the EA is serviced by a qualified person as required in the Chapter 1! After the EA is put into operation it is necessary to check whether during manipulation its surface finishing was not damaged –... -
Page 37: Troubleshooting
UM 2 5.3 Troubleshooting • In case of a mains failure the EA stands in the position where it was before the failure occurred. If needed the EA can be reset using the manual control (with the handwheel). When necessary EA can by manually... -
Page 38: Accessories And Spare Parts
UM 2 6. Accessories and Spare Parts As accessories the handwheel is packed with the product. 6.1 List of the Spare Parts Table 8: Spare Parts Spare part Order Nr. Position Figure Electric motor; 100 W; 24 VAC; 63 592 XXX Electric motor 120 W/228VA;... -
Page 39: Enclosures
UM 2 7. Enclosures 7.1 Wiring diagrams UM 2... - Page 40 UM 2...
- Page 41 UM 2...
- Page 42 UM 2...
- Page 43 UM 2 Legend: The legend to the wiring diagrams Zxxx (eg Z5c) with terminal board connection is identical with wiring diagrams with connection to connector ZKxxx (eg ZK5c). Z5c ....wiring diagram of single resistant transmitter Z6c ....wiring diagram of double resistant transmitter Z10g....
-
Page 44: Operation Logic Diagram Of Switches And Relays
UM 2 7.2 Operation Logic Diagram of switches and relays connector Terminal open closed Switch pin number Operating stroke 11 - 12 11 - 12 12 - 14 12 - 13 15 – 16 14 – 15 16 – 18 15 –... -
Page 45: Dimensional Drawings
UM 2 7.3 Dimensional drawings Electric multi-turn actuators Unimact UM 2 – flange connection ISO 5210... - Page 46 UM 2...
-
Page 47: Guarantee Service Check Report
UM 2 7.4 Guarantee service check report Service center: Date of repair: Guarantee repair no.: User of actuator: Claim applied by: Actuator type number: Actuator production number: Product claim fault: Detected product fault: Used spare parts: Remarks: Issued on a day:... -
Page 48: Post Guarantee Service Check Report
UM 2 7.5 Post guarantee service check report Service center: Date of repair: User of actuator: Actuator operating place : Actuator type number: Actuator production number: Detected product fault: Used spare parts: Remarks: Issued on a day: Signature:... -
Page 49: Commercial Representation
UM 2 7.6 Commercial representation Slovak Republic: Regada, s.r.o., Strojnícka 7, 080 01 Prešov Tel.: +421 (0)51 7480 460, Fax: +421 (0)51 7732 096, E-mail: regada@regada.sk...
Need help?
Do you have a question about the UM 2 and is the answer not in the manual?
Questions and answers