Table of Contents
Advertisement
Available languages
Available languages
Quick Links
20
ALLEN + ROTH and logo design are
trademarks or registered trademarks of LF, LLC.
All rights reserved.
Serial Number
Purchase Date
Thank you for purchasing this ALLEN + ROTH product.
Questions, problems or missing parts?
Before returning, contact us on:
866-439-9800, 8 a.m. – 8 p.m., EST, Monday - Sunday or ascs@lowes.com.
SG24458
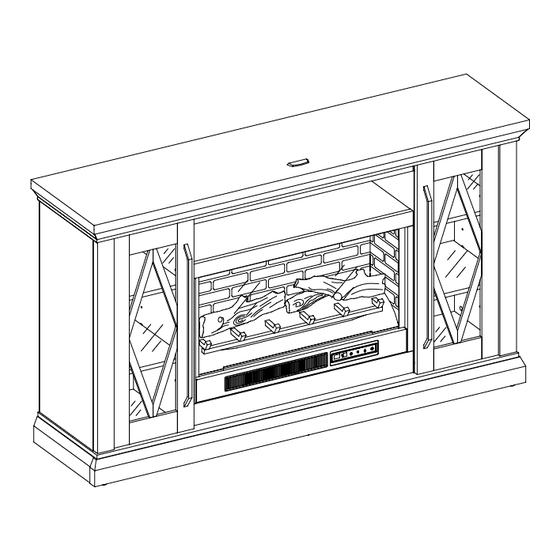
ITEM #5691736
MODEL #LWFP62-9
62-IN MEDIA FIREPLACE
Español p. 21
ATTACH YOUR RECEIPT HERE
1
Advertisement
Table of Contents

Subscribe to Our Youtube Channel
Related Manuals for LF Allen + Roth LWFP62-9


Summary of Contents for LF Allen + Roth LWFP62-9
- Page 1 ITEM #5691736 MODEL #LWFP62-9 62-IN MEDIA FIREPLACE ALLEN + ROTH and logo design are trademarks or registered trademarks of LF, LLC. All rights reserved. Español p. 21 ATTACH YOUR RECEIPT HERE Serial Number Purchase Date Thank you for purchasing this ALLEN + ROTH product.
-
Page 2: Table Of Contents
TABLE OF CONTENTS PACKAGE CONTENTS Wood Dowel Installation ..........................2 Package Contents ............................3 Hardware Contents............................4 Safety Information ............................5 Preparation ..............................5 Assembly Instructions..........................6 Care and Maintenance ..........................18 One-Year Warranty ............................ 18 Replacement Parts List ..........................19 WOOD DOWEL INSTALLATION FINAL 1. -
Page 3: Hardware Contents
HARDWARE CONTENTS (shown not actual size) SAFETY INFORMATION Please read and understand this entire manual before attempting to assemble, operate or install the product. • Do not allow children to climb or play in or around this product. • Use this unit for its intended purpose only. Do not use shelves as step ladder. •... -
Page 4: Assembly Instructions
ASSEMBLY INSTRUCTIONS ASSEMBLY INSTRUCTIONS 1a. Unpack the unit and confirm that you have all the hardware and 4a. Glue two 30 mm wood dowels (DD) into the upper side holes of required parts. Assemble the unit on a carpeted floor or the empty firebox long support (Z) and six wood dowels (DD) to the media shelf carton to avoid any scratch. - Page 5 ASSEMBLY INSTRUCTIONS ASSEMBLY INSTRUCTIONS 7. Glue one wood dowel (DD) into the designated hole on the bottom 10a. Ask for assistance to turn the base upright. middle stretcher (R) and attached it to the front skirting (O) by 10b. Securely screw seven cam bolts (CC) into the designated engaging one cam lock (BB).
- Page 6 ASSEMBLY INSTRUCTIONS ASSEMBLY INSTRUCTIONS 13. Fasten the firebox long support (Z) to the bottom panel (M) by 16a. Glue eight wood dowels (DD) to the top inner holes of the engaging three cam locks (BB). vertical panels (S, T and U). 16b.
- Page 7 ASSEMBLY INSTRUCTIONS ASSEMBLY INSTRUCTIONS 19a. Ask for assistance to stand the unit upright. Installing the fireplace insert 19b. Pick up one door (C1) and attach the extended hinge arms to the Figure A IMPORTANT NOTE: Use hand screwdriver, not power driver to assemble hinge bases installed on the left side panel (S).
- Page 8 ASSEMBLY INSTRUCTIONS ASSEMBLY INSTRUCTIONS 25a. Fold the wall panel (H) as shown. Then position yourself at back 28. Position top connector strap (D) over the glass (I) and upright arms side of heater (A). (B and C). Follow orientation shown below. 25b.
- Page 9 ASSEMBLY INSTRUCTIONS ASSEMBLY INSTRUCTIONS 31a. Lift the fireplace insert carefully onto the firebox short supports Installing the tipping restraint hardware (A1) and in the back of the assembled mantel and center it in the opening. DO NOT drag the insert across the firebox short supports 34a.
- Page 10 CARE AND MAINTENANCE REPLACEMENT PARTS LIST For replacement parts, call our customer service department at 866-439-9800, 8 a.m. - 8 p.m., EST, A touch-up pen has been provided to minimize the small nicks or scratches that may occur during assembly or shipping. Monday - Sunday.
- Page 11 MODELO #LWFP62-9 CHIMENEA PARA SISTEMA DE ALLEN + ROTH y el diseño del logotipo son mar- AUDIO Y TV DE 157.48 CM cas comerciales o marcas registradas de LF, LLC. Todos los derechos reservados. ADJUNTE SU RECIBO AQUÍ Número de serie Fecha de compra Gracias por comprar este producto ALLEN+ROTH.
- Page 12 ÍNDICE CONTENIDO DEL PAQUETE Instalación de espigas de madera ......................22 Contenido del paquete ..........................23 Aditamentos..............................24 Información de seguridad ........................... 25 Preparación ..............................25 Instrucciones de ensamblaje ........................26 Cuidado y mantenimiento ........................... 38 Un año de garantía ............................. 38 Lista de piezas de repuesto........................
-
Page 13: Información De Seguridad
ADITAMENTOS (no se muestran en tamaño real) INFORMACIÓN DE SEGURIDAD Lea y comprenda completamente este manual antes de intentar ensamblar, usar o instalar el producto. • No permita que los niños se suban al producto o que jueguen cerca de él. •... -
Page 14: Instrucciones De Ensamblaje
INSTRUCCIONES DE ENSAMBLAJE INSTRUCCIONES DE ENSAMBLAJE 1a. Desembale la unidad y confirme que tiene todos los aditamentos y 4a. Pegue dos espigas de madera (DD) de 30 mm en los orificios las piezas necesarias. Ensamble la unidad sobre un piso alfombrado laterales superiores del soporte largo de la cámara de combustión (Z) o sobre la caja de cartón vacía para evitar que se raye. - Page 15 INSTRUCCIONES DE ENSAMBLAJE INSTRUCCIONES DE ENSAMBLAJE 7. Pegue una espiga de madera (DD) en el orificio designado en el 10a. Pida ayuda para poner la base en posición vertical. extensor central inferior (R) y fíjelo al travesaño delantero (O) al 10b.
- Page 16 INSTRUCCIONES DE ENSAMBLAJE INSTRUCCIONES DE ENSAMBLAJE 13. Fije el soporte largo de la cámara de combustión (Z) al panel inferior 16a. Pegue ocho espigas de madera (DD) a los orificios interiores (M) al enganchar tres cerrojos de leva (BB). superiores de los paneles verticales (S, T y U). 16b.
- Page 17 INSTRUCCIONES DE ENSAMBLAJE INSTRUCCIONES DE ENSAMBLAJE 19a. Pida ayuda para poner la unidad en posición vertical. Instalación del accesorio para chimenea 19b. Levante una puerta (C1) y fije los brazos de bisagra extendidos a las Figura A NOTA IMPORTANTE: utilice un destornillador manual, no un bases de bisagra instaladas en el panel lateral izquierdo (S).
- Page 18 INSTRUCCIONES DE ENSAMBLAJE INSTRUCCIONES DE ENSAMBLAJE 25a. Doble el panel de pared (H) como se muestra. Luego colóquese en 28. Coloque la correa del conector superior (D) sobre el vidrio (I) y los la parte posterior del calentador (A). brazos verticales (B y C). Siga la orientación que se muestra a El borde biselado debe 25b.
- Page 19 INSTRUCCIONES DE ENSAMBLAJE INSTRUCCIONES DE ENSAMBLAJE Instalación de los aditamentos de contención antivuelcos 31a. Levante el accesorio de la chimenea con cuidado sobre los soportes cortos de la cámara de combustión (A1) y en la parte 34a. Ajuste los niveladores para pisos para nivelar la unidad en su ubicación posterior de la repisa para chimenea ensamblada, y céntrelo deseada contra la pared.
-
Page 20: Cuidado Y Mantenimiento
CUIDADO Y MANTENIMIENTO LISTA DE PIEZAS DE REPUESTO Para obtener piezas de repuesto, llame a nuestro Departamento de Servicio al Cliente al 866-439-9800, Se proporciona un aplicador de retoque para minimizar pequeños rasguños o rayones que pueden ocurrir durante el ensamble de lunes a domingo de 8 a.m.
Need help?
Do you have a question about the Allen + Roth LWFP62-9 and is the answer not in the manual?
Questions and answers