Table of Contents
Advertisement
Quick Links
USER MANUAL
GT1 2.5-10KW
Copy Declaration
The copyright of this munual belongs to Hangzhou Livoltek Power Co., td. All rights
L
reserved. Without the written permission of the company, Any unit or individual shall
1418-35 Moganshan Road, Hangzhou, 310011, China
not extract or reproduce part or all of the contents of this document, and shall not
transmit it in any form.
info@livoltek.com
www.livoltek.com
Ver.00
Advertisement
Table of Contents

Related Manuals for LIVOLTEK GT1-2K5D2


Summary of Contents for LIVOLTEK GT1-2K5D2
- Page 1 USER MANUAL GT1 2.5-10KW Copy Declaration The copyright of this munual belongs to Hangzhou Livoltek Power Co., td. All rights reserved. Without the written permission of the company, Any unit or individual shall 1418-35 Moganshan Road, Hangzhou, 310011, China not extract or reproduce part or all of the contents of this document, and shall not transmit it in any form.
-
Page 2: Table Of Contents
Table of Contents About This Manual..............1 Scope ..............1 Intended Audience ..........1 Symbols Used ............. 1 How to use this manual ........1 Safety ................. 2 Product Description ..........2 Important Safety Instructions ....... 2 Symbol on the Type Label ........4 Product Overview .............. -
Page 3: About This Manual
Read the manual and other related documents before performing any operation on the inverter. Documents must be stored carefully and be available at all times. The information in this manual is subject to change without notice. Please check www.livoltek.com for more information. -
Page 4: Safety
Perform operations considering actual onsite As soon as receiving the inverter please check if it is damaged during its conditions. LIVOLTEK shall not be held liable for any damage caused transportation. If yes, please contact your dealer immediately. -
Page 5: Symbol On The Type Label
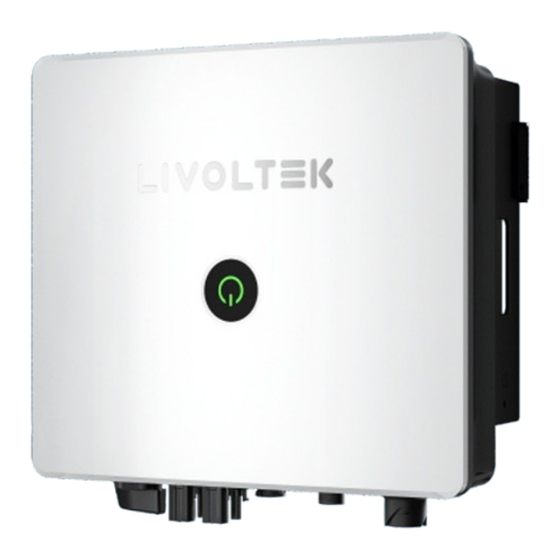
2.3 Symbol on the Type Label 3 Product Overview Symbol Explanation 3.1 View of the inverter CE mark. The inverter complies with the requirements of the applicable CE guild lin s e. UKCA mark. The inverter complies with the requirements of the applicable UKCA guidelines. UKNI mark. -
Page 6: Dimension
3.2 Dimension 3.3 Terminals of the inverter GT1 2.5~10KW SERIES GRID-TIED INVERTER HAS TWO EXTERNAL DIMENSIONS. GT1 2.5~6.0KW SERIES GRID-TIED INVERTER : 150mm 368mm PV1+ PV2+ Wi-Fi DC Switch Grid PV1- PV2- GT1 7~10KW SERIES GRID-TIED INVERTER : 180mm 465mm PV1+ PV2+ PV3+... -
Page 7: System Diagram
3.4 System Diagram Solar Power available PV Array Surge arrestor Inverter QUICKINSTALLATIONGUIDE Fuse DC breaker GT1-2.5~6KW DC distribution box Surge arrestor www.livoltek.com Fuse AC breaker Designation Item distribution Inverter Bracket Expansion screws for xing mounting bracket Electric meter Single phase meter... -
Page 8: Mechanical Mounting
5 Mechanical Mounting 5.1.2 Environment Requirements The inverter must be installed in a ventilated environment to ensure good 5.1 Requirements for Mounting heat dissipation. Make sure the installation site meets the following conditions: • Make sure there is no electrical connection before installation. •... - Page 9 5.1.3 Angle and Space Requirements The distance of installation space for multiple inverter is as follows: Never install the inverter horizontally, or with a forward tilt or with a ≥500mm ≥500mm backward tilt or even with upside down. The horizontal installation can result in damage to the inverter.
-
Page 10: Mounting Instructions
Step 2: Install the inverter to the wall 5.2 Mounting Instructions Insert the expansion tubes into the holes andh ang the back plate, Then Installation Tools (recommended but not limited to the following ones): tighten the screws to install it. Protective glasses and gloves, Marker, Measuring tape, Multi-meter, Wire crimper, Stripping pliers, Screwdriver, Manual wrench, Hammer drill and drill bit, etc. -
Page 11: Electrical Connection
6 Electrical Connection 6.1 PV Connection Please only use the PV connectors from the accessory box for connection. This chapter mainly describes the cable connections of the system. Before connecting, please make sure: Prior to any electrical connections, keep in mind that the inverter has •... - Page 12 Step 4. The PV joint is divided into 2 parts - the plug and the fastening head. WARNING Insert the cable through the fastening head and the opposite plug. • This unit is not provided with a GFDI device. This inverter controller Note:that the red and black lines correspond to differentof plugs.
-
Page 13: Grid Output Connection
6.2 Grid Output Connection Step1: Assembling the Grid Connector . ①Remove the cable jacket by 50~60mm. • WARNING • ②Strip the wire insulation by 5 • The grid voltage and frequency must be in the permissible range. ① 60~65mm • An external AC breaker must be installed between inverter and... - Page 14 Step5: Tighten the L/N/PE screws of Grid respectively, and then fasten Grid GT1-7.0~10.0kW series PV connection are as follows: 1.5N· m Cover. ( torque: Step1:First pull out waterproof plug of the Grid Cover. Step2:And pass the Grid harness through the Grid cover. Step3: Remove the cable jacket and strip 60~65mm, And strip wire insulation by 7-10mm.
-
Page 15: Communication Connection
RS485A RS485B Please note that the Smart meter brand required by Livoltek must be used. Meter connection diagram: Step 4: Correspondingly insert the COM port, tighten it. (torque:1.2N·m) -
Page 16: Earth Connection
6.4 Earth connection(mandatory requirement) WARNING • Earth connection essential before connecting supply • Be sure that AC power source is disconnected before attempting to hardwire i t to the unit. NOTICE • Good grounding is good for resistance to surge voltage shocks and improves EMI performance. -
Page 17: Wi-Fi Connection
When "AFCI self-test fault" is prompted, an arc occurs in the PV system Please go to the Livoltek APP to connect to the Internet and set it up. self-test. Inverter retest start. For specic details, please refer to the Wi-Fi user manual. -
Page 18: Installation VeriCation
Method 2: Put the DC and AC switches of the inverter in the "OFF" 7 System Operation position. Wait for the screen to turn off. 7.1Powering ON the Inverter Step 1: Switch ON the DC and AC circuit breaker Wait a few seconds and the inverter will start a self-test procedure when DC Switch DC Switch the indicator light ashes, when it is done successfully, the green led... -
Page 19: Leds And Graphical Display
APP User Manual is available for free from website. Download and Install Livoltek APP • Method 1: Go to Google Play or Apple App Store to search Livoltek, download and install the app. • Method 2: Scan QR code pasted on the right side of the inverter or below to download and install Livoltek app. - Page 20 ll in the power station name, address and 。 other related information. Then you can add to Site. Add Device User Register Registeranaccount, select the country, customer type, and ll in the account, Password and other related information. GT1-2K5D2 GT1-2K5D2...
-
Page 21: Troubleshooting
9 Troubleshooting Error Message Causes Measures Recommended... -
Page 24: Technical Data
10 Technical Data Temperature Protection Support Ground Fault Monitoring Support Technical Data GT1-2K5D2 GT1-3KD2 GT1-3K3D2 GT1-3K6D2 Support Internal Over Voltage Protection PV Input Data Support Input Over Current Protection Max. DC Input Power [Wp] 3750 4500 4950 5400 Grid Monitoring Support Max. - Page 25 Technical Data GT1-4KD2 GT1-5KD2 GT1-5KD2 C GT1-6KD2 Temperature Protection Support PV Input Data Ground Fault Monitoring Support Max. DC Input Power [Wp] 6000 7500 7500 9000 Support Internal Over Voltage Protection Max. DC Input Voltage[V] Support Input Over Current Protection Min PV input voltage[V] Grid Monitoring Support...
-
Page 27: Decommissioning
Ÿ . Build monitoring, control system without authority from Livoltek. . Livoltek will keep right to explain all the contents in this user manual. 11.4 Waste Disposal If it is necessary to scrap the inverter or other related parts, be Ÿ...
Need help?
Do you have a question about the GT1-2K5D2 and is the answer not in the manual?
Questions and answers