Table of Contents
Advertisement
Quick Links
Advertisement
Table of Contents

Related Manuals for Air Techniques CamX Triton HD


Summary of Contents for Air Techniques CamX Triton HD
- Page 1 CamX Triton HD EN-US Installation and Operating Instructions...
- Page 3 Contents Contents Spectra interchangeable head . . . Proxi interchangeable head ..Handpiece holder ... . Important information Handpiece holder with USB hub About this document ....(optional) .
-
Page 4: Table Of Contents
Contents 11.2 Reprocessing procedures ..11.3 Preparation at the operating location ....11.4 Manual cleaning, disinfection and drying . -
Page 5: About This Document
These installation and operating instructions are – CAUTION an integral part of the unit. Risk of minor injuries Air Techniques shall not be held liable and – NOTICE offers no guarantees of the safe and Risk of extensive material/property damage... -
Page 6: Copyright Information
Air Techniques. CamX Triton HD Cam The intraoral camera with Cam interchangeable head is used in or next to the oral cavity of the patient. - Page 7 CamX Triton HD Spectra The CamX Triton HD Spectra is intended to be Contraindications used as an aid in the detection and diagnosis of CamX Triton HD Cam dental caries.
-
Page 8: Specialist Personnel
Observe the relevant specifications of ❯ IEC 60601‑1 (EN 60601‑1) when connecting CamX Triton HD Cam / CamX Triton HD Spec- the appliance to other appliances, e.g. to a PC tra / CamX Triton HD Proxi system, both inside as well as outside the Any use of this appliance/these appliances above vicinity of the patients. -
Page 9: Essential Performance Characteristics
Important information Maintain a minimum distance of at least ❯ Air Techniques accepts no liability for 12 inches between the unit and other elec- damage resulting from the use of non- tronic devices. approved accessories, optional items or Maintain a minimum distance of 12 inches ❯... -
Page 10: Product Description
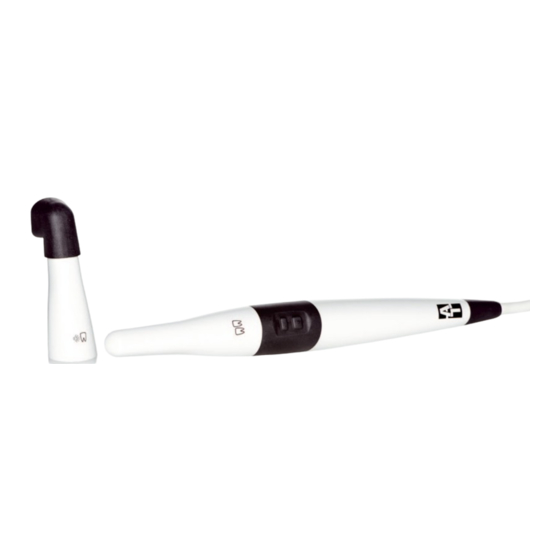
The following items are included in the scope of delivery (possible variations due to country-spe- cific requirements and/or import regulations): Overview CamX Triton HD with Cam and Spectra package ..J2500 – Handpiece – Cam interchangeable head –... -
Page 11: Optional Items
Product description CamX Triton HD Order no. As sold with Cam, Spectra and Proxi package . . J2700 Storage box for inter- J2550 Not sterile – Handpiece changeable heads – Cam interchangeable head Spacers (qty. 5) J2720 Not ster- – Spectra interchangeable head ile, must –... -
Page 12: Technical Data
Product description Technical data Handpiece Electrical data Nominal voltage V DC 4.75 - 5.25 Communication interfaces USB 2.0 Type of protection IP20 Protection class Operating mode* T1/T2 = 27% 1.5 min / 5.5 min (On/off time) At an ambient temperature of max. 104 °F and while observing the on/off time, the handpiece/the interchangeable head reaches a maximum surface temperature of 140 °F. - Page 13 Product description Dimensions and weights Handpiece including Cam interchangeable head Length 7.87 Diameter 0.94 Weight including cable Weight not including cable 2.47 Cable length Cam interchangeable head Technical data Light source 2 LEDs, white light Wavelength 400 - 780 Irradiance 0.16 - ¥...
- Page 14 Product description Proxi interchangeable head Proxi interchangeable head Light source 2 LEDs Wavelength 780 - 880 Dominant wavelength Irradiance 0.34 Focus level 0.16 - ¥ Focus level, preset 0.31 Aperture angle 64° Classification Medical Device Class (MDR) FDA classification (CFR Title 21) Class EN-US 2109100018L29 J2505...
- Page 15 Product description Handpiece holder with USB hub (optional) Electrical data Nominal voltage V DC General technical data Dimensions (W x H x D) 2.28 x 3.27 x 4.84 Weight Power supply type Manufacturer GlobTek Inc. Model GTM41076-0612-X.X Electrical data of the power supply unit Nominal voltage V AC 100 - 240...
-
Page 16: Ambient Conditions
Product description Electromagnetic compatibility (EMC) Interference immunity tests Emitted HF disturbance variables in Conforms accordance with IEC 61000-4-3 Connection cable Cable length Ambient conditions Ambient conditions during operation Temperature °F 50 to 104 Rel. humidity 20 to max. 75 Air pressure inHg 20.67 - 31.30 Ambient conditions during storage and transport... -
Page 17: Model Identification Plate
Product description Model identification plate The model identification plate is located on the cable: Conformity assessment This device has been subjected to conformity acceptance testing in accordance with the cur- rent relevant guidelines of the European Union. This equipment conforms to all relevant require- ments. - Page 18 USB hub. The camera needs an imaging software. The Spectrum interchangeable head needs an imag- ing software from Air Techniques or a compatible TWAIN imaging software. The camera is supplied with power via the USB connection cable to the PC.
- Page 19 Product description Cam interchangeable head Optical system The Cam interchangeable head has an optical element with autofocus with a focal range for intraoral recordings. When placing on the interchangeable head, the focus level is preset to two molars. Two LEDs are positioned around the optical element for even illumination.
- Page 20 Product description Spectra interchangeable head Application areas of the Spectra interchangeable head: – Detecting plaque and tartar – Detecting caries at an early stage – Fissure caries that are difficult to detect – Precise location of carious lesions on smooth surfaces –...
- Page 21 Product description Analysis Use gold standard techniques to examine for potential caries. The images are analyzed by the imaging software with the help of a filter. All images captured with the Spectra inter- changeable head are stamped with the Spectra symbol top right.
- Page 22 Product description Proxi interchangeable head – Healthy enamel appears very dark, high trans- lucency – Interproximal caries appears bright, low trans- lucency – Dentine appears bright, low translucency – Several restorations appears bright, no translu- cency Spacer Interchangeable head Focus button Capture button The handpiece with the Proxi interchangeable head creates a black and white image for detect-...
-
Page 23: Storage Box
Product description The tooth enamel appears brighter in patients USB connection (for camera or USB stick) with highly opaque tooth enamel. The caries Connection for power unit diagnosis is complicated here by the low differ- Micro USB connection for computer ence in contrast. -
Page 24: Installation
Installation Installation Only qualified specialists or persons trained by Air Techniques may install, connect, and commis- sion the unit. System requirements The system requirements of the software being used to operate the device must always be met during its operation. -
Page 25: Commissioning And First Start-Up
Installation Commissioning and first Installation start-up Assembling the handpiece holder NOTICE Short circuit due to build up of con- The handpiece holder can be attached using the densation adhesive or screws. Use suitable mounting materials. Do not put the appliance into operation ❯... - Page 26 Select the registration card Video source 1. ❯ – Upon pressing (preset) Working under Control type, select the camera ❯ – On releasing CamX Triton HD. The following settings can be made Standby settings Video source Standby time Time until automatic switch-off if the camera is not moved.
- Page 27 USB hub (optional) Start VistaConfig using Start > All Programs > ❯ Air Techniques > VistaEasy > VistaConfig. The camera is detected and activated auto- matically. The registration card Settings opens. The following settings can be made...
-
Page 28: Commissioning Tests
Installation Commissioning tests Electrical safety checks Carry out an electrical safety check according ❯ to all national regulations. Document the results. ❯ The interchangeable heads in the various versions (see "5 Function") are application parts in accordance with IEC 60601-1. Handover record Carry out and document the instruction and ❯... -
Page 29: Operation
Usage Attaching the interchangeable head Usage Prerequisite: ü The handpiece and interchangeable head are completely dry. 10 Operation Slide the interchangeable head onto the hand- ❯ piece (rotate if necessary) until it engages. NOTICE A guide on the handpiece ensures that the interchangeable head can only be placed on Damage to the camera by dropping or correctly. - Page 30 Usage 10.2 Use the hygienic protective Hold the hygienic protective cover firmly on the ❯ white edge and pull off the transparent plastic cover side in the direction of the camera head. WARNING Danger of cross contamination when not using the hygienic protective cover or when using the hygienic pro- tective cover more than once Do not use the unit without the...
- Page 31 Usage 10.3 Recording an image with the 10.4 Recording an image with the Cam interchangeable head Spectra interchangeable head Still images and video can be recorded with the When imaging with the Spectra interchangeable camera. The possible recording modes are head, two views are possible in the imaging soft- dependent on the imaging software.
- Page 32 Usage Putting on the spacer Place the camera with spacer onto the corre- ❯ sponding tooth. WARNING Danger of cross-contamination when used without preparation or following incorrect preparation Sterilize the spacer in the steam steri- ❯ lizer (see "12 Reprocessing the spacer") before each use.
- Page 33 Usage Analysis The prophylaxis view shows the original image. Red areas indicate caries-causing bacteria. The healthy tooth enamel is shown as green areas. Fig. 6: Prophylaxis view The caries view analyzes the fluorescence of the substances with the caries filter. Fig.
- Page 34 Usage 10.5 Recording an image with the Positioning the camera correctly The camera must be positioned correctly to ach- Proxi interchangeable head ieve a good image quality. Position the camera in a line with the teeth. ❯ CAUTION Health risks for the patient due to contraindications Before taking an X-ray image, check ❯...
- Page 35 Usage Place the camera with spacer on the row of Analysis ❯ teeth above the approximal area. The black and white image shows structures with varying translucency as different levels of bright- ness. The lower the translucency, the higher the reflection of the infra-red light and the brighter the structure.
-
Page 36: Switching Off The Camera
Usage 10.6 Switching off the camera If the camera is not moved, it automatically switches itself off after the set stand-by time (pre- set to 2 minutes). Placing the camera in the handpiece holder switches the camera off immediately. Always store the camera in the handpiece holder with the interchangeable head plugged on. -
Page 37: Reprocessing Procedures
The reprocessing procedure was validated as fol- lows: – Pre-cleaning – Lint-free disposable wipe – Manual cleaning – Monarch disinfection wipes (Air Techniques) – Manual disinfection – Monarch disinfection wipes (Air Techniques) 2109100018L29 J2505 2301V012 EN-US... -
Page 38: Preparation At The Operating Location
Usage General information Protect the unit from contamination when ❯ transporting it from the treatment chair to the Comply with all national directives, standards ❯ reprocessing location. and specifications for the cleaning, disinfection and sterilization of medical devices as well as 11.4 Manual cleaning, disinfection the specific specifications for dental practices... -
Page 39: Reprocessing The Spacer
Usage 12 Reprocessing the spacer Repeat this step with a new disinfection wipe ❯ for 2 minutes. This means that the entire disinfection step is 12.1 Risk analysis and classifica- performed for 3 minutes. tion Drying A risk analysis and classification of medical devi- Allow the device to air-dry. -
Page 40: Preparation At The Operating Location
Usage General information Important information! Comply with all national directives, standards ❯ The reprocessing instructions in accord- and specifications for the cleaning, disinfection ance with FDA Guidance "Reprocessing and sterilization of medical devices as well as Medical Devices in Health Care Settings - the specific specifications for dental practices Validation Methods and Labeling"... -
Page 41: Automatic Cleaning, Intermediate Rinsing, Disinfection, Final Rinse, Drying
Usage Clean the spacer with a disposable wipe 12.4 Automatic cleaning, inter- ❯ soaked in cold tap water until no more dirt or mediate rinsing, disinfection, contamination can be seen. final rinse, drying Protect the unit from contamination when ❯ transporting it from the treatment chair to the Selection of the washer-disinfector reprocessing location. -
Page 42: Steam Sterilization
Usage 13 Cleaning 12.5 Steam sterilization 13.1 Cleaning the camera lens WARNING Health risk due to improper steriliza- The optical element is located partly in the inter- tion changeable head and partly in the handpiece. If the sterilization is not performed cor- NOTICE rectly, it may not be effective. -
Page 43: Maintenance
Usage 14 Maintenance Dry clean the lens in the handpiece with com- ❯ pressed air or a cotton swab. 14.1 Replacing the o-ring If the interchangeable head does not engage properly when being placed on, the O-ring on the handpiece can be replaced. Replacing the O-ring. -
Page 44: Troubleshooting
Troubleshooting Troubleshooting 15 Tips for operators and service technicians Any repairs above and beyond routine maintenance may only be done by suitably qualified per- sonnel or by one of our service technicians. Error Possible cause Remedy Image cloudy, milky Hygienic protective cover not Place the hygienic protective ❯... -
Page 45: Spectra Interchangeable Head
Troubleshooting Error Possible cause Remedy Moving image judders Computing power of the com- Reduce the image resolution. ❯ puter too low Use the computer in accord- ❯ ance with the system require- ments (E7201). Camera is not detected by the USB driver not up to date Install an up-to-date USB ❯... - Page 46 Troubleshooting Error Possible cause Remedy Image is too light or too dark Incorrect settings in the imaging Alter the brightness of the ❯ software image in the imaging soft- ware. Adapt the brightness in the ❯ configuration of the imaging software to change the bright- ness settings.
-
Page 47: Appendix
Appendix Appendix 16 Handover record This document confirms that a qualified handover of the medical device has taken place and that appropriate instructions have been provided for it. This must be carried out by a qualified adviser for the medical device, who will instruct you in the proper handling and operation of the medical device. Product name Order number (REF) Serial number (SN) - Page 52 Manufactured for / Distributed by: Air Techniques, Inc. 1295 Walt Whitman Road Melville, New York 11747-3062, USA Phone: 800-247-8324 Fax: 888-247-8481 www.airtechniques.com Hersteller / Manufacturer: DÜRR DENTAL SE Höpfigheimer Str. 17 74321 Bietigheim-Bissingen Germany www.duerrdental.com...
Need help?
Do you have a question about the CamX Triton HD and is the answer not in the manual?
Questions and answers