Air Techniques ScanX Duo Touch J1200 Installation And Operating Instructions Manual
Image plate scanner
Hide thumbs
Also See for ScanX Duo Touch J1200:
- Installation and operating instructions manual (64 pages) ,
- Quick start instructions (4 pages) ,
- Quick start instructions (16 pages)
Table of Contents
Advertisement
Quick Links
Advertisement
Table of Contents

Subscribe to Our Youtube Channel
Related Manuals for Air Techniques ScanX Duo Touch J1200


Summary of Contents for Air Techniques ScanX Duo Touch J1200
- Page 1 ScanX Duo Touch Image Plate Scanner Installation and Operating Instructions...
-
Page 3: Table Of Contents
Monitor ..........21 12.8 Scanning image data via the touch screen 42 Computer system requirements ....22 12.9 Image recovery ........43 Computer system required components ... 22 Recommended components ....22 System properties ........23 Air Techniques, Inc. Page 3... - Page 4 File Size (uncompressed)......56 B-1. Electromagnetic Compatibility (EMC) Compliance Information ......57 B-2. Manufacturer’s Guidance and Declaration - Electromagnetic Emissions ......57 B-3. B-3. Recommended Separation Distances Between Equipment ......... 60 Warranty ..........Online Registration ........ Page 4 Air Techniques, Inc.
-
Page 5: Important Information
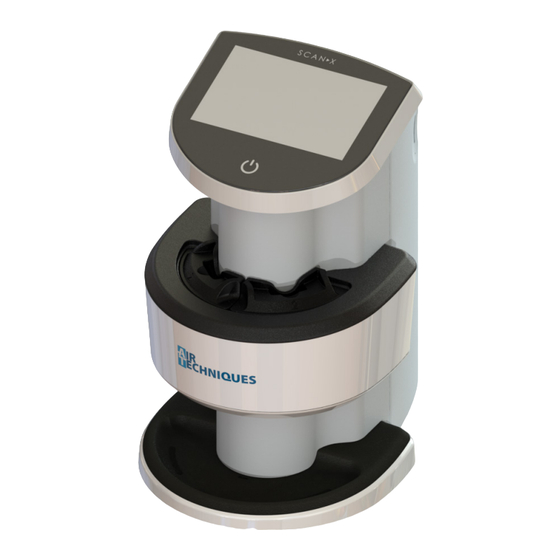
Duo Touch Image Plate Scanner, the chair-side imaging ® device from Air Techniques, a leading manufacturer of dental, medical and veterinary equipment since 1962. The ScanX Duo Touch processes two at image plates a time. The devices are hereafter referred to as ®... - Page 6 30 cm (12 in) to any part of the ScanX including Warning cables specified by the manufacturer. Otherwise, degradation of the performance of this equipment could result. Page 6 Air Techniques, Inc.
- Page 7 1.5 m away from the patient. Do not touch the device and the patient simultaneously. • Laser product compliance: Air Techniques meets the requirements of IEC 60825-1 Ed. 3 (2014). • PSP preparation: Completely clean and erase PSPs before taking an X-ray exposure.
-
Page 8: Copyright Information
All circuits, processes, names, software programs and appliances quoted are protected under industrial property rights. Printing or copying of these Installation and Operating Instructions, even excerpts thereof, may only be carried out with the written approval of Air Techniques. Page 8... -
Page 9: Safety
2.6 Only use genuine parts Only parts specified by Air Techniques or specifically approved accessories and special accessories may be used with this appliance. Only use original working parts and spare parts. -
Page 10: Transport
2.7 Transport Only the original packing ensures optimum protection for the appliance during transport. Where required original unit packing for this unit can be ordered from Air Techniques. Only transport the unit in its original packing. ... -
Page 11: Product Description
Unpack each component of ScanX and inspect for physical damage such as scratched panels, damaged connectors, etc. If there is any damage, notify your Air Techniques authorized dealer immediately so corrective action can be taken. Save all cartons and packing materials to protect ScanX in the event that it is to be transported or shipped in the future. -
Page 12: Technical Data
Conformity Acceptance Procedure EU Medical Device Directive 93/42/EEC Barrier envelope Medical device classification Phosphor storage plate Medical device classification Conducted HF - disturbance V according to IEC 61000-4-6 Radiated HF - disturbance V according to IEC 61000-4-3 Page 12 Air Techniques, Inc. - Page 13 °C -20 to +60 Air pressure in Hg 22 to 31 750 to 1060 Altitude <52493 <16000 Humidity 10 to 95 Manufacturer Air Techniques, Inc. 1295 Walt Whitman Road Melville, New York 11747-3062, USA www.airtechniques.com Air Techniques, Inc. Page 13...
- Page 14 GSM 800/900, TETRA 800, iDEN 820, CDMA 850 800-960 and LTE band 5 GSM 1800, CDMA 1900, 1700-1990 GSM 1900, DECT, LTE band 1, 3, 4, 25 and UMTS Bluetooth, WLAN802.11b/g/n, 2400-2570 RFID2450 and LTEband7 WLAN802.11a/n 5100-5800 Page 14 Air Techniques, Inc.
- Page 15 ± 2 kV 100 kHz repetition frequency Immunity to interference, line-conducted disturbances induced by high-frequency fields–SIP/SOP ports EC61000-4-6:2013 0.15 - 80 MHz Compliant ISM frequency bands 0.15 - 80 MHz 80% AM at 1 kHz Air Techniques, Inc. Page 15...
-
Page 16: Phosphor Storage Plate
31 x 41 Size 3 1.1 x 2.1 27 x 54 Size 4 2.2 x 3 57 x 76 4.3 Barrier envelope Classification Medical device class (MDR 2017/745) Class I Medical Device (FDA) Class Il Page 16 Air Techniques, Inc. -
Page 17: Model Identification Plate
Complies with 21 CFR 1040.10 and 1040.11 except for conformance with IEC 60825-1 Ed. 3 and IEC 60601-2-22 Ed. 3.1, as described in Laser Notice No. 56, dated May 8, 2019. Air Techniques, Inc. 1295 Walt Whitman Rd. Melville, NY 11747 U.S.A. REF Order number Serial number Air Techniques, Inc. -
Page 18: Function
After scanning, the imaging plate runs through the erasure section of the unit. Any image data remaining on the imaging plate is erased using a strong light source. The imaging plate is then released for further use. Page 18 Air Techniques, Inc. -
Page 19: Phosphor Storage Plate
2 Active side is light blue, with positioning aid a Positioning Positioning aid a is visible on the x-ray image and makes orientation easier during diagnosis Positioning Printed Inactive Side Tube or Active Sensitive Side Air Techniques, Inc. Page 19... -
Page 20: Barrier Envelope
(Size #0, #1 or #2). 5.5 Transfer box Protects the PSP during typical day-to-day use and storage. Typical Air Techniques The transfer box also protects the PSP image against light Barrier Envelope source damage when they are moved from the patient to the unit. -
Page 21: Installation
Monitors designed for digital X-ray processes with a higher light intensity and broad contrast range should be used. Strong room lighting, direct sunlight and reflections all serve to reduce the diagnostic capabilities of the X-ray exposures. Air Techniques, Inc. Page 21... -
Page 22: Computer System Requirements
ScanX operation Monitor SXGA, 1280 x 1024 or higher resolution, contrast ratio 10,000:1, .22 dot pitch Video Display Adapter: 32 MB RAM Peripherals: Standard Keyboard & Mouse Backup Device External Surge Protector Power supply backup Page 22 Air Techniques, Inc. -
Page 23: System Properties
• Do not hold or apply pressure to the transport cover or touch screen. 7.2 ScanX dimensions. The dimensions are shown below. 14.9 in. 37.9 cm 11.5 in. 9.2 in. 29.3 cm 23.4 cm Air Techniques, Inc. Page 23... -
Page 24: Software Installation
3. Connect the 24VDC Power Supply Adapter to the Mains outlet. 4. Verify that the On/Off switch illuminates amber denoting ScanX is in the standby mode. 5. Replace and secure the rear cover making sure that it is correctly fitted. Page 24 Air Techniques, Inc. -
Page 25: Connect Scanx For Operation
Remove the cover on the rear of ScanX and connect the supplied Ethernet cable between the unit’s Ethernet network connection port, item 3, and the facility network connector. Replace and secure the rear cover making sure that it is correctly fitted. Air Techniques, Inc. Page 25... -
Page 26: Initial Start-Up
Configure the device by performing the following steps. 1. Click the Windows Start button and select All Programs. 2. Select the Air Techniques listing and observe that the VistaEasy option appears. 3. Click VistaEasy to expand the option. Notice that the VistaEasy and VistaConfig options appear. - Page 27 VistaConfig window. 1. Select the Test tab. 2. Select the unit from the Registered Devices selection list 3. Select the mode class. 4. Set the scan mode. 5. Click Read Image. Air Techniques, Inc. Page 27...
-
Page 28: Configuring X-Ray Devices
Children are more sensitive to radiation than adults Keep the exposure parameters as low as possible taking into consideration the image quality Also refer to the informa- tion on pediatric x-ray imaging of the FDA (http://www.fda.gov/Radiation-Emitting- Products/RadiationEmitting-ProductsandProcedures/MedicalImaging/ucm298899.htm) Page 28 Air Techniques, Inc. -
Page 29: Operation
Touch to open the menu. 9.3 Entering text in the field Where fields require input, touch the field. The keyboard window will open. Switch to numbers/special symbols Shift key Switch to umlauts Delete Cancel input and close window Confirm input and close window Space bar Air Techniques, Inc. Page 29... -
Page 30: Calling Up Messages On The Touch Screen
View the MAC address of the unit Edit the name of the network and interface Network Activate or deactivate DHCP Edit IP address, subnet mask and gateway Set the brightness of the monitor Touch screen Touch screen calibration Page 30 Air Techniques, Inc. -
Page 31: Main Menu
X-ray image is stored on the SD card together with the image information under the name of the patient. Intra Rapid The scanning order starts without specification of the Rapid scanning patient and image information The X-ray image is stored on the SD card in a folder with date and time. Air Techniques, Inc. Page 31... - Page 32 Edit the brightness of the image. To increase the brightness, move the controller to the left or touch the left arrow several times. To reduce the brightness, move the controller to the right or touch the right arrow several times. Page 32 Air Techniques, Inc.
- Page 33 Switch between the positive and negative display of the image Vertically invert the image Horizontally invert the image Display help Save all changes Undo last change Cancel image processing All changes carried out after the last save are lost Air Techniques, Inc. Page 33...
-
Page 34: Barrier Envelope
• Only use Air Techniques Plates. ScanX is operated in combination with Air Techniques plates in size #0, #1 #2 #3 or #4. (See 4.1, System Components.) Each size of plate requires the matching barrier envelope. Exposure of the... -
Page 35: Working With Plates
Guide Tube or Active Sensitive Side Printed Inactive Side Typical Air Techniques Size #2 Plate Configuration 11.2 Working with plates. Plates must be visibly checked for signs of damage. Damaged plates (e.g. a torn outer layer, or visible scratches, which will affect the diagnostic quality) must be replaced. -
Page 36: Cleaning Phosphor Storage Plates
Peel off the adhesive strip and seal the envelope. View A. View B. View C. Insert the Plate. Peel off the adhesive strip. Seal the Barrier Envelope. Sealing the Plate in the Barrier Envelope Page 36 Air Techniques, Inc. -
Page 37: Take An X-Ray Image
If an inlet guide is removed, a warning message will appear on the LCD screen that the guide is missing. PSP Size # Position Pins View B. Inlet guide installation View A. Typical inlet guide and removal. Air Techniques, Inc. Page 37... -
Page 38: Scanner Plate Processing
5. As shown by View C, the PSP is now ready to be scanned to read the image from the PSP by performing scanning procedures. View B: View A: Empty Transfer box View C: PSPs ready for Scanning Ejecting PSP to Transfer box Preparing the Exposed Plate for Scanning Page 38 Air Techniques, Inc. -
Page 39: Scanning Multiple Plates
The special Erase mode enables the erasure unit in ScanX to be activated alone. No image data will be transmitted to the software. To erase again: Choose the special Erase mode in the software and feed the plate. Air Techniques, Inc. Page 39... - Page 40 Operation View A. Plate insertion into the inlet guide slot. View B. Plate transport mech- anism moves the plate. View C. Plate drops onto the bottom outlet pad. Plate Feeding and Scanning Page 40 Air Techniques, Inc.
-
Page 41: Image Data Scanning
As shown below, an animation on the touch screen prompts for insertion of the imaging plate. Insert the imaging plate only when the bar above the animation is green. Green Bar Example animation prompting for imaging plate insertion Air Techniques, Inc. Page 41... -
Page 42: Scanning Image Data Via The Touch Screen
Use of LCD Screen The image that appears on the LCD during and after scanning should NEVER be used for diagnostic purposes. Do not form a diagnosis from any image appearing on the LCD screen. Page 42 Air Techniques, Inc. -
Page 43: Image Recovery
Select the images you would like to transfer and hit Transfer Images. The images look like a normal scan job again. Air Techniques, Inc. Page 43... -
Page 44: Disinfection And Cleaning
A well-organized maintenance program aids dependable equipment operation and reduces problems to a minimum. Yearly service carried out by an Air Techniques trained and certified technician will ensure continued uninterrupted operation. These routine checks help to detect general overall wear, and replacement of parts can often be made before a problem occurs. - Page 45 1. Make sure to comply with the instructions for use of the test body and take an X-ray image with the test body. 2. Read the PSP 3. Check the image for homogeneity, resolution, contrast and artifacts. 4. If errors are visible in the image, contact a service technician Air Techniques, Inc. Page 45...
-
Page 46: Troubleshooting
• Reduce the threshold value. is too high X-ray image is mirror inverted PSP incorrectly inserted in inlet • Insert PSP correctly. guide or barrier envelope. PSP not placed straight. • Position the PSP correctly. Page 46 Air Techniques, Inc. - Page 47 Amplification (HV value) is set • Increase amplification (HV value). too low in the software Unsuitable scanning mode • Select a suitable scanning mode. selected The setting for the threshold • Reduce the threshold value value is too high Air Techniques, Inc. Page 47...
- Page 48 X-ray image, extending transport belts if necessary. beyond the left and right image edge X-ray image is stretched Wrong barrier envelope or PSP • Only use original accessories. lengthwise with bright, used horizontal stripes Page 48 Air Techniques, Inc.
-
Page 49: Software Error
• Turn the unit such that no light can directly enter into the entry slot. Overtemperature Laser or erasure unit too hot • Switch the unit off and allow it to cool. Erasure unit fault LED defective • Contact technician. Air Techniques, Inc. Page 49... - Page 50 Error during data transmission Connecting cable used is incor- • Only use original cables. between unit and computer. rect or too long Error message “CRC error timeout” Page 50 Air Techniques, Inc.
-
Page 51: Fault On The Unit
• Switch the unit off and on again. no display on the touch screen Touch screen brightness set too • Update firmware dark • Increase the brightness of the touch screen. Touch screen defective • Contact technician Air Techniques, Inc. Page 51... -
Page 52: Error Messages On The Touch Screen
Fault on the laser, SOL sensor or • Update firmware. pentaprism assembly Error code 1172 SOL sensor timeout • Inform a service technician. Fault on the laser, SOL sensor or • Update the firmware. pentaprism assembly Page 52 Air Techniques, Inc. - Page 53 Faulty configuration file • Update the firmware. reset after unit restart • Reset the configuration to the factory settings and reconfigure. Warning message during Not a malfunction • Update the firmware. shutdown of the unit Air Techniques, Inc. Page 53...
-
Page 54: Storage
The following lists the ordering number and description for accessory components and consumable items available to use and maintain the ScanX to meet your professional needs. Contact your authorized dealer for information. Description Quantity Order Number ScanX Cleaning Sheets J1020 J1025 Page 54 Air Techniques, Inc. -
Page 55: Transfer Storage Box, Pn 73470
Specially formulated PSP Cleaning Wipes are used to clean all plates. These single-use, extra soft, 100% polyester fabric wipes plates will not scratch or damage while safely removing dust, hair, dirt and smudges from the imaging surface. 17.7 Plate Guides Order Size Quantity Number J1015-0 J1015-1 J1015-2 J1015-3 J1015-4 Air Techniques, Inc. Page 55... -
Page 56: A-1. Scanning Times
The file sizes here are approximate sizes which have been rounded up. The file sizes can be considerably reduced by using a suitable compression program. Scan mode Intraoral Very High Intraoral Standard Theor. Resolution LP/mm 23.8 Pixel size µm Size #0 Size #2 Page 56 Air Techniques, Inc. -
Page 57: Electromagnetic Compatibility (Emc) Compliance Information
Portable and mobile RF communications equipment can affect ScanX operation. Use of accessories or cables other than those specified or provided by Air Techniques may result in increased ScanX emissions and decreased ScanX immunity. - Page 58 Power frequency magnetic fields should be at (50/60Hz) levels characteristic of a typical location within magnetic field a typical commercial or hospital environment. IEC 61000-4-8 Note: Ur is the a. c. mains voltage prior to application of the test level. Page 58 Air Techniques, Inc.
- Page 59 If abnormal performance is observed, additional measures may be neces- sary, such as re-orienting or relocating the ScanX. b Over the frequency range 150 kHz to 80 MHz, field strengths should be less than 3 V/m. Air Techniques, Inc. Page 59...
-
Page 60: B-3. Recommended Separation Distances Between Equipment
Note 1: At 80 and 800 MHz, the higher frequency range applies. Note 2: These guidelines may not apply in all situations. Electromagnetic propagation is affected by absorption and reflection from structures, ob- jects and people. Page 60 Air Techniques, Inc. -
Page 61: Warranty
Any item returned under warranty, will be repaired or replaced at our option at no charge provided that our inspection shall indicate it to have been defective. Air Techniques, Inc. is not liable for indirect or consequential damages or loss of any nature in connection with this equipment. Dealer labor, shipping and handling charges are not covered by this warranty. - Page 62 NOTES Page 62 Air Techniques, Inc.
- Page 63 Australian Sponsor: Emergo Australia Level 20 Tower II, Darling Park 201 Sussex Street Sydney, NSW 2000. Australia. Air Techniques, Inc. Page 63...
- Page 64 For over 50 years, Air Techniques has been a leading innovator and manufacturer of dental products. Our priority is ensuring complete satisfaction by manufacturing reliable products and providing excellent customer and technical support. Whether the need is digital imaging, utility room equipment or merchandise, Air Techniques can provide the solution via our network of authorized professional dealers.
Need help?
Do you have a question about the ScanX Duo Touch J1200 and is the answer not in the manual?
Questions and answers