Advertisement
Advertisement
Table of Contents

Related Manuals for Midea FZ10-18TR


Summary of Contents for Midea FZ10-18TR
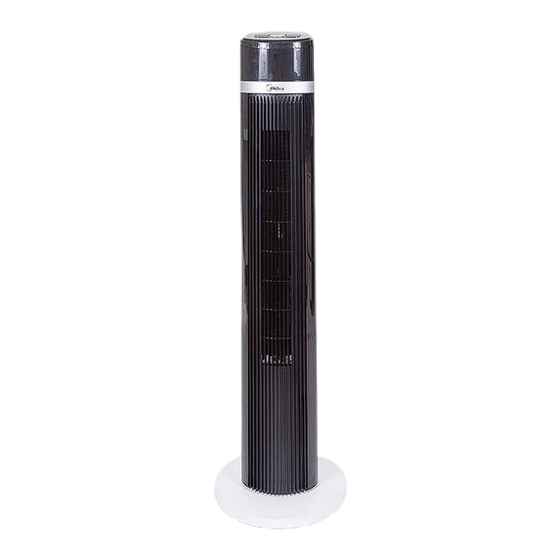
- Page 1 维修手册 Service Manual, 2019 v1.0 Service Manual 维修手册 Applicable Models 适用机型 FZ10-18TR (本图片为参考示意图,具体外观和配置以实物为准)(The picture is only for reference, and specific appearance and configuration are subject to the real product) Prepared by 编制 赵冬冬 Reviewed by 审核 崔朝阳 Approved by 批准...
-
Page 2: Important Safety Notice
Midea Environment Appliance Technical Maintenance Manual Copyright @2017 All rights reserved. Replication of all or part of the Manual in any forms shall not be allowed without written approval by the Overseas Sales of Midea Environment Appliance. 2 / 15... -
Page 3: Safety Warning Code
维修手册 Service Manual, 2019 v1.0 安全警示规范 Safety Warning Code WARNING Read these instructions. Keep these instructions. Follow all instructions. Do not use this appliance near water. This appliance is intended to be used in household and similar environments. Clean only with a damp cloth. Install in accordance with the manufacturer’s instructions. - Page 4 维修手册 Service Manual, 2019 v1.0 整机拆卸 Dismantling of appliance SOM dismantling 蝶型螺母拆卸 逆时针拧开 3 个蝶型螺母,然后取下底盘。 Unscrew the 3 wing nuts counterclockwise and remove the chassis. Chassis disassembly 底盘拆卸 取下底盘 Take down the chassis 螺钉拆卸 Screw disassembly 松开并取出后壳 4 颗螺钉 Release and remove 4 screws from the rear shell 4 / 15...
- Page 5 维修手册 Service Manual, 2019 v1.0 Rear shell disassembly 后壳的拆卸 向后壳方向用力拍,始前后壳扣位脱开。 Press backward in the direction of the shell and pull the front and rear buttons off. Back shell 取下后壳 取下后壳 Back shell 5 / 15...
- Page 6 维修手册 Service Manual, 2019 v1.0 Disassembly of guide plate 导风板的拆卸 用螺丝刀取下固定导风板的螺钉, 然后取下导 风板。 Remove the screws of the fixed deflector with a screwdriver and remove the deflector. Disassembly of bearing components 轴承组件的拆卸 用螺丝刀取下轴承组件的 2 颗螺钉,即可取下 轴承组件。 2 screws of the bearing assembly are removed with a screwdriver, and the bearing assembly can be removed.
- Page 7 维修手册 Service Manual, 2019 v1.0 风轮的拆卸 Disassembly of the wind wheel 用螺丝刀取下风轮的固定螺钉,即可取下风 轮。 Use the screwdriver to take down the fixing screw of the wind wheel, and then take down the wind wheel. Disassembly of motion components 运动组件的拆卸 用螺丝刀取下摇头组件 的固定螺钉, 即可取下电 机组件。...
- Page 8 维修手册 Service Manual, 2019 v1.0 用螺丝刀取下电机安装 的固定螺钉, 即可取下电 机。 Remove the motor with the screwdriver. Remove the motor with the screwdriver. Disassembly of the control system 控制系统的拆卸 使用螺丝刀将防火盒的固定螺钉松开然后取出防 火盒。 Use a screwdriver to loosen the captive screws of the fire box and remove the fire box. 用螺丝刀松开固定电路板的...
-
Page 9: Function And Operation
维修手册 Service Manual, 2019 v1.0 取出电路板后就可以将电路板支架拆开,并且取 出按键。 After removing the board, you can remove the board bracket and remove the button. 整机的安装 Function and operation The installation of the control system 的安装 控制系统 先将按键装进前壳顶盖处,然后将电路板装进电 路板支架上。 First install the button into the top cover of the front case, then load the board into the board bracket. - Page 10 维修手册 Service Manual, 2019 v1.0 Assembly of motion components 运动组件安装 用螺丝刀拧紧电机安装的固定螺钉 Tighten the fixed screw of the motor with a screwdriver 用螺丝刀拧紧电机安装板的固定螺钉 Screw the fixed screw of the motor mounting plate with a screwdriver 用螺丝刀拧紧摇头组件的固定螺钉 Screw a screwdriver to tighten the fixed screw of the head component 10 / 15...
- Page 11 维修手册 Service Manual, 2019 v1.0 The installation of the wind wheel 风轮的安装 用螺丝刀拧紧轴承组件的固定螺钉 Screw the fixed screw of the bearing assembly with a screwdriver 用螺丝刀拧紧风轮的固定螺钉 Tighten the fixed screw of the wind wheel with a screwdriver 11 / 15...
- Page 12 维修手册 Service Manual, 2019 v1.0 Installation of air guide plate 导风板的安装 用螺丝刀拧紧导风板的固定螺钉 Tighten the fixed screw of the guide plate with a screwdriver 后壳的安装 The installation of the rear shell 合上后壳 Back shell 用螺丝刀拧紧后壳的 4 颗固定螺钉 Tighten the 4 fixed screws of the rear shell with a screwdriver Chassis installation 底盘的安装...
-
Page 13: Fault Code And Solutions
维修手册 Service Manual, 2019 v1.0 拧上蝶型螺母 Screw on butterfly nuts 常见故障及解决方法 Fault code and solutions 故 障 代 码 故障内容 Fault 显示 维修方法步骤 Display Steps for maintenance methods Fault code content A、家庭的电源插座故障:检查插座是否有电,如出现故 障更换。 B、产品内部各部分故障: B1、电路板故障:电路板损坏,插线脱落; B2、内部接线故障:内部线断;故障:电路板损坏,插 线脱落; 不能正常启动 B3、电机故障:烧坏或热熔断器断路。 It is not normal 处理方法:分段检查,逐一排除找到原因后进行修理。... - Page 14 维修手册 Service Manual, 2019 v1.0 Appendix: 附录 Electrical Schematic Diagram 整机接线图 风扇维修常用工具、设备和材料 refrigerator maintenance tooling and equipment and material 工具 Tooling 名称 图片 主要用途 Name Photo Main Usage 十字螺丝刀 拆卸螺钉 Phillips screw assemble and screwdriver disassemble 14 / 15...
- Page 15 如需获得厂家详细技术咨询,请联系: xxx@midea.com 环境电器事业部 外销 地址:中国广东省中山市东凤镇东阜路和穗工业园东区 28 号 Midea Environment Appliance If you need to get detailed technical information from the manufacturer, please contact: xxx@midea.com Environment Appliance Division Overseas Sales Address: Eastern 28th, Hesui industrial Park, Dongfu Road, Dongfeng Town, Zhongshan City,...
Need help?
Do you have a question about the FZ10-18TR and is the answer not in the manual?
Questions and answers