Table of Contents
Advertisement
Quick Links
Advertisement
Table of Contents

Related Manuals for Midea FSD35-19R


Summary of Contents for Midea FSD35-19R
- Page 1 用戶手冊 電風扇 型號: FSD35-19R 本手冊僅供參考,所含資訊已經過仔細檢查, 如有差異,以出廠規格為准。 注意:用戶手冊中的圖片僅供參考。...
- Page 2 小心 請仔細閱讀安全操作規則和說明。 警告 1. 如果電源線損壞,必須由製造商或其服務代理商或具有類似資 格的人員更換,以避免危險。 2. 為避免觸電危險,請勿將設備、電源線或插頭浸入水中或其他 液體中。 3. 身體、感官或精神上有障礙的人,或缺乏經驗和知識的人員( 包括兒童)可以使用本電器,前提是他們已獲得有關安全使用 本電器的監督或指導,並瞭解相關的危險。應監督幼兒,以避 免其玩耍本產品。 4. 在不使用設備時以及在清潔之前,請從插座上 下電源插頭。 5. 兒童不得玩耍本產品。兒童不得在沒有監督的情況下進行清潔 和維護。 6. 組裝風扇後,不得再取下轉子葉片防護罩。 - 清潔前請 下電源插頭 - 不得拆卸/打開轉子護罩以清潔轉子葉片。 - 用一塊略濕的布擦拭風扇罩和轉子葉片防護罩。 7. 8歲以上的兒童以及身體、感官或精神上有障礙的人,或缺乏 經驗和知識的人員可以使用本電器,前提是他們已獲得有關安 全使用本電器的監督或指導,並瞭解相關的危險。 8. 電器應按照國家接線規定進行安裝。...
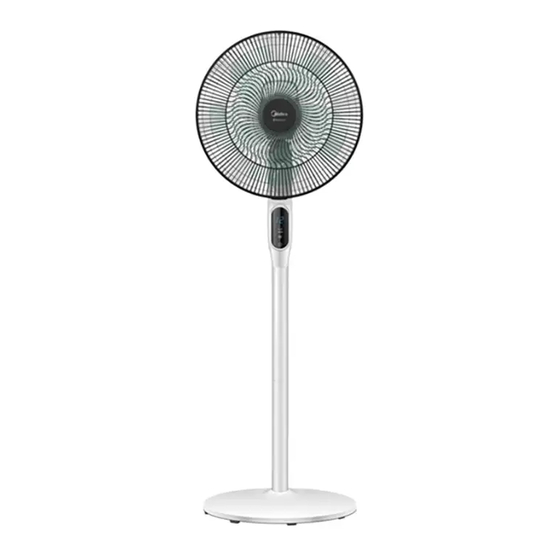
- Page 3 安全操作規則 1. 風扇運轉時,切勿將手指、鉛筆或任何其他物體插入網罩。 2. 移動位置之前,請斷開風扇的電源連接。 3. 運行時,請確保風扇處於穩定的表面上,以免翻倒。 4. 請勿在窗戶上使用風扇,否則可能會引起電氣危險。 5. 僅限家庭使用。 產品介紹 注意 手冊中包含的圖片僅供參考,請以包裝盒中的實物為准。...
- Page 4 組件名稱 電機 + 機殼 後網罩 前網罩 上立柱管 塑膠螺母 下立柱管 底座 葉片 旋鈕...
- Page 5 安裝說明 安裝準備 在安裝之前,從 電機+機殼中取出 塑膠螺母和 旋鈕。 順時針鬆開旋鈕 安裝步驟 底座安裝 對準並旋轉 下立柱管,將其插入 底座的孔中並固定。...
- Page 6 安裝機殼和上下支撐杆 對準 上立柱管和 下立柱管的孔並旋轉固定,然後對準 電機+機殼與 上立柱管的孔並旋轉固定。 對準 安裝和固定後網罩和葉片 對準電機 的軸凸起 凸起與圓孔對齊 固定後網罩 逆時針旋轉並鎖定葉片 將 電機+機殼與 後網罩對齊,鉤住並用 塑膠螺母鎖定。 對準並將 葉片插入電動機軸,然後用 旋鈕鎖住葉片。 安裝和固定前網罩 牢固地扣緊前格 柵後的格柵略圖 雙手依次按一下網罩,當聽 到“啪”的聲音時,說明網罩 已正確安裝。 夾子 將Midea標記調整到正 確的位置 卡扣安裝就緒 安裝要點:與 前網罩的夾子正確對齊,然後將Midea標記調整到正確的位置。 卡扣...
- Page 7 使用說明 風扇操作說明 上下調整(手動) 控制調整 風扇轉速 時間設定 顯示 顯示 擺頭按鈕:短按擺頭按鈕以啟用或停止擺頭功 能,按住擺頭按鈕2秒鐘可以設置時間,然後短 按擺頭按鈕調整時間。 調速按鈕:短按調速按鈕,風扇速度將按 1-2-3-4-……-1-2的順序變化。按住調速按鈕 可以快速調節風扇速度。 開/關按鈕:切換以操作或停止。 注意:風扇開機運行后無任何操作,風扇將在12小時后自動關機...
- Page 8 遙控器面板 警告 遙控器的操作範圍為產品正面5米之內,左右兩側角度30°以內。 電池中含有大量重金屬、酸和堿等,可能會威脅人體健康。應分類回收廢電池。 開始或停止 開機/待機 擺頭 “+/-”設置風 扇速度 設置定時關機/ 開機 1.5V 7號電池 注意:請使用7號錳或鹼性電池。請勿使 用可充電電池。 提示: 遙控器是通用的,“ ”和“ ”鍵不可以用在本風扇中。...
- Page 9 保養說明 風扇幾乎不需要保養。不要試圖自己修理。如果需要維修,請把它交給有資質 的維修人員。 1. 在清潔和組裝之前,必須 下風扇的電源線。 2. 為確保電機有充分的通風,請確保電機背面的通風孔沒有灰塵。請勿拆卸風扇以 清除灰塵。 3. 請用軟布蘸中性清潔劑擦拭外部部件。 4. 請勿使用任何研磨性清潔劑或溶劑,以免刮傷表面。請勿使用以下任何一種清潔 劑:汽油、稀釋劑。 5. 請勿讓水或任何其他液體進入電機外殼或內部零件。 清潔 1. 清潔前,請務必 下電源插頭。 2. 塑膠部件應使用蘸有中性肥皂液的軟布清潔。用乾布徹底清除肥皂膜。 型號和基本參數 型號 功率 產品尺寸(闊x高x深) 淨重(kg) 額定頻率 額定電壓 FSD35-19R 220-240V~ 50/60Hz 410x1300x410mm 5.3kg...
-
Page 10: Electric Fan
OWNER’S MANUAL Electric Fan MODEL: FSD35-19R This manual is for reference only, the information has been carefully checked, if there are any discrepancy, the factory specifications shall prevail. Attention: Pictures in the IM are for reference only. - Page 11 CAUTION Read Rules for Safe Operation and Instructions Carefully. WARNING 1. If the supply cord is damaged, it must be replaced by manufacturer or its service agent or a similarly qualified person in order to avoid a hazard. 2. To protect against the risk of electrical shock, do not immerse the unit, cord or plug in water or other liquid.
-
Page 12: Rules For Safe Operation
RULES FOR SAFE OPERATION 1. Never insert fingers, pencils, or any other object through the grille when fan is running. 2. Disconnect fan when moving from one location to another. 3. Be sure fan is on a stable surface when operating to avoid overturning. 4. -
Page 13: Name Of Each Component
Name of Each Component Motor + Housing Rear Grill Front Grill Upper pole Plastic Nut Lower pole Chassis Blade Spinner... -
Page 14: Installation Instructions
Installation Instructions Installation preparation Before installation, take out the Plastic Nut and the Spinner from the Motor + Housing. Loosen the Spinner clockwise Installation Procedures Base Installation Aim and rotate the Lower pole into the hole of the Base and fixate it. - Page 15 "snap" is heard, it is installed properly. Clip Adjust the Midea mark to the right place Ready-clasping installation Main points of installation Align correctly with the Clip of the Front Grill, and adjust the Midea mark to the right place. Clasp...
- Page 16 Instructions for Use Operating instructions of the fan itself Up-and-down adjustment (manual) Control adjustment Fan speed Time setting display display Oscillation button: Short press the oscillation button to engage or stop the oscillation function, and hold down the oscillation button for 2 seconds to set the time, and then short press the oscillation button to adjust the time.
- Page 17 Panel of Remote controller Caution The remote controller can work properly within 5 meters and an angle of 30 degrees to each side of the front of the product. The battery contains lots of heavy metals, acids and bases, etc., which may threaten human health.
-
Page 18: Maintenance Instruction
2. Plastic parts should be cleaned with a soft cloth moisten with mild soap. Thoroughly remove soap film with dry cloth. MODEL AND BASIC PARAMETERS Rated Rated Model Power Product size(W*H*D) Net weight (KG) voltage frequency FSD35-19R 220-240V~ 50/60Hz 410x1300x410mm 5.3kg...
Need help?
Do you have a question about the FSD35-19R and is the answer not in the manual?
Questions and answers