
Related Manuals for Midea FZ10-19BRA


Summary of Contents for Midea FZ10-19BRA
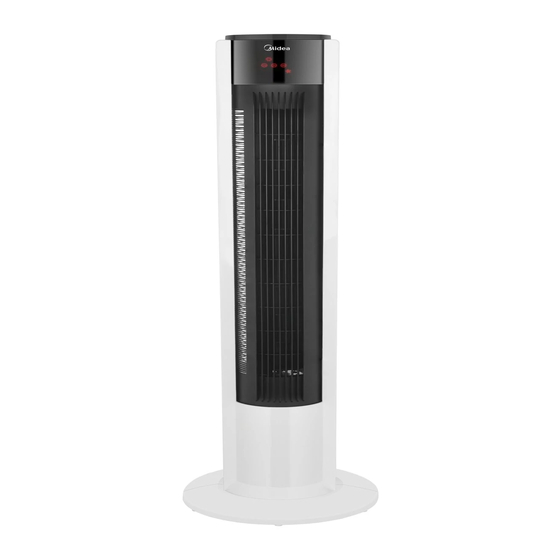
- Page 1 ΕΓΧΕΙΡΙΔΙΟ ΧΡΗΣΤΗ Ανεμιστήρας Πύργου ΜΟΝΤΕΛΟ: FZ10-19BRA ΔΙΑΒΑΣΤΕ ΚΑΙ ΦΥΛΑΞΤΕ ΑΥΤΕΣ ΤΙΣ ΟΔΗΓΙΕΣ Προσοχή: Οι εικόνες στο IM προορίζονται μόνο για αναφορά.
- Page 2 ΠΡΟΣΟΧΗ Διαβάστε Προσεκτικά τους Κανόνες για Ασφαλή Λειτουργία και τις Οδηγίες. ΠΡΟΕΙΔΟΠΟΙΗΣΗ 1. Εάν το καλώδιο τροφοδοσίας έχει πάθει βλάβη, πρέπει να αντικατασταθεί από τον κατασκευαστή, τον εξουσιοδοτημένο πάροχο σέρβις ή κατάλληλα καταρτισμένο άτομο για αποφυγή κινδύνων. 2. Αυτή η συσκευή μπορεί να χρησιμοποιηθεί από παιδιά ηλικίας...
- Page 3 προφυλάσσοντας το περιβάλλον. Το υλικό συσκευασίας είναι ανακυκλώσιμο. Απορρίψτε τη συσκευασία με ένα περιβαλλοντικά φιλικό τρόπο και καταστήστε τη διαθέσιμη για την υπηρεσία συλλογής ανακυκλώσιμου υλικού. 4. Μόνον για εσωτερική και οικιακή χρήση. 5. Όταν δεν χρησιμοποιείτε τη συσκευή και πριν την καθαρίσετε, βγάλτε...
-
Page 4: Οδηγίες Συναρμολόγησης
Οδηγίες συναρμολόγησης Σημείωση Τοποθετήστε το μηχάνημα στο αφρολέξ της συσκευασίας ή σε άλλες μαλακές επιφάνειες και αναστρέψτε το για να αποφύγετε να το χαράξετε όταν εγκαθιστάτε τη βάση. 1 Βγάλετε τα δύο μέρη της βάσης από το κουτί συσκευασίας. Μετά, ευθυγραμμίστε τα... - Page 5 Πατήστε τα πλήκτρα στον κορμό του μηχανήματος για να ξεκινήσουν οι αντίστοιχες λειτουργίες. Όπου: Πατήστε «Ταχύτητα ανεμιστήρα» απευθείας για να προσαρμόσετε την ταχύτητα από μετάβαση 1 σε 3. Πατήστε «Χρονοδιακόπτης» για να προσαρμόσετε την ώρα: Ορίστε την χρονομετρημένη απενεργοποίηση μεταξύ 1 ώρας...
- Page 6 Τοποθέτηση της μπαταρίας Εγκοπή έλξης Μπαταρία, 3v CR2032 Μάνταλο ασφάλισης Χρησιμοποιεί μία μπαταρία κυψέλης τύπου "CR2032". Εξετάστε τη Συμβουλή: 1. Εγκαταστήστε τη μπαταρία με τον θετικό πόλο να κοιτάζει προς τα πάνω. 2. Αποτελεσματικό εύρος του Τηλεχειριστηρίου: απόσταση εντός 5m και ανάκλαση 30 μοιρών μπροστά...
-
Page 7: Οδηγιεσ Συντηρησησ
ΟΔΗΓΙΕΣ ΣΥΝΤΗΡΗΣΗΣ Ο ανεμιστήρας χρειάζεται κάποια συντήρηση. Μην τον διορθώσετε μόνοι σας. Αναφέρετέ το σε εξειδικευμένο προσωπικό σέρβις, εάν χρειαστεί σέρβις. 1. Πριν τον καθαρισμό και την συναρμολόγηση, πρέπει να βγει το βύσμα του ανεμιστήρα. 2. Για να διασφαλιστεί η κατάλληλη κυκλοφορία αέρα στον κινητήρα, διατηρείτε... - Page 9 OWNER’S MANUAL Tower Fans MODEL: FZ10-19BRA READ AND SAVE THESE INSTRUCTIONS Attention: Pictures in the IM are for reference only.
- Page 10 CAUTION Read Rules for Safe Operation and Instructions Carefully. WARNING 1. If the supply cord is damaged, it must be replaced by manu- facturer,its service agent or a similarly qualified person in order to avoid a hazard. 2. This appliance can be used by children aged from 8 years and above and persons with reduced physical, sensory or mental capabilities or lack of experience and knowledge if they have been given supervision or instruction concerning use of the...
-
Page 11: Product Profile
4. Indoor and household use only. 5. When the appliance is not in use and before cleaning, unplug the appliance from the outlet. 6. To protect against the risk of electrical shock, do not disassem- ble the fan and do not immerse the unit, cord or plug in water or other liquid. -
Page 12: Use Instructions
Assembly Instructions Note Please place the machine on the package foam or other soft surfac- es and invert it to avoid scratch mark when install the base. 1 Take out the two parts of the base from packing box. Then, align the centers of the two parts of the base and place them in a crossed form. - Page 13 Press buttons on the machine body to start corresponding functions. Wherein: Press "Fan speed" directly to adjust the speed from shift 1 to 3. Press "Timing" to adjust the time: Set timed power off between 1 hour and 7 hours in starting up status;...
-
Page 14: Circuit Diagram
Battery Installation Pull Notch CR2032 Battery, 3v Locking latch It uses one button battery of type "CR2032". Considerate Hint: 1. Install the battery with positive side facing up. 2. Effective Range of Remote Control: within 5m distance and 30-degree deflection in front of Product. -
Page 15: Maintenance Instruction
MAINTENANCE INSTRUCTION The fan requires little maintenance. Do not try to fix it by your- self. Refer it to qualified service personnel if service is needed. 1. Before cleaning and assembling, fan must be unplugged. 2. To ensure adequate air circulation to the motor, keep vents at the rear of the motor free of dust.
Need help?
Do you have a question about the FZ10-19BRA and is the answer not in the manual?
Questions and answers