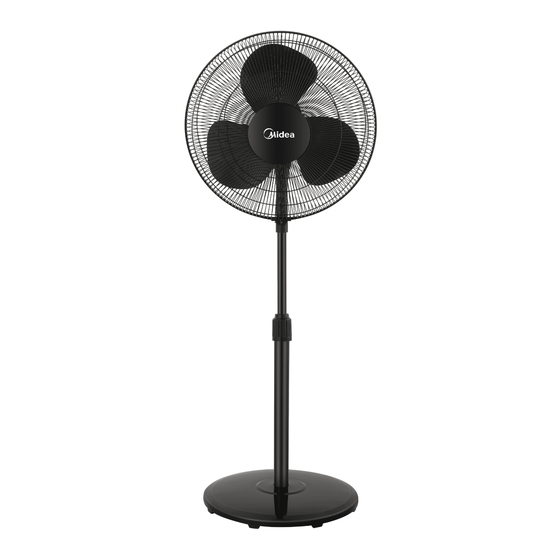
Summary of Contents for Midea FS40-19M
- Page 1 ΕΓΧΕΙΡΙΔΙΟ ΧΡΗΣΤΗ Ανεμιστήρας δαπέδου 16" Μοντελο: FS40-19M ΔΙΑΒΑΣΤΕ ΚΑΙ ΦΥΛΑΞΤΕ ΑΥΤΕΣ ΤΙΣ ΟΔΗΓΙΕΣ Προσοχή: Οι εικόνες στο IM προορίζονται μόνο για αναφορά.
- Page 2 ΠΡΟΣΟΧΗ Διαβάστε Προσεκτικά τους Κανόνες για Ασφαλή Λειτουργία και τις Οδηγίες. ΠΡΟΕΙΔΟΠΟΙΗΣΗ 1. Εάν το καλώδιο τροφοδοσίας έχει πάθει βλάβη, πρέπει να αντικατασταθεί από τον κατασκευαστή, τον εξουσιοδοτημένο πάροχο σέρβις ή κατάλληλα καταρτισμένο άτομο για αποφυγή κινδύνων. 2. Αυτή η συσκευή μπορεί να χρησιμοποιηθεί από παιδιά ηλικίας από...
- Page 3 4. Μόνον για εσωτερική και οικιακή χρήση. 5. Όταν δεν χρησιμοποιείτε τη συσκευή και πριν την καθαρίσετε, βγάλτε τη συσκευή από την πρίζα. 6. Για να προστασία από τον κίνδυνο ηλεκτροπληξίας, μην βυθίσετε τη μονάδα, το καλώδιο ή το βύσμα σε νερό ή άλλο υγρό.
- Page 4 ΟΔΗΓΙΕΣ ΕΓΚΑΤΑΣΤΑΣΗΣ Όνομα εξαρτημάτων Άξονας κινητήρα Κινητήρας Εγκατάσταση ανά ευθυγράμμιση Βίδα Εγκατάσταση βάσης Πίσω σχάρα Ευθυγραμμίστε την κολόνα με την αύλακα στη βάση και στερεώστε τα μαζί χρησιμοποιώντας ένα πόλος μπουλόνι δεξιάς γωνίας. Βάση Εξετάστε τη Συμβουλή: Αφαιρέστε τα μέρη από το στοιχείο...
- Page 5 Εγκατάσταση μπροστά και πίσω προστατευτικού Ευθυγραμμίστε το μάνταλο του Πατήστε τα προστατευτικά και με τα δύο μπροστινού προστατευτικού με την χέρια. απεικονισμένη θέση του Πίσω προστατευτικού. Μπροστινή σχάρα Παξιμάδι ασφάλισης πτερωτής Παξιμάδι ασφάλισης πτερωτής αριστερόστροφα, και κατόπιν εγκαταστήστε το Πτερωτή μπροστινό...
-
Page 6: Οδηγιεσ Χρησησ
ΟΔΗΓΙΕΣ ΧΡΗΣΗΣ Οριζόντια κίνηση Τραβήξτε προς τα επάνω για στατική θέση Τραβήξτε προς τα κάτω για περιστροφή Μοχλός έλξης περιστροφής Μοχλός ελέγχου ταχύτητας Προσαρμογή ύψους Γυρίστε αριστερόστροφα και χαλαρώστε το εκτελώντας ρύθμιση ύψους. Κλειδί ρύθμισης ύψους... -
Page 7: Οδηγιεσ Συντηρησησ
ΟΔΗΓΙΕΣ ΣΥΝΤΗΡΗΣΗΣ Ο ανεμιστήρας χρειάζεται κάποια συντήρηση. Μην τον διορθώσετε μόνοι σας. Αναφέρετέ το σε εξειδικευμένο προσωπικό σέρβις, εάν χρειαστεί σέρβις. 1. Πριν τον καθαρισμό και την συναρμολόγηση, πρέπει να βγει το βύσμα του ανεμιστήρα. 2. Για να διασφαλιστεί η κατάλληλη κυκλοφορία αέρα στον κινητήρα, διατηρείτε... - Page 9 OWNER’S MANUAL 16" Stand Fan Model: FS40-19M READ AND SAVE THESE INSTRUCTIONS Attention: Pictures in the IM are for reference only.
- Page 10 CAUTION Read Rules for Safe Operation and Instructions Carefully. WARNING 1. If the supply cord is damaged, it must be replaced by manufacturer,its service agent or a similarly qualified person in order to avoid a hazard. 2. This appliance can be used by children aged from 8 years and above and persons with reduced physical, sensory or mental capabilities or lack of experience and knowledge if they have been given supervision or instruction concerning use of the...
- Page 11 4. Indoor and household use only. 5. When the appliance is not in use and before cleaning, unplug the appliance from the outlet. 6. To protect against the risk of electrical shock, do not disassemble the fan and do not immerse the unit, cord or plug in water or other liquid.
-
Page 12: Installation Instructions
INSTALLATION INSTRUCTIONS Name of components Motor shaft Motor Install by aligning Screw Base Installation Rear grill Align the column with the groove on the base and fix them together using a Pole right-angle bolt. Base Considerate Hint: Remove parts from the component before performing installation. - Page 13 Front and Rear Guard Installation Align Catch of the Front Guard Press guards with both hands. with the illustrated position of the Rear Guard. Front grill Lock nut of blade Lock nut of blade anticlockwise, and then install the front fan cover. Blade Pull the blade to rotate after installing, so as to ensure that the blade can be...
- Page 14 INSTRUCTIONS FOR USE Horizontal Swing Pull-up for static Push-down to swing Swing Pull-knob Speed control knob Height Adjustment Turn counterclockwise and loosen for performing height adjustment. Height Adjustment Key...
-
Page 15: Maintenance Instruction
MAINTENANCE INSTRUCTION The fan requires little maintenance. Do not try to fix it by yourself. Refer it to qualified service personnel if service is needed. 1. Before cleaning and assembling, fan must be unplugged. 2. To ensure adequate air circulation to the motor, keep vents at the rear of the motor free of dust.


Need help?
Do you have a question about the FS40-19M and is the answer not in the manual?
Questions and answers