Legal Provisions The information contained in these documents is the property of SMA Solar Technology AG. No part of this document may be reproduced, stored in a retrieval system, or transmitted, in any form or by any means, be it electronic, mechanical, photographic, magnetic or otherwise, without the prior written permission of SMA Solar Technology AG.
SMA Solar Technology AG Table of Contents Table of Contents Information on this Document..................... Validity................................Target Group ..............................Content and Structure of this Document......................Levels of Warning Messages.......................... Symbols in the Document..........................Typographies in the document........................Designations in the Document.........................
Page 4
Table of Contents SMA Solar Technology AG Electrical connection procedure ........................30 Connecting the AC Cable..........................31 Connecting the Network Cables ........................32 Connecting the DC Cables ..........................33 Connecting the equipment grounding conductor ..................34 Commissioning ..........................35 Procedure for commissioning in systems with System Manager..............35 Procedure for commissioning in systems without System Manager .............
Page 5
12.7 Cleaning the Fans ............................76 12.8 Diagnostic function in the event of a defective Speedwire communication..........78 12.9 Activating the Speedwire communication display..................78 12.10 Testing the Speedwire communication by using SMA Data Manager............78 13 Decommissioning ......................... 79 13.1 Disconnecting product connections........................ 79 13.2 Disassembling the product ..........................
The latest version of this document and additional information about the product can be found in PDF format and as an eManual at www.SMA-Solar.com. You can also call up the eManual via the user interface of the product. Illustrations in this document are reduced to the essential information and may deviate from the real product.
"PUBLIC CYBER SECURITY - Guidelines for a Secure PV System Communication" Technical Information "Efficiency and Derating" Technical Information Efficiency and derating behavior of the SMA inverters "Parameters and Measured Values" Technical Information Device-specific overview of all parameters and measured values and their setting...
Any use of the product other than that described in the Intended Use section does not qualify as appropriate. The documentation supplied is an integral part of SMA products. Keep the documentation in a convenient, dry place for future reference and observe all instructions contained therein.
SMA Solar Technology AG 2 Safety The type label must remain permanently attached to the product. IMPORTANT SAFETY INSTRUCTIONS Keep the manual for future reference. This section contains safety information that must be observed at all times when working. The product has been designed and tested in accordance with international safety requirements. As with all electrical or electronical devices, some residual risks remain despite careful construction.
Page 10
2 Safety SMA Solar Technology AG DANGER Danger to life due to electric shock in case of overvoltages and if surge protection is missing Overvoltages (e.g., in the event of a flash of lightning) can be further conducted into the building and to other connected devices in the same network via the network cables or other data cables if there is no surge protection.
Page 11
SMA Solar Technology AG 2 Safety WARNING Danger to life due to electric shock from destruction of the measuring device due to overvoltage Overvoltage can damage a measuring device and result in voltage being present in the enclosure of the measuring device.
Page 12
2 Safety SMA Solar Technology AG NOTICE Damage to the inverter due to electrostatic discharge Touching electronic components can cause damage to or destroy the inverter through electrostatic discharge. • Ground yourself before touching any component. NOTICE Damage to the inverter due to switching operations on the transformer If voltages are present in the inverter, switching operations on the transformer can lead to large fluctuations in the voltage in the inverter.
SMA Solar Technology AG 3 Scope of Delivery 3 Scope of Delivery Check the scope of delivery for completeness and any externally visible damage. Contact your distributor if the scope of delivery is incomplete or damaged. Figure 1: Components included in scope of delivery...
4 Additionally Required Materials and Equipment SMA Solar Technology AG Position Quantity Designation Connecting plate Button head screw M8x70 Sealing plug (21 mm (0.75 in)) Counter nut for sealing plug (21 mm (0.75 in)) Permanent marker "Edding 750" (only included with SHP FLEX-US-21) Quick reference guide, production test report, supplementary sheet with the de-...
Page 15
SMA Solar Technology AG 4 Additionally Required Materials and Equipment Material or equipment Quantity Explanation Eye bolt (M10) Only required if the product is to be transported with a hoist Hoist Only required if the product is to be transported with a...
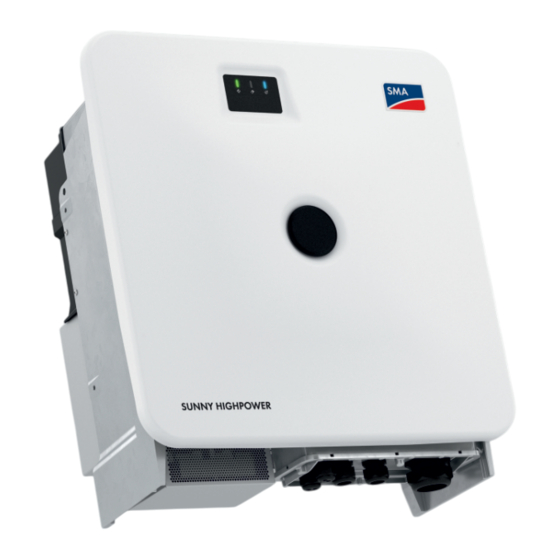
5 Product overview SMA Solar Technology AG 5 Product overview Product Description Figure 2: Design of the product Position Designation LEDs The LEDs indicate the operating state of the product. Cover Type label The type label clearly identifies the product. The type label must remain permanently at- tached to the product.
The product is equipped with a Modbus interface. The Modbus interface is deactivated by default and must be configured as needed. The Modbus interface of the supported SMA products is designed for industrial use – via SCADA systems, for example – and has the following tasks: •...
SMA Solar Technology AG 6 Mounting and Preparing the Connection LED signal Explanation The blue LED flashes slowly for Communication connection is being established approx. 1 minute The product is establishing a connection to a local network or is establishing a di- rect connection to a smart device via Ethernet (e.g.
6 Mounting and Preparing the Connection SMA Solar Technology AG Figure 3: Dimensions of the profile rails and the clamping range of the mounting bracket (dimensions in mm (in)) 6.1.3 Permitted and prohibited mounting positions ☐ The product may only be mounted in a permitted position. This will ensure that no moisture can penetrate the product.
Page 21
SMA Solar Technology AG 6 Mounting and Preparing the Connection ® Prescribed clearances in accordance with the National Electrical Code or Canadian Electrical ® Code CSA C22.1 ® ® Under certain conditions, the National Electrical Code or the Canadian Electrical Code CSA C22.1 specify...
6 Mounting and Preparing the Connection SMA Solar Technology AG Overview of Connecting Plate Figure 6: Overview of the connecting plate (included in the scope of delivery) Position Designation Entry for the network cables (for 19.05 mm (0.75 in) trade size conduits) Entry for the DC cables (for 76.2 mm (3 in) trade size conduits)
SMA Solar Technology AG 6 Mounting and Preparing the Connection Preparing for mounting and connection DANGER Danger to life due to electric shock when live cables are touched High voltages are present on the AC and DC cables. Touching live cables results in death or lethal injuries due to electric shock.
6 Mounting and Preparing the Connection SMA Solar Technology AG 9. Attach the conduit fittings for attachment of the conduits to the connecting plate. 10. Lead the cables through the conduit fittings in the connecting plate and align the connecting plate using the mounting template.
Page 25
SMA Solar Technology AG 6 Mounting and Preparing the Connection CAUTION Risk of injury due to weight of product Injuries may result if the product is lifted incorrectly or dropped while being transported or mounted. • Transport and lift the product carefully. Take the weight of the product into account.
Page 26
6 Mounting and Preparing the Connection SMA Solar Technology AG 7. Hook the product into the mounting brackets. To do this, guide the product over the cables and the connecting plate so that the cables protrude through the opening into the product and the connecting plate sits under the opening.
In case of installations with long outdoor cabling routes, additional measures to reduce overvoltage category IV to overvoltage category III are required (see the Technical Information "Overvoltage Protection" at www.SMA-Solar.com). 7.1.3 AC cable requirements ☐...
7 Electrical Connection SMA Solar Technology AG ☐ Maximum cable length between 2 nodes when using patch cables: 50 m (164 ft) ☐ Maximum cable length between 2 nodes when using installation cables: 100 m (328 ft) ☐ UV-resistant for outdoor use. 7.1.5 Laying plan for network cables Figure 8: Interior view of the product with laying plan for network cables 7.1.6...
SMA Solar Technology AG 7 Electrical Connection Overview of the Connection Area Figure 9: Connection areas in the interior of the product Position Designation Equipment grounding terminal for the equipment grounding conductor of the PV array Cable for DC connection with tin-plated copper terminal lugs...
7 Electrical Connection SMA Solar Technology AG DC connection overview 1 DC cable 2 DC cable Figure 10: DC connection overview Position Designation DC cable with tin-plated copper terminal lugs (installed in the product) M10x40 combination hexagon head screw (AF16)
SMA Solar Technology AG 7 Electrical Connection Connecting the AC Cable Requirements: ☐ A suitable medium-voltage transformer must be available. For the SHP 100-21, depending on the local standards and connection conditions, a medium-voltage transformer is not absolutely necessary. Additionally required material (not included in the scope of delivery): ☐...
7 Electrical Connection SMA Solar Technology AG 9. Ensure that the correct conductors are assigned to the terminals. 10. Ensure that all conductors are securely in place. Also see: • Overvoltage category ⇒ page 27 Connecting the Network Cables DANGER Danger to life due to electric shock in case of overvoltages and if surge protection is missing Overvoltages (e.g., in the event of a flash of lightning) can be further conducted into the building and to other...
SMA Solar Technology AG 7 Electrical Connection Connecting the DC Cables NOTICE Damage to the product due to ground fault on DC side during operation Due to the transformerless topology of the product, the occurrence of ground faults on DC side during operation can lead to irreparable damage.
7 Electrical Connection SMA Solar Technology AG 6. Clean the contact surfaces of all terminal lugs using a clean cloth and ethanol cleaning agent and do not touch the contact surfaces after cleaning. 7. Connect the DC cables with each other. To do this, insert the...
This section describes the procedure of commissioning an inverter that is used in systems with System Manager (e.g. SMA Data Manager). The System Manager is the device for the configuration of the overall system. The configuration is transferred to all inverters in the system.
SMA Grid Guard code for changing the grid-relevant parame- ters must be available after completion of the first ten feed-in hours or installation assistant. You can request the SMA Grid Guard code via the Online Service Center. Only for SHP FLEX-US: Set power, AC voltage and electric cur- Section 8.8, page 40...
Page 37
SMA Solar Technology AG 8 Commissioning 2. Ensure that the cover sits straight on the enclosure. 3. Hold the enclosure lid pressed against the enclosure and screw and tighten the screw (hex socket AF8, torque: 18 Nm). 4. Place the cover on the screw in the enclosure lid.
☐ You are logged in as Installer, and the user interface is open on the Configuring the Inverter page. ☐ When configuring after completion of the first ten feed-in hours, the SMA Grid Guard code must be available in order to change the grid-relevant parameters. You can request the SMA Grid Guard code via the Online Service Center.
8 Commissioning SMA Solar Technology AG 4. Set the desired parameters. 5. Select [Save all]. ☑ The inverter parameters are set. Also see: • Logging Into the User Interface ⇒ page 46 SHP FLEX-US 8.8.1 Configuration SHP FLEX-US The SHP FLEX-US can be flexibly adjusted in terms of power and AC voltage and current. As a result, the SHP FLEX-US can be optimized for repowering purposes and used variably.
SMA Solar Technology AG 8 Commissioning Further parameters Name Value to be set Minimum voltage input PV voltage to start the feed-in operation. Formula: AC voltage x 1.55 Minimum PV voltage to which the MPP tracker tracks Critical voltage to end feed-in down.
8 Commissioning SMA Solar Technology AG Figure 11: Marking of the exemplary configuration on the label next to the type label Adjustable parameters for voltage and frequency monitoring You can set the following parameters for voltage and frequency monitoring via the user interface of the inverter.
Page 43
SMA Solar Technology AG 8 Commissioning Name Value/range Default value Voltage monitoring lower max. threshold trip. time (Overvolt- 0 ms to 1000000 ms 1000000 ms age/Slow, maximum time) Voltage monitoring, upper minimum threshold (Undervoltage/ 0 p.u. to 1 p.u. 0.88 ms Slow) Voltage monitoring, lower min. threshold trip. time (Undervolt- 0 ms to 1000000 ms...
On the Configuring the Inverter page, different configuration options for the first configuration of the device are available to choose from. SMA Solar Technology AG recommends carrying out the configuration with the installation assistant. This way, you ensure that all relevant parameters are set for optimal inverter operation.
Certain settings may only be changed by the user group Installer. The installer's SMA Grid Guard code must be available to change network-relevant settings after the first 10 hours of feed-in operation, or after completing the installation assistant. You can request the SMA Grid Guard code via the Online Service Center.
9 Operation SMA Solar Technology AG • Logging Into the User Interface ⇒ page 46 9.3.2 Establishing a Connection via Ethernet in the local network Usage of cookies For the correct display of the user interface, cookies are required. The cookies are used for convenience only. By using this user interface you agree to the placement of cookies.
SMA Solar Technology AG 9 Operation Start Page Design of the User Interface Figure 13: Design of the user interface's home page (example) Operating manual SHPxxx-US-21-BE-en-11...
Page 48
• Show eManual • Logout Help Provides the following functions: • Displaying information on Open Source licenses used • Link to the website of SMA Solar Technology AG Status bar Displays the following information: • Inverter serial number • Inverter firmware version •...
Page 49
SMA Solar Technology AG 9 Operation Position Designation Description Current power and current con- Temporal progression of the PV power and the power con- sumption sumption of the household over the selected time period. Please note, the power consumption will only be displayed if an energy meter is installed in the PV system.
☐ The personal SMA Grid Guard code of the Installer must be available for the changing of grid-relevant settings after completion of the first 10 operating hours or of the installation assistant. You can request the SMA Grid Guard code via the Online Service Center.
2. Click on [Edit parameters]. 3. Log in using the SMA Grid Guard code to change those parameters designated by a lock (only for installers). In the menu, select User Settings > SMA Grid Guard Login, enter the SMA Grid Guard code and select [Login].
SMA Solar Technology AG Creating a product key is not mandatory, but is recommended by SMA Solar Technology AG because the product key significantly increases the security of the system. A product key must be generated for each of the user groups User and Installer.
9.12 Activate Service access In the event of a malfunction of the product, it may be necessary for a service user authorized by SMA Solar Technology AG to access the user interface of the product. Service access must be activated to execute warranty services. If a quick and uncomplicated service intervention is to be enabled in an emergency, the service access must be permanently activated.
PV systems registered in a communication product With PV systems that are registered in a System Manager (e.g. SMA Data Manager) or in Sunny Portal, you can also assign a new password for the user group Installer via the System Manager. The password for the user group Installer is also the system password.
SMA Solar Technology AG 9 Operation The provision of reactive power during feed-in operation leads to a reduction of the feed-in power. This means that at 100% reactive power, the feed-in power is 0%. If the inverter is disconnected from the utility grid outside of feed-in operation, the "Q on Demand 24/7"...
Requirements: ☐ Changes to grid-relevant parameters must be approved by the responsible grid operator. ☐ The SMA Grid Guard code must be available. You can request the SMA Grid Guard code via the Online Service Center. ☐ You are logged in on the user interface as Installer.
Requirements: ☐ An update file with the desired firmware of the product must be available. You can download the update file, for example, from the product page under www.SMA-Solar.com. ☐ You are logged in on the user interface as Installer.
10 Disconnecting the product from voltage sources SMA Solar Technology AG 10 Disconnecting the product from voltage sources Prior to performing any work on the inverter, always disconnect it from all voltage sources as described in this section. Always adhere to the prescribed sequence.
Page 59
SMA Solar Technology AG 10 Disconnecting the product from voltage sources 8. Use a current clamp to ensure that no current is present in the DC cables. As a result, a possible residual current can be detected. 9. Ensure that no voltage is present between the positive terminal and negative terminal on the DC surge protection devices using a suitable measuring device.
11 Cleaning SMA Solar Technology AG 11 Cleaning The product must be cleaned regularly to ensure that the product is free of dust, leaves and other dirt. NOTICE Damage to the product due to cleaning agents The use of cleaning agents may cause damage to the product and its components.
Page 61
SMA Solar Technology AG 12 Troubleshooting Explanation: The grid frequency is not within the permissible range. The inverter has disconnected from the utility grid. Corrective measures: • If possible, check the grid frequency and observe how often fluctuations occur. If fluctuations occur frequently and this message is displayed often, contact the grid operator and request approval to change the operating parameters of the inverter.
Page 62
12 Troubleshooting SMA Solar Technology AG • If possible, check the grid frequency and observe how often fluctuations occur. If fluctuations occur frequently and this message is displayed often, contact the grid operator and request approval to change the operating parameters of the inverter.
Page 63
SMA Solar Technology AG 12 Troubleshooting 12.1.10 Event 3601 Event message: • High discharge current • Check generator Explanation: The leakage current of the inverter and the PV module is too high. There is a ground fault, a residual current or a malfunction.
Page 64
12 Troubleshooting SMA Solar Technology AG Explanation: The inverter has switched off due to excessive temperature. Corrective measures: • Clean the cooling fins on the rear of the enclosure and the air ducts on the top using a soft brush.
Page 65
SMA Solar Technology AG 12 Troubleshooting Explanation: A temperature sensor in the inverter is defective and the inverter interrupts the feed-in operation. The cause must be determined by the Service. Corrective measures: • Contact Service. 12.1.18 Event 7102 Event message: •...
Page 66
12 Troubleshooting SMA Solar Technology AG Explanation: The testing of the update conditions was not successful. The firmware update package is not suitable for this inverter. 12.1.22 Event 7333 Event message: • Update transport failed Explanation: Update file could not be copied to the inverter's internal memory. In the event of connection with the inverter via Wi-Fi network, a poor connection quality can be the cause.
Page 67
SMA Solar Technology AG 12 Troubleshooting 12.1.25 Event 7349 Event message: • Incorrect login rights for configuration file Explanation: The user group logged in does not have the user rights necessary to be able to import a configuration. Corrective measures: •...
Page 68
12 Troubleshooting SMA Solar Technology AG Corrective measures: • Ensure that the surge arrester is inserted correctly. • If surge arresters have tripped, replace the tripped surge arresters with new surge arresters. 12.1.29 Event 8003 Event message: • Temperature derating Explanation: The inverter has reduced its power output for more than 10 minutes due to excessive temperature.
Page 69
12.1.34 Event 9002 Event message: • Installer code invalid Explanation: The SMA Grid Guard code entered is incorrect. The operating parameters are still protected and cannot be changed. Corrective measures: • Enter the correct SMA Grid Guard code. 12.1.35 Event 9003 Event message: •...
Page 70
12 Troubleshooting SMA Solar Technology AG 12.1.36 Event 9007 Event message: • Abort self-test Explanation: The self-test was terminated. Corrective measures: • Ensure that the AC connection is correct. • Ensure that the country data set has been entered correctly.
Page 71
SMA Solar Technology AG 12 Troubleshooting Corrective measures: • Increase the query intervals. • If necessary, reduce the number of devices in the network. 12.1.40 Event 10249 Event message: • |tn4|: network busy Explanation: The network is overloaded. There is no data exchange between the devices.
12 Troubleshooting SMA Solar Technology AG 12.1.43 Event 10253 Event message: • |tn4|: connection speed goes to |tn8| Explanation: The data transfer rate has changed. The cause for the status [10 Mbit] can be a defective plug, a defective cable or the pulling or plugging of the network connector.
SMA Solar Technology AG 12 Troubleshooting Password assignment for inverters that are registered in a System Manager (e.g. SMA Data Manager) The password for the user group Installer is also the system password for the PV system in the System Manager or Sunny Portal. Changing the password of the user group Installer can lead to the inverter no longer being able to be reached by the System Manager.
12 Troubleshooting SMA Solar Technology AG 6. Perform one of the displayed actions within the specified time period. ☑ A newly generated product key is displayed. ☑ If the action performed was tapping the enclosure lid 2 times, the blue LED will flash rapidly.
Page 75
SMA Solar Technology AG 12 Troubleshooting WARNING Danger to life due to electric shock from destruction of the measuring device due to overvoltage Overvoltage can damage a measuring device and result in voltage being present in the enclosure of the measuring device.
12 Troubleshooting SMA Solar Technology AG Also see: • Calculating the insulation resistance ⇒ page 74 12.6 Replacing the Surge Arrester If the inverter displays event number 7801, an error is present in the surge arresters or the surge arresters have tripped. If the surge arresters have tripped, replace the tripped surge arresters with new surge arresters.
Page 77
SMA Solar Technology AG 12 Troubleshooting 2. Unlock the fan bracket on the right and left of the product. To do so, press in the locking tabs and push them upwards. 3. Move the fan bracket upwards and fold it backwards. When doing this, note that the fan bracket cannot be removed completely, because the fan cable connects it to the product.
12.10 Testing the Speedwire communication by using SMA Data Manager If there is an SMA Data Manager in the system, the product can use the red LED to signal whether the Speedwire communication is working properly. The diagnostic function can only be activated via the user interface of the SMA Data Manager.
13 Decommissioning Procedure: 1. Select the Communication diagnosis parameter via the SMA Data Manager user interface and set it to On. ☑ The red LED of the product flashes (250 ms on and 250 ms off): The communication of the Speedwire devices connected in line topology is working properly.
Page 80
13 Decommissioning SMA Solar Technology AG 4. Remove the DC cable connection. Loosen the hex nuts and remove the combined hexagon head screw (AF16). 5. Remove the network cables from the network ports. 6. Remove all cable conduits from the connecting plate. To do this, screw the conduit fittings out of the openings from the inside.
SMA Solar Technology AG 13 Decommissioning 9. Ensure that the cover sits straight on the enclosure. 10. Hold the enclosure lid pressed against the enclosure and screw and tighten the screw (hex socket AF8, torque: 18 Nm). 11. Place the cover on the screw in the enclosure lid.
Page 82
13 Decommissioning SMA Solar Technology AG ☐ A pallet is available. ☐ Mounting material for attaching the packaging on the pallet is available (e.g., tie-down straps). ☐ All transport handles are in place. Procedure: 1. Screw the transport handles as far as they will go into the tapped holes on the right- and left-hand side until they lie flush with the enclosure.
In case of failure, the product may need to be replaced. If this is the case, you will receive a replacement device from SMA Solar Technology AG. If you received a replacement device, replace the defective product with the replacement device as described below.
Page 84
15 Replacing the Product with a Replacement Device SMA Solar Technology AG 5. Secure the pre-configured DC connection cables in the defective product for transport. To do so, screw the supplied cable tie into the hole below the DC surge protection devices and place and tighten the cable tie around the DC connection cables.
17. Pack the defective product in the packaging of the replacement device. 18. Fasten the packaging to the pallet on which the replacement device was supplied using the reusable lashing straps. 19. Arrange for pick-up by SMA Solar Technology AG. 16 Technical Data 16.1...
16 Technical Data SMA Solar Technology AG Length x width x height of the packaging 1150 mm x 850 mm x 630 mm (45.3 in x 33.5 in x 24.8 in) Transport weight (including pallet) 115 kg (254 lbs) Operating temperature range -25°C to +60°C (-13°F to +140°F) Storage temperature -40°C to +70°C (-40°F to +158°F) Maximum permissible value for relative humidity, con- 100 %...
SMA Solar Technology AG 16 Technical Data SHP 125-US-21 SHP 150-US-21 SHP 165-US-21 SHP 172-US-21 SHP FLEX- US-21 Rated input volt- 830 V 960 V 994 V 1025 V 524 V to 1025 V Minimum input 684 V 855 V 898 V 941 V 289 V to 940 V...
Page 88
16 Technical Data SMA Solar Technology AG SHP 125-US-21 SHP 150-US-21 SHP 165-US-21 SHP 172-US-21 SHP FLEX- US-21 Total harmonic < 0.5 % < 0.5 % < 0.5 % < 0.5 % < 0.5 % distortion (THD) Maximum resid- 662.8 A 662.8 A 662.8 A 662.8 A...
17 Compliance Information SMA Solar Technology AG AC overvoltage protection" Surge arrester type 2 AC short-circuit current capability Current control Grid monitoring SMA Grid Guard 10.0 Maximal output overcurrent protection 250 A Ground fault monitoring Insulation monitoring: R > 32.2 kΩ All-pole sensitive residual-current monitoring unit...
Changes or modifications made to this equipment not expressly approved by SMA Solar Technology AG may void the FCC authorization to operate this equipment.
Need help?
Do you have a question about the SUNNY HIGHPOWER PEAK3 SHP FLEX-US-21 and is the answer not in the manual?
Questions and answers