SMA SUNNY HIGHPOWER PEAK3 SHP 100-21 Operating Manual
Hide thumbs
Also See for SUNNY HIGHPOWER PEAK3 SHP 100-21:
- Operating manual (92 pages) ,
- Quick reference manual (47 pages) ,
- Manual (38 pages)

Related Manuals for SMA SUNNY HIGHPOWER PEAK3 SHP 100-21


Summary of Contents for SMA SUNNY HIGHPOWER PEAK3 SHP 100-21
- Page 1 Operating manual SUNNY HIGHPOWER PEAK3 SHP 100-21 / SHP 150-21 / SHP 172-21 / SHP 180-21 ENGLISH SHPxxx-21-BE-en-10 | Version 1.0...
- Page 2 Legal Provisions The information contained in these documents is the property of SMA Solar Technology AG. No part of this document may be reproduced, stored in a retrieval system, or transmitted, in any form or by any means, be it electronic, mechanical, photographic, magnetic or otherwise, without the prior written permission of SMA Solar Technology AG.
-
Page 3: Table Of Contents
SMA Solar Technology AG Table of contents Table of contents Information on this Document..................... Validity................................Target Group ..............................Content and Structure of this Document......................Levels of warning messages..........................Symbols in the Document..........................Typographical Elements in the Document ...................... Designations in the Document......................... - Page 4 Table of contents SMA Solar Technology AG Electrical connection procedure ........................33 Connecting the AC Cable..........................34 Connecting the Network Cables ........................35 Connecting the DC Cables ..........................37 Commissioning ..........................39 Procedure for commissioning in systems with System Manager..............39 Procedure for commissioning in systems without System Manager .............
- Page 5 12.7 Cleaning the Fans ............................79 12.8 Diagnostic function in the event of a defective Speedwire communication..........81 12.9 Activating the Speedwire communication display..................81 12.10 Testing the Speedwire communication by using SMA Data Manager............81 13 Decommissioning ......................... 83 13.1 Disconnecting product connections........................ 83 13.2 Disassembling the product ..........................
-
Page 6: Information On This Document
You will find the latest version of this document and further information on the product in PDF format and as eManual at www.SMA-Solar.com. You can also call up the eManual via the user interface of the product. Illustrations in this document are reduced to the essential information and may deviate from the real product. -
Page 7: Symbols In The Document
Title and information content Type of information "PUBLIC CYBER SECURITY - Guidelines for a Secure PV System Communication" Technical Information "SMA GRID GUARD 10.0 - Grid Management Services via Inverter and System Technical Information Controller" "Efficiency and Derating" Technical Information Efficiency and derating behavior of the SMA inverters "Parameters and Measured Values"... - Page 8 SMA Solar Technology AG Title and information content Type of information "SMA MODBUS" Technical Information Information on the SMA Modbus interface "SUNSPEC MODBUS" Technical Information Information on the activation of the SunSpec Modbus interface and information on the SunSpec Modbus profiles "SMA SPEEDWIRE FIELDBUS"...
-
Page 9: Safety
All components must remain within their permitted operating ranges and their installation requirements at all times. The product must only be used in countries for which it is approved or released by SMA Solar Technology AG and the grid operator. -
Page 10: Important Safety Instructions
This document does not replace any regional, state, provincial, federal or national laws, regulations or standards that apply to the installation, electrical safety and use of the product. SMA Solar Technology AG assumes no responsibility for the compliance or non-compliance with such laws or codes in connection with the installation of the product. - Page 11 SMA Solar Technology AG 2 Safety DANGER Danger to life due to electric shock in case of overvoltages and if surge protection is missing Overvoltages (e. g. in the event of a flash of lightning) can be further conducted into the building and to other connected devices in the same network via the network cables or other data cables if there is no surge protection.
- Page 12 2 Safety SMA Solar Technology AG WARNING Danger to life due to electric shock from destruction of the measuring device due to overvoltage Overvoltage can damage a measuring device and result in voltage being present in the enclosure of the measuring device.
- Page 13 SMA Solar Technology AG 2 Safety NOTICE Damage to the inverter due to electrostatic discharge Touching electronic components can cause damage to or destroy the inverter through electrostatic discharge. • Ground yourself before touching any component. NOTICE Damage to the inverter due to switching operations on the transformer If voltages are present in the inverter, switching operations on the transformer can lead to large fluctuations in the voltage in the inverter.
-
Page 14: Scope Of Delivery
3 Scope of Delivery SMA Solar Technology AG 3 Scope of Delivery Check the scope of delivery for completeness and any externally visible damage. Contact your distributor if the scope of delivery is incomplete or damaged. Figure 1: Components included in scope of delivery... - Page 15 SMA Solar Technology AG 3 Scope of Delivery Position Quantity Designation Cable gland and counter nut M40x1.5 M32x1.5 cable gland and counter nut with two-hole seal insert and two sealing plugs Quick reference guide with registration data label on the rear side The label contains the following information: •...
-
Page 16: Additionally Required Materials And Equipment
4 Additionally Required Materials and Equipment SMA Solar Technology AG 4 Additionally Required Materials and Equipment Material or equipment Quantity Explanation Profile rail (length: min. 770 mm, depth: For mounting the product 40 mm to 60 mm, height: 50 mm to 83 mm) Terminal lugs (flange hole: M10) -
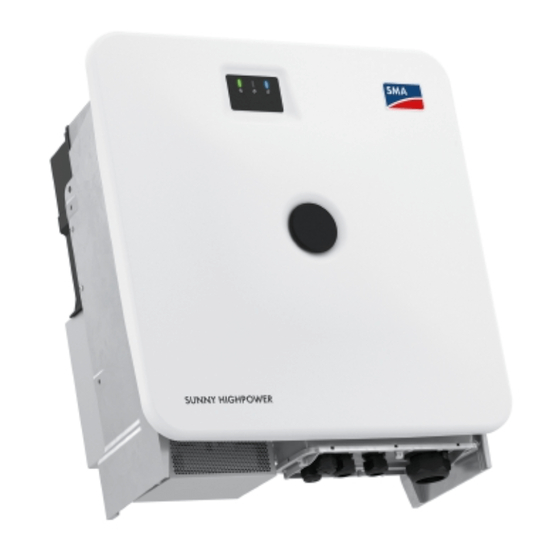
Page 17: Product Overview
SMA Solar Technology AG 5 Product Overview 5 Product Overview Product Description Figure 2: Design of the product Position Designation LEDs The LEDs indicate the operating state of the product. Cover Type label The type label clearly identifies the product. The type label must remain permanently at- tached to the product. -
Page 18: Interfaces And Functions
5 Product Overview SMA Solar Technology AG Icon Explanation Beware of hot surface The product can get hot during operation. Observe the documentations Observe all documentations supplied with the product. Inverter Together with the green LED, this symbol indicates the operating state of the inverter. -
Page 19: Smart Inverter Screen
PUK via SMA Solar Technology AG. If you have lost the product key, you can generate a new one by physically accessing the product. -
Page 20: Led Signals
5 Product Overview SMA Solar Technology AG LED Signals The LEDs indicate the operating state of the product. LED signal Explanation The green LED is flashing (2 s on Waiting for feed-in conditions and 2 s off) The conditions for feed-in operation are not yet met. As soon as the conditions are met, the product will start feed-in operation. -
Page 21: Mounting And Preparing The Connection
SMA Solar Technology AG 6 Mounting and Preparing the Connection 6 Mounting and Preparing the Connection Requirements for Mounting 6.1.1 Requirements for the Mounting Location WARNING Danger to life due to fire or explosion Despite careful construction, electrical devices can cause fires. This can result in death or serious injury. -
Page 22: Permitted And Prohibited Mounting Positions
6 Mounting and Preparing the Connection SMA Solar Technology AG 40 − 60 (1.57 − 2.36) 767.5 (30.2) 701 (27.6) 770 (30.3) 470 (18.5) Figure 3: Dimensions of the profile rails and the clamping range of the mounting bracket (dimensions in mm (in)) 6.1.3... -
Page 23: Connecting Plates Overview
SMA Solar Technology AG 6 Mounting and Preparing the Connection (20) (20) (20) (20) (20) (20) Figure 5: Recommended clearances (dimensions in mm (in)) Connecting Plates Overview A standard connecting plate is included in the scope of delivery. An alternative connecting plate can be purchased as an accessory. -
Page 24: Center Of Gravity
6 Mounting and Preparing the Connection SMA Solar Technology AG Position Designation Entry for DC cable (M40) Entry for AC cable (M63) Accessory connecting plate Figure 7: Overview of the connecting plates that can be ordered as an accessory Position... -
Page 25: Preparing For Mounting And Connection
SMA Solar Technology AG 6 Mounting and Preparing the Connection Preparing for mounting and connection DANGER Danger to life due to electric shock when live cables are touched High voltages are present on the AC and DC cables. Touching live cables results in death or lethal injuries due to electric shock. -
Page 26: Mount The Product
6 Mounting and Preparing the Connection SMA Solar Technology AG 9. Thread the swivel nuts of the cable glands over the cables. 10. Attach the cable glands to the connecting plate. 11. Lead the cables through the cable glands in the connecting plate and align the connecting plate by means of the mounting template. - Page 27 SMA Solar Technology AG 6 Mounting and Preparing the Connection CAUTION Risk of injury due to weight of product Injuries may result if the product is lifted incorrectly or dropped while being transported or mounted. • Transport and lift the product carefully. Take the weight of the product into account.
- Page 28 6 Mounting and Preparing the Connection SMA Solar Technology AG 7. Hook the product into the mounting brackets. To do this, guide the product over the cables and the connecting plate so that the cables protrude through the opening into the product and the connecting plate sits under the opening.
- Page 29 SMA Solar Technology AG 6 Mounting and Preparing the Connection • Center of gravity ⇒ page 24 Operating manual SHPxxx-21-BE-en-10...
-
Page 30: Electrical Connection
1000 mA and for SHP 150-21 the rated residual current must be 1500 mA or higher (for information on selecting a residual-current device, see Technical Information "Criteria for Selecting a Residual-Current Device" under www.SMA-Solar.com). Each inverter in the system must be connected to the utility grid via a separate residual- current device. -
Page 31: Laying Plan For Network Cables
SMA Solar Technology AG 7 Electrical Connection ☐ UV-resistant for outdoor use. 7.1.5 Laying plan for network cables Figure 9: Interior view of the product with laying plan for network cables 7.1.6 DC cable requirements ☐ Aluminum or copper wires must be used. -
Page 32: Overview Of The Connection Area
7 Electrical Connection SMA Solar Technology AG Overview of the Connection Area Figure 10: Connection areas in the interior of the product Position Designation Optional connection for additional grounding or equipotential bonding Cable for DC connection with tin-plated copper terminal lugs... -
Page 33: Dc Connection Overview
SMA Solar Technology AG 7 Electrical Connection DC connection overview 1 PV-Anschlusskasten 2 PV-Anschlusskästen Figure 11: DC connection overview Position Designation DC cable with tin-plated copper terminal lugs (installed in the product) M10x40 combination hexagon head screw (AF16) Washer M10... -
Page 34: Connecting The Ac Cable
7 Electrical Connection SMA Solar Technology AG Connecting the AC Cable Requirements: ☐ A suitable medium-voltage transformer must be available. For the SHP 100-21, depending on the local standards and connection conditions, a medium-voltage transformer is not absolutely necessary. Additionally required material (not included in the scope of delivery): ☐... -
Page 35: Connecting The Network Cables
SMA Solar Technology AG 7 Electrical Connection Connecting the Network Cables DANGER Danger to life due to electric shock in case of overvoltages and if surge protection is missing Overvoltages (e. g. in the event of a flash of lightning) can be further conducted into the building and to other connected devices in the same network via the network cables or other data cables if there is no surge protection. - Page 36 7 Electrical Connection SMA Solar Technology AG 5. For each network cable, remove one of the plugs from the cable support sleeve and cut the enclosure opening laterally with a utility knife. This will push the cable into the opening.
-
Page 37: Connecting The Dc Cables
SMA Solar Technology AG 7 Electrical Connection 12. If the product is installed outdoors, install overvoltage protection for all components in the network. 13. Either connect the other end of the network cable directly to the local network (e.g. via a router) or connect all present inverters in the system to each other in line topology and connect the first or last inverter in the line to the local network. - Page 38 7 Electrical Connection SMA Solar Technology AG 4. Remove any cable remnants from the product. 5. Remove the fixing of the pre-harnessed DC cables from the product. 6. Clean the contact surfaces of all terminal lugs using a clean cloth and ethanol cleaning agent and do not touch the contact surfaces after cleaning.
-
Page 39: Commissioning
This section describes the procedure of commissioning an inverter that is used in systems with System Manager (e.g. SMA Data Manager). The System Manager is the device for the configuration of the overall system. The configuration is transferred to all inverters in the system. -
Page 40: Commissioning The Inverter
SMA Grid Guard code for changing the grid-relevant parameters must be available after completion of the first ten feed-in hours or installa- tion assistant. You can request the SMA Grid Guard code via the Online Service Center. Ensure that the country standard has been config- Section 9.18, page 56... -
Page 41: Logging Into The User Interface For The First Time
The passwords for the user groups Installer and User must be assigned when accessing the user interface for the first time. If the inverter was registered in a System Manager (e.g. SMA Data Manager) and the system password was assigned, the system password is also the installer password. In this case, only the user password must be assigned. -
Page 42: Carry Out The Configuration Using The Installation Assistant
☐ You are logged in as Installer, and the user interface is open on the Configuring the Inverter page. ☐ When configuring after completion of the first ten feed-in hours, the SMA Grid Guard code must be available in order to change the grid-relevant parameters. You can request the SMA Grid Guard code via the Online Service Center. -
Page 43: Adopting The Configuration From A File
☐ You are logged in as Installer, and the user interface is open on the Configuring the Inverter page. ☐ When configuring after completion of the first ten feed-in hours, the SMA Grid Guard code must be available in order to change the grid-relevant parameters. You can request the SMA Grid Guard code via the Online Service Center. -
Page 44: Operation
On the Configuring the Inverter page, different configuration options for the first configuration of the device are available to choose from. SMA Solar Technology AG recommends carrying out the configuration with the installation assistant. This way, you ensure that all relevant parameters are set for optimal inverter operation. -
Page 45: Information For The Use Of The User Interface
Certain settings may only be changed by the user group Installer. The installer's SMA Grid Guard code must be available to change network-relevant settings after the first 10 hours of feed-in operation, or after completing the installation assistant. You can request the SMA Grid Guard code via the Online Service Center. -
Page 46: Establishing A Connection Via Ethernet In The Local Network
Web browser signals a security vulnerability After the IP address has been entered, a message might appear indicating that the connection to the user interface of the product is not secure. SMA Solar Technology AG guarantees the security of the user interface. -
Page 47: Logging Out Of The User Interface
SMA Solar Technology AG 9 Operation Logging out of the user interface Requirement: ☐ You are logged in on the user interface as User or Installer. Procedure: 1. On the right-hand side of the menu bar, select the menu User Settings. -
Page 48: Start Page Design Of The User Interface
9 Operation SMA Solar Technology AG Start Page Design of the User Interface Figure 13: Design of the user interface's home page (example) SHPxxx-21-BE-en-10 Operating manual... - Page 49 • Show eManual • Logout Help Provides the following functions: • Displaying information on Open Source licenses used • Link to the website of SMA Solar Technology AG Status bar Displays the following information: • Inverter serial number • Inverter firmware version •...
- Page 50 9 Operation SMA Solar Technology AG Position Designation Description Current power and current con- Temporal progression of the PV power and the power con- sumption sumption of the household over the selected time period. Please note, the power consumption will only be displayed if an energy meter is installed in the PV system.
-
Page 51: Layout Of The Installation Assistant
☐ The personal SMA Grid Guard code of the Installer must be available for the changing of grid-relevant settings after completion of the first 10 operating hours or of the installation assistant. You can request the SMA Grid Guard code via the Online Service Center. -
Page 52: Configuring The Active Power Mode For Systems With External Setpoint
9 Operation SMA Solar Technology AG Procedure: 1. Select the menu User settings on the home page of the user interface. 2. In the context menu, select [Starting the installation assistant]. ☑ The installation assistant will open. Also see: • Layout of the installation assistant ⇒ page 51... -
Page 53: Changing Parameters
2. Click on [Edit parameters]. 3. Log in using the SMA Grid Guard code to change those parameters designated by a lock (only for installers). In the menu, select User Settings > SMA Grid Guard Login, enter the SMA Grid Guard code and select [Login]. -
Page 54: Generate New Product Key
• Restoring the password without product key ⇒ page 76 9.14 Activate Service access In the event of a malfunction of the product, it may be necessary for a service user authorized by SMA Solar Technology AG to access the user interface of the product. SHPxxx-21-BE-en-10... -
Page 55: Deactivate Service Access
SMA Solar Technology AG 9 Operation Service access must be activated to execute warranty services. If a quick and uncomplicated service intervention is to be enabled in an emergency, the service access must be permanently activated. You have the option of activating the service access permanently or for a certain period of time. -
Page 56: Password
PV systems registered in a communication product With PV systems that are registered in a System Manager (e.g. SMA Data Manager) or in Sunny Portal, you can also assign a new password for the user group Installer via the System Manager. The password for the user group Installer is also the system password. -
Page 57: Saving The Configuration In A File
SMA Solar Technology AG 9 Operation 100% reactive power, the feed-in power is 0%. If the inverter is disconnected from the utility grid outside of feed-in operation, the "Q on Demand 24/7" function is not active. The "Q on Demand 24/7" function can only be restarted once there is sufficient PV power at the DC inputs of the inverter, meaning that the inverter can briefly switch back to feed-in operation at least once. -
Page 58: Adopting A Configuration From A File
Requirements: ☐ Changes to grid-relevant parameters must be approved by the responsible grid operator. ☐ The SMA Grid Guard code must be available. You can request the SMA Grid Guard code via the Online Service Center. ☐ You are logged in on the user interface as Installer. -
Page 59: Updating Firmware With Update File Via The User Interface
Updating Firmware with Update File via the User Interface Requirements: ☐ An update file with the desired firmware of the product must be available. You can download the update file from the product page under www.SMA-Solar.com. ☐ You are logged in on the user interface as Installer. Procedure: 1. -
Page 60: Disconnecting The Product From Voltage Sources
10 Disconnecting the product from voltage sources SMA Solar Technology AG 10 Disconnecting the product from voltage sources Prior to performing any work on the inverter, always disconnect it from all voltage sources as described in this section. Always adhere to the prescribed sequence. - Page 61 SMA Solar Technology AG 10 Disconnecting the product from voltage sources 8. Use a current clamp to ensure that no current is present in the DC cables. As a result, a possible residual current can be detected. 9. Ensure that no voltage is present between the positive terminal and negative terminal on the DC surge protection devices using a suitable measuring device.
-
Page 62: Cleaning
11 Cleaning SMA Solar Technology AG 11 Cleaning The product must be cleaned regularly to ensure that the product is free of dust, leaves and other dirt. NOTICE Damage to the product due to cleaning agents The use of cleaning agents may cause damage to the product and its components. -
Page 63: Troubleshooting
SMA Solar Technology AG 12 Troubleshooting 12 Troubleshooting 12.1 Event Messages 12.1.1 Event 501 Event message: • System incident Explanation: The grid frequency is not within the permissible range. The inverter has disconnected from the utility grid. Corrective measures: • If possible, check the grid frequency and observe how often fluctuations occur. - Page 64 12 Troubleshooting SMA Solar Technology AG 12.1.4 Event 701 Event message: • Frequency not permitted > Check parameter Explanation: The grid frequency is not within the permissible range. The inverter has disconnected from the utility grid. Corrective measures: • Check the AC cabling from the inverter to the feed-in meter.
- Page 65 SMA Solar Technology AG 12 Troubleshooting 12.1.7 Event 3401 Event message: • DC overvoltage • Disconnect generator Explanation: Overvoltage at the DC input A. This can destroy the inverter. This message is signalized additionally by rapid flashing of the LEDs.
- Page 66 12 Troubleshooting SMA Solar Technology AG 12.1.10 Event 3701 Event message: • Residual current too high • Check generator Explanation: The inverter has detected a residual current through brief grounding of the PV array. Corrective measures: • Check the PV system for ground faults.
- Page 67 SMA Solar Technology AG 12 Troubleshooting • Overtemperature Explanation: The inverter has switched off due to excessive temperature. Corrective measures: • Clean the cooling fins on the rear of the enclosure and the air ducts on the top using a soft brush.
- Page 68 12 Troubleshooting SMA Solar Technology AG 12.1.17 Event 7001 Event message: • Fault sensor interior temperature Explanation: A temperature sensor in the inverter is defective and the inverter interrupts the feed-in operation. The cause must be determined by the Service.
- Page 69 SMA Solar Technology AG 12 Troubleshooting • If this message is displayed again, contact the Service. 12.1.21 Event 7330 Event message: • Wait for update conditions Explanation: The testing of the update conditions was not successful. The firmware update package is not suitable for this inverter.
- Page 70 12 Troubleshooting SMA Solar Technology AG 12.1.25 Event 7349 Event message: • Incorrect login rights for configuration file Explanation: The user group logged in does not have the user rights necessary to be able to import a configuration. Corrective measures: •...
- Page 71 SMA Solar Technology AG 12 Troubleshooting Corrective measures: • Ensure that the surge arrester is inserted correctly. • If surge arresters have tripped, replace the tripped surge arresters with new surge arresters. 12.1.29 Event 8003 Event message: • Active power limit Temperature Explanation: The inverter has reduced its power output for more than 10 minutes due to excessive temperature.
- Page 72 12.1.34 Event 9002 Event message: • SMA Grid Guard code invalid Explanation: The SMA Grid Guard code entered is incorrect. The operating parameters are still protected and cannot be changed. Corrective measures: • Enter the correct SMA Grid Guard code. 12.1.35 Event 9003 Event message: •...
- Page 73 SMA Solar Technology AG 12 Troubleshooting 12.1.36 Event 9007 Event message: • Abort self-test Explanation: The self-test was terminated. Corrective measures: • Ensure that the AC connection is correct. • Ensure that the country data set has been entered correctly.
- Page 74 12 Troubleshooting SMA Solar Technology AG Corrective measures: • Increase the query intervals. • If necessary, reduce the number of devices in the network. 12.1.40 Event 10249 Event message: • [Interface]: network busy Explanation: The network is overloaded. There is no data exchange between the devices.
-
Page 75: Restoring The Password With Product Key
SMA Solar Technology AG 12 Troubleshooting 12.1.43 Event 10253 Event message: • [Interface]: connection speed goes to [100 Mbit / 10 Mbit] Explanation: The data transfer rate has changed. The cause for the status [10 Mbit] can be a defective plug, a defective cable or the pulling or plugging of the network connector. -
Page 76: Restoring The Password Without Product Key
12 Troubleshooting SMA Solar Technology AG Password assignment for inverters that are registered in a System Manager (e.g. SMA Data Manager) The password for the user group Installer is also the system password for the PV system in the System Manager or Sunny Portal. Changing the password of the user group Installer can lead to the inverter no longer being able to be reached by the System Manager. -
Page 77: Calculating The Insulation Resistance
40 MOhm and for polycrystalline and monocrystalline PV modules approximately 50 MOhm per PV module (for further information on calculating the insulation resistance see the Technical Information "Insulation Resistance (Riso) of Non-Galvanically Isolated PV Systems" at www.SMA-Solar.com). Also see: • Checking the PV System for Ground Faults ⇒ page 77 12.5... - Page 78 12 Troubleshooting SMA Solar Technology AG WARNING Danger to life due to electric shock from destruction of the measuring device due to overvoltage Overvoltage can damage a measuring device and result in voltage being present in the enclosure of the measuring device.
-
Page 79: Replacing The Surge Arrester
SMA Solar Technology AG 12 Troubleshooting 12. Recommission the inverter. 13. If the inverter still displays an insulation error, contact the Service. The PV modules might not be suitable for the inverter in the present quantity. Also see: • Calculating the insulation resistance ⇒ page 77 12.6... - Page 80 12 Troubleshooting SMA Solar Technology AG 2. Unlock the fan bracket on the right and left of the product. To do so, press in the locking tabs and push them upwards. 3. Move the fan bracket upwards and fold it backwards. When doing this, note that the fan bracket cannot be removed completely, because the fan cable connects it to the product.
-
Page 81: Diagnostic Function In The Event Of A Defective Speedwire Communication
12.10 Testing the Speedwire communication by using SMA Data Manager If there is an SMA Data Manager in the system, the product can use the red LED to signal whether the Speedwire communication is working properly. The diagnostic function can only be activated via the user interface of the SMA Data Manager. - Page 82 SMA Solar Technology AG Procedure: 1. Select the Communication diagnostic parameter via the SMA Data Manager user interface and set it to On. ☑ The red LED of the product flashes (250 ms on and 250 ms off): The communication of the Speedwire devices connected in line topology is working properly.
-
Page 83: Decommissioning
SMA Solar Technology AG 13 Decommissioning 13 Decommissioning 13.1 Disconnecting product connections To decommission the product completely upon completion of its service life, first disconnect all connections from the product. Procedure: 1. Disconnect the product from voltage sources . 2. Remove the AC cable from the inverter. To do so, loosen the screws (AF8) and pull the cables out of the terminal. - Page 84 13 Decommissioning SMA Solar Technology AG 5. Remove the network cables from the network ports. 6. Remove all cable glands from the connecting plate. To do so, unscrew the counter nuts from inside and remove the cable glands from the opening.
-
Page 85: Disassembling The Product
SMA Solar Technology AG 13 Decommissioning 10. Hold the enclosure lid pressed against the enclosure and screw and tighten the screw (hex socket AF8, torque: 18 Nm). 11. Place the cover on the screw in the enclosure lid. 12. Disassemble the product (see Section 13.2, page 85). - Page 86 13 Decommissioning SMA Solar Technology AG Procedure: 1. Screw the transport handles as far as they will go into the tapped holes on the right- and left-hand side until they lie flush with the enclosure. When doing so, ensure that the transport handles are screwed into the tapped holes so that they are perfectly straight.
- Page 87 SMA Solar Technology AG 13 Decommissioning 7. If the product should be stored or shipped: Package the product and the wall mounting bracket. To do this, use original packaging or packaging suitable for the weight and size of the product and secure the packaging to the pallet with tension straps.
-
Page 88: Disposal
14 Disposal SMA Solar Technology AG 14 Disposal The product must be disposed of in accordance with the locally applicable disposal regulations for waste electrical and electronic equipment. SHPxxx-21-BE-en-10 Operating manual... -
Page 89: Replacing The Product With A Replacement Device
Under fault conditions, the product may need to be replaced. If this is the case, you will receive a replacement device from SMA Solar Technology AG. If you received a replacement device, replace the defective product with the replacement device as described below. - Page 90 15 Replacing the Product with a Replacement Device SMA Solar Technology AG 6. Mount the replacement device and make the electrical connections as described in this document. Use the connection plate and the DC protection elements against contact of the defective product.
- Page 91 17. Pack the defective product in the packaging of the replacement device. 18. Fasten the packaging to the pallet on which the replacement device was supplied using the reusable lashing straps. 19. Arrange for pick-up by SMA Solar Technology AG. Operating manual SHPxxx-21-BE-en-10...
-
Page 92: Technical Data
16 Technical Data SMA Solar Technology AG 16 Technical Data 16.1 General Data Width x height x depth 767.5 mm x 833 mm x 470 mm Weight with enclosure lid 99 kg Weight without enclosure lid 94 kg Length x width x height of the packaging 1150 mm x 850 mm x 630 mm... -
Page 93: Dc Input
SMA Solar Technology AG 16 Technical Data Event messages for users 1024 events Event messages for installers 1024 events 16.2 DC Input SHP 100-21 SHP 150-21 SHP 172-21 SHP 180-21 Maximum power of 200 kWp 300 kWp 344 kWp 360 kWp... - Page 94 16 Technical Data SMA Solar Technology AG SHP 100-21 SHP 150-21 SHP 172-21 SHP 180-20 Nominal AC voltage 400 V 600 V 660 V 690 V AC voltage range 304 V to 477 V 480 V to 690 V 528 V to 759 V 552 V to 793 V Nominal AC current 145 A 145 A...
-
Page 95: Efficiency
SMA Solar Technology AG 16 Technical Data 16.4 Efficiency SHP 100-21 SHP 150-21 SHP 172-21 SHP 180-21 Maximum efficiency, 98.8 % 99.1 % 99.2 % 99.2 % η European weighted 98.6 % 98.8 % 98.9 % 98.9 % efficiency, η... - Page 96 16 Technical Data SMA Solar Technology AG Screws for AC terminals with conductor cross-section of 20 Nm 50 mm² to 95 mm² Screws for AC terminals with conductor cross-section of 30 Nm 120 mm² to 150 mm² Screws for DC connection (AF16) 24 Nm ± 2 Nm Screw enclosure lid (AF8)
-
Page 97: Accessories
SMA Solar Technology AG 17 Accessories 17 Accessories Designation Short designation SMA order number Connecting plate Connecting plate with openings for connecting 2 SHP-CONN-PLATE-2 PV combiner boxes Operating manual SHPxxx-21-BE-en-10... -
Page 98: Eu Declaration Of Conformity
2011) and 2015/863/EU (L 137/10, March 31, 2015) (RoHS) SMA Solar Technology AG confirms herewith that the products described in this document are in compliance with the fundamental requirements and other relevant provisions of the above-mentioned directives. The entire EU Declaration of Conformity can be found at www.SMA-Solar.com. -
Page 99: Declaration Of Conformity
• The Restriction of the Use of Certain Hazardous Substances in Electrical and Electronic Equipment Regulations 2012 (SI 2012/3032) SMA Solar Technology AG confirms herewith that the products described in this document are in compliance with the fundamental requirements and other relevant provisions of the above-mentioned regulations. The entire UK Declaration of Conformity can be found at www.SMA-Solar.com. -
Page 100: Contact
20 Contact SMA Solar Technology AG 20 Contact If you have technical problems with our products, please contact the SMA Service Line. The following data is required in order to provide you with the necessary assistance: • Type of device • Serial number •... - Page 102 www.SMA-Solar.com...
Need help?
Do you have a question about the SUNNY HIGHPOWER PEAK3 SHP 100-21 and is the answer not in the manual?
Questions and answers