
Subscribe to Our Youtube Channel
Related Manuals for Eneo MNR-18N0400A


Summary of Contents for Eneo MNR-18N0400A
- Page 1 Full User Manual Hybrid HD Video Recorder HDMI, SATA, w/o HDD MNR-18N0400A MNR-18N1600A Learn more about eneo IN series on our YouTube channel.
-
Page 2: Table Of Contents
Table of Contents TABLE OF CONTENTS ............................. 1 SAFETY INSTRUCTION ............................3 CHAPTER 1 - PRODUCT OVERVIEW ........................4 1.1 Rear Panel ..............................4 1.2 Remote control (for reference only, subject to material objects) ..............5 CHAPTER 2 - DVR INSTALLATION & CONNECTION .................... 6 2.1 HDD Installation ............................ - Page 3 CHAPTER 8 - REMOTE ACCESS VIA WEB CLIENT ..................161 8.1 Basic System Environment Requirements ....................161 8.2 Web Plugin Download and Installation ..................... 162 8.3.1 Live Interface ..........................163 8.3.2 Playback ............................167 8.3.3 Remote Setting ..........................171 8.3.4 Local Setting ........................... 171 CHAPTER 9 - VIEWING BACKED UP VIDEO ON PC/MAC ................
-
Page 4: Safety Instruction
SAFETY INSTRUCTION Please carefully read the following safety instruction so as to avoid personal injuries and prevent the equipment and other connection devices from being damaged. Power sources Note: please use the power supply attached or specified by the manufacturer) Never operate the equipment by using unspecified power supply. -
Page 5: Chapter 1 - Product Overview
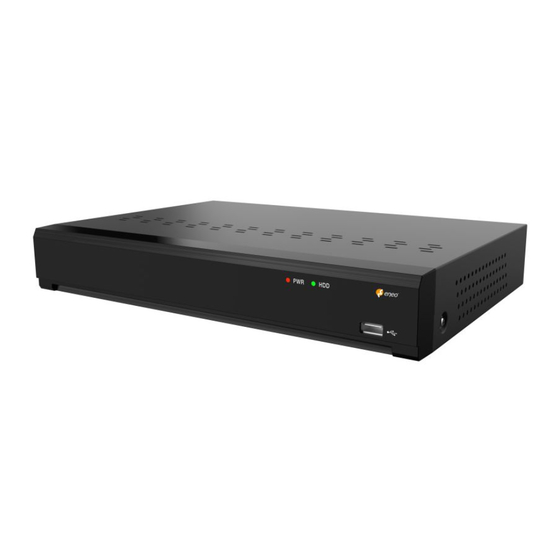
Chapter 1 - Product Overview 1.1 Rear Panel Item Description VIDEO INPUT Connect with video input devices, standard BNC port AUDIO INPUT Connect with audio input signals, RCA port AUDIO OUTPUT Audio signal output, RCA port USB port Connect the supplied mouse or USB flash memory Connect to your TV or a monitor with VGA input. -
Page 6: Remote Control (For Reference Only, Subject To Material Objects)
1.2 Remote control (for reference only, subject to material objects) Icon Description Numeric keys Press to display channel 1~8 Numeric keys Press to display all channels Multiple display mode Menu Press to enter or exit the Main Menu Mute Mute On/off Subme Go to submenu Up arrow key;... -
Page 7: Chapter 2 - Dvr Installation & Connection
Chapter 2 - DVR Installation & Connection 2.1 HDD Installation Depending on the package you have purchased, the hard disk drive may be included in the full package. If it is not pre-installed, follow the installation instructions on this user manual. Caution: DO NOT install or remove the hard disk drive while the device power is turned ON. -
Page 8: Connection Diagram
2.2 Connection Diagram Note: Above diagram is for reference only. The practical connection may be different depending on the DVR you purchased. 2.3 Power Supply Connection Caution: Use only the supplied power adapter that came with the DVR Connect one end of the power adapter to the power connector on the back of the DVR. Plug the other end of the power adapter into the wall outlet. -
Page 9: Chapter 3 - Dvr Common Operations
Chapter 3 - DVR Common Operations 3.1 Using the Supplied Mouse 1 - Left Button: Click to select menu options. During live viewing in split-screen view, double-click on a channel to view it in full-screen. Double-click the channel again to return to split-screen viewing. Click upon a channel on Live Viewing screen to open ... -
Page 10: Password
3.3 Password The first time you run a DVR, you must immediately set your password to protect your privacy. Be sure to record your user name and password and keep it in a secure place. Device ID: Select the language of the interface Device ID: Enter the device ID in parentheses.The default ID is 000000. - Page 11 ①Security Question Configuration: Question check and modify the main user password function. After opening, you need to choose 3 out of 15 common questions, and set the answer required to retrieve the ②Certificate of authorization: Use the key to modify the master user password function, and click password.
-
Page 12: Chapter 4 - Dvr Starting Up
Chapter 4 - DVR Starting up 4.1 Start Wizard Startup Wizard will help to configure the system and get the DVR works quickly. 4.1.1 Start Wizard Click the Start Wizard to proceed to the next step 4.1.2 Network configuration If you connect to a router allows to use DHCP, please check the DHCP box. The router will assign automatically all the network parameters for your DVR. - Page 13 4.1.3 Date/Time This menu allows you to configure the Date, Time, Date Format, Time Format, Time Zone, NTP and DST. Date and Time: Click on the calendar icon to set the current system date. Date: Click on the calendar icon to set the system date. Time: Click to set the system time.
- Page 14 4.1.4 IP Camera Click Search to search IP cameras in the same network. Choose the IP camera(s) you want to add, and then click icon to add to the DVR Enter the camera’s user name & password to add the camera(s). You can also click button to add individual IP camera to a single channel.
- Page 15 4.1.5 Disk If the HDD is installed in the DVR for the first time, it must be formatted. Select the HDD and then click Format HDD button to format the HDD. Overwrite: Use this option to overwrite the old recordings on the HDD when the HDD is full.
-
Page 16: Introduction Of The Real-Time View Interface
4.2 Introduction of the real-time view interface Camera name Display the camera name A-: This indicates that the connected camera is an AHD camera T-: This indicates that the connected camera is a TVI camera C-: This indicates that the connected camera is a CVI camera IP: This indicates that the connected camera is an IP camera Status icon A Smart alert is triggered... - Page 17 4.2.1 Camcorder Quick Toolbar In the preview screen, left-click on the attached camera to display the Quick Toolbar. Video recording: Click to manually record the channel immediately. If a manual recording is ongoing, the icon is in red.Click Stop Manual recording again Grab: Click to save a snapshot of the current camera image.
-
Page 18: Equipment Shutdown
4.2.3 The Start Menu With the Start menu, you can switch between users, search and playback, enter the System Settings menu, lock and unlock the screen, close, restart and log out the system. Switch users. To enable multiple users, please see 5.7.2.2 Add a new use. Search and play.For more details, please see Chapter 7 Search, playback, and backup NVR system Settings. - Page 19 If you select to log out the system (Logout),the live viewing screen disappears.You will need to log in to the system for further operations.
-
Page 20: Chapter 5 - Dvr System Settings
Chapter 5 - DVR System Settings You can configure channels, records, alerts, network, device, and system parameters, location: Start Menu Setup. 5.1 Channel In this section, you are allowed to configure the camera, live view display, manage IP cameras, adjust IP camera’s image, PTZ setup, motion setup, convert mode, and more. - Page 21 5.1.1.2 IP Channels Click Search to search IP cameras from local network, click Add to add individual IP camera, click Add All to add all IP cameras. Click Search button to search IP cameras, and then click one of the IP camera in the device list.
- Page 22 User Name: User Name of the IP camera Password: Password of the IP camera Bind channel: Choose a channel of the DVR you want to attach to Auto Assign IP to Camera(s): The added IP camera would be not able to connect if its IP address is not in the same network segment with DVR.
- Page 23 5.1.2 Live Configure the video camera parameters. Channel: Display channel name. Setup: Click icon into the setup page. Select the channel Name the channel The date format displayed by the camera Time format displayed by the camera Camera refresh rate The camera name is displayed in the preview The system time is displayed in the preview Text transparency...
-
Page 24: Image Control
5.1.3 Image control This menu allows you to control image settings for supported IP cameras. Channel: Channel name Setup: Click to enter the Settings page Choose a channel to configure Select the desired built-in IR cut filter mode to ensure the camera works properly both in the day and night. - Page 25 5.1.4 PTZ This menu allows you to configure the PTZ (Pan-Tilt-Zoom) settings for the dome camera Channel: Channel name Signal Type: Analog for analog channels, Analog & Digital for IP channels. Protocol: Choose the communication protocol between the PTZ capable camera and DVR. If your camera support UTC (Up the Coax) function, you can choose COAX1 or COAX2 to display your camera OSD menu or control the UTC PTZ function.
- Page 26 5.1.4.1 PTZ control With the PTZ setup complete, you can use the PTZ feature to control the high-speed ball machine Click the left mouse button on the Live View screen channel to open the 4.2.1 Camcorder Quick toolbar , , then select the PTZ Control icon, and click the icon will display the PTZ control panel.
- Page 27 PRESET mode page:: Click the screen showing the preset point under the preview screen, as shown below; Click or "Add preset point" in the figure above,the preset point screen will be displayed at the bottom of the preview interface, and the preset point will be displayed on the left.
- Page 28 Line Scan page: Area Scan: Click record start position, rotate the ball machine, click record end position; Speed: Select a linear cruising Speed. Click to start linear cruise. In this mode, the ball machine only moves in the same horizontal plane. Tour page: Time Interval: indicates the stay Time of each preset point Click...
- Page 29 Pattern Scan page: Record: Click to start recording cruise route, click stop recording. Cruise: Click to start a Cruise using the route and action previously recorded. 5.1.5 The Privacy Area This menu allows you to create privacy areas, and if you want to partially cover certain specific parts of the image, you can create up to 4 privacy areas of arbitrary size and location.
- Page 30 5.1.6 Motion This menu allows you to configure motion parameters. When motion has been detected by one or more cameras, your DVR will alert you to a potential threat at your home. It does this by sending you an email alert with an attached image from the camera to use as a reference (if this option is enabled) and/or sending push notifications via the mobile app.
- Page 31 5.1.7 PIR This is an optional function. If your camera has PIR function, you can configure the PIR recording here. The PIR alarm menu, when the PIR alarm is triggered, it will send the alarm by mail and APP push, just like motion Switch: Enable or disable PIR detection.
- Page 32 5.1.8 White Light The parameters related to the white light alarm can be set here Channel: Channel name Setup: Click the icon to enter the setup page. White light deterrent area: Click Select All to set the entire screen of the camera to the white light deterrent area.
- Page 33 Schedule (schedule): Click the icon to open the setup page. When the IPC connects to the DVR with a media port, the setting page is shown below: When the schedule is marked in light blue, the channel can trigger a white light deterrent alarm for the time slot.
- Page 34 5.1.9 Intelligent (Intelligent Analytics) Optional intelligent analysis includes perimeter intrusion detection, line-crossing detection, still life detection, pedestrian detection, face detection, line-crossing statistics, sound detection alarm and occlusion alarm 5.1.9.1 PID (Perimeter intrusion detection) Perimeter Intrusion Detection function detects people, vehicle or other objects which enter and loiter in a pre-defined virtual region, and some certain actions can be taken when the alarm is triggered.
- Page 35 Channel: Select the channel that you want to configure Rule Number: You can set four rules, draw rule areas on the area map and point to the few rules, then you can draw rules on the area map. The Rule Switch (rule switch) and Rule Type (rule type) of each rule are independent, and need to be turned on, off or set separately Rule Switch: 3.Enable detection in the rule switch.
- Page 36 5.1.9.2 LCD (Line Crossing Detection) Line Crossing Detection function detects people, vehicle or other objects which cross a pre-defined virtual line, and some certain actions can be taken when the alarm is triggered. Switch (Switch): Turn on or disable this function Sensitive (sensitivity): sensitivity, parameter range 1~4, default value 2, the higher the sensitivity of the detection target, the easier the moving target in the channel will be detected, and the more misdetection, the corresponding missing detection will be reduced, it is recommended to maintain the default value...
- Page 37 Click the Alarm button to configure the 5.3.4.2 LCD(Off-line detection alarm) Note: When LCD is triggered (cross-line detection), "S" will appear on the preview interface. In addition, LCD and PID / SOD are not mutually exclusive, but can be opened at the same time, mutually exclusive with PD / FD / CC, not at the same time 5.1.9.3 SOD (Stationary Object Detection) Stationary Object Detection function detects the objects left over or lost in the pre-defined region such as...
- Page 38 1. Channel: Select the channel that you want to configure 2. Rule Number: You can set four rules, draw rule areas on the area map and point to the few rules, then you can draw rules on the area map. The Rule Switch (rule switch) and Rule Type (rule type) of each rule are independent, and need to be turned on, off or set separately 3.
- Page 39 5.1.9.4 PD&VD (pedestrian and vehicle type detection) The pedestrian detection function detects moving personnel in a predetermined area and takes a series of measures when an alarm is triggered. Switch: Turn on or disable this function Level: The sensitivity level is low, medium to high. Higher sensitivity will be easier to trigger detection. Area: Click Setup to row the virtual area in the image 1.
- Page 40 Note: trigger PD & VD (pedestrian and vehicle detection), "S" will appear on the preview interface, PD & VD and FD / CC, can be opened at the same time, and PID / LCD / SOD, not at the same time) 5.1.9.5 FD (face detection) Face Detection function detects the faces of moving people appear in a pre-defined region, and a series of actions can be taken when the alarm is triggered.
- Page 41 1. Channel: Select the channel that you want to configure 2. Rule Number: Select the rule number. It is the number of PD regions.The PD function can set only 1 area. 3. Rule Switch: Enable detection in the rule switch. 4.
- Page 42 1. Channel: Select the channel that you want to configure. 2. Rule Number: Select the rule number. It is the number of virtual lines that you can draw. Up to 1 line. 3. Rule Switch: Enables detection rules in the rule switch. 4.
- Page 43 Click the Alarm button to configure the face detection alarm function for details:5.3.4.6 CC (line statistical alarm) You can search for and view the statistical results of the overline counts in the5.1.9.10 Cross Counting Statistics (line statistical alarm) Statistics (Overline statistics) Note: When CC (crossing statistics) is triggered, "S"...
- Page 44 5.1.9.8 Video Tampering (Video Tampering) Video Tampering detection detects real-time view screen occlusion, and certain specific actions can be taken when an alarm is triggered. Switch: Enable or disable the alarm caused by video cover. Sensitivity (sensitivity): the sensitivity level is 1~6, the default value is 4. The higher the sensitivity, the easier it is to trigger the alarm.
- Page 45 5.1.9.10 Cross Counting Statistics (crossing statistics) In the line statistics, the number of entry and exit of a period of time can be counted, and reflected in the way of statistical chart. Channel: Select the channel that you want to search for Date: Select the date that you want to search for Report Type: Select the report type, with Daily Report, Weekly Report, Monthly Report, and Annual Report Type of report in...
-
Page 46: Recording
5.2 Recording This menu allows you to configure the video recording parameters 5.2.1 Encoding This menu allows you to configure the image quality for recorded video or network transfers.Generally, the master stream is the quality of the recorded video that will be saved in the HDD; the substream is the preview video quality through remote access (such as the Web client and CMS).Mobile code stream defines the preview quality of viewing remotely using mobile devices, and the switch of the connected IP camera's audio, the input and output volume, and the audio type can be set at the Audio interface. - Page 47 Bitrate Control: Select the bit rate level. For simple scenarios, for example, a gray wall is suitable for using a constant bit rate (CBR). For more complex scenarios, such as busy streets, it is suitable for using a variable bit rate (VBR). Video Quality: The optional values are Lowest, Lower, Low, Medium, Higher, and Highest Bitrate Mode: If you want to set your own bit rate, select User Defined mode.
- Page 48 Bitrate Control: Select the bit rate level. For simple scenarios, for example, a gray wall is suitable for using a constant bit rate (CBR).For more complex scenarios, such as busy streets, it is suitable for using a variable bit rate (VBR). Video Quality: The optional values are Lowest, Lower, Low, Medium, Higher, and Highest Bitrate Mode: If you want to set your own bit rate, select User Defined mode.
- Page 49 5.2.1.4 Audio Audio Menu tab: Set up the audio of the camera (with device support). Enable: Set up the audio switch for the video camera. Output Volume: Set the output volume of the camera. Input Volume: Set the input volume of the video camera. Type: Set the audio decoding type of the camera.
-
Page 50: Capture
5.2.2.2 Video recording schedule This menu allows you to specify when the DVR records the video and determine the recording mode for each channel.The recording schedule lets you set video schedules, such as daily (hourly) regular (continuous) recording, mobile detection recording, I / O alert recording, and PIR recording (if DVR supports) time.To set the video mode, click the mode radio button (General, Move Detection, IO, PIR), and then drag the cursor to mark the area.The recording schedule is valid for only one channel.If you want to use the same recording schedule for other channels, click Copy (Apply) to use the replication... - Page 51 5.2.3.2 Capture Schedule table Channel (Channel): Select a channel to set its grip parameters. Normal (General): When the area is marked green, the channel regularly grasps the corresponding time. Motion (Move detection): When the area is marked yellow, the channel moves the area for the corresponding time.
-
Page 52: Alarm
5.3 Alarm Configure the alarm parameters 5.3.1 Mobile detection and alarm Channel (Channel Name): Channel name Buzzer (buzzer): The DVR can use its internal buzzer to sound an alarm. You can set the buzzer duration in seconds when an action is detected. Alarm Out (Alarm output): optional function. - Page 53 See 5.6.2 Cloud Storage for more details Video to Cloud (Cloud Storage Video): After an alert is triggered, upload the alert video to the cloud storage.See 5.6.2 Cloud Storage for more details Full Screen (Full-Screen Display): If you have this feature enabled and detected motion in the channel, you will see the channel in full-screen mode.
- Page 54 FTP Video Upload (FTP video upload): After the alarm is triggered, upload the alarm video to the FTP server.See the 5.5.4 FTP for more details Picture to Cloud (Cloud Storage Picture): After an alert, upload the alert picture to the cloud storage. See 5.6.2 Cloud Storage for more details Video to Cloud (Cloud Storage Video): After an alert is triggered, upload the alert video to the cloud storage.See 5.6.2 Cloud Storage for more details...
- Page 55 Post Recording: Click the icon Post Recording (delayed video recording): You can set the duration of continuous DVR recording after the event occurs. The suggested recording time is 30 seconds, but can be set to up to 5 minutes. Show Message (Display icon): Select this box to display the icon on the real-time display screen when an I / O alarm is detected.
- Page 56 5.3.4 Intelligent analysis and alarm 5.3.4.1 PID (Perimeter intrusion Detection) You can configure the PID alarm function here. Channel: Channel name Buzzer (buzzer): The DVR can use its internal buzzer to sound an alarm. You can set the buzzer duration (in seconds) when triggering a perimeter intrusion alarm.
- Page 57 5.3.4.2 LCD (Line Cross detection and alarm) You can configure the LCD over-line detection alarm function here. Channel: Channel name Buzzer (buzzer): The DVR can use its internal buzzer to sound an alarm. You can set the buzzer duration (in seconds) when triggering a perimeter intrusion alarm. Alarm out (Alarm output): Check the external alarm device when the perimeter intrusion alarm is triggered.
- Page 58 5.3.4.3 SOD ((Stationary Object Detection)) You can configure the SOD function here Channel: Channel name Buzzer (buzzer): The DVR can use its internal buzzer to sound an alarm. You can set the buzzer duration (in seconds) when triggering a perimeter intrusion alarm. Alarm out (Alarm output): Check the external alarm device when the perimeter intrusion alarm is triggered.
- Page 59 5.3.4.4 PD&VD (Pedestrian Detection & Vehicle Detection) You can configure the PD & VD pedestrian and vehicle detection and alarm function here. Channel: Channel name Buzzer (buzzer): The DVR can use its internal buzzer to sound an alarm. You can set the buzzer duration (in seconds) when triggering a perimeter intrusion alarm.
- Page 60 5.3.4.5 FD (face detection) You can configure the FD face detection and alarm function here. Channel: Channel name Buzzer (buzzer): The DVR can use its internal buzzer to sound an alarm. You can set the buzzer duration (in seconds) when triggering a perimeter intrusion alarm. Alarm out (Alarm output): Check the external alarm device when the perimeter intrusion alarm is triggered.
- Page 61 5.3.4.6 CC (Cross-Counting) You can configure the CC statistical alarm function here. Channel: Channel name Buzzer (buzzer): The DVR can use its internal buzzer to sound an alarm. You can set the buzzer duration (in seconds) when triggering a perimeter intrusion alarm. Alarm out (Alarm output): Check the external alarm device when the perimeter intrusion alarm is triggered.
- Page 62 5.3.4.7 Sound Detection You can configure the Sound Detection sound alarm function here. Channel: Channel name Buzzer (buzzer): The DVR can use its internal buzzer to sound an alarm. You can set the buzzer duration (in seconds) when triggering a perimeter intrusion alarm. Alarm out (Alarm output): Check the external alarm device when the perimeter intrusion alarm is triggered.
- Page 63 5.3.4.8 Video Tampering You can configure the Video Tampering video occlusion alarm function here. Channel: Channel name Buzzer (buzzer): The DVR can use its internal buzzer to sound an alarm. You can set the buzzer duration (in seconds) when triggering a perimeter intrusion alarm. Alarm out (Alarm output): Check the external alarm device when the perimeter intrusion alarm is triggered.
- Page 64 5.3.5 Combined alarm Channel: Channel name Enable Alarm: can set whether channel combination alarm is enabled, Enable enables combination alarm (combined alarm system parameters of channel configuration take effect, alarm parameter set separately by the channel is not effective), Disable does not enable combination alarm (combined alarm system parameter configured by the channel is not effective, and event alarm system parameter set separately by the channel will take effect).
- Page 65 Record (Recording): Click the icon and select the channel to record when triggering the perimeter intrusion alarm. Post Recording (delayed video recording): You can set the duration of continuous DVR recording after the event occurs.The suggested recording time is 30 seconds, but can be set to up to 5 minutes. Show Message (Display icon): Select this box to display the icon on the real-time display screen when a perimeter intrusion alarm is detected.
- Page 66 5.3.6 PTZ linkage If you had connected the PTZ cameras, you can set the linkage between PTZ cameras and Motion Alarm and/or external I/O sensor alarm. With the linkage function, you can turn your PTZ cameras focus to the preset point when a motion or I/O alarm happens. Switch: Enable or disable the PTZ linkage function.
- Page 67 5.3.8 Alarm Schedule In this menu, you can set up alarm call, push, FTP upload, cloud upload, buzzer and other time periods. Channel (Channel): Select a channel and set its capture parameters. When the slot is marked in green, the channel works for the slot. 5.3.9 Voice broadcast This function is to realize the alarm occurrence, the system collects the alarm signal and the voice broadcast equipment for linkage, and automatically or manually plays the associated audio to the field...
- Page 68 Local: Local broadcast (when selecting this broadcast mode, the audio output device is connected to the device side) IPC: Network camera broadcast (the camera program has the voice broadcast function, and the camera side supports the audio output) Voice broadcast setting by time period: an alarm type can support setting the voice broadcast for up to 12 time periods.
- Page 69 5.3.9.2 loop management Voice Prompts selects the audio file, and after setting the time period, the selected audio file plays the audio file repeatedly, supporting the voice broadcast for up to 12 time periods. Local: Local broadcast (when selecting this broadcast mode, the audio output device is connected to the device side) IPC: Network camera broadcast (the camera program has the voice broadcast function, and the camera side supports the audio output)
- Page 70 Picture Quality: Set the image quality, 1 lowest, 100 highest. Min Pixel: Set the minimum recognition pixel box, the face should be greater than the set pixel to be identified. Face Enhance: Face enhancement, open after catching the moving target face effect is enhanced, but will reduce the overall quality of the picture.
- Page 71 Channel: Channel selection Snap Mode: Catch mode, with default mode (select the best quality picture push during the period from person & car to disappear), real-time mode (push once when appearing, push again when disappearing) and interval mode (the time and interval of custom push). Snap Num: In interval mode, set the number of grab pictures pushed by faces.
- Page 72 1. Channel: Select the channel that you want to configure 2. Detection, Type: Detection type. Person: Pedestrian alarm when pedestrian triggers perimeter intrusion. Motor Vehicle: Alarm when the motor vehicle triggers the perimeter intrusion. Non-motorized Vehicle: Alarm when non-motor vehicles trigger a perimeter intrusion. 3.
- Page 73 5.4.1.4 Line Crossing detection The cross-line detection function detects people, vehicles or other objects crossing a predetermined virtual line and takes certain measures when an alarm is triggered. Switch (Switch): Turn on or disable this function Sensitive (sensitivity): It has a sensitivity level of 1 to 4. Higher sensitivity will be easier to trigger detection.
- Page 74 Note: When Line Crossing Detection (line detection), The "S" will appear on the preview screen, In addition, Line Crossing Detection is mutually exclusive with Perimeter Intrusion Detection and Human & Vehicle Detection, Face Detection, Cross Counting, Crowd Density Detection, Queue Length Detection, Licence Plate Detection, Not to open simultaneously) 5.4.1.5 Cross Counting statistics The Cross Counting statistics function counts people or moving objects.
- Page 75 1. Channel: Select the channel that you want to configure. 2. Type: Select the rule type Person: count the crossing pedestrians only. Motion: Count any moving object that has crossed the line. Vehicle: count only the crossed vehicles. 3. Alarm Num: Set the alert number. Alarm Num= (number of cross in) - - (number of cross out), which is in Number of internal supports exists.
- Page 76 5.4.1.6 Heat map Display the graphics of the popular page area and the geographical area, and the heat map can also tell you which areas of the screen attract most visitors. Switch (Switch): Turn on or disable this function. Area (Monitoring area): Click Setup to row the virtual area in the image.
- Page 77 5.4.1.7 Crowd Detection Population density detection is used to detect population aggregation to maintain controlled order in specific areas. Switch (Switch): Turn on or disable this function Sensitive (sensitivity): It has a sensitivity level of 1 to 4. Higher sensitivity will be easier to trigger detection.
- Page 78 5.4.1.8 Queueing length detection Cohort length detection was used to detect the status of the cohort, including its length and stall time. Switch (Switch): Turn on or disable this function Sensitive (sensitivity): It has a sensitivity level of 1 to 4. Higher sensitivity will be easier to trigger detection. Area (Monitoring area): Click Setup to row the virtual area in the image Min pixel: Set the minimum identification pixel box, the person should be greater than the set pixels to be...
- Page 79 5.4.1.9 License plate detection The license plate detection function recognizes whether the license plate of the passing vehicles is an unfamiliar vehicle or the vehicle that has been recorded into the database. At the same time, it can also back up the unfamiliar vehicle license plate information to the database, or retrieve the license plate detection and alarm information for video playback.License plate testing currently only supports license plates in two regions, Europe and America.
- Page 80 5.4.1.10 RSD Setup: Click to enter the setting interface. Switch: Enable or turn off sound exception detection. Channel: Channel selection Sensitivity: Sensitivity, 1 minimum, 100 maximum. Detection Type: Detection type Baby Crying Sound: Baby crying can be detected after checking Dog Barking: Dog barking can be detected after checking Gunshot: Gunshots can be detected after checking them 5.4.1.11 Schedule...
- Page 81 5.4.2 Recognition 5.4.2.1 Model configuration Select the algorithm model in this menu. There are local and IPC algorithm models (some devices do not have a local algorithm model and need to take the IPC of the algorithm model). 5.4.2.2 Face Database Management This menu sets up a database for face recognition contrast.
- Page 82 Import: Click and select Local Storage Device to enter the local interface. Select the date, duration, and channel back point Search to search for the faces saved by all devices during that time. If you select the face and set the similarity and then click Search, you will search out the face matching with the selected face similarity, select the face in the search area and click Delete to delete the face of this search area.
- Page 83 Export: Export the face picture to external memory, if not click on the face group to click Export to export all the face pictures of the face group; click to the face group, then click Export to export the selected face picture.
- Page 84 Search: Plate filter based on keywords. Total: Total number of license plate data in this group. Click to modify the corresponding license plate data information. There are three ways to add license plate information: Im port (manually added), Im port From CSV (CVS table import), and I mport From Local (local import).
- Page 85 Click Import from CSV button to pop up the above interface, select the C SV license plate file to be imported, click OK button. Popup the picture interface below: Click the Import / Modify button to add a batch, and you can also select a single license plate information to modify it.
- Page 86 Select the date, duration and channel back point Search to search for license plates saved by all devices during this time. Channels: License plate detection events triggered by each channel. Select All: Select all of the license plate information. Click a piece of data to edit the license plate information, and click the Import /Modify button to modify, if the modification is successful.
- Page 87 Alarm Out (Alarm output): optional function.If your DVR supports a connection to an external alert device, you can set up an external alert device. Latch Time (alarm trigger time): Set the external alarm time when the face is detected. Save Face: When a face is detected, the face is saved. Save Background: When a face is detected, the entire preview image is saved.
- Page 88 5.4.3.2 Face attribute alarm You can configure the face attribute alarm function here. Channel: Channel name Alarm Detection: Set the face attribute alarm type, including close, No Mask without mask and mask Wear Mask. Buzzer (buzzer): The DVR can use its internal buzzer to sound an alarm. You can set the buzzer duration (in seconds) that triggering a pedestrian and vehicle alarm.
- Page 89 Fault-tolerant: Fault tolerance rate, if set to three characters, the white list in the group is B594SB, and an alert trigger when a B734KB enters the monitoring area. That is, the detection license plate number has 0~3 characters and the database license plate number is different will alarm. Alarm Channel: Set the channel to alarm after the license plate is detected and aligned successfully.
- Page 90 5.4.3.4 Pedestrian and vehicle detection You can configure the pedestrian and vehicle alarm function here. Channel: Channel Name Buzzer (buzzer) :The DVR can use its internal buzzer to sound an alarm. You can set the buzzer duration (10s, 20s, 40s, 40s and 1Min). Alarm out (Alarm output): Check the external alarm device when triggering pedestrian and vehicle alarms.
- Page 91 5.4.3.5 Pedestrian intrusion You can configure the PD function here. Channel: Channel Name Buzzer (buzzer) :The DVR can use its internal buzzer to sound an alarm. You can set the buzzer duration (10s, 20s, 40s, 40s and 1Min). Alarm out (Alarm output): Check the external alarm device when triggering pedestrian and vehicle alarms.
- Page 92 Picture to Cloud (Cloud Storage Picture): After an alert, upload the alert picture to the cloud storage. See 5.6.2 Cloud Storage for more details5.6.2 Cloud Storage Voice Prompts: Voice prompt, when the alarm is triggered, the audio file imported by voice prompt (IPC to support voice prompt function), details can be seen at 5.3.9 Vioce Broadcast 5.4.3.6 Line Cross Detection You can configure the line detection alarm function here.
- Page 93 FTP Picture Upload (FTP image upload): After triggering the alert, upload the alert picture to the FTP server. See the5.5.4 FTP for more details. FTP Video Upload (FTP video upload): After the alarm is triggered, upload the alarm video to the FTP server.
- Page 94 5.4.3.8 CD You can configure the CD function here. Channel: Channel Name Buzzer (buzzer) :The DVR can use its internal buzzer to sound an alarm. You can set the buzzer duration (10s, 20s, 40s, 40s and 1Min). Alarm out (Alarm output): Check the external alarm device when triggering pedestrian and vehicle alarms.
- Page 95 5.4.3.9 QD Alarm You can configure the QD alarm function here. Channel: Channel Name Buzzer (buzzer) :The DVR can use its internal buzzer to sound an alarm. You can set the buzzer duration (10s, 20s, 40s, 40s and 1Min). Alarm out (Alarm output): Check the external alarm device when triggering pedestrian and vehicle alarms.
- Page 96 5.4.3.10 LPD Channel: Channel Name Buzzer (buzzer) :The DVR can use its internal buzzer to sound an alarm. You can set the buzzer duration (10s, 20s, 40s, 40s and 1Min). Alarm out (Alarm output): Check the external alarm device when triggering pedestrian and vehicle alarms.
- Page 97 5.4.3.11 RSD You can configure the RSD function here. Channel: Channel Name Buzzer (buzzer) :The DVR can use its internal buzzer to sound an alarm.You can set the buzzer duration (10s, 20s, 40s, 40s and 1Min). Alarm out (Alarm output): Check the external alarm device when triggering pedestrian and vehicle alarms.
- Page 98 5.4.4 Statistics 5.4.4.1 Face recognition statistics In the face statistics, all the faces can be detected in a period of time, and reflected by statistical chart. When Groups, Channels, date, and statistical time are selected, the statistical results will appear directly. Click Export to import the data into the U disk.
- Page 99 5.4.4.3 CC In the CC statistics, the number of entry and exit of a period of time can be counted, then reflected by statistical chart. Channel: Select the channel that you want to search for Date: Select the date that you want to search for Report Type: Select the report type, with Daily Report, Weekly Report, Monthly Report, and Annual Report Type of report in...
- Page 100 5.4.4.4 Heat map In the heat map statistics, the frequent activity of some areas over a period of time can be counted and be reflected by a statistical chart. Channel: Select the channel that you want to search for Date: Select the date that you want to search for Start Hour: Select the start time End Hour: Select the end time Report Type: Select the report type, with Daily Report, Weekly Report, Monthly Report, and Annual...
-
Page 101: Network
5.5 Network This menu allows you to configure network parameters like PPPoE, DHCP and so on.The most common type is the DHCP.Your network type is most likely DHCP unless the network is manually addressed.If an authentication user name and password are required to access the Internet, select PPPoE. 5.5.1 General 5.5.1.1 General configuration If you connect to a router that allows for DHCP s, check the DHCP box.The router automatically assigns... - Page 102 5.5.1.3 SNMP By configuring the SNMP (Simple Network Management Protocol) parameters, the network management side can obtain the equipment information after the network management platform connects with the equipment, which facilitates the maintenance and management of the equipment on the network management side.
- Page 103 When the list selects the WiFi you want to connect, double-click the WiFi name you want to connect Rate: Signal intensity. Security: Security protocol information used by WiFi. Update: Refresh the list. Password: Password for connecting to the WiFi routing. IP Address: The IP address obtained after successful connection to WiFi routing.
- Page 104 5.5.2 DDNS (Dynamic Domain name server) This menu configure DDNS settings.The DDNS provides a static address to simplify the remote connection to the DVR.To use DDNS, you first need to open an account on the D D service provider's D N S web page.
- Page 105 5.5.3.1 Email Configuration Email: Check to enable. Encryption: Enable if your email server requires the SSL or TLS verification. If you are not sure, set to be Auto. SMTP Port: Enter the SMTP port of your email server. SMTP Server: Enter the SMTP server address of your email. User Name: Enter your email address.
- Page 106 5.5.4 FTP This menu allows you to enable FTP function to view and load captured snapshots from DVR to your storage device over FTP. FTP Enable: Click to enable FTP function. Server IP: Enter your FTP server IP address or domain name. Port: Enter the FTP port for file exchanges.
- Page 107 5.5.5 IP Filter This function allows you to set a blacklist and whitelist so that only the IP addresses in the whitelist can connect to the device. Enable: Enable or Disbale the IP filter function. Can use the blacklist or whitelist once enabled. Restricted Type: Select the list (blacklist or whitelist) to set.
- Page 108 4. Use an existing profile or add a new profile, and log in to the same Amazon account that you bind to a DVR. 5. Search from app store and install Amazon Alexa to your phone, and log in with the same Amazon account 6.
- Page 109 7. Click on the search icon in the top right corner. 8. Enter the keyword: Smart Camera View, and search. Click "Smart Camera View" to enter the search results list.
- Page 110 Click “ENABLE TO USE” 9. You need to link to your Amazon account.Log in to the same Amazon account as you bind to the DVR. Click "Complete" after the successful function link. 10. Click on "DISCOVER DEVICES" to wait for the app to search for the camera. After finding and connecting the device, click on Next.
- Page 111 11. Select one of the devices, and then click on SET UP DVICE.You can add an IPC to the group or skip it. 12. Repeat 11, add all cameras, and click Done to finish.
- Page 112 13. All added cameras are listed in the Devices.Click on the camera icon to view all of the added cameras. 14. Press the voice button on the fire TV stick remote control and say the command clearly.This command may be similar to: Show The XXX camera / Show XXX.The XXX is the video camera channel name.For example, if the channel is named "Office", say the "Show the Office camera".
- Page 113 5. Log in to the Google account that you have bound on your DVR. 6. Click "Get Started" (Start) to create a home, and then click "New devices" (new device). Enter your home nickname and address, and then touch "Next." Allows location access to applications.
- Page 114 8. Your Chromecast will be found.Click on the Next to connect it.Click on Yes to confirm the code. 9. Select the location of the Chromecast and click Next. 10. Select the Wi-Fi network for the Chromecast and enter the Wi-Fi password to connect.Make sure that your Wi-Fi choice is the same as the phone and is in the same local network as the DVR.Click on Continue to the next step.
- Page 115 11. Click on No Thanks or Sign Up to login to your Google account. Click Next->Skip->Finish Tutorial 12. The Chromecast has now been added to your Google home page.Click on the + icon in the upper left corner.Indoor, and then select Setup Device.
- Page 116 Select "Work with Google," click on the search icon in the top right corner, and enter "smart camera view." Click on "smart camera view" in the search results.You will need to log in to your Google account and allow Google access to your device. Wait a while and the app will connect to Google home.
- Page 117 14. Repeat step 13 to add all the cameras. 15. Search from the app store and install the Google Assistant app to your phone. 16. Run Google Assistant and log in to your Google account that is the same as you bind to DVR. 17.
-
Page 118: Device
5.5.7 Platform Access 5.5.7.1 Onvif Turning on this feature will allow devices to be searched for and added by other third-party platforms through the ONVIF protocol. Enable: enable switch, turn on the service function, off whether search or add will fail Authentication: login authentication methods, authentication methods are Digest_sha256, Digest, Digest / WSSE, WSSE four kinds Protocol: Connection protocol... - Page 119 Mounting Type Mounting mode (NFS or CIFS) NFS does not need to enter the NAS account password, whereas CIFS requires the NAS account and password. User Name: Enter the NAS account (unselectable in NFS mode). Password: Enter the Password of the NAS (unselectable in NFS mode). Server IP: Enter the NAS IP address.
- Page 120 5.6.1.2 S.M.A.R.T This function can be used to display technical information on the hard drive installed inside your DVR. You can also perform a test (there are three types available) to evaluate and detect potential drive errors. Self-check Type: There are three types available: Short: This test verifies major components of the hard drive such as read/write heads, electronics and internal memory.
-
Page 121: System
Before activating the cloud function, we recommend that you create a Dropbox account using the same email address and password used for your DVR. Go to www.dropbox.com, nput your name, email address and password, agree to the terms & conditions then click the sign up button. Cloud Storage: Check to enable the function. - Page 122 Preview/Playback Session Timeout: After enable, in the preview or playback, to avoid automatic logout of the web side. Mode: XVR or DVR, XVR mode will allow you to add IP cameras to the DVR. If the mode is changed from xvr to DVR, all added IP cameras will be removed.
- Page 123 The DST (Daylight Saving Time) function allows you to select the amount of time that Daylight Saving has increased by in your particular time zone or region. Enable DST: If Daylight Saving applies to your time zone or region, check this option to enable. Time Offset: Select the amount of time that Daylight Saving has increased by in your time zone.
- Page 124 Output Resolution: Select a display resolution that is suitable for your TV. 1920 x 1080 will suit most TVs. If your DVR supports 4K output resolution, you can select either 2K (2560 x 1440) or 4K (3840 x 2160) to take advantage of the higher resolution that your 4K TV provides.
- Page 125 View Mode: Select the number of split screens to display in Static mode. Define SEQ Setting: Select the channel screen for each split screen in Static mode. 5.7.2 Multi-user This menu allows you to configure the user name, password and user permission.
- Page 126 The system supports the following account types: ADMIN — System Administrator: The administrator has full control of the system, and can • change both administrator and user passwords and enable/disable password protection. USER — Normal User: Users only have access to live viewing, search, playback, and other •...
- Page 127 5.7.2.2 Add New Users Select one of the user accounts that is currently disabled, click the User Edit icon Select Enable from the drop-down next to User Enable. Click the field next to User Name to change the user name for the account. Select Enable from the drop-down next to Password Enable.
- Page 128 1. Click the edit icon under Permission tab 2. Set the user's permission and check the box corresponding to the function.Click All to select all of the boxes.Click Clear to clear all of the boxes. User password permission setting, the administrator can select the general user permission as required. Have the following privileges to select: Log search: You can view all the logs of the system;...
- Page 129 5.7.3.1 Log The system log shows you important system events, such as motion alarms and system warnings. You can easily create a backup file of the system log for a set time period to a USB flash drive. Log Searching and Backing Up: Click the field next to Start Date &...
- Page 130 5.7.3.2 Load Default Reset the DVR settings to its out-of-box state. You can choose to reset all settings at once, or just settings on specific menus. Restoring default settings will not delete recordings and snapshots saved to the hard drive. Check the items you want restore, or check Select All to choose all items.
- Page 131 5.7.3.4.2 Online upgrade By burning the upgrade file website and the online upgrade switch parameters, you can upgrade the board end online through the network server (HTTP or FTP). 1. When the automatic detection is opened, the initial power on the board will first judge whether it is automatic maintenance and restart, and if it is automatic maintenance, skip to detect whether there is a new upgrade package (judgment method: the current system time is considered automatic maintenance within 30 minutes later than the automatic maintenance time).If it is not automatic maintenance and restart,...
- Page 132 5.7.3.5 Parameter Management You can export the main menu settings you have configured to a USB flash drive, or import an exported setting file from USB flash drive to the DVR. Save Settings: Click to save the DVR current system settings to the USB device. You will be required to input the Admin password to authenticate.
- Page 133 5.7.4 IP Camera Maintain This menu allows you to upgrade the IP camera’s firmware and restore default settings of IP camera. 5.7.4.1 Upgrade IP Camera Choose one of the IP cameras you want to upgrade firmware Click Select File select the update file from your USB flash drive, then click OK. Click IPC Upgrade button to start upgrading.
- Page 134 5.7.4.3 Reboot IPC You can restart IPC in this menu. Check IPC and click reboot IPC. 5.7.4.4 Manage IPC parameters Export parameters, check IPC, click Save settings, and the USB flash disk path will pop up. After selecting the path, click OK to export IPC to USB flash disk; Check IPC and click load settings to import parameter files from USB flash disk into the IPC.
- Page 135 5.7.5 System Information This menu allows you to view the system information, channel information, record information & network status 5.7.5.1 Information View system information such as device ID, device model name, IP address, MAC address, firmware version and more. If your DVR supports P2P function, you will find the P2P ID & P2P QR code in the information page. You can scan this QR cord with mobile app to remote view the DVR.
- Page 136 5.7.5.3 Record Information View recording information for each connected camera such as bitrate, stream type, recording resolution and frame rate (FPS). 5.7.5.4 Network State View network information. Total Band Width: It shows the DVR’s total input band width for IP cameras. Used Band Width: It shows the used band width of IP cameras.
-
Page 137: Chapter 6 - Ai Scenario-Based Application
Chapter 6 - AI scenario-based application AI scene application function you real real view of the face attendance, more intuitive and convenient to view the real situation 6.1 Face attendance Face attendance scene screen full screen display, can record real-time face attendance, real-time view attendance results 1. - Page 138 3. Click to enter the setup interface. Channels: Channel selection, you can select the attendance channel Groups: Select the faces of those face library for attendance, and click on the right to pop up to the AI database management settings interface. GUI Theme: Main interface diagram On Duty Time: Set up the working hours Off Duty Time: Set up the closing time...
- Page 139 Enable: Open the email to send face attendance results (the attendance result is a form file) Send Email: Set the time of sending face attendance result email, click the pop-up system mail setting interface on the right side of the sending time to configure the system email. The specific configuration can see 5.5.3.1 Email Configuration Mode: The mode of sending face attendance results, including Day, Week, and Month Day: Send it once a day, send it to yesterday's face attendance results...
-
Page 140: Cc Scenario
6.2 CC scenario This is an AI application based on cross-count functions that helps control the attendance of customers / visitors / vehicles in public places such as restaurants, parks, zoos, theaters, museums, parking lots. 6.2.1 Channel Count and view real-time results through a single camera.Mainly used for small places with single entrances and exits. - Page 141 6.2.2 Groups Statistics and view real-time results by group.It is mainly used in large places with multi-channel entrances and is monitored by multi-channel cameras. 1. 1.Group can select the group information to display, Live displays the channel preview screen and statistics information, and Map displays the map information;...
- Page 142 6.2.3 Search You can search for channels and groups separately.Select the channel or group that you want to search for, set the search duration by day, week, month, or year, and select the type of target that you want to search for.Click the search icon and the results appear on the right side of the window.
- Page 143 Click Add New Picture, and click Delete Add Picture one by one. Check the Keep Aspect Ratio box if you want to display an image with the original aspect ratio; uncheck the box if you want the image to be stretched and full screen.Return to Channel View Mode or Group View Mode, click the full screen button in the upper right corner to display your ad picture and real-time count data for the selected channel or group.
-
Page 144: Non-Human Machine Statistics
6.3 Non-human machine statistics Face, human shape, motor vehicle, non-motor vehicle detection scene interface full screen display, can view the detection results in real time. 1. Interface theme of machine and non-human statistics 2. Click to enter the playback humanoid model search interface. 3. - Page 145 GUI Theme: The interface theme Statistics: Statistical time, you can choose 1 day, 2 days, 3 days, 4 days, 5 days, 6 days, 7 days, week, month and year. Channels: Channel selection, you can select the statistical channel 4. Show the current date and time 5.
-
Page 146: Chapter 7 - Search, Playback & Backup
Chapter 7 - Search, Playback & Backup The Search function gives you the ability to search for and play previously recorded videos as well as snapshots that are stored on your DVR’s hard drive. You have the choice of playing video that matches your recording schedule, manual recordings or motion events only. -
Page 147: Search & Play Video In General
Video Clip. Quickly save a section of video to a USB flash drive. View more on 7.1.1.1 Video Clip Backup Save Video Clip. Volume Control: scroll the slider bar to increase or decrease volume. Snapshots: to capture a snapshot image to your USB flash drive. If the video playback is in split-screen view, move the mouse cursor to the channel you want to capture, and then click the icon to save the snapshot. - Page 148 4. The search result will display on the timeline from 00:00 to 24:00. 5. Click button to start playback. 6. Control the playback with buttons on Video Playback Controls. 7. Use the timeframe options ( ) to view a smaller or larger time period. 8.
-
Page 149: Event Search, Playback & Backup
7.1.2 Event Search, Playback & Backup Event search lets you view a list of video recordings with the channel, start and end time, and recording type conveniently summarized. You can also quickly back up events to a USB flash drive. To search, play &... - Page 150 Detailed view. You can view the details of the events. In the detailed view mode, you can lock the video events to keep events from being overwritten in the hard drive. Click the icon to lock or click to unlock the events. When you click the left button of your mouse upon one of the event, system will show the event information on the left bottom corner of the screen.
-
Page 151: Sub-Periods Playback
7.1.2.1 Event Playback Control Event List, you can select the events here. Click icon to save your selected event videos to USB flash drive. Click icon to play video. Control playback through the icon on the video playback control. You can click the icon or right-click to exit playback and return to the event search window. -
Page 152: Smart
To search & play video in sub-periods: Click the date & time you want to search. Choose the date & time you want to search. Choose the split-screens you want the videos to be played in. Check the recording types you want to search, or check Search Type to choose all. Click the play button o start playing. -
Page 153: Tag
The red grid is the selected area. If someone in the area triggers the Motion, it will be searched and marked with blue time bar. 7.1.5 Tag Here you can view all the tags you have added and edit, play back, or delete them. Select time and channel click to complete the search. -
Page 154: External File
7.1.6 External File This is where you can play video from the external usb drive. Select the file on the left to play it automatically. 7.1.7 Picture Search & View This function can be used to search, play and copy snapshots to a USB flash drive. To search, play &... - Page 155 Thumbnails view. You can view the snapshots of the events. List view: The events will be displayed in list. Detailed view: You can view the details of the events. When you click the left button of your mouse upon one of the pictures, system will show the picture information on the left bottom corner of the screen.
-
Page 156: Split Playback
7.1.7.1 Picture Preview Control Picture List, you can select the pictures here. Click button to save your selected pictures to a USB flash drive. Click button to view the pictures in slideshow. Press button to exit preview control window and go back to picture search window. Press button to pause, press to resume slideshow. - Page 157 the previous selection can only be selected first. 7.1.9 AI 7.1.9.1 Face After selecting the date, time, channel and face group, click search, you can search the face information of the group during this time period. 1. Click to customize to add the search face.Or choose Groups to select the face pictures of the whole group of the face library for comparison search.
- Page 158 If you click the left button on an IPC icon and play back, there will be a simple playback in the lower right corner. If more than one IPC detects the face, the point playback will automatically judge the person's movement and introduce an arrow.
- Page 159 Channels: License plate detection events triggered by each channel. Search: Query according to the selected settings. Alarm Group: Select the different groups in the database to compare and search for the display results. This function is to click the triangle icon in the lower right corner of the event video to select the following delay: 5s, 10s, 20s, 30s, 1min, 2min, 5min, 10min, Custom Playback.If you choose 30s, the video will be extended by 30 seconds each.
- Page 160 7.1.9.4 PID&LCD After selecting the date, time, channel and alarm type and person and car type, click search to search for the alarm information for the PID and LCD triggered by all people and car during that time period. Left click on the left will have basic information, right click to customize playback and view details.Click on the lower left corner to play for simple playback, double-click to enlarge, and enter the normal playback mode.
- Page 161 7.1.9.6 Face attendance The attendance system allows you to check if someone appears at the specified time.And automatically determine whether they are late or leave early. 1. Channels: Choose the channel for face attendance 2. Select Mode: Select the attendance face picture, with By Group and By Person two modes By Group: Select a face image...
-
Page 162: Chapter 8 - Remote Access Via Web Client
Chapter 8 - Remote Access via Web Client Use the Web Client to remotely access your DVR at any time via a PC. Before you access the Web Client, you need to ensure that the internet settings of the DVR are configured properly 8.1 Basic System Environment Requirements The minimum requirements for hardware and OS required to run Web Client are given as below. -
Page 163: Web Plugin Download And Installation
8.2 Web Plugin Download and Installation To access the Web Client, do the following: For IE Chrome: 1. Launch the explorer on your PC and enter the DVR IP address or DDNS domain name (Host Name) you have set on DVR in the URL box. 2. -
Page 164: Web Client Manager
8.3 Web Client Manager The web client supports to fully control the DVR with administrator account. Please make sure to protect your user name & password for preventing illegal login. 8.3.1 Live Interface This is the first screen that opens after you have logged in to the Web Client. Here you can open or close live preview, record video to local computer manually, take snapshots of the screens, PTZ control, color adjustment, etc. - Page 165 6. Manual Alarm: Manually turn on or off Alarm Out 7. Color Controls. Click to display or hide the color controls. 8. AI alarm: To trigger the push of AI alarm event, click to check the AI push type, which type will be pushed, click to clear the current push list 9.
- Page 166 10. PTZ Controls Directional Arrows: Click to move the PTZ camera Automatic line scan. PTZ Speed:Click to set the speed of the PTZ camera’s movement. Zoom:Click –/+ to zoom in or out. Focus:Click –/+ to adjust focus. Iris: Click –/+ to adjust iris. The first icon is 3D PTZ, the second icon is autofocus, the third icon is reset preset point, the fourth icon is watch mode, and the fifth icon is manual tracking mode.
- Page 167 Watch Mode page: Time Interval: wait Time of the watchposition. It is the Interval between stopping operations and resuming operations of the watch position. Mode: Select the watch Mode, can choose the default, preset point, linear scan, track cruise, pattern scan; Click to start cruising.
-
Page 168: Playback
11. Live View Control Buttons: Channel window switch display mode Open the all-channel preview Close all channel preview Original proportion: display the live video according to the original proportion Stretch: live video to fit the entire area of each channel on the screen Zoom in the web client to the full screen Manual recording: Click Start manual recording for all display channels.Click again to stop the recording.Manual video recording is saved to your computer... - Page 169 Search Video: 1. Click Playback in the top-right corner of the window. 2. Select a day on the calendar to search for recordings from. Days with recordings appear with a red underline. 3. Select the recording type to search for from the dropdown next to Type, or select All to search for all recordings.
- Page 170 Choose the files you want to download, press Start Download button to begin, you will see the download status. Press Stop Download button to stop. Playback Speed. Click to choose the playing speed. Play All Channels: Click to play all channels you have chosen to searched. Only available when the Synchronous playback option is not checked.
- Page 171 You can double-click any picture to enter the small fragment playback interface, and click to return to the previous interface 8.3.2.3 Tag playback In this menu, you can view all the tags that have been added Details see 7.1.5 Tag. 8.3.2.4 Smart Playback After setting the mobile detection in5.1.6 Motion Detection, the mobile detection alarm is triggered with the human form to search the Smart playback video in the plug-free browser (Apple Safari / Google browser /...
-
Page 172: Remote Setting
8.3.2.5 AI Playback After the AI alarm is set in 5.4 AI, you can search for AI alarm events here, including face detection, license plate detection, pedestrian and vehicle detection, PID & LCD, repeat guest and face attendance 8.3.3 Remote Setting Here you can remotely configure the settings of the DVR. - Page 173 Save: Click to save the modifications.
-
Page 174: Chapter 9 - Viewing Backed Up Video On Pc/Mac
Chapter 9 - Viewing Backed Up Video on PC/Mac This section will help you to play the backup files with the powerful video player which is attached in the For Mac users, please install the app “VideoPlayer_x.x.xx_xxxx_xx_x.dmg”, for example: VideoPlayer_1.0.15_2017_01_6.dmg. For PC users, please install the software “VideoPlayer_x.x.xx_xxxx_xx_xx.exe”, for example: VideoPlayer_1.0.15_2017_01_06.exe. - Page 175 Video Player Control 1. Play List Add files Remove files To choose play mode: play a single file and stop; play all listed files by sequence; repeat one file; repeat all files. Filter by file name Hide/Show Playlist Click to open files or load a folder. 3.
-
Page 176: Chapter 10 - Remote Access Via Mobile Devices
Chapter 10 - Remote Access via Mobile Devices The DVR supports to remote access via mobile devices based on Android & iOS operating system. 1. Search RXCamView from Google Play Store for android devices or App Store or iOS devices and install. 2. - Page 177 4. Select Manual Add and enter the DVR information to Add a new device. 1. Scan the QR code: Scan the QR code to add devices. 2. Online search: On the same LAN as the device, search and add. 3. Manually add: 4.
-
Page 178: Chapter 11 - Appendix
Chapter 11 - Appendix 11.1 FAQ questions 1. What should I do if the hard disk is not detected? A: If the system does not detect the hard disk, check whether the data cable and power cord are well connected, faulty with the interface on the motherboard, or whether the hard disk is supported in the specification. -
Page 179: Usage Maintenance
10. What can not find any recorded information when playing the video back? A: Please check whether the data cable of the hard disk is well connected and whether the system time is being illegally adjusted.Try several times, if the above phenomenon still appears to check whether the hard disk is damaged. -
Page 180: Accessories (For Reference Only)
11.3 Accessories (For reference only) Remote Controller Power Adapter Warranty Card USB mouse... - Page 181 Videor E. Hartig GmbH Exclusive distribution through specialised trade channels only. Videor E. Hartig GmbH Carl-Zeiss-Straße 8 63322 Rödermark / Germany Tel. +49 (0) 6074 / 888-0 Technical changes reserved Fax +49 (0) 6074 / 888-100 www.videor.com...
Need help?
Do you have a question about the MNR-18N0400A and is the answer not in the manual?
Questions and answers