Chapters
Table of Contents

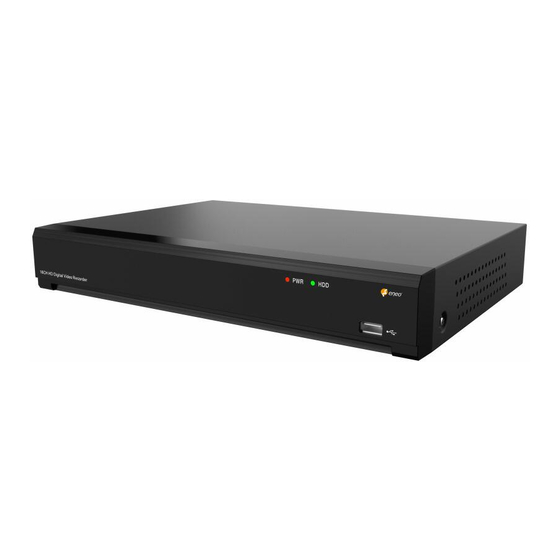
Related Manuals for Eneo MNR-18N04000A


Summary of Contents for Eneo MNR-18N04000A
- Page 1 Quick Installation Guide Hybrid HD Video Recorder, HD-TVI, AHD, HDMI, SATA, w/o HDD MNR-18N04000A MNR-18N16000A Learn more about eneo IN series on our YouTube channel.
-
Page 2: Table Of Contents
Table of Contents Components ........................5 Description ........................6 Connection Diagram ................................6 HDD Installation .................................7 Startup W izard ...................................7 Start wizard ..................................7 Network Configuration ..............................8 Date/Time ..................................9 IP Camera ..................................10 Disk ....................................13 Resolution ..................................13 Mobile ................................... 14 Summary ..................................14 Live View Screen Overview ............................ - Page 3 Safety instructions General safety instructions • Before switching on and operating the system, first read this safety advice and the operating instructions. • Keep the operating instructions in a safe place for later use. • Installation, commissioning and maintenance of the system may only be carried out by authorised individuals and in accordance with the installation instructions - ensuring that all applicable standards and guidelines are followed.
- Page 4 Class A device note This is a Class A device. This device can cause malfunctions in the living area; in such an event, the operator may need to take appropriate measures to compensate for these. WEEE (Waste Electronical & Electronic Equipment) Correct Disposal of This Product (Applicable in the European Union and other European countries with separate collection systems).
-
Page 5: Components
Components This system comes with the following components; • DVR • Installation Guide • DC adapter & power cord • Mouse... -
Page 6: Description
Description CAUTION: The first time you run the DVR, you will be required to set your password immediately in order to protect your privacy. Please be sure to record your username and password and save them in a secure place. If you forget your password, you will be unable to login the system, please contact your reseller to reset the password. -
Page 7: Hdd Installation
HDD Installation CAUTION: DO NOT install or remove the hard disk drive while the device power is turned ON.. 1. Connect the data and power cables to the HDD and place the HDD on the DVR case. 2. Carefully flip the DVR case and secure the HDD to the DVR with the screws. Notice: Depending on the model you purchased, the actual product may be slightly different from the images above. -
Page 8: Network Configuration
Network Configuration If you connect to a router allows to use DHCP, please check the DHCP box. The router will assign automatically all the network parameters for your DVR. Unless the network is manually addressed below parameters: IP Address: The IP address identifies the DVR in the network. It consists of four groups of numbers between 0 to 255, separated by periods. -
Page 9: Date/Time
RTSP Port: This is the port that the DVR will be allowed to transmit real-time streaming to other device (e.g. using a streaming Media player.). UPNP: If you want to log in remotely to the DVR using Web Client, you need to complete the port forwarding in your router. -
Page 10: Ip Camera
Date: Click on the calendar icon to set the system date. Time: Click to set the system time. Date Format: Choose from the dropdown menu to set preferred date format. Time Format: Choose time format between 24Hour and 12Hour. Time Zone: Set the correct time zone. NTP stands for Network Time Protocol. - Page 11 Click Search to search IP cameras in the same network. Choose the IP camera(s) you want to add, and then click → icon to add to the DVR. Enter the camera’s user name & password to add the camera(s). You can also click + button to add individual IP camera to a single channel.
- Page 12 Click Search button to search IP cameras, and then click one of the IP camera in the device list. IP Address/Domain: IP address or domain name of the IP camera Alias: Name of the IP camera Position: Position to display the camera name on the screen. Port: Port of the IP camera Protocol: Choose the protocol of the IP camera from the dropdown menu User Name: User Name of the IP camera...
-
Page 13: Disk
Disk If the HDD is installed in the DVR for the first time, it must be formatted. Select the HDD and then click Format HDD button to format the HDD. Overwrite: Use this option to overwrite the old recordings on the HDD when the HDD is full. -
Page 14: Mobile
Mobile If your DVR come with a P2P ID, you can scan the QR code with your mobile app to view the DVR remotely. Summary You can check the system summary information you had set in the start wizard and finish the wizard. -
Page 15: Live View Screen Overview
Live View Screen Overview Camera Title Status Icons Camera Quick Toolbar Start Menu System Date & Time Task Menu Bar Camera Title To display the camera title A-: This indicates that the camera connected is an AHD camera T-: This indicates that the camera connected is a TVI camera C-: This indicates that the camera connected is a CVI camera IP: This indicates that the camera connected is an IP camera Status Icons... -
Page 16: Remote Access Via Web Client
VIDEO LOSS: The analog camera is disconnected. No Camera: IP camera is disconnected. Decoding Failed: The DVR doesn’t support this kind of IP camera compression standard, please change to H.264 compression standard. Click to open Quick Add menu to add IP camera. Click to edit current IP camera. - Page 17 Remote Live View on Mobile Devices 1. Open the App Store (iOS) or Play Store (Android). 2. Search for and install eneoINsightmobile application. 3. Open eneoINsightmobile application. 4. Go to Device. Click + to add new device. Scan QR code under NVR / DVR box. Then input client port, user name and password, and then click “Save“...
-
Page 18: Further Information
• the product detail pages on the eneo website (www.eneo-security.com), • the eneo download portal (https://datacloud.videor.com/s/eneodownloadportal). In case that previous link is broken, the latest link to the eneo download portal can be found on the respective eneo product page at www.eneo-security.com. - Page 19 Inhalt Komponenten ......................22 Beschreibung .......................23 Anschlussschema ................................23 HDD-Installation ................................24 Startup-Assistent ................................24 Start-Assistent ................................24 Netzwerk-Konfiguration ............................25 Datum/Uhrzeit ................................27 IP-Kamera ..................................28 Festplatte..................................30 Auflösung ..................................31 Mobil ....................................31 Zusammenfassung ..............................32 Übersicht über den Live-Ansichtsbildschirm ....................... 33 Fernzugriff über Web Client............................
- Page 20 Sicherheitsanweisungen Sicherheitshinweise allgemein • Bevor Sie das System anschließen und in Betrieb nehmen, lesen Sie zuerst diese Sicherheitshinweise und die Betriebsanleitung. • Bewahren Sie die Betriebsanleitung sorgfältig zur späteren Verwendung auf. • Montage, Inbetriebnahme und Wartung des Systems darf nur durch dafür autorisierte Personen vorgenom- men und entsprechend den Installationsanweisungen - unter Beachtung aller mitgeltenden Normen und Richtlinien - durchgeführt werden.
- Page 21 • Bei abgedunkelter Umgebung und direktem Blick in den IR-Scheinwerfer ist ein Sicherheitsabstand von > 1 m zum Scheinwerfer einzuhalten. • Unsichtbare LED Strahlung nicht direkt mit optischen Instrumenten (z.B. Lupe, Vergrößerungsglas oder Mikroskop) betrachten, da sie eine Augengefährdung verursachen kann, LED Klasse 1M. •...
-
Page 22: Komponenten
Komponenten Das System wird mit den folgenden Komponenten geliefert: • DVR • Installationsanleitung • DC-Adapter und Netzkabel • Maus... -
Page 23: Beschreibung
Beschreibung VORSICHT: Wenn Sie den DVR zum ersten Mal starten, müssen Sie sofort ein Pass- wort festlegen, um Ihre Privatsphäre zu schützen. Bitte notieren Sie sich Ihren Benutzernamen und Ihr Passwort und be- wahren Sie sie an einem sicheren Ort auf. Wenn Sie Ihr Passwort verges- sen haben, können Sie sich nicht mehr in das System einloggen. -
Page 24: Hdd-Installation
HDD-Installation VORSICHT: Installieren oder entfernen Sie das Festplattenlaufwerk NICHT, wenn das Gerät eingeschaltet ist. 1. Schließen Sie die Daten- und Stromkabel an die Festplatte an und legen Sie die Festplatte in das Gehäuse des Digitalrekorders. 2. Drehen Sie das Gehäuse des Digitalrekorders vorsichtig um und befestigen Sie die Festplatte mit den Schrauben am Digitalrekorder. -
Page 25: Netzwerk-Konfiguration
Netzwerk-Konfiguration Wenn Sie eine Verbindung zu einem Router herstellen, der die Verwendung von DHCP erlaubt, prüfen Sie bitte das DHCP-Kästchen. Der Router weist automatisch alle Netz- werkparameter für Ihren DVR zu. Es sei denn, das Netz wird manuell unter den Parame- tern angesprochen IP-Adresse: Die IP-Adresse identifiziert den DVR im Netzwerk. - Page 26 Client-Anschluss Dies ist der Port, über den der DVR Informationen sendet (z. B. über die mobile App). Wenn der Standard-Port 9000 bereits von anderen Anwendungen belegt ist, ändern Sie ihn bitte. RTSP-Anschluss: Dies ist der Port, über den der DVR Echtzeit-Streaming an andere Gerä- te übertragen darf (z.
-
Page 27: Datum/Uhrzeit
Datum/Uhrzeit In diesem Menü können Sie Datum, Uhrzeit, Datumsformat, Zeitformat, Zeitzone, NTP und Sommerzeit einstellen. Datum und Uhrzeit Klicken Sie auf das Kalendersymbol, um das aktuelle Systemdatum einzustellen. Datum Klicken Sie auf das Kalendersymbol, um das Systemdatum einzustellen. Uhrzeit: Klicken Sie darauf, um die Systemzeit einzustellen. Datumsformat Wählen Sie aus dem Dropdown-Menü... -
Page 28: Ip-Kamera
DST steht für Daylight Savings Time (Sommerzeit). DST: Aktivieren Sie diese Option, wenn in Ihrer Region die Sommerzeit gilt Zeitverschiebung: Wählen Sie die Zeit, die für die Sommerzeit verschoben werden soll Zeitmodus: Wählen Sie, ob Sie die Sommerzeit in Wochen oder in Tagen einstellen möch- Startzeit/Endzeit: Legen Sie die Startzeit und die Endzeit für die Sommerzeit fest IP-Kamera In diesem Menü... - Page 29 Klicken Sie auf Suchen um IP-Kameras im selben Netzwerk zu suchen. Wählen Sie die IP-Kamera(s) aus, die Sie hinzufügen möchten, und klicken Sie dann auf → Symbol, um sie dem DVR hinzuzufügen. Geben Sie den Benutzernamen und das Passwort der Kamera ein, um die Kamera(s) hinzuzufügen.
-
Page 30: Festplatte
IP-Adresse/Domäne: IP-Adresse oder Domänenname der IP-Kamera Alias: Name der IP-Kamera Position: Position für die Anzeige des Kameranamens auf dem Bildschirm. Port: Anschluss der IP-Kamera Protokoll: Wählen Sie das Protokoll der IP-Kamera aus dem Dropdown-Menü Benutzername: Benutzername der IP-Kamera Passwort: Passwort der IP-Kamera Kanal binden: Wählen Sie einen Kanal des DVR aus, an den Sie sich anschließen möchten. -
Page 31: Auflösung
Aufzeichnen auf ESATA: Wenn Ihr DVR mit einem e-SATA-Anschluss auf der Rückseite ausgestattet ist, können Sie die Aufzeichnung des Videos auf eine e-SATA-Festplatte aktivieren. Auflösung Wählen Sie eine Ausgabeauflösung, die zu Ihrem Monitor passt. Der DVR unterstützt die automatische Anpassung der Ausgangsauflösung an die beste Auflösung Ihres Monitors beim Starten des Systems. -
Page 32: Zusammenfassung
Zusammenfassung Sie können die im Startassistenten eingestellten Systemzusammenfassungsinformatio- nen überprüfen und den Assistenten beenden. Wählen Sie "Dieses Fenster beim nächsten Mal nicht mehr anzeigen" aus, wenn Sie den Startassistenten beim nächsten Neustart des Systems nicht mehr anzeigen möchten. Klicken Sie auf Beenden um zu speichern und zu beenden. -
Page 33: Übersicht Über Den Live-Ansichtsbildschirm
Übersicht über den Live-Ansichtsbildschirm Kamera-Titel Status-Symbole Kamera Quick Toolbar Start-Menü System Datum und Uhrzeit Aufgaben-Menüleiste Kamera-Titel So zeigen Sie den Kameratitel an A- Dies zeigt an, dass die angeschlossene Kamera eine AHD-Kamera ist T- Dies zeigt an, dass die angeschlossene Kamera eine TVI-Kamera ist C- Dies zeigt an, dass die angeschlossene Kamera eine CVI-Kamera ist IP: Zeigt an, dass es sich bei der angeschlossenen Kamera um eine IP-Kamera handelt Status-Symbole... -
Page 34: Fernzugriff Über Web Client
VIDEOAUSFALL: Die analoge Kamera ist nicht angeschlossen. Keine Kamera: Die IP-Kamera ist nicht angeschlossen. Dekodierung fehlgeschlagen: Der DVR unterstützt diese Art von IP-Kamera-Komprimie- rungsstandard nicht, bitte wechseln Sie zum H.264-Komprimierungsstandard. Anklicken zum Öffnen des Menüs Schnelles Hinzufügen, um eine IP-Kamera hinzuzufü- gen. -
Page 35: Remote-Live-Ansicht Auf Mobilen Geräten
2. Nach erfolgreicher Anmeldung beim Web Viewer wechselt das System in die Live-Display-Oberfläche und verbindet sich automatisch mit dem Audio-/ Video-Feed. Remote-Live-Ansicht auf mobilen Geräten 1. Öffnen Sie den App Store (iOS) oder den Play Store (Android). 2. Suchen Sie nach der Anwendung eneoINsightmobile und installieren Sie sie. 3. -
Page 36: Weitere Informationen
Bitte halten Sie die Firmware stets aktuell, damit Sie die neuesten Funktionen des Geräts nutzen können. Die aktuellsten Firmware-Versionen finden Sie auf unserer Website unter www.eneo-security.com. Das Benutzerhandbuch und weitere Software-Tools sind auf der eneo Website unter www.eneo-security.com verfügbar. Informationen zu kompatiblen Video Management Software-Lösungen finden Sie in der Kategorie Software unter www.eneo-security.com. - Page 40 VIDEOR E. Hartig GmbH Exclusive distribution through specialised trade channels only. VIDEOR E. Hartig GmbH Carl-Zeiss-Straße 8 63322 Rödermark/Germany Tel. +49 (0) 6074 / 888-0 Technical changes reserved Fax +49 (0) 6074 / 888-100 www.videor.com...