Table of Contents
Advertisement
Available languages
Available languages
Quick Links
OWNER'S MANUAL/ MANUAL DEL PROPIETARIO
ASSEMBLY AND OPERATING IN STRUC TIONS
INSTRUCCIONES DE ARMADO Y OPERACIÓN
Model / Modelo SMK8028MS / SMK8028MSO
NOTICE TO INSTALLER:
LEAVE THESE
INSTRUCTIONS WITH THE
GRILL OWNER FOR
FUTURE REFERENCE .
AVISO PARA EL
INSTALADOR:
ENTREGUE ESTAS
INSTRUCCIONES AL
PROPIETARIO DE LA
AHUMADOR PARA
REFERENCIA FUTURA.
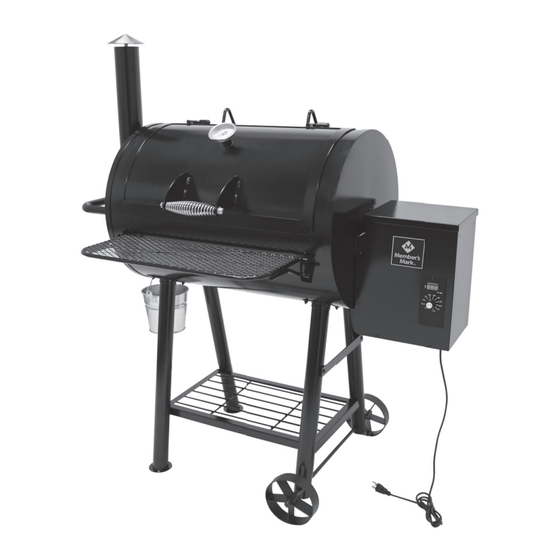
PELLET SMOKER & GRILL
Pellet fumador y parrilla
PLEASE READ THIS ENTIRE MANUAL BEFORE INSTALLATION AND USE OF
THIS PELLET FUEL-BURNING APPLIANCE. FAILURE TO FOLLOW THESE
INSTRUCTIONS COULD RESULT IN PROPERTY DAMAGE, BODILY INJURY
OR EVEN DEATH. CONTACT LOCAL BUILDING OR FIRE OFFICIALS ABOUT
RESTRICTIONS AND INSTALLATION INSPECTION REQUIREMENTS IN YOUR
LEA ESTE MANUAL COMPLETO ANTES DE LA INSTALACIÓN Y EL USO DE
ESTE ARTEFACTO CALENTADOR A COMBUSTIBLE GRANULAR SI NO SIGUE
ESTAS INSTRUCCIONES, PUEDE PROVOCAR DAÑOS A LA PROPIEDAD,
LESIONES CORPORALES E INCLUSO LA MUERTE. COMUNÍQUESE CON LOS
OFICIALES LOCALES DE CONSTRUCCIÓN O DE INCENDIOS PARA SABER LAS
RESTRICCIONES Y LOS REQUISITOS DE INSPECCIÓN DE INSTALACIÓN EN SU
SAVE THIS MANUAL FOR FUTURE REFERENCE
GUARDE ESTE MANUAL PARA REFERENCIA FUTURA
ADVERTENCIA/WARNING
AREA. SAVE THESE INSTRUCTIONS.
ÁREA. CONSERVE ESTAS INSTRUCCIONES.
Advertisement
Chapters
Table of Contents

Related Manuals for Member's Mark SMK8028MS


Summary of Contents for Member's Mark SMK8028MS
- Page 1 SAVE THIS MANUAL FOR FUTURE REFERENCE ASSEMBLY AND OPERATING IN STRUC TIONS INSTRUCCIONES DE ARMADO Y OPERACIÓN GUARDE ESTE MANUAL PARA REFERENCIA FUTURA Model / Modelo SMK8028MS / SMK8028MSO ADVERTENCIA/WARNING NOTICE TO INSTALLER: PLEASE READ THIS ENTIRE MANUAL BEFORE INSTALLATION AND USE OF LEAVE THESE THIS PELLET FUEL-BURNING APPLIANCE.
-
Page 2: Important Safety Warnings
IMPORTANT SAFETY WARNINGS WE WANT YOU TO ASSEMBLE AND USE YOUR SMOKER AS SAFELY AS POSSIBLE. THE PURPOSE OF THIS SAFETY ALERT SYMBOL IS TO ATTRACT YOUR ATTENTION TO POSSIBLE HAZARDS AS YOU ASSEMBLE AND USE YOUR SMOKER/GRILL. WHEN YOU SEE THE SAFETY ALERT SYMBOL, PAY CLOSE ATTENTION TO THE INFORMATION WHICH FOLLOWS! READ ALL SAFETY WARNINGS AND INSTRUCTIONS CAREFULLY BEFORE ASSEMBLING AND OPERATING YOUR SMOKER/GRILL. -
Page 3: Table Of Contents
TABLE OF CONTENTS: General Warnings ..........3-4 Operating the Grill . -
Page 4: General Warnings
GENERAL WARNINGS: WARNING When using electric appliances, basic safety precautions should always be followed including the following: • Operate only per manufacturers instructions. • Keep all combustible materials at least 36 inches (66 cm) away from the grill at all times. Do not use this grill under any overhang or near any combustible structures. - Page 5 • This product is not designed for tabletop use. Do not set this product on a tabletop. • Outdoor extension cords must be used with outdoor use products and are marked with suffix “W” and with the statement “Suitable for Use with Outdoor Appliances.” •...
-
Page 6: Operating The Grill
USE CAUTION AND COMMON SENSE WHEN OPERATING YOUR PELLET SMOKER & GRILL. FAILURE TO ADHERE TO THE SAFETY WARNINGS AND GUIDELINES IN THIS MANUAL COULD RESULT IN SEVERE BODILY INJURY OR PROPERTY DAMAGE. SAVE THIS MANUAL FOR FUTURE REFERENCE. OPERATING THE GRILL: WARNING Read and follow all warnings and instructions contained in the preceding sections of this manual. - Page 7 Step 2 Make sure temperature control knob is “OFF” . Plug power cord into a GFCI (grounded) outdoor electrical outlet. Step 3 Open the pellet hopper lid. Make sure the auger is free from debris and other objects. Turn the temperature control knob Control Panel to “SMOKE”...
-
Page 8: Turning Off The Grill
Step 2 Open cooking chamber lid and turn temperature control knob to “SMOKE” . You should see smoke coming out of the cooking chamber as the pellets ignite in about 2 - 3 minutes. NOTE: Always start the grill on “SMOKE” setting with the cooking chamber lid open. Step 3 Close cooking chamber lid and set the temperature control knob to the desired setting. -
Page 9: Cook Mode
SMOKE MODE: • The “SMOKE” settings is for smoking and adding smoke fl avor to foods being cooked. • Smoke Mode can be adjusted from P0 to P4. P0 provides less smoke into the cooking chamber and can be adjusted up to P4 for maximum smoke. P2 is the normal factory setting. •... -
Page 10: Proper Care And Maintenance
PROPER CARE & MAINTENANCE: • Remove wood pellets from hopper if grill will not be used for a long period of time. Wood pellets can become soggy due to moisture/humidity and can cause the auger to bind up or not push pellets to burn chamber. -
Page 11: Transporting And Storage
TRANSPORTING AND STORAGE: WARNING • Never move a grill when it is hot or when objects are on the cooking surfaces. • Never store fl ammable liquids or spray canisters under or near the grill. • DO NOT extinguish grease fi res using water. BEFORE STORING YOUR GRILL: •... -
Page 12: Trouble Shooting
TROUBLE SHOOTING: PROBLEM CAUSE CORRECTION Electric 1. Reseat plug in a 3-wire grounded GFCI 1. Check that the 3-wire plug is fully seated outlet wired for 120 volts. into a 3-wire grounded GFCI outlet wired element for 120 volts. 2. Reset breakers or replace fuse. will not 2. -
Page 13: Wiring Diagram
WIRING DIAGRAM: POWER CORD MOLEX TYPE CONNECTOR 4-TYPICAL BLACK WHITE ORANGE WHITE WHITE Smoke ˚F High PURPLE WHITE BLOWER FAN AUGER MOTOR FIRE POT HOT ROD NOTE: FUSE IS LOCATED ON BACK OF CONTROL. Maximum Fuse Size: 5mm x 20 mm, 5 amps... -
Page 14: Assembly Instructions
ASSEMBLY INSTRUCTIONS: Make sure you have all items listed under PARTS LIST and PARTS CARD CONTENTS before you begin the installation process. PARTS CARD CONTAINS: M4 Bolt & Nut M12 Wheel Washers M12 Nuts (32) M6 Nuts (44) M6 Bolts (20) M6 Lock Washers... - Page 15 READ ALL SAFETY WARNINGS & INSTRUCTIONS CAREFULLY BEFORE ASSEMBLING AND OPERATING YOUR MEMBER’S MARK PELLET SMOKER & GRILL. FOR MISSING PARTS, PLEASE CALL CUSTOMER SERVICE AT 855-735-9922. (Proof of purchase will be required.) The following tools are required to assemble your Member’s Mark Pellet Smoker & Grill: •...
- Page 17 Smoke Stack Grill Body Assembly opening Place grill body on its end with the lid open as illustrated. Grease Hole TOP VIEW (8) M6 Bolts (8) M6 Nuts (8) M6 Lock Washers Note: Do not fully tighten Note: Threads should be facing inwards.
- Page 18 BOTTOM VIEW (8) M6 Bolts (8) M6 Nuts (8) M6 Lock Washers Note: Do not fully tighten (4) M6 Bolts (4) M6 Lock Washers Note: Fully tighten...
- Page 19 (2) M12 Wheel Washers (2) M12 Nuts (2) M6 Bolts Note: Do not fully tighten Once you have followed steps 1-6, turn the smoker upright and make sure it’s on level ground. Tighten all bolts.
- Page 20 Felt Gasket (8) M6 Bolts (8) M6 Nuts (1) Felt Gasket (4) M6 Bolts (4) M6 Nuts...
- Page 21 Chimney Grease Drainage Tray (2) M6 Bolts Note: Remove pre-attached shoulder bolt before installing grease drainage tray Shoulder Bolt Note: Re-install shoulder bolt To center the temperature gauge insert gauge into lid and adjust with nut.
- Page 22 Pellet Hopper Gasket Right side mounting bracket (4) M6 Bolts Note: The top two bolts attach part #4 (right side mounting bracket) to the inside of the cooking chamber and then go through and attach to pellet hopper. (2) M4 Bolt (2) M4 Nut (4) M6 Bolts (4) M6 Nuts...
- Page 23 Step 3 - Install cooking grates and warming rack. Step 2 - Install the grease tray so that it sits on the left and right mounting brackets. Step 1 - Install heat baffle onto brackets so it sits over fi re pot. Attach grease bucket...
-
Page 24: Importantes Advertencias De Seguridad
IMPORTANTES ADVERTENCIAS DE SEGURIDAD ES NUESTRO DESEO QUE ARME Y UTILICE SU PARRILLA EN LA FORMA MÁS SEGURA POSIBLE. EL PROPÓSITO DE ESTE SÍMBOLO DE ALERTA DE SEGURIDADES ES QUE USTED PRESTE ATENCIÓN A LOS POSIBLES PELIGROS CUANDO ARME Y UTILICE SU PARRILLA. -
Page 25: Advertencia De La Proposición 65 De California
TABLA DE CONTENIDOS: Advertencias Generales ........25-26 Funcionamiento de la Parrilla . -
Page 26: Advertencias Generales
ADVERTENCIAS GENERALES: ADVERTENCIA Cuando se usan aparatos eléctricos, las precauciones básicas de seguridad siempre se deben seguir incluyendo las siguientes: • Operar sólo por instrucciones del fabricante. • Mantenga todos los materiales combustibles por lo menos 36 pulgadas (91.44 cm) de distancia de la parrilla en todo momento. - Page 27 • Este producto no está diseñado para uso de mesa. No coloque este producto sobre una mesa. • Cables al aire libre de extensión debe ser utilizado con productos de uso al aire libre y están marcados con el sufi jo “W”...
-
Page 28: Funcionamiento De La Parrilla
SEA PRECAVIDO Y UTILICE SENTIDO COMÚN CUANDO OPERE LA PARRILLA DE PELLET COMBUSTIBLE. HACER CASO OMISO A LAS ADVERTENCIAS DE SEGURIDAD E INSTRUCCIONES EN ESTE MANUAL PUEDEPRODUCIR GRAVES LESIONES PERSONALES, MUERTE O DA—OS MATERIALES.GUARDE ESTE MANUAL PARA REFERENCIA FUTURA. FUNCIONAMIENTO DE LA PARRILLA: ADVERTENCIA Lea y siga todas las advertencias e instrucciones contenidas en las secciones anteriores de este manual. - Page 29 Paso 3 Abra la tapa de la tolva para pellets. Asegúrese de que la barrena no contenga desechos u otros objetos. Coloque la perilla del control de temperatura en la posición de “AHUMAR” y verifi que que la barrena comience a girar. Paso 4 Ponga su mano en la cámara de cocción durante 3”...
-
Page 30: Apagado De La Parrilla
NOTA: Siempre encienda la parrilla con la temperatura en “AHUMAR” y la tapa de la cámara de cocción abierta. Paso 3 Cierre la tapa de la cámara y ajuste la perilla del control de la temperatura a la temperatura deseada. Para obtener resultados óptimos, caliente previamente la parrilla durante 10 a 15 minutos con la tapa cerrada antes de colocar el alimento en la parrilla. -
Page 31: Consejos De Uso
CONSEJOS DE USO: • Su Member’s Mark Pellet Smoker & Grill nunca se debe mover mientras está caliente. Si está transportando su parrilla en un vehículo después de cocinarla, asegúrese de que el fuego esté completamente apagado y que la parrilla esté fría antes de colocarla en cualquier vehículo. NUNCA ponga agua en la olla de fuego. Atascará... -
Page 32: Cuidado Y Mantenimiento Apropiados
CUIDADO Y MANTENIMIENTO APROPIADOS: • Retire los pellets de madera de la tolva si la parrilla no será utilizado durante un largo periodo de tiempo. Pellets demadera pueden llegar a ser empapado causa de la humedad / humedad y pueden causar la barrena se una o no empujar para quemar pellets de cámara. -
Page 33: Transporte Y Almacenaje
TRANSPORTE Y ALMACENAJE: ADVERTENCIA • Nunca mueva una parrilla cuando está caliente o con objetos sobre las superfi cies de cocción. • Nunca guarde líquidos infl amables o latas de aerosol debajo o cerca de la parrilla. • NO apague incendios de grasa con agua. ANTES DE GUARDAR LA PARRILLA: •... -
Page 34: Solución De Problemas
SOLUCION DE PROBLEMAS: PROBLEMA CAUSA CORRECCION Elemento 1. Enchufe de nuevo al cable de 3 alambres 1. Asegúrese que el cable de 3 alambres de 120 voltios que es protegido por GFCI este enchufado bien en una tomacorriente eléctrico de 7 o 10 amperios. aterrizador de 3 alambres de 120 voltios no calienta que es protegido por GFCI de 7 o 10... -
Page 35: Diagrama De Cableado
DIAGRAMA DE CABLEADO: CABLE DE ALIMENTACION CONECTOR CLÁSICO TIPO MOLEX 4-PIN NEGRO BLANCO NARANJA ROJO BLANCO BLANCO Smoke ˚F High VIOLETA BLANCO VENTILADOR MOTOR DE BARRENA OLLA DE FUEGO VARILLA CALIENTE... -
Page 36: Instrucciones De Montaje
INSTRUCCIONES DE MONTAJE: Verifi que que tiene todos los artículos indicados en la LISTA DE PARTES y en el CONTENIDO DE LA BOLSA DE PARTES antes de comenzar con el proceso de instalación. LA BOLSA DE PARTES INCLUIRÁ LO SIGUIENTE: Perno y tuerca M4 Arandelas de rueda M12 Tuercas M12... - Page 37 LEA CUIDADOSAMENTE TODAS LAS ADVERTENCIAS E INSTRUCCIONES DE SEGURIDAD ANTES DE ENSAMBLAR Y OPERAR SU QUEMADOR DE PELLET DE MEMBER’S MARK. PARA PIEZAS QUE FALTAN, POR FAVOR LLAME AL SERVICIO AL CLIENTE AL 855-735-9922. (Se requerirá un comprobante de compra). Se requieren las siguientes herramientas para ensamblar su ahumador y parrilla Member’s Mark: •...
- Page 39 Asamblea del cuerpo de la parrilla Apertura de la pila de humo Coloque el cuerpo de la parrilla en su extremo con la tapa abierta como se ilustra. Agujero de engrase VISTA SUPERIOR (8) Pernos M6 (8) Tuercas M (8) Arandelas de seguridad M6 Nota: No apriete por completo Nota: los hilos deben estar orientados hacia...
- Page 40 VISTA INFERIOR (8) Pernos M6 (8) Tuercas M6 (8) Arandelas de seguridad M6 Nota: No apriete por completo (4) Pernos M6 (4) Arandelas de seguridad M6 Nota: Completamente apretar...
- Page 41 (2) Arandelas de rueda M12 (2) Tuercas M12 (2) Pernos M6 Nota: No apriete por completo Una vez que haya seguido los pasos 1 a 6, coloque el ahumador en posición vertical y asegúrese de que esté nivelado. Apretar todos los pernos.
- Page 42 Junta de fi eltro (8) Pernos M6 (8) Tuercas M6 (1) Junta de fi eltro (4) Pernos M6 (4) Tuercas M6...
- Page 43 Tapa de la chimenea Draninage de la grasa Bandeja (2) Pernos M6 Nota: Retire el perno de hombro preinstalado antes de instalar la bandeja de drenaje de grasa Perno de hombro Nota: vuelva a instalar el perno de hombro Para centrar el indicador de inser- ción de medidor de temperatura en la tapa y ajustar con la tuerca.
- Page 44 Junta de tolva de pellet Soporte de montaje del lado derecho (4) Pernos M6 Nota: Los dos pernos superiores sujetan la pieza n. ° 4 (soporte de montaje del lado derecho) al interior de la cámara de cocción y luego pasan y se sujetan a la tolva de pellet. (2) Perno M4 (2) Tuerca M4 (4) Pernos M6...
- Page 45 Paso 3 - Instale las parrillas de cocción y el estante calentador. Paso 2 - Instale la bandeja de grasa de modo que se asiente en los so- portes de montaje izquierdo y derecho. Paso 1 - Instale el defl ector de calor en los soportes para que se asiente sobre la olla de fuego.
- Page 46 8:00 a.m. A las 5:00 p.m. DE LUNES A VIERNES. FOR COVERS, ACCESSORIES AND OTHER PRODUCTS, PLEASE VISIT US ONLINE AT: www.embersgrills.com ©2018 The Boltz Group LLC Owner’s Manual for Model Addison, Texas 75001 U.S.A OM8028MS / OM8028MSO Manual del Propietario para el Modelo www.embersgrills.com 0518 SMK8028MS / SMK8028MSO...
Need help?
Do you have a question about the SMK8028MS and is the answer not in the manual?
Questions and answers