Table of Contents
Advertisement
Quick Links
Advertisement
Table of Contents

Related Manuals for Grunbeck cliQlock softliQ:SE


Summary of Contents for Grunbeck cliQlock softliQ:SE
- Page 1 We understand water. Water softener | softliQ:SE Operation manual...
- Page 2 General Contact Germany International Sales +49 9074 41-145 Service +49 9074 41-333 service@gruenbeck.de Availability Monday to Thursday 7:00 am - 6:00 pm Friday 7:00 am - 4:00 pm We reserve the right to technical modifications. © by Grünbeck Wasseraufbereitung GmbH Original operation manual Edition: July 2024 Order no.: 100298540000_en_014...
-
Page 3: Table Of Contents
Table of contents Table of contents Starting the start-up program ........30 Introduction ............... 4 Setting the product ...........30 Handing over the product to the Validity of the manual ..........5 owner/operator/operating company ......32 Other applicable documents ........5 Product identification ..........6 Symbols used ............ -
Page 4: Introduction
Introduction Introduction This manual is intended for owners/operators/operating companies, users as well as qualified specialists and ensures the safe and efficient handling of the product. The manual is an integral part of the product. ● Carefully read this manual and the included manuals on the components before you operate your product. -
Page 5: Validity Of The Manual
Introduction Validity of the manual This manual applies to the products below: ● Water softener softliQ:SE18 ● Water softener softliQ:SE21 ● Water softener softliQ:SE24 ● Special designs that essentially correspond to the standard products given above. For information on changes, please refer to the respective information sheet that is enclosed, if applicable. -
Page 6: Product Identification
Introduction Product identification You can identify your product based on the product designation and the order number shown on the type plate. ► Check whether the products indicated in chapter 1.1 correspond to your product. The type plate is located on the inside of the salt tank lid. Designation Designation CE mark... -
Page 7: Symbols Used
Introduction Symbols used Symbol Meaning Danger and risk Important information or requirement Useful information or tip Written documentation required Reference to further documents Work that must be carried out by qualified specialists only Work that must be carried out by qualified electricians only Work that must be carried out by technical service personnel only Depiction of warnings This manual contains information and instructions that you must obey for your personal... -
Page 8: Demands On Personnel
Introduction Demands on personnel During the individual life cycle phases of the product, different people carry out work on the product. This work requires different qualifications. 1.7.1 Qualification of personnel Personnel Requirements • No special expertise required User • Knowledge of the tasks assigned •... -
Page 9: Personal Protective Equipment
Introduction 1.7.3 Personal protective equipment ► As an owner/operator/operating company, make sure that the required personal protective equipment is available. The components below fall under the heading of personal protective equipment (PPE): Protective gloves Safety goggles 9 | 56... -
Page 10: Safety
Safety Safety Safety measures ● Only operate your product if all components are installed properly. ● Obey the local regulations on drinking water protection, accident prevention and occupational safety. ● Do not make any changes, alterations, extensions or program changes on your product. -
Page 11: Electrical Hazards
Safety 2.1.3 Electrical hazards There is an immediate danger of fatal injury from electric shock when touching live parts. Damage to the insulation or individual components can be lethal. ● Only have a qualified electrician carry out electrical work on the system. ●... -
Page 12: Product-Specific Safety Instructions
Safety Product-specific safety instructions 2.2.1 Signals and warning devices Designation Designation Status indication on the display Illuminated LED ring* Audio signal * Only with softliQ:SE21 and 24 Labels on the product Risk of electric shock The affixed information and pictograms must be clearly legible. They must not be removed, soiled or painted over. -
Page 13: Conduct In Emergencies
Safety Conduct in emergencies 2.3.1 In the event of water leaks 1. De-energise the product. Unplug the power plug. 2. Locate the leak. 3. Close the shut-off valves on the connection module. 4. Shut off the water supply, if necessary. 5. -
Page 14: Product Description
Product description Product description Intended use The softliQ water softener must only and exclusively be used for the softening and partial softening of cold drinking water. The softliQ water softener protects water pipes and connected water-carrying systems from scaling as well as from malfunctions and damage caused by scaling. The softliQ water softener does not prevent corrosion. -
Page 15: Product Components
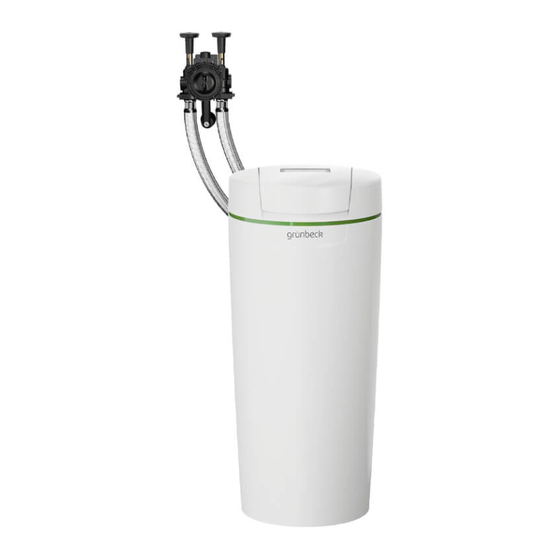
Product description Product components Designation Designation cliQlock bracket Illuminated LED ring* Raw water shut-off valve Control unit (display) Locking screw Cover of connections (customer interface)* Water test kit “Total hardness” Blending valve Housing of technical equipment, upper part Hose bracket Wall support Connections Soft water shut-off valve... -
Page 16: Connections
Product description Connections Designation Designation Safety overflow Raw water connection Soft water connection Flushing water connection 16 | 56... -
Page 17: Inputs And Outputs Of The Control Unit
Product description Inputs and outputs of the control unit The control unit features voltage-free inputs and outputs (refer to chapter 7.2) 3.4.1 Data circuit board (only with softliQ:SE21 and softliQ:SE24) Designation Designation LAN connection iQ Comfort 2 DIP switch Leak sensor (digital input) iQ Comfort 1 Leak sensor (digital input) Pin configuration:... -
Page 18: Functional Description
Product description 3.4.2 Power circuit board (only with softliQ:SE24) WARNING Electrical voltage beneath the touch protection ● Electric shock ► Unplug the power plug before you remove the touch protection. Designation Factory setting Touch protection Fault signal contact max. 230 V/max. 1 A Normally closed (upper two terminals) Programmable output... -
Page 19: Permissible Regenerant
Product description 3.5.2 Function iQ mode In the IQ mode, the softliQ:SE water softener knows when how much water is needed in what quality. By means of artificial intelligence, the control unit automatically adapts to the respective needs. Boost mode In the boost mode, the softliQ:SE water softener regenerates manually and can thus cover unplanned peaks in consumption. -
Page 20: Transport, Set-Up And Storage
Transport, set-up and storage Transport, set-up and storage Shipping/Delivery/Packaging ► Upon receipt, immediately check for completeness and transport damage. ► In case of visible transport damage, proceed as follows: • Do not accept the delivery or only accept it under reserve. •... -
Page 21: Installation
Installation Installation The installation of the product represents a major intervention into the drinking water system and must be carried out by a qualified specialist only. WARNING Contaminated drinking water due to stagnation ● Infection due to bacterial growth ► Do not connect the product to the drinking water system until immediately before start-up/commissioning. -
Page 22: Requirements For The Installation Site
Installation Requirements for the installation site Obey the local installation directives, general guidelines and technical specifications. ● Protection from frost, severe heat exposure and direct sunlight ● Protection from chemicals, dyes, solvents and their vapours ● Ambient temperature and radiation temperature in the immediate vicinity •... -
Page 23: Checking The Scope Of Supply
Installation Checking the scope of supply The cliQlock basic module is not included in the scope of supply and must be ordered separately (refer to chapter 5.3). Designation Designation Water test kit “Total hardness” Completely assembled water softener Connection module Drain connection (only with softliQ:SE24) Connection hoses ►... - Page 24 InstallationInstallation 5.3.2 Installing the connection module Make sure that the pipe and the cliQlock basic module are unpressurised and the shut-off valves upstream and downstream of the cliQlock basic module are closed. 1. Squeeze the cliQlock bracket. 2. Pull out the cliQlock bracket. 3.
- Page 25 Installation Attaching the wall support The wall support is only required for installation in horizontal pipes. The handwheel can compensate for a wall distance of 50 - 125 mm. 7. Plug the wall support from below onto the pre-installed screw heads. 8.
- Page 26 InstallationInstallation 11. Make sure that the shut-off valves on the raw water inlet and the soft water outlet are closed. » The connection module is installed. 5.3.3 Connecting the product to the water pipe NOTE Incorrect installation of connection hoses ●...
- Page 27 Installation ► Obey the flow direction indicated by arrows on the connection module and on the softliQ:SE water softener. 1. Slightly squeeze the hose bracket and pull it out. 2. Insert the plug connector into the connection module as far as it will go. 3.
- Page 28 InstallationInstallation 4. Loosen the screws on the side of the upper part of the housing for the technical equipment. 5. Pull out the upper part of the housing for the technical equipment. 6. Install the connection hoses on the connections of the softliQ:SE using a suitable tool.
- Page 29 Installation 5.3.4 Establishing the waste water connection NOTE Waste water backing up due to kinked hoses ● Water damage ► Run the hoses to the drain with a downward slope and without any kinks. According to DIN EN 1717, a free outlet and a backflow-free discharge of the waste water (flushing and regeneration water) must be guaranteed.
-
Page 30: Start-Up/Commissioning
Start-up/commissioningStart-up/commissioning Start-up/commissioning ► Document the initial start-up/commissioning in the operation log. Preliminary work ► Have salt tablets at hand. ► Have the value of the raw water hardness at hand. a Ask your water supplier for the respective value or b Determine the value by using the water test kit (refer to chapter 7.4). - Page 31 Start-up/commissioning ► Proceed as follows to calculate the maximum possible softening of the inlet water: ● 200 mg/l – x mg/l (sodium concentration in the raw water inlet) = y mg/l (permitted addition of sodium during softening) y mg/l = Z °dH (maximum softening permitted) 8.2 mg/l ●...
-
Page 32: Handing Over The Product To The Owner/Operator/Operating Company
Start-up/commissioningStart-up/commissioning Handing over the product to the owner/operator/operating company ► Explain to the owner/operator/operating company how the product works. ► Use the manual to brief the owner/operator/operating company and answer any questions. ► Inform the owner/operator/operating company about the need for inspections and maintenance. -
Page 33: Operation
Operation Operation NOTE The valves of the system are operated electrically. ● Water can flow to the drain if there is a power failure during regeneration. ► In the event of a power failure, check your product and shut off the water supply, if necessary. -
Page 34: Menu Structure
Operation Menu structure The greyed-out menu items are stored in Code 005 (service level 1) and must only be changed by qualified specialists. Menu level 1 Menu level 2 Menu level 3 Menu level 4 Water Raw water hardness Soft water hardness Information History Soft water... -
Page 35: Establishing Connection To Grünbeck Cloud
Operation Menu level 1 Menu level 2 Menu level 3 Menu level 4 Secondary DNS Status MAC address – Wi-Fi MAC address – LAN Maintenance & Maintenance and inspection inspection instructions Last maintenance Next maintenance in Resetting the counter Maintenance interval Maintenance was carried out properly... -
Page 36: Determining The Water Hardness
Operation Designation Designation Grünbeck product Grünbeck Cloud Router Mobile device As soon as a user account has been created via Grünbeck’s myProduct app and the anonymous data is assigned to your user account by pairing, the data is personalised as defined by the Data Protection Act. -
Page 37: Refilling Salt Tablets
Operation 7.4.2 Determining the water hardness in °dH/°f 1. Add one drop of titration solution (1 drop = 1 °dH or 1 °f). 2. Shake the test tube until the titration solution is mixed with the water. 3. In case of red colouring, repeat steps 1 and 2 and count the drops required until the colour changes to green. -
Page 38: Maintenance And Repair
Maintenance and repair Maintenance and repair Maintenance and repair includes cleaning, inspection and maintenance of the product. WARNING Contaminated drinking water ● Infectious diseases ► Pay attention to hygiene when working on the product. The responsibility for inspection and maintenance is subject to local and national requirements. -
Page 39: Intervals
Maintenance and repair Intervals DIN EN 806-5 recommends a semi-annual and an annual maintenance to ensure trouble- free and hygienic operation of the product. The interval table below shows the minimum intervals for the activities to be carried out. Activity Interval Tasks •... -
Page 40: Inspection
Maintenance and repair Inspection You as owner/operator/operating company can carry out the regular inspections yourself. Initially, we recommend inspecting the product at shorter intervals and later on as required. ► Carry out an inspection at least every 2 months. 1. Check the installation for leaks. a Look out for leaks and puddles on the floor. -
Page 41: Annual Maintenance
Maintenance and repair Minor deviations are normal and cannot be prevented technically. ► Contact technical service in case of considerable fluctuations in salt consumption. 6. Check the leak sensor for function by bridging the leak sensor with a metal object. »... -
Page 42: Consumables
Maintenance and repair Maintenance work 10. Check the soft water meter for pulse output (current flow during operation). 11. Check the injector and the injector sieve and clean them, if necessary. 12. Check the brine filling orifice in the brine connection angle (red). 13. -
Page 43: Wearing Parts
Maintenance and repair Wearing parts Wearing parts must be replaced by qualified specialists only. The wearing parts are listed below: ● All seals ● Wearing parts of cliQlock basic module and connection module: Designation Non-return valve Overflow valve ● Wearing parts of control valve: Designation Designation Injector (with circlip) - Page 44 Maintenance and repair ● Wearing parts of brine valve: Designation Designation Seal Electrodes 44 | 56...
-
Page 45: Troubleshooting
Troubleshooting Troubleshooting WARNING Contaminated drinking water due to stagnation ● Infectious diseases ► Have faults eliminated immediately. Messages The softliQ:SE water softener indicates messages on the display. The fault display remains active until the condition has been rectified. Designation Designation Connection failure to LAN or Wi-Fi Leak and frost warning Warning message (yellow dot) -
Page 46: Warning Messages
Table of contents 9.1.2 Warning messages Display Explanation Remedy ► Perform inspection Inspection due The time period for an inspection has expired. Maintenance due The time period for maintenance ► Contact technical service has expired. ► Check the power supply Power failure detected Upon return of power, the water (>... -
Page 47: Other Observations
Table of contents Display Explanation Remedy ► Contact technical service Water loss to drain Water flows to the drain outside a regeneration Salt supply used up Salt supply used up ► Fill salt tablets into salt tank ► Break up incrustations with a Hollow area below the salt suitable tool ►... - Page 48 Table of contents Observation Explanation Remedy ► Check connection hoses Start-up program: Connection hoses are mixed up During the venting program or the (raw water and soft water) ► Close the shut-off valves test regeneration, the display on the connection module remains unchanged for more than ►...
-
Page 49: Final Shutdown
Table of contents Decommissioning In order to prevent the water from stagnating, the system regenerates after 3 days (in accordance with DIN EN 19636-100), even if the softening capacity has not yet been exhausted. ► Keep your product connected to the power and water supply. Decommissioning is only required when the product is being dismantled. -
Page 50: Dismantling And Disposal
Table of contents Dismantling and disposal 11.1 Dismantling The work below must be carried out by a qualified specialist only. ► Carry out a guided decommissioning before dismantling. » The display guides you through the decommissioning procedure step-by-step. 1. Remove the connection hoses. a Squeeze the hose bracket. - Page 51 Table of contents 11.2 Disposal ► Obey the applicable national regulations. Packaging ► Dispose of the packaging in an environmentally sound manner. NOTE Danger to the environment due to incorrect disposal ● Packaging materials are valuable raw materials that can be reused in many cases ●...
- Page 52 Notes Notes 52 | 56...
-
Page 53: Eu Declaration Of Conformity
EU Declaration of Conformity EU Declaration of Conformity This is to certify that the system designated below meets the safety and health protection requirements of the applicable EU directives in terms of its design, construction and execution. This certificate becomes void if the system is modified in any way not approved by us. The manufacturer bears sole responsibility for issuing this declaration of conformity. - Page 54 EU Declaration of Conformity Appendix to EU Declaration of Conformity for water softener softliQ:SE with integrated Wi-Fi module (Wi-Fi access point) Order no. Product name 189000020000 Water softener softliQ:SE18 189000030000 Water softener softliQ:SE21 189000040000 Water softener softliQ:SE24 54 | 56...
- Page 56 Grünbeck Wasseraufbereitung GmbH Josef-Grünbeck-Str. 1 89420 Hoechstaedt/Germany +49 9074 41-0 +49 9074 41-100 info@gruenbeck.com For more information go to www.gruenbeck.com www.gruenbeck.com Publisher's information Technical documentation Should you have any questions or suggestions regarding this operation manual, please contact Grünbeck’s Department for Technical Documentation directly.
Need help?
Do you have a question about the cliQlock softliQ:SE and is the answer not in the manual?
Questions and answers