Table of Contents
Advertisement
Quick Links
Charles Universal Broadband Enclosure
CUBE-PM63912 and CUBE-PM63915
1.
GENERAL INTRODUCTION ..................................................................1
1.1
Document Purpose ........................................................... 1
1.2
Product Purpose .............................................................. 1
1.3
Product Mounting and Location........................................ 1
2.
PRODUCT DESCRIPTION .......................................................................2
3.
INSTALLATION.........................................................................................5
3.1
Inspecting the Product ...................................................... 5
3.2
Following and Using Safety Precautions ........................... 5
3.3
Obtaining Tools and Equipment ........................................ 5
3.4
Preparing the Installation Site .......................................... 5
3.5
Lifting the CUBE.............................................................. 6
3.6
Mounting the CUBE ......................................................... 6
3.7
CUBE Wiring and Equipment ........................................... 8
3.8
Reversible Door ............................................................. 11
3.9
Conduit Seals ................................................................. 13
3.10
Verifying the Installation ................................................ 13
4.
PERIODIC MAINTENANCE.................................................................. 13
5.
TECHNICAL ASSISTANCE AND REPAIR SERVICE....................... 13
6.
WARRANTY & CUSTOMER SERVICE .............................................. 13
7.
SPECIFICATIONS.................................................................................... 14
7.1
Regulatory Specifications ............................................... 14
7.2
Product Specifications .................................................... 14
1.
GENERAL INTRODUCTION
1.1
Document Purpose
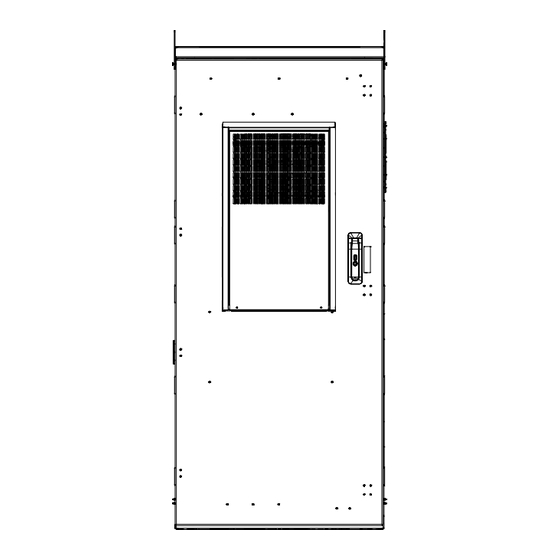
This document provides general information for the CUBE-PM63912 and CUBE-PM63915 family of the Charles Industries' Universal
Broadband Enclosure (CUBE) product line. Supplemental documentation that ships with the CUBE contains more detailed information
about specific models. Figure 1 shows a closed front view of the enclosure.
Hereafter, the CUBE-PM6391X Charles Universal Broadband Enclosure will be referred to as the PM63912, PM63915, or the "CUBE."
1.2
Product Purpose
These CUBEs consist of a protective enclosure for an integrated system of electronic components and equipment that can serve copper
and fiber interfaces. Batteries are not supported in the configurations covered by this document.
1.3
Product Mounting and Location
These enclosures are suitable for outside plant-type (OSP) locations and those that may require NEC compliance. These outdoor, weather-
resistant CUBEs are to be mounted on a pad or steel-grate. The installer connects the power, fiber and copper connections. Detailed
mounting and installation information is covered in Section 3. Charles recommends the CPAD composite pad for pad mounting
applications.
©Copyright 2024 Charles Industries LLC. All rights reserved.
Availability of features and technical specifications herein are subject to change without notice.
Charles is a registered trademark of Charles Industries.
General Description and Installation
Figure 1
-NOTE-
LT-PM63912XXX
27
th
Printing, March 28, 2024
Front View of the CUBE
Page 1 of 15
Advertisement
Table of Contents

Subscribe to Our Youtube Channel
Related Manuals for Amphenol Charles CUBE-PM63912


Summary of Contents for Amphenol Charles CUBE-PM63912
-
Page 1: Table Of Contents
LT-PM63912XXX Printing, March 28, 2024 Charles Universal Broadband Enclosure CUBE-PM63912 and CUBE-PM63915 General Description and Installation GENERAL INTRODUCTION ..............1 Document Purpose ............1 Product Purpose .............. 1 Product Mounting and Location........1 PRODUCT DESCRIPTION ...............2 INSTALLATION..................5 Inspecting the Product ............5 Following and Using Safety Precautions ...... -
Page 2: Product Description
LT-PM63912XXX PRODUCT DESCRIPTION The CUBE includes an equipment compartment with 39RU of rack spacing. The PM63912 has front and rear doors while the PM63915 has a front door and a removable rear panel. Figure 2 shows the dimensions for the CUBE. Figure 3 shows the dimensions with the door(s) opened. - Page 3 LT-PM63912XXX 93.93 62.89 PM63915xxx PM63912xxx FRONT DOOR, REMOVABLE REAR PANEL FRONT AND REAR DOORS Figure 3 CUBE Open Door Dimensions (in inches) Printing Page 3 of 15...
- Page 4 LT-PM63912XXX 13.5 12.6 CUBE-PM6391xLXX CUBE-PM6391xJXX CUBE-PM6391xMXX CUBE-PM6391xUXX CUBE-PM6391xKXX 13.5 12.6 12.6 10.3 CUBE-PM6391xTXX CUBE-PM6391x8N2 CUBE-PM6391xYXX CUBE-PM6391xVXX 13.5 13.5 CUBE-PM63912BN2 Figure 4 CUBE Thermal Equipment Dimensions (in inches) Page 4 of 15 Printing...
-
Page 5: Installation
LT-PM63912XXX INSTALLATION Inspecting the Product The CUBE is shipped mounted upright to a skid. Remove the bolts, unpack the unit, remove and dispose of the packaging material. -INSPECTION NOTE- Visually inspect the unit for damages prior to installation. If the equipment was damaged in transit, immediately report the extent of the damage to the transportation company. -
Page 6: Lifting The Cube
LT-PM63912XXX Lifting the CUBE See the supplemental documentation for CUBE weight. SPREADER BARS Some models have vertical (straight) lifting hoists, while others have angled lifting hoists. The SHORT SLINGS/CHAINS lifting procedures are slightly different for each style of hoist. Prior to lifting, remove the lifting brackets that hold the mounting gasket in place. - Page 7 LT-PM63912XXX Constructing a New Pad 7.60 16.80 Use only concrete for the pad. Do not use substitute materials since they lack • the rigidity for CUBE placement. • Charles recommends using 1/2” anchor bolts for mounting to the pad. The embedment depth of the anchor is not to exceed 3.5”.
-
Page 8: Cube Wiring And Equipment
LT-PM63912XXX Mounting the CUBE on a CPAD First, follow the instructions that ship with the CPAD to ensure that the CPAD is securely installed in the ground. Then proceed to mount the CUBE on the CPAD. Four customer supplied, corrosion resistant, 1/2”-13, 2” long fully threaded hex head bolts are required for mounting the CUBE to the CPAD. - Page 9 LT-PM63912XXX Macro Alarm Terminal Panel An integrated macro-site alarm panel is mounted on the left wall of the cabinet. This panel provides forty protected dry contact alarm inputs to screw down terminals or 66- block connections (Figure 12). CABLE 5-PIN SURGE 66-BLOCK ALARM The cabinet comes with a standard alarm...
-
Page 10: Overheat Alarm
LT-PM63912XXX Overheat Alarm The CUBE is equipped with an overheat (high temperature) alarm thermostat in the equipment compartment that provides a normally closed connection. The overheat alarm is factory set at 50°C in units with HVACs or 60°C in units with heat exchangers and will open the connection when this temperature is exceeded. -
Page 11: Reversible Door
LT-PM63912XXX Reversible Door HINGE PIN The PM63912 and PM63915 doors can be removed and remounted with the hinges on the opposite side of the CUBE in order to change the direction of the swing. (2) NUTS (2) M6 PHILLIPS (DOOR SIDE) SCREWS Remove the two nuts that connect the wind latch to the cabinet. - Page 12 LT-PM63912XXX WIND LATCH IN NEW POSITION DOOR RAMP (4) MOUNTING HOLES (4) EXISTING HINGE IN NEW POSITION FOR NEW HINGE POSITIONS POSITIONS Figure 17b New Locations for Wind Latch and Door Ramp HOLE PLATE SEE DETAIL A (3) MOUNTING HOLES FOR NEW DOOR LATCH POSITIONS DOOR ROD...
-
Page 13: Conduit Seals
LT-PM63912XXX Conduit Seals All internal and external conduit openings on the CUBE must be completely sealed with a duct seal compound to prevent moisture from entering the equipment compartment. Use a moldable, flame- BEFORE retardant putty style duct seal material. Do not use an expanding foam seal. Mold the putty so that the open space around the wire or conduit is completely sealed, as shown in Figure 19. -
Page 14: Specifications
LT-PM63912XXX 7. SPECIFICATIONS 7.1 Regulatory Specifications Designed to meet GR-487 • UL-2416 Listed, Type 3R (select models) • • GFCI: UL-943 Listed If CUBEs are field-modified, a customer provided ETL field evaluation of the modified components may be required to re-establish ETL certification to UL standards. -
Page 15: Available Models
LT-PM63912XXX Available Models CUBE Part Number Thermal Power System CUBE-PM639158N2 12000BTU DC HVAC None CUBE-PM63915BN1 Hybrid DAC/14000BTU HVAC None CUBE-PM63912BN2 Dual 17000BTU DC HVACs None CUBE-PM63912JN1 4000BTU AC HVAC None CUBE-PM63912KN1 4000BTU DC HVAC None CUBE-PM63912LN1/PM63915LN1 12000BTU DC HVAC None CUBE-PM63915LN3 10000BTU DC HVAC ABB -48V...
Need help?
Do you have a question about the Charles CUBE-PM63912 and is the answer not in the manual?
Questions and answers