Table of Contents
Troubleshooting

Related Manuals for Daikin ERA200AMYFB


Summary of Contents for Daikin ERA200AMYFB
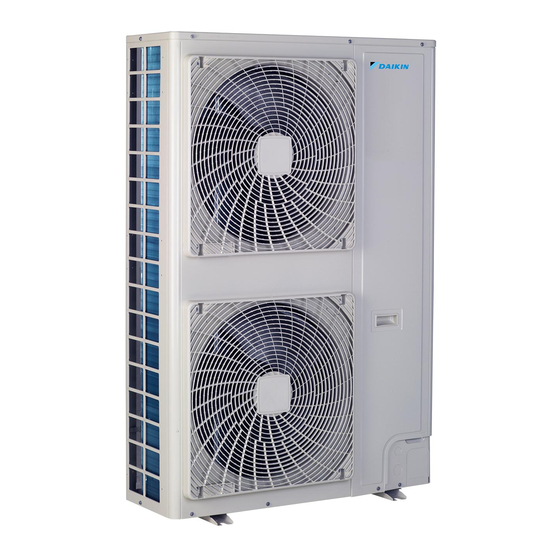
- Page 1 Installation and operation manual Inverter outdoor unit for AHU option kit and air curtains ERA200AMYFB Installation and operation manual ERA250AMYFB English Inverter outdoor unit for AHU option kit and air curtains ERA300AMYFB...
- Page 2 [mm] — ≥100 A, B, C — ≥100 ≥100 ≥100 B, E — ≥100 ≥1000 ≤500 A, B, C, E — ≥150 ≥150 ≥150 ≥1000 ≤500 — ≥500 D, E — ≥1000 ≥1000 ≤500 B, D — ≥100 ≥1000 B, D, E <H ≤½H ≥250...
- Page 3 Lowest underground floor All other floors No safety measure No safety measure NOT allowed Alarm + Natural ventilation m [kg] m [kg] [m²] [m²] m [kg] Lowest underground floor All other floors m [kg] Lowest underground floor All other floors No safety measure Alarm OR No safety measure...
-
Page 4: Table Of Contents
Table of contents 12 About the units and options Table of contents 12.1 About the outdoor unit ............... 16 12.2 System layout ................17 13 Special requirements for R32 units 1 About this document 13.1 Requirements for compatible air curtains ........17 2 Specific installer safety instructions 13.1.1 Installation space requirements ........ -
Page 5: About This Document
Low temperature solder alloys shall not be used for pipe ▪ Detailed step-by-step instructions and background information connections. for basic and advanced usage ▪ Format: Digital files on https://www.daikin.eu. Use the search CAUTION function to find your model. ▪ Do NOT use mineral oil on flared part. - Page 6 2 Specific installer safety instructions CAUTION WARNING Install the refrigerant piping or components in a position ▪ Only use R32 as refrigerant. Other substances may where they are unlikely to be exposed to any substance cause explosions and accidents. which may corrode components containing refrigerant, ▪...
-
Page 7: Instructions For Equipment Using R32 Refrigerant
Make sure installation, servicing, maintenance and repair When performing the test operation, NOT ONLY the comply with instructions from Daikin and with applicable outdoor unit, but the connected indoor unit will operate as legislation (for example national gas regulation) and are well. -
Page 8: For The User
▪ Do NOT rinse the unit. materials follow the instructions from ▪ Do NOT operate the unit with wet Daikin (including all documents listed in hands. “Documentation set”) and, in addition, comply with applicable legislation and ▪... - Page 9 3 User safety instructions ▪ Do NOT remove the front panel. CAUTION Some parts inside are dangerous to Do NOT insert fingers, rods or other touch and appliance problems may objects into the air inlet or outlet. Do happen. For checking and adjusting NOT remove the fan guard.
-
Page 10: About The System
4 About the system WARNING WARNING The appliance shall be stored in a The unit is equipped with a refrigerant room without continuously operating leak detection system for safety. ignition sources (example: open To be effective, the unit MUST be flames, an operating gas appliance or electrically powered at all times after an operating electric heater). -
Page 11: System Layout
5 User interface NOTICE INFORMATION For future modifications or expansions of your system: An air curtain is a heating-only product designed primarily for providing air separation. Therefore, it cannot be A full overview of allowable combinations (for future considered a comfort product. system extensions) is available in technical engineering data and should be consulted. -
Page 12: About The Heating Operation
7 Maintenance and service ▪ The fan may keep on running for about 1 minute after the heating Cooling operation Heating operation Fan only operation operation stops. ▪ The air flow rate may adjust itself depending on the room temperature or the fan may stop immediately. -
Page 13: After-Sales Service
8 Troubleshooting Periodical inspections for refrigerant leaks may be required Malfunction Measure depending on the applicable legislation. Contact your installer for The operation switch does NOT work Turn OFF the power more information. well. supply. NOTICE If the user interface display indicates the Notify your installer and unit number, the operation lamp flashes report the malfunction... -
Page 14: Symptoms That Are Not System Malfunctions
8 Troubleshooting For your reference, a list with malfunction codes is provided. You Main code Contents can, depending on the level of the malfunction code, reset the code Abnormal low pressure drop, faulty expansion valve by pushing the ON/OFF button. If not, ask your installer for advice. Reversed power supply phase malfunction Main code Contents... -
Page 15: Symptom: White Mist Comes Out Of A Unit (Indoor Unit, Outdoor Unit)
9 Relocation 8.2.4 Symptom: White mist comes out of a unit 8.2.10 Symptom: The units can give off odours (Indoor unit, outdoor unit) The unit can absorb the smell of rooms, furniture, cigarettes, etc., and then emit it again. When the system is changed over to heating operation after defrost operation. -
Page 16: To Remove The Accessories From The Outdoor Unit
12 About the units and options Forklift. If the unit remains on its Crane. For ERA250+300 1× 1× 1× 1× 2× pallet, you can also use a forklift. models, you can also use a crane and lift the unit as follows: 1×... -
Page 17: System Layout
13 Special requirements for R32 units 12.2 System layout Special requirements for R32 units WARNING The installation MUST comply with the requirements that apply to this R32 equipment. For more information, see 13.1 Requirements for compatible air units" [ 4 17]. "13 Special requirements for R32 curtains INFORMATION... -
Page 18: To Determine The Required Safety Measures
13 Special requirements for R32 units Piping requirements NOTICE The total refrigerant charge amount in the system MUST CAUTION always be lower than 79.8 kg. Piping MUST be installed according to instructions given in installation" [ 4 26]. Only mechanical joints (e.g. "15 ... -
Page 19: Overview: Flowchart
13 Special requirements for R32 units ▪ Based on the graph for "All other floors" (All other floors), the room area limit is 19.7 m² (approx. 20 m ) for "No safety measure" (No safety measures). No safety measure ▪ This means that the following safety measures are required: Room area Required safety measure A=50 m²≥20 m²... -
Page 20: Safety Measures
13 Special requirements for R32 units ▪ The sound output of the remote controller is not sufficient to 13.1.4 Safety measures guarantee the 15 dB difference. This alarm can be connected to the SVS output channel of the outdoor unit, or to the optional No safety measure output of the air curtain, if available. -
Page 21: Natural Ventilation
13 Special requirements for R32 units Step 3 – The total amount of refrigerant in the system MUST be less 4 In particular situations it is mandatory to install a remote than the refrigerant charge limit derived from the graph above. If controller at a supervised location. - Page 22 13 Special requirements for R32 units Result: Total refrigerant charge limit for the system determined using the graph for natural ventilation is 16.8 kg. Total amount of refrigerant in the system (7 kg) < Total refrigerant charge limit (16.8 kg), which means that the Natural ventilation safety measure can be applied.
-
Page 23: Requirements For Air Handling Units
13 Special requirements for R32 units Overview: flowchart Alarm Natural ventilation No safety measure Do NOT use 'Alarm' as the ONLY safety measure in case the air Make field settings in the curtain is installed in an occupied space where people are Determine total room area (= total area of the space with natural indoor unit accordingly. -
Page 24: Unit Installation
If the unit is selected to operate at ambient temperatures lower than –5°C for 5 days or longer, with relative humidity levels exceeding 95%, we recommend to apply a Daikin range specifically designed for such application and/or to contact your dealer for further advice. -
Page 25: To Close The Outdoor Unit
14 Unit installation NOTICE Fix the outdoor unit to the foundation bolts using nuts with resin washers (a). If the coating on the fastening area is stripped off, the metal can rust easily. 14.3.2 To install the outdoor unit 2× 3×... -
Page 26: Piping Installation
15 Piping installation 1 Prepare 2 cables as indicated in the following illustration (field Ambient Humidity Minimum thickness supply). temperature 2 Place the 2 cables over the outdoor unit. ≤30°C 75% to 80% RH 15 mm >30°C ≥80% RH 20 mm 3 Insert a rubber sheet between the cables and the outdoor unit to prevent the cables from scratching the paint (field supply). -
Page 27: To Remove The Pinched Pipes
15 Piping installation 3 FULLY turn the stop valve counterclockwise and tighten until the correct tightening torque value is achieved (see "Tightening torques" [ 4 27]). 2 Connect the vacuuming/recovery unit through a manifold to the service port of all stop valves. NOTICE Stop valves need to be opened on torque specified in this Service port... -
Page 28: To Connect The Refrigerant Piping To The Outdoor Unit
15 Piping installation ▪ When brazing, blow through with nitrogen to prevent creation of INFORMATION large quantities of oxidised film on the inside of the piping. This film adversely affects valves and compressors in the refrigerating system and prevents proper operation. ▪... -
Page 29: Checking The Refrigerant Piping
15 Piping installation ▪ Connect the gas piping accessories c and d (d: only for NOTICE ERA250 ). There are three possibilities: Indoor units should also be leak and vacuum tested. Keep any possible (field supplied) field piping valves open as To the front To the side Downwards... -
Page 30: To Check For Leaks After Charging Refrigerant
16 Charging refrigerant ▪ Use heat resistant polyethylene foam which can withstand a NOTICE temperature of 70°C for liquid piping and polyethylene foam which Do not block the air vents. This could affect air circulation can withstand a temperature of 120°C for gas piping. inside the unit. -
Page 31: To Determine The Additional Refrigerant Amount
16 Charging refrigerant NOTICE Inch piping Metric piping Piping Weight factor Piping Weight factor In case of maintenance and the system (outdoor unit+field piping+indoor units) does not contain any refrigerant any Ø9.5 mm 0.053 Ø10 mm 0.058 more (e.g., after refrigerant reclaim operation), the unit has Ø12.7 mm 0.10 Ø12 mm... -
Page 32: Error Codes When Charging Refrigerant
16 Charging refrigerant Charging refrigerant (in manual additional refrigerant charge NOTICE mode) Make sure to open all stop valves after (pre-) charging the The remaining additional refrigerant charge can be charged by refrigerant. operating the outdoor unit by means of the manual additional Operating with the stop valves closed will damage the refrigerant charge mode. -
Page 33: Electrical Installation
17 Electrical installation If a leak is detected Component Outdoor unit 1 Recover the refrigerant, repair the joint, and repeat the test. ERA200 ERA250 ERA300 test" [ 4 29]. 2 Perform the leak tests see "15.3.2 To perform a leak Interconnection Voltage 220-240 V cable Wire size... -
Page 34: To Connect The Electrical Wiring To The Outdoor Unit
17 Electrical installation ▪ ERA250+300 : the shielding is earthed (only at outdoor unit side Wire type Installation method of the cable) via a metal P-clamp. Strip the insulation up to the Single-core wire shielding mesh, to provide full contact of the earth with the shielding. -
Page 35: To Connect The External Outputs
17 Electrical installation 5 Route the cables through the frame according to the illustration NOTICE below. Do NOT use the outputs as a power source. Instead, use Note: for ERA200, choose one of the two possibilities to route the each output to energize a relay that controls the external cables through the frame. -
Page 36: To Check The Insulation Resistance Of The Compressor
18 Configuration INFORMATION ERA200 ERA250+300 It is important that all information in this chapter is read sequentially by the installer and that the system is configured as applicable. 18.1 Making field settings 18.1.1 About making field settings To continue the configuration of the ERA system, it is required to give some input to the PCB of the unit. -
Page 37: Field Setting Components
18 Configuration 18.1.2 Field setting components INFORMATION If you get confused in the middle of the process, push BS1 Location of the 7‑segment displays, buttons and DIP switches: to return to the default situation (no indication on 7‑segment displays: blank, see "18.1.3 To access mode 1 2" [ 4 37]. -
Page 38: Mode 2: Field Settings
If 30 minutes was not sufficient to add the commissioning instructions in this chapter, a general needed refrigerant amount, the function can be commissioning checklist is also available on the Daikin reactivated by changing the field setting again. Business Portal (authentication required). -
Page 39: Precautions When Commissioning
19 Commissioning 19.1 Precautions when commissioning Internal wiring Visually check the switch box and the inside of the unit for CAUTION loose connections or damaged electrical components. Do NOT perform the test operation while working on Pipe size and pipe insulation the indoor unit(s). -
Page 40: To Perform A Test Run
20 Hand-over to the user ▪ After the test operation is finished, check the indoor unit by explained in the malfunction code table. Carry out the test operation performing a normal operation using the user interface. Refer to again and confirm that the abnormality is properly corrected. the indoor unit installation manual for more details concerning the INFORMATION individual test run. -
Page 41: Checklist For Yearly Maintenance Of The Outdoor Unit
22 Troubleshooting with a tester and confirm that the voltage of the capacitor in the 2 Evacuate the system with a vacuum pump. main circuit is less than 50 V DC. If the voltage measured is still 3 Press BS3 to stop vacuuming mode. higher than 50 V DC, discharge the capacitors in a safe manner by using a dedicated capacitor discharge pen to avoid 21.3.2... -
Page 42: Error Codes: Overview
22 Troubleshooting 22.1.1 Error codes: Overview Main code Sub code Cause Solution SVEO The R32 sensor of the compatible air curtain has Possible R32 leak. The compressor will shut detected a refrigerant leak down and the unit will stop operating. Service is needed to repair the leak and activate the system. - Page 43 22 Troubleshooting Main code Sub code Cause Solution SVEO Discharge temperature sensor malfunction Check connection on PCB or actuator. (R21T): open circuit – main PCB (X33A) Discharge temperature sensor malfunction Check connection on PCB or actuator. (R21T): short circuit - main PCB (X33A) Compressor casing temperature sensor Check connection on PCB or actuator.
-
Page 44: Refrigerant Leak Detection System
Technical data ▪ A subset of the latest technical data is available on the regional Daikin website (publicly accessible). ▪ The full set of the latest technical data is available on the Daikin Business Portal (authentication required). Heat pump outdoor unit... -
Page 45: Service Space: Outdoor Unit
24 Technical data 24.1 Service space: Outdoor unit 24.2 Piping diagram: Outdoor unit When mounting units side by side, the piping route must be to the Piping diagram: ERA200 front or downwards. In this case the piping route to the side is not possible. -
Page 46: Wiring Diagram: Outdoor Unit
24 Technical data Capillary tube (2×) Legend for wiring diagram: Charge port Printed circuit board (main) Heat sink Compressor Printed circuit board (noise filter) M1F-M2F Fan motor Thermistor (air) Printed circuit board (inverter) Thermistor (suction accumulator) Printed circuit board (fan 1) Thermistor (heat exchanger, liquid) Thermistor (liquid) Printed circuit board (fan 2) - Page 48 4P780153-1 0000000M 4P780153-1 2024.07...
Need help?
Do you have a question about the ERA200AMYFB and is the answer not in the manual?
Questions and answers