STIEBEL ELTRON WWK 221 electronic Operation And Installation Manual
Dhw heat pump
Hide thumbs
Also See for WWK 221 electronic:
- Operation and installation (36 pages) ,
- Operation and installation (80 pages) ,
- Operation and installation manual (76 pages)

Subscribe to Our Youtube Channel
Related Manuals for STIEBEL ELTRON WWK 221 electronic


Summary of Contents for STIEBEL ELTRON WWK 221 electronic
- Page 1 OPERATION AND INSTALLATION DHW heat pump » WWK 221 electronic » WWK 301 electronic » WWK 301 electronic SOL...
-
Page 2: Table Of Contents
CONTENTS | SPECIAL INFORMATION SPECIAL INFORMATION Shutdown ��������������������������������������������������� 28 Troubleshooting �������������������������������������������� 28 OPERATION 13.1 Resetting the safety pressure limiter ����������������������� 29 General information �����������������������������������������3 13.2 Resetting the high limit safety cut-out ��������������������� 29 Safety instructions ����������������������������������������������� 3 13.3 Motor overload relay ������������������������������������������� 29 Other symbols in this documentation �����������������������... -
Page 3: Special Information
SPECIAL INFORMATION | OPERATION General information OPERATION - Observe the requirements concerning the instal- lation room (see chapter "Specification / Data table"). - If the appliance is permanently connected General information to the power supply, ensure that the appli- The chapters "Special Information" and "Operation" are intended ance can be separated from the power supply for both the user and qualified contractors. -
Page 4: Other Symbols In This Documentation
OPERATION Safety Other symbols in this documentation Safety Note Intended use General information is identified by the adjacent symbol. The appliance is intended for DHW heating within the application f Read these texts carefully. limits detailed in chapter "Specification / Data table". This appliance is intended for domestic use. -
Page 5: Ce Designation
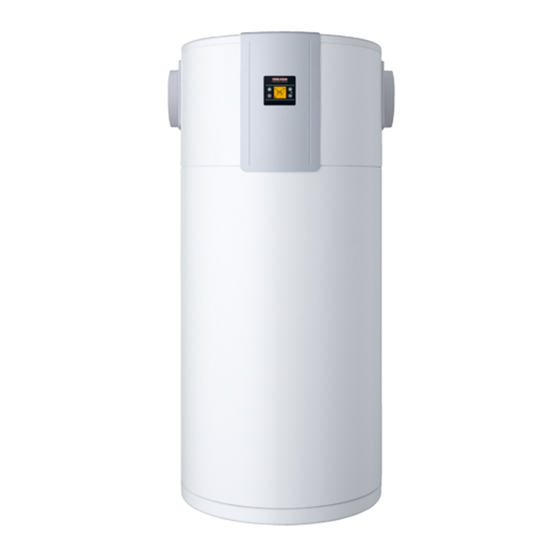
OPERATION Appliance description Appliance description CAUTION Injury f Never place any objects on top of the appliance. The fully wired appliance enables DHW to be supplied efficiently If objects are left on the appliance, noise emissions may to several draw-off points using renewable energy. The appliance increase due to resulting vibrations, and the objects extracts heat from the intake air. -
Page 6: Dhw Heating
OPERATION Appliance description Heat pump operating principle For information on the heat-up time, see chapter "Specification". The calculation of the available amount of mixed water is based A closed circuit within the appliance contains refrigerant. This on the average cylinder temperature. The amount of mixed water refrigerant evaporates at low temperatures. -
Page 7: Appliance Operation Outside The Application Limits
OPERATION Appliance description Defrosting 3.1.1 WWK 301 electronic SOL: Connection of an external heat generator Low air intake temperatures may result in the formation of hoar frost on the evaporator depending on air humidity and DHW tem- Material losses perature. The appliance is equipped with an electronic defrost Even if an external heat generator is connected, do not monitor. -
Page 8: Settings
OPERATION Settings Settings Set temperature adjustment symbol The appliance reduces the set value temporarily to the current ac- Display and controls tual value on the integral sensor subject to the intake temperature and the hot gas temperature, as required. The appliance displays the set temperature adjustment symbol and blocks DHW heating Note until the actual value on the integral sensor is 6 K lower than the... - Page 9 OPERATION Settings 4.2.2 Actual temperature display Adjust set temperature 2 from 20 to 65 °C using the plus and minus keys. The actual temperature symbol appears. The current actual temperature is shown. The actual temperature indicates the temperature in the upper section of the DHW cylinder and therefore largely cor- Operation with external signal transmitter (230 V input) responds to the outlet temperature.
-
Page 10: Calling Up Fault Codes
OPERATION Settings 4.2.5 Fan speed The period after which the electric emergency/booster heater provides automatic back-up needs to be selected individually by The current set fan output appears, iden- the user based on local conditions. DHW consumption and the tified by a preceding F. expected intake temperatures need to be considered. -
Page 11: Rapid Heating Key
OPERATION Settings 4.4.2 Emergency mode A fault code preceded by E appears if the fault relates to the refrigerant circuit. No- If the appliance is faulty, you can use the emergency mode to tify a qualified contractor. activate the electric emergency/booster heater. The compressor shuts down if, following a DHW demand, no tem- perature increase is captured for 13 hours (52 intervals of 15 min- utes each, during which the temperature increase is <0.25 °C re-... -
Page 12: Maintenance And Care
OPERATION Maintenance and care Maintenance and care WARNING Electrocution - Only clean the exterior of the appliance. - Never open the appliance. - Do not insert objects through the grille into the in- terior of the appliance. - Never spray the appliance with water. - Never spray water into the appliance. - Page 13 OPERATION Troubleshooting Problem Cause Remedy The appliance is not heating the The compressor blocking time has not yet elapsed. Once No action required. DHW cylinder although the heat the compressor has been switched off, it will only be pump symbol is illuminated. switched back on again after the 20 minute compressor blocking time has elapsed.
- Page 14 OPERATION Troubleshooting Fault code 1 Application scenarios for emergency mode If the service/fault symbol is flashing or continuously illuminated If the appliance shows fault code 8, you can manually activate on the display, you can call up a fault code. emergency mode. If a different fault occurred previously, but did not cause the appliance to switch off, the display will show a fault code that is the result of several faults added together.
-
Page 15: Installation
INSTALLATION Safety INSTALLATION - 2 reducers (DN 200 to DN 160) for the side air intake and dis- charge connections - 2 EPS profiles to seal the side air discharge if air is to be discharged through the connection in the cover rather than through the side connection. -
Page 16: Storage
INSTALLATION Preparations Installation site and location of air extraction Vehicular transport or air intake Material losses The appliance must generally be stored and transported Material losses vertically. Observe the lower application limit for the appliance. The temperature of the air discharged from the appliance may The appliance may be transported horizontally for brief periods, be lower than this value. -
Page 17: Siting The Appliance
INSTALLATION Preparations The following installation sites are not permissible, due to risk of appliance damage: - Locations where the air is contaminated with oil, grease or hairspray - Saline environments - Environments with thermal water - Areas in proximity to high frequency machines - Places where the air contains ammonia (e.g. -
Page 18: Installation
INSTALLATION Installation 10. Installation Minimum clearances WARNING Injury Incorrect installation can lead to serious injury or materi- al damage. Before any work, ensure sufficient clearances for the installation. Handle sharp-edged components carefully. Material losses Observe the lower application limit for the appliance. The temperature of the air discharged from the appliance may be lower than this value. -
Page 19: Top Air Intake
INSTALLATION Installation 10.2 Top air intake 10.1.2 Air duct (optional) Fitting reducer to side air connector (optional, only with duct 10.2.1 Fitting air connector to cover connection) The side air duct connectors have a diameter of DN 200 when delivered. Standard delivery includes reducers for the air intake and discharge should you wish to connect an air duct with a di- ameter of DN 160. -
Page 20: Side Air Discharge
INSTALLATION Installation 10.2.2 Air duct connection (optional) f Fit the reducer to the air connector by engaging the locking hooks on the back of the reducer in the openings provided in the air connector. Note f Grip the small vanes on the reducer with your fingers. Connect the appliance and the air duct system using a flexible method, e.g. -
Page 21: Air Discharge, Top
INSTALLATION Installation 10.4 Air discharge, top Removing air connector from air discharge If air is to be discharged at the top, the side air discharge must be WARNING Injury sealed using the EPS profiles included in the standard delivery as Avoid contact with the rotating fan as this can lead to well as fitting the air connector in the appliance cover. - Page 22 INSTALLATION Installation Refitting air connector 10.4.3 Air duct connection (optional) Note Connect the appliance and the air duct system using a flexible method, e.g. a flexible ventilation pipe, to reduce noise and vibrations. f Connect a flexible 500 cm hose to the air duct. f Push the flexible hose onto the appliance air connector.
-
Page 23: Water Connection
INSTALLATION Installation f Invert the internal hose halfway down the connector. f Secure the external hose with the hose clip to the connector. f Insulate the air duct and all connections in line with insula- tion standards if used for waste heat or outside air to prevent condensation on these components. -
Page 24: Condensate Drain
INSTALLATION Installation Safety valve Material losses The appliance is a sealed unvented DHW cylinder. Provide the Ensure condensate cannot back up. appliance with a pressure relief valve. f Use a condensate drain hose with a diameter great- er than the diameter of the condensate drain bend. f Install a type-tested safety valve in the cold water supply f Ensure the condensate drain hose is not kinked. - Page 25 INSTALLATION Installation Standard connection without external signal transmitter GNYE GNYE 1 Inverter (floating contact) 10.7.1 Connection with external signal transmitter The inverter power feed is located at a central distribution point An external signal transmitter for switching a separate set DHW (e.g.
-
Page 26: Assembling The Appliance
INSTALLATION Commissioning 10.8 Assembling the appliance 11.1.1 Fan setting subject to pressure drop The appliance requires a constant air flow rate of 350 m³/h to op- Note erate correctly. If an air duct is connected, the fan output must be f Refit the appliance cover after completing your adjusted in the appliance menu due to the resulting pressure drop. - Page 27 INSTALLATION Commissioning Individual system calculation 11.1.2 Filling the DHW cylinder f Calculate the system pressure drop as the sum of all compo- nents installed in the air duct. Material losses Heating liquids other than potable water is not permitted. f Enter the calculated pressure drop on the X-axis of the dia- gram.
-
Page 28: Recommissioning
INSTALLATION Shutdown 11.1.4 Appliance handover If you want to switch the appliance off for a longer period, always drain the DHW cylinder. See chapter "Maintenance / Draining the f Explain the appliance function to users and familiarise them appliance". with its operation. f Make the user aware of potential dangers, especially the risk The appliance can only be switched off by interrupting the power of scalding. -
Page 29: Resetting The Safety Pressure Limiter
INSTALLATION Maintenance and cleaning 13.2 Resetting the high limit safety cut-out Fault Cause Remedy The com- The thermal load of the Remedy the cause of the high ther- pressor compressor has been ex- mal load. Wait until the appliance switches off ceeded. -
Page 30: Removing The Casing Ring
INSTALLATION Maintenance and cleaning Material losses Inside the appliance, an earth cable is connected to the casing ring. Undo the earth cable in order to be able to remove the casing ring. The casing ring overlaps along the joint. A tab on one end clips into the recess at the other end of the casing ring. -
Page 31: Descaling The Electric Emergency/Booster Heater
INSTALLATION Maintenance and cleaning 14.5 Descaling the electric emergency/booster 14.9 Replacing the power cable heater WARNING Electrocution Only descale the electric emergency/booster heater after disas- The power cable must only be replaced (for example sembly. Never treat the inside of the DHW cylinder or the im- if damaged) with an original spare part by a qualified pressed current anode with descaling agents. -
Page 32: Specification
INSTALLATION Specification 15. Specification 15.1 Dimensions and connections 15.1.1 WWK 221 electronic WWK 221 electronic Entry electrical cables Cold water inlet Male thread DHW outlet Male thread DHW circulation Male thread G 1/2 A Condensate drain Male thread G 3/4... - Page 33 INSTALLATION Specification 15.1.2 WWK 301 electronic WWK 301 electronic Entry electrical cables Cold water inlet Male thread DHW outlet Male thread DHW circulation Male thread G 1/2 A Condensate drain Male thread G 3/4 Air intake Nominal diameter DN 200 (DN 160 with supplied reducer) Air discharge Nominal diameter DN 200 (DN 160 with supplied reducer)
-
Page 34: Wiring Diagram
INSTALLATION Specification 15.1.3 WWK 301 electronic SOL WWK 301 electronic SOL Entry electrical cables Cold water inlet Male thread DHW outlet Male thread DHW circulation Male thread G 1/2 A Heat source flow Female thread Heat source return Female thread Condensate drain Male thread G 3/4... - Page 35 INSTALLATION Specification coat gnye N´ L´ storage tank storage tank Material losses chauffage) If terminals X0/1-2 are connected, the appliance can only ode dégivrage) be supplied with power via a permanent connection. See chapter "Electrical connection / Connection option with external signal transmitter".
-
Page 36: Data Table
INSTALLATION Specification 15.3 Data table WWK 221 electronic WWK 301 electronic WWK 301 electronic SOL 230949 230950 233584 Hydraulic data Nominal capacity Surface area, indirect coil m² Application limits Max. DHW temperature with heat pump only °C Maximum DHW temperature with emergency/booster heater °C... - Page 37 INSTALLATION Specification WWK 221 electronic WWK 301 electronic WWK 301 electronic SOL Connections Condensate connection G 3/4 A G 3/4 A G 3/4 A DHW circulation connection G 1/2 A G 1/2 A G 1/2 A Water connection G 1 A...
-
Page 38: Environment And Recycling
GUARANTEE | ENVIRONMENT AND RECYCLING Guarantee The guarantee conditions of our German companies do not apply to appliances acquired outside of Germany. In countries where our subsidiaries sell our products a guarantee can only be issued by those subsidiaries. Such guarantee is only grant- ed if the subsidiary has issued its own terms of guarantee. - Page 39 NOTES www.stiebel-eltron.com WWK 221-301 electronic |...
- Page 40 Deutschland Verkauf Tel. 05531 702-110 | Fax 05531 702-95108 | info-center@stiebel-eltron.de STIEBEL ELTRON GmbH & Co. KG Kundendienst Tel. 05531 702-111 | Fax 05531 702-95890 | kundendienst@stiebel-eltron.de Dr.-Stiebel-Straße 33 | 37603 Holzminden Ersatzteilverkauf Tel. 05531 702-120 | Fax 05531 702-95335 | ersatzteile@stiebel-eltron.de Tel.
Need help?
Do you have a question about the WWK 221 electronic and is the answer not in the manual?
Questions and answers