
Related Manuals for Encore ENDSL-A2+WIGX2


Summary of Contents for Encore ENDSL-A2+WIGX2
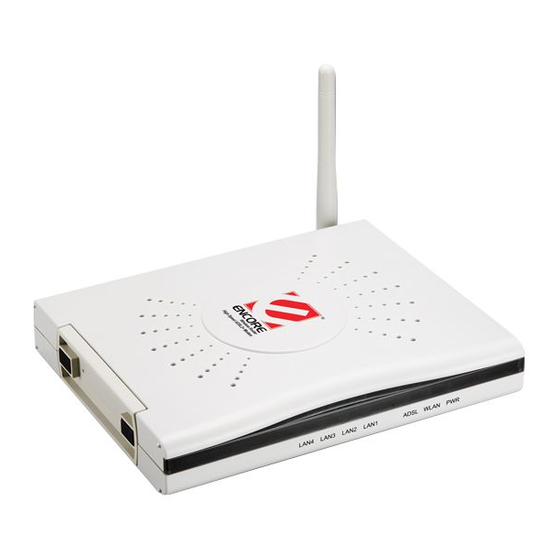
- Page 1 ENDSL-A2+WIGX2 ADSL2+ Modem With Four Port Ethernet and 802.11g Wireless Router User’s Manual August 2007...
-
Page 2: Fcc Warning
FCC Warning ENDSL-A2+WIGX2 has been tested and found to comply with the limits for a Class B digital device, pursuant to part 15 of the FCC Rules. These limits are designed to provide reasonable protection against harmful interference in a residential installation. This equipment generates, uses, and can radiate radio frequency energy and, if not installed and used in accordance with the instructions, may cause harmful interference to radio communication. - Page 3 Copyright 2007 All Rights Reserved. No part of this document can be copied or reproduced in any form without written consent from Encore Electronics Inc. Trademarks: All trade names and trademarks are the properties of their respective companies. Revision History...
-
Page 4: Table Of Contents
Contents 1. Introduction................. 6 1.1 Introduction ..................6 1.2 Product Features................. 6 2. Hardware Installation..............10 2.1 System Requirements............... 10 2.2 Package Contents ................10 2.3 Front Panel Indicators and Description .......... 10 2.4 Back Panel ..................11 2.5 Connect Related Devices ..............11 3. - Page 5 6.2.4 DHCP Relay ................46 6.2.5 DNS Relay ................47 6.3 Wireless ..................... 48 6.3.1 Access Point Settings............. 48 6.3.2 Multiple SSIDs Settings ............49 6.3.3 MAC Address Filter ..............49 7 Advanced Setup................. 50 7.1 Firewall....................50 7.2 Routing....................50 7.3 NAT .....................
- Page 6 11. Troubleshooting..............81 11.1 Using LEDs to Diagnose Problems..........81 11.1.1 Power LED ................81 11.1.2 LAN LED................. 81 11.1.3 ADSL LED................81 11.2 Problems with the Web Interface ........... 82 11.3 Problems with the Login Username and Password ..... 82 11.4 Problems with LAN Interface............
-
Page 7: Introduction
1. Introduction 1.1 Introduction This full rate ENDLS-A2+WIGX2 is an all-in-one gateway for Home and SOHO applications. This gateway are with full-featured ADSL router that provides high-speed Internet access, 4-port Ethernet switch direct connections to individual PCs or local area network with 10/100 Base-T Ethernet... - Page 8 is compliant with the following standards. ANSI T1.413 issue 2 ITU-T G.992.1 (G.dmt) ITU-T G.992.2 (G.lite) G.994.1 (G.hs, Multimode) ITU-T G.992.3 (ADSL2 G.dmt.bis) ITU-T G.992.4 (ADSL2 G.lite.bis) ITU-T G.992.5 (ADSL2+; Annex A, B, I, J, L & M) Reach Extended ADSL (RE ADSL) Quick Setup Wizard Support Quick Setup Wizard Web GUI to configure the ENDLS-A2+WIGX2 easily and quickly.
- Page 9 With Dynamic DNS support, you can have a static hostname alias for a dynamic IP address, allowing the host to be more easily accessible from various locations on the Internet. You must register for this service with a Dynamic DNS client. DHCP Support DHCP (Dynamic Host Configuration Protocol) allows individual clients to obtain TCP/IP configuration at start-up from a centralized DHCP server.
- Page 10 Dynamic date rate scaling at 11, 5.5, 2 and 1Mbps for IEEE802.11b Supports Quality of Service (QoS), 802.11e, WMM MAC Address Filtering Security PPP over PAP (Password Authentication Protocol; RFC1334) PPP over CHAP (Challenge Authentication Protocol; RFC1994) DoS Protection Stateful Packet Inspection (SPI) VPN (IPsec, PPTP, L2TP) pass through Built-in NAT Firewall IP-based Packet filtering...
-
Page 11: Hardware Installation
2. Hardware Installation 2.1 System Requirements Pentium III 266 MHz processor or higher 128 MB RAM minimum 20 MB of free disk space minimum RJ45 Ethernet Port 2.2 Package Contents ENDLS-A2+WIGX2 modem RJ-45 Ethernet cable RJ-11 Phone cable Power Adapter Quick Installation Guide One External Antenna (for detachable model) 2.3 Front Panel Indicators and Description... -
Page 12: Back Panel
2.4 Back Panel Connect with power adapter ON/OFF Power switch button LINE Connect with phone cable Connect with Ethernet Cable to Switch Hub or PC Connect with Ethernet Cable to Switch Hub or PC Connect with Ethernet Cable to Switch Hub or PC Connect with Ethernet Cable to Switch Hub or PC DEFAULT Reset button... -
Page 13: Connecting Wireless Endls-A2+Wigx2 Via Ethernet
3. Connecting ENDLS-A2+WIGX2 via Ethernet Your router can be managed from anywhere with the embedded Web configuration using a Web browser, such as Microsoft Internet Explorer or Netscape Navigator. Internet Explorer 6.0 and later or Netscape Navigator 7.0 and later versions with JavaScript enabled should be used. 3.1 Setup ENDLS-A2+WIGX2 via Ethernet Cable If there is an available LAN card present on your PC, you just simply connect ADSL router and PC through the Ethernet cable. - Page 14 Option1: Get an IP from Router Automatically Select the IP Address tab. In this page, click Obtain an IP address automatically radio button. Select Gateway tab and click OK...
- Page 15 Then, select DNS Configuration tab and select Disable DNS then click OK to finish the configuration. Option2: Configure IP Manually 1) At IP Address tab, select Specify an IP address, set default IP address for the Router is 192.168.1.1, so use 192.168.1.X (X is a number between 2 to 254) for IP Address field and 255.255.255.0 for Subnet Mask field.
- Page 16 2) Select Gateway tab and add default Router IP Address “192.168.1.1” in the New gateway field and click Add. Under DNS Configuration tab, select Enable DNS and add DNS values (192.168.1.1) in DNS Server Search Order field then click Add.
- Page 17 For Windows® 2000 Step 1: (a) Right-click My Network Places and select Properties in the main window screen (b) Or, go to Start / Settings / Control Panel. In the Control Panel, double-click on Network and Dial-up Connections. Step 2: Right click Local Area Connection (your local network hooked up with ADSL router) and select Properties:...
- Page 18 Step 3: Select Internet Protocol (TCP/IP) then click Properties: Configure IP Automatically: Step 4: Select Obtain an IP address automatically and Obtain DNS server address automatically then click OK to complete IP configuring process.
- Page 19 Configure IP Manually: Step 4: Select Use the following IP address and Use the following DNS server addresses. IP address: Fill in IP address 192.168.1.x (x is a number between 2 to 254). Subnet mask: Default value is 255.255.255.0. Default gateway: Default value is 192.168.1.1. Preferred DNS server: Fill in preferred DNS server IP address.
- Page 20 Step 2: Double-click Network Connections icon. Step 3: Right-click Local Area Connection (local network your ADSL hooked up with) and select Properties:...
- Page 21 Step 4: Select Internet Protocol (TCP/IP) then click Properties: Configure IP address Automatically: Step 5: Select Obtain an IP address automatically and Obtain DNS server address automatically. Click OK to finish the configuration.
- Page 22 Configure IP Address Manually: Step 5: Select Use the following IP address and Use the following DNS server addresses. IP address: Fill in IP address 192.168.1.x (x is a number between 2 to 254). Subnet mask: Default value is 255.255.255.0. Default gateway: Default value is 192.168.1.1.
- Page 23 For Windows Vista™ Step 1: Click Start then select Control Panel (in the Classic View). Step 2: Double-click Network and Sharing Center icon.
- Page 24 Step 3: Select “Manage Network connections”. Step 4: Right-click Local Area Connection (local network your ADSL hooked up with) and select Properties:...
- Page 25 Step 5: Select Internet Protocol (TCP/IP) then click Properties: Configure IP address automatically: Step 6: Select Obtain an IP address automatically and Obtain DNS server address...
- Page 26 automatically. Click OK to finish the configuration. Configure IP Address Manually: Step 7: Select Use the following IP address and Use the following DNS server addresses. IP address: Fill in IP address 192.168.1.x (x is a number between 2 to 254). Subnet mask: Default value is 255.255.255.0.
-
Page 27: Configure Wireless Endls-A2+Wigx2 Router Via Html
Alternate DNS server: Fill in alternate DNS server IP address. You can use ping command under DOS prompt to check if you have setup TCP/IP protocol correctly and if your computer has successfully connected to this router. 2) Type ping 192.168.1.1 under DOS prompt and the following messages will appear: Pinging 192.168.1.1 with 32 bytes of data: Reply from 192.168.1.1: bytes=32 times<2ms TTL=64 Reply from 192.168.1.1: bytes=32 times<1ms TTL=64... -
Page 28: Navigating The Web Configurator
4.2 Navigating the Web Configuration Steps to navigate the Web configuration from the Site Map are summarized as below. -
Page 29: Quick Start Wizard
Steps to navigate the Web configuration from the Site Map are summarized below. Click on Quick Start to begin a wizard that helps to configure your router. Click on Interface Setup to configure Internet and LAN functions. Click on Advanced Setup to configure advanced features. Click on Access Management to manage Internet access options. - Page 30 Click Quick Start to guide you to configure the device to connect your ISP and have Internet access within minutes. This Quick Start will guide you step by step to configure the password, time zone, and WAN settings of you device. This Wizard is a helpful guide for first time uses to the device.
- Page 31 The Quick Start Setup Wizard includes four quick steps: 1) Set your new password. 2) Choose your time zone. 3) Set your Internet connection. 4) Re-start your ADSL router. Please follow the quick start step by step to configure the device. Note: If your ISP doesn’t provide DNS, after you complete Quick Start configuration, please go to Interface Setup Internet to configure your DNS settings.
-
Page 32: Setting A New Password
5.1 Setting a New Password This screen helps you set a new password, replacing the default password. The following table describes the labels in this screen. LABEL DESCRIPTION New Password Enter the password you wish to use here Confirmed Password Enter the password again to confirm Click on BACK to return to the previous screen, on NEXT to continue, or on EXIT to exit the wizard without saving. -
Page 33: Set Your Internet Connection
5.3 Set your Internet Connection This screen helps you select, then configure, your ISP connection type. Select the Internet connection type you use to connect to your ISP. Click on BACK to return to the previous screen, on NEXT to continue, or on EXIT to exit the wizard. The following screen will vary depending on which connection type you chose. -
Page 34: Configuring Static Ip Address
The following table describes the labels in this screen. LABEL DESCRIPTION Enter the VPI here. VPI can range from 0 to 255. Enter the VCI here. VCI can range from 1 to 65535. Connection Type Select your connection type from the dropdown list. Your ISP should provide the above information. -
Page 35: Configuring Pppoe
5.3.3 Configuring PPPoE PPPoE provides access control and billing functionality in a manner similar to dial-up services using PPP. The router bridges a PPP session over Ethernet (PPP over Ethernet, RFC 2516) from your computer to an ATM Permanent Virtual Circuit (PVC) that connects to the ADSL Access Concentrator, where the PPP session terminates. -
Page 36: Configuring Bridge Mode
The following table describes the labels in this screen. LABEL DESCRIPTION Username Enter your username here. Password Enter your password here. Enter the VPI here. VPI can range from 0 to 255. Enter the VCI here. VCI can range from 1 to 65535. Connection Type Select your connection type from the dropdown list. -
Page 37: Multiplexing
The following table describes the labels in this screen. LABEL DESCRIPTION Enter the VPI here. VPI can range from 0 to 255. Enter the VCI here. VCI can range from 32 to 65535. Connection Type Select your connection type from the dropdown list. Your ISP should provide the above information. -
Page 38: Finishing The Wizard
5.4 Finishing the Wizard The Quick Start wizard now has all the information it needs. Click on BACK to make changes or correct mistakes. Click on NEXT to save the current settings. Click on EXIT to exit the wizard without saving. Your changes have been saved. -
Page 39: Interface Setup
6. Interface Setup The physical connections determine whether the router ports are local area network (LAN) ports or wide area network (WAN) ports. There are two kinds of IP networks. The local, private kind is the LAN network; the global, public kind is the WAN network. The following illustration shows the relationship between the router and the two different networks. -
Page 40: Atm Vc & Qos
6.1.1 ATM VC & QoS ATM settings are used to connect to your ISP. Your ISP provides VPI, VCI, settings to you. In this Device, you can totally setup 8 PVCs on different encapsulations if you apply 8 different virtual circuits from your ISP. You need to activate the VC to take effect. For PVCs management, you can use ATM QOS to setup each PVC traffic line’s priority. -
Page 41: Encapsulation
time, more cells (up to the MBS) can be sent at the PCR again. CBR is for connections that support constant rates of data transfer. The only parameter you need to worry about in CBR is PCR. UBR is for connections that have variable traffic. The only parameter you need to worry about in UBR is PCR. - Page 42 (2) Static IP Address Select this option to set static IP information. You will need to enter in the encapsulation type (1483 Bridged IP LLC, 1483 Bridged IP VC-Mux, 1483 Routed IP LLC (IPoA), 1483 Routed IP VC-Mux), IP address, subnet mask, and gateway address provided to you by your ISP. Each IP address entered in the fields must be in the appropriate IP form, which is 4 IP octets separated by a dot (x.x.x.x).
- Page 43 LABEL DESCRIPTION Username Enter your username for your PPPoE/PPPoA connection. Password Enter your password for your PPPoE/PPPoA connection. Encapsulation Select your encapsulation type from the dropdown list. Bridge Interface Select whether the Interface will be Activated or Deactivated. Connection Select whether your connection is always on or if it connects on demand. If on demand, specify how many minutes the connection may be idle before it disconnects.
- Page 44 Connection Setting: For PPPoE/PPPoA connection, you can select Always on or Connect on-demand. Connect on demand is dependent on the traffic. If there is no traffic (or Idle) for a pre-specified period of time, the connection will tear down automatically. And once there is traffic send or receive, the connection will be automatically on.
-
Page 45: Lan
The following table describes the labels in this screen. LABEL DESCRIPTION Encapsulation Select your encapsulation type from the dropdown list. 6.2 LAN There are the IP settings of the LAN Interface for the device. These settings may be referred to as Private settings. You may change the LAN IP address if needed. The LAN IP address is provided to your internal network and cannot be seen on the Internet. -
Page 46: Explaining Rip Setup
Dynamic Route: Select the Dynamic Route from RIP1, RIP2-B, and RIP2-M. Please refer to Internet Dynamic Route. The only difference is the interface. IGMP Snoop: You can disabled and enabled IGMP Snoop function. 6.2.2 Explaining RIP Setup Routing Information Protocol (RIP) allows a router to exchange routing information with other routers. -
Page 47: Dhcp Relay
LABEL DESCRIPTION Starting IP Address Enter the starting IP address you wish to use as the DHCP server's IP assignment. IP Pool Count Enter the maximum user pool size you wish to allow. Lease Time Enter the amount of time you wish to lease out a given IP address. DNS Relay Select the DNS relay option you wish to use from the dropdown list. -
Page 48: Dns Relay
6.2.5 DNS Relay The DNS Configuration allows the user to set the configuration of DNS. DNS Rely Selection: If user wants to disable this feature, he just needs to set both Primary & Secondary DNS to 0.0.0.0. Using DNS relay, users can setup DNS server IP to 192.168.1.1 on their computer. -
Page 49: Wireless
6.3 Wireless 6.3.1 Access Point Settings Beacon Interval: The Beacon Interval value indicates the frequency interval of the beacon. Enter a value between 20 and 1000. A beacon is a packet broadcast by the Router to synchronize the wireless network. RTS/CTS Threshold: The RTS (Request To Send) threshold (number of bytes) for enabling RTS/CTS handshake. -
Page 50: Multiple Ssids Settings
handshake. Enter a value between 0 and 2432. Fragment Threshold: The threshold (number of bytes) for the fragmentation boundary for directed messages. It is the maximum data fragment size that can be sent. Enter a value between 256 and 2432. DTIM: This value is between 1 and 255, indicates the interval of the Delivery Traffic Indication Message (DTIM). -
Page 51: Advanced Setup
Action: Select Deny Association to block access to the router, MAC addresses not listed will be allowed to access the router. Select Allow Association to permit access to the router, MAC addresses not lusted will be denied access to the router. 7 Advanced Setup 7.1 Firewall User can enable or disable firewall feature of the ADSL router in the page. - Page 52 [Static Route] Select this option to set Static Routing information. Destination IP Address: This parameter specifies the IP network address of the final destination of packets routed by this rule. IP Subnet Mask: Enter the subnet mask for this destination. Gateway IP Address: Enter the IP address of the gateway.
-
Page 53: Nat
Announced in RIP: This parameter determines if the ADSL router includes the router to this remote node in its RIP broadcasts. If you choose Yes, the router in this remote node will be propagated to other hosts through RIP broadcasts. If you choose No, this route is kept private and is not included in the RIP broadcasts. -
Page 54: What Nat Does
Note: For VCs with single IP, they share the same DMZ & Virtual servers; for VCs with multiple IPs, each VC cab set DMZ and Virtual servers. Furthermore, for VCs with multiple IPs, they can define the Address Mapping rules; for VCs with single IP, since they have only one IP, there is no need to individually define the Address Mapping rule. -
Page 55: Nat Application
Each packet has two addresses – a source address and a destination address. For outgoing packets, the ILA is the source address on the LAN, and the IGA is the source address on the WAN. For incoming packets, the ILA is the destination address on the LAN, and the IGA is the destination address on the WAN. -
Page 56: Nat Mapping Types
7.3.4 NAT Mapping Types NAT supports five types of IP/port mapping. They are: a. One-to-One: In One-to-One mode, the TC3162 EVM maps one local IP address to one global IP address. b. Many-to-One: In Many-to-One mode, the TC3162 EVM maps multiple local IP addresses to one global IP address. -
Page 57: Dmz
ILA4 IGA2 … Many-to-Many No Overload ILA1 IGA1 ILA2 IGA2 ILA3 IGA3 … Server Server 1 IP IGA1 Server 2 IP IGA1 Server 3 IP IGA1 7.3.5 DMZ A DMZ (de-militarized zone) is a host between a private local network and the outside public network. - Page 58 Rule Index: The Virtual server rule index for this VC. You can specify up to 10 rules. All the VCs with single IP will use the same Virtual Server rules. Start & End port number: Enter the specific Start and End Port number you want to forward. If it is one port only, you can enter the End port number the same as Start port number.
-
Page 59: Ip Address Mapping
7.3.7 IP Address Mapping The IP Address Mapping is for those VCs that with multiple IPs. The IP Address Mapping rule is per-VC based. (only for Multiple IPs’ VCs). Rule Index: The Virtual server rule index for this VC. You can specify up to 10 rules. All the VCs with single IP will use the same Virtual Server rules. -
Page 60: Qos
QoS (Quality of Service). This option will provide better service of selected network traffic over various technologies. Deploying QoS management to guarantee that all application receive the service levels required and sufficient bandwidth to meet performance expectations is indeed one important aspect of modem enterprise network. -
Page 61: Vlan
VLAN Virtual LAN (VLAN) is a group of devices on one or more LANs that are configured so that they can communicate as if they were attached to the same wire, when in fact they are located on a number of different LAN segments. Because VLANs are based on logical instead of physical connections, it is very flexible for user/host management, bandwidth allocation and resource... - Page 62 optimization. (1) Port-Based VLAN: each physical switch port is configured with an access list specifying membership in a set of VLANs. (2) ATM VLAN-using LAN Emulation(LANE) protocol to map Ethernet packets into ATM cells and deliver then to their destination by converting an Ethernet MAC address into an ATM address.
-
Page 63: Adsl
7.6 ADSL Select this option to set ADSL Mode and ADSL Type information. ADSL Mode: Select which mode your ADSL connection uses from the dropdown list. The option has Auto Sync-up, ADSL2+, ADSL2, G.DMT, T1.413, G.LITE ADSL Type: Select the ADSL type you use from the dropdown list. ANNEX A, ANNEX I, ANNEX A/L, ANNEX M, ANNEX A/I/J/L/M When you are done making changes, click on SAVE to save your changes. - Page 64 on application. You may use telnet or Web to remotely manage the ADSL Router. User just needs to enable Telnet or Web and give it an IP address that wants to access the ADSL Router. The default IP 0.0.0.0 allows any client to use this service to remotely manage the ADSL Router. ACL: There has Activated &...
-
Page 65: Ip Filter
4. Choose the Application which you want to access for this ACL Rule index. 5. Select the Interface you want to access from. 6. After all settings are ready, click SAVE and continue next ACL Rule Index setting. [Note] 1. You must set one ACL index to access your router via LAN interface. If you don’t, your router cannot access other listed IP Address. - Page 66 IP Filter Set Index: The IP Filter Set Index from 1 to 12 and each index can set up to 6 IP Filter. Interface: Choices from PVC0 to PVC7 and LAN. Direction: Choices are Both, Incoming and Outgoing. Select which direction of data flow you wish to apply the filters to.
- Page 67 Active: Toggle this rule index on or off with Yes or No, respectively. Source IP Address: Enter the source IP address you wish to deny access to your system. Subnet Mask: Enter the subnet mask of the source IP address. Port Number: Enter the port number of the source IP address.
-
Page 69: Snmp
8.3 SNMP The Simple Network Management Protocol (SNMP) is used for exchanging information between network devices. It enables a host computer to access configuration, performance, and other system data that resides in a database on the modem. The host computer is called a management station and the modem is called an SNMP agent. -
Page 70: Ddns
UPnP (Universal Plug and Play): You can choose “Activated” or “Deactivated” option from this session. Auto-Configured (by UPnP Application): UPnP network devices can automatically configure network addressing, announce their presence in the network to other UPnP devices and enable exchange of simple product and service descriptions. Choose “Activated” option to allow UPnP-enabled applications to automatically configure the ADSL Router so that they can communicate through the ADSL Router, for example by using NAT traversal, UPnP applications automatically reserve a NAT forwarding port in order to communicate with another UPnP... -
Page 71: Cwmp
Dynamic DNS: Choose the option for Activated or Deactivated DDNS. Service Provider: The default Dynamic DNS service provider is www.dyndns.org. My Host Name: Type the domain name assigned to your ADSL by your Dynamic DNS provider. E-mail Address: Type your e-mail address. Username: Type your user name. - Page 72 number of different Internet access possibilities grew as well (e.g. modems, routers, gateways, Set-top box, paddles, VoIP-phones). At the same time the configuration of this equipment became more complicated -- too complicated for the end-users. For this reason the TR-069 standard was developed.
-
Page 73: Maintenance
9. Maintenance Administration There is only one account that can access Web-Management interface-Administration. Admin has read/write access privilege. In this web page, you can set new password for admin. New Password: Type the new password in this field. Confirm Password: Type the new password again in this field. Note: If you ever forget the password to log in, you may press the RESET button up to 6 second to restore the factory default settings. - Page 74 Current Date/Time: This field displays an updated Date and Time when you reenter this menu. [Time Synchronization] Synchronize time with: You can choose “NTP Server automatically”, “PC’s Clock”, or “Manually” to coordinate the time. Time Zone: Choose the Time Zone of your location. This will set the time difference between your time zone and Greenwich Mean Time (GMT).
-
Page 75: Firmware
9.3 Firmware You can upgrade the firmware of the router in this page. Make sure the firmware you want to use is on the local hard drive of the computer. Click on Browse to browse the local had drive and locate the firmware to be used for the update. Then press UPGRADE to upload new Firmware. -
Page 76: Diagnostic
9.5 Diagnostic The Diagnostic Test page shows the test results for the connectivity of the physical layer and protocol layer for LAN & WAN sides. Select which PVC you wish to test from the dropdown list. The router will automatically run diagnostic tests on that circuit. -
Page 77: Status
10. Status 10.1 Device Info The Device Info screen is a tool that you use to monitor your ADSL Router. It shows the Firmware Version, WAN, LAN, and MAC address information. Note that these fields are read-only and are not meant for diagnostic purposes. Except the Virtual Circuit, click the drop-down list and select the name of the Virtual Circuit on which the system status is to be shown. - Page 78 [LAN] IP Address: The LAN port IP address Subnet Mask: The LAN port IP subnet mask. DHCP Server: The status of DHCP Server (Enabled or Disabled) [WAN] Virtual Circuit: Click the drop-down list and select the name of the Virtual Circuit on which the system status is to be shown.
-
Page 79: System Log
10.2 System Log The System Log displays data generated or acquired by routine system communication with other devices, such as the results of negotiations with the ISP's computers for DNS and gateway IP addresses. The device keeps a running log of events and activities occurring on the Router. -
Page 80: Statistics
10.3 Statistics The ADSL Router keeps statistic of traffic that passes through it. You are able to view the amount of packets that passes through the Router on both the WAN port & the LAN port. The traffic counter will reset if the device is rebooted. You can select Ethernet/ADSL/WLAN to view the statistics report of LAN/WAN. - Page 81 [ADSL] The ADSL screen gives you information about how much data your router has transmitted or received across the ADSL connection. Click on REFRESH to update the screen. [WLAN] The WLAN screen gives you information about how much data your router has transmitted or received across the ADSL connection.
-
Page 82: Troubleshooting
11. Troubleshooting If the router is not function properly, first check this session for simple troubleshooting before contacting your Internet service provider (ISP) for support. 11.1 Using LEDs to Diagnose Problems The LEDs are useful aides for finding possible problem causes. 11.1.1 Power LED The PWR LED on the front panel does not light up. -
Page 83: Problems With The Web Interface
11.2 Problems with the Web Interface I cannot access the web Interface. STEPS CORRECTIVE ACTION Make sure you are using the correct IP address of the router. Check the IP address of the router. Make sure that there is not a console session running. Check that you have enabled web service access. -
Page 84: Problems With Lan Interface
It is highly recommended to change the default username and password. Make sure you store the username and password in a save place. 11.4 Problems with LAN Interface I cannot access the router from the LAN or ping any computer on the LAN. STEPS CORRECTIVE ACTION Check the Ethernet LEDs on the front panel. -
Page 85: Problems With The Internet Access
Contact your ISP. If you have any troubles to configure or setup this ENDLS-A2+WIGX2, please feel free to contact us. Encore Electronics Inc. Support hotline information can be found on our web site at www.encore-usa.com Before contacting us, make sure collect following information. Submit complete detailed information of your problem will help us to provide you accurate answers.
Need help?
Do you have a question about the ENDSL-A2+WIGX2 and is the answer not in the manual?
Questions and answers
Where can I find the following modem software to update it Encore-ENDSL-A2+WIGX2