
Related Manuals for FS IPC305-2M-D


Summary of Contents for FS IPC305-2M-D
- Page 1 Dome Network Cameras Dome-Netzwerkkamera Caméras Réseau à Dôme ドーム型ネッ トワークカメラ Quick Start Guide V1.0 Quick Start Anleitung Guide de Démarrage Rapide クイックスタートガイド...
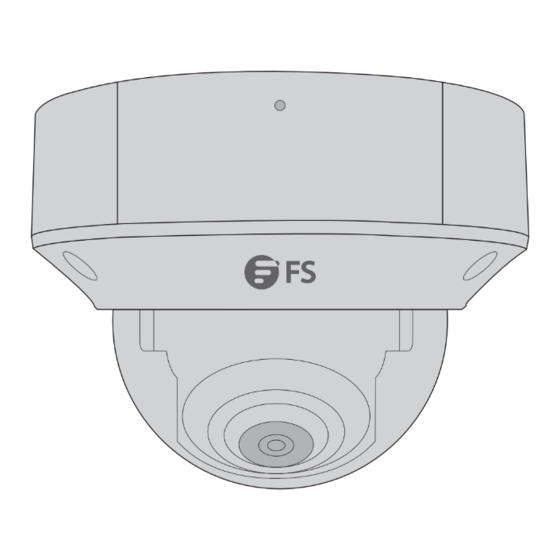
- Page 2 Introduction Thank you for choosing Dome Network Cameras. This guide is designed to familiarize you with the structure of the network cameras and describes how to deploy them in your network. IPC305-2M-D/IPC305-5M-D Accessories Screw Kit x1 Waterproof Kit x1 Drill Template Sticker x1...
-
Page 3: Hardware Overview
Hardware Overview IPC305-2M-D/IPC305-5M-D Name Description Audio Interface Input/output the audio signal or function as the GND Alarm Interface Input/output the alarm signal or function as the GND Power Interface Connect to the DC 12V power Ethernet Interface Connect to the Ethernet cable... -
Page 4: Installation Requirements
Installation Requirements Precautions Make sure that the working temperature is maintained at -30°C~60°C and that the relative humidity is <95%. Keep the camera with good ventilation from excessive pressure vibration, dust, corrosive gases, and intensive electromagnetic radiation. Place the device on a at surface. Unless otherwise speci ed, do not stack devices. The connectors of the tail cable, waterproof box, corrugated pipe,and PVC pipe must be fully protected. -
Page 5: Installation
Installation Installing Micro SD Card (Optional) Take o the cover by loosening the screws. Then Insert the Micro SD card (purchased separately) into the camera. NOTE: The Micro SD card doesn't support hot plug operation. - Page 6 Installing the Waterproof Kit (Optional) Install the supplied waterproof kit to the Ethernet cable/DC cable. NOTE: Please use the self-adhesive waterproof tape (purchased separately) to protect the cable.
-
Page 7: Mounting The Camera
Mounting the Camera Ceiling Mounting The ceiling mounting is similar to the wall mounting. This part takes the former as an example. 1. Paste the drill template sticker and lead the cables through the hole. Drill 30mm-depth guide holes with a 6-6.5mm drill bit. 2. - Page 8 3. Connect the cables. Then lead the supplied self-tapping screws through the guide holes and x the screws on the ceiling.
- Page 9 Lens Base Fastening Screw Lens 4. Adjust the monitoring direction of the lens. The lens can be turned horizontally by rotating the lens base and vertically by loosening the fastening screws (tighten the screws at last). CAUTION: Do not rotate the camera when the lens is blocked, otherwise the lens might be damaged.
- Page 10 5. Align the screw holes in the base, and x the dome cover with three Torx screws.
- Page 11 Use an Ethernet cable to connect the Ethernet interface of the camera to the PoE port on a POE device, such as a POE switch or a PoE NVR.
-
Page 12: Camera Login
Power Adapter Connect the power interface of the camera to the local power supply with the power adapter (purchased separately). Camera Login Before you begin, check that: Your camera is operating properly and connected to the network. The PC you are using is installed with Chrome 45 or later. - Page 13 1. Open your browser, input the IP address of your camera in the address bar and then press Enter to open the login page. The default IP is 192.168.1.13. 2. Enter the default username and password (admin/admin) and then click Login. IPC305-2M-D Username admin...
-
Page 14: Online Resources
Product Warranty FS ensures our customers that for any damage or faulty items due to our workmanship, we will o er a free return within 30 days from the day you receive your goods. This excludes any custom-made items or tailored solutions. - Page 15 Einführung Vielen Dank, dass Sie sich für diese Dome-Netzwerkkamera entschieden haben. Diese Anleitung soll Sie mit dem Aufbau der Kamera vertraut machen und beschreibt, wie Sie sie in Ihrem Netzwerk einsetzen können. IPC305-2M-D/IPC305-5M-D Zubehör Schrauben-Set x1 Dichtungssatz x1 Aufkleber Bohrschablone x1 Torx-Schlüssel x1...
- Page 16 Hardware-Übersicht IPC305-2M-D/IPC305-5M-D Ports Beschreibung Eingang/Ausgang des Audiosignals oder Audio-Schnittstelle Verwendung als Erdung Eingang/Ausgang des Alarmsignals oder Alarm-Schnittstelle Verwendung als Erdung Strom-Schnittstelle Anschluss an den 12 V DC-Strom Ethernet-Schnittstelle Anschluss des Ethernet-Kabels Legen Sie die Micro-SD-Karte (separat erhältlich) Micro SD-Kartensteckplatz ein, um einen lokalen Speicher zu scha en.
- Page 17 Installationsanforderungen Vorsichtsmaßnahmen Achten Sie darauf, dass die Betriebstemperatur bei -30 °C~60 °C und die Luftfeuchtigkeit bei < 95 % liegt. Schützen Sie die Kamera bei guter Belüftung vor übermäßigen Druckschwingungen, Staub, korrosiven Gasen und intensiver elektromagnetischer Strahlung. Stellen Sie das Gerät auf eine ebene Fläche. Sofern nicht anders angegeben, dürfen Sie die Geräte nicht stapeln.
-
Page 18: Installation
Installation Einlegen der SD-Karte (optional) Ö nen Sie die untere Abdeckung durch Lösen der Schrauben. Legen Sie dann die Micro-SD-Karte (separat erhältlich) in die Kamera ein. ACHTUNG: Die Micro-SD-Karte unterstützt kein Hot-Swapping. - Page 19 Installieren des Dichtungs-Sets (optional) Bringen Sie den mitgelieferten Dichtungssatz am Ethernet-Kabel/DC-Stromkabel an. HINWEIS: Verwenden Sie zum Schutz des Kabels das selbstklebende wasserdichte Band (separat erhältlich).
-
Page 20: Montage Der Kamera
Montage der Kamera Deckenmontage Die Deckenmontage ist ähnlich wie die Wandmontage. In diesem Teil wird die Deckenmontage als Beispiel verwendet. 1. Kleben Sie die Bohrschabloneauf und führen Sie die Kabel durch das Loch. Bohren Sie 30 mm tiefe Führungslöcher mit einem 6-6,5 mm Bohrer. 2. - Page 21 3. Schließen Sie die Kabel an. Führen Sie dann die mitgelieferten selbstschneidenden Schrauben durch die Führungslöcher und befestigen Sie die Schrauben an der Decke.
- Page 22 Objektivsockel Befestigungsschraube Objektiv 4. Stellen Sie die Richtung des Objektivs ein. Das Objektiv kann durch Drehen des Objektivsockels horizontal und durch Lösen der Befestigungsschrauben vertikal gedreht werden (ziehen Sie die Schrauben zuletzt fest). ACHTUNG: Drehen Sie die Kamera nicht, wenn das Objektiv fest ist, da das Objektiv sonst beschädigt werden könnte.
- Page 23 5. Richten Sie die Schraubenlöcher aus und ziehen Sie die Schrauben am Rand der Kuppelabdeckung an.
- Page 24 Verwenden Sie ein Ethernet-Kabel, um die Ethernet-Schnittstelle der Kamera mit dem PoE-Port eines PoE-Geräts, wie z. B. einem PoE-Switch oder einem PoE-NVR, zu verbinden.
- Page 25 Netzadapter Verwenden Sie den (separat erhältlichen) Netzadapter, um die Stromschnittstelle der Kamera mit der lokalen Stromquelle zu verbinden. Anmeldung der Kamera Bevor Sie beginnen, überprüfen Sie, ob: Ihre Kamera ordnungsgemäß funktioniert und mit dem Netzwerk verbunden ist. der von Ihnen verwendete PC verfügt über Chrome 45 oder höher.
- Page 26 1. Ö nen Sie Ihren Browser, geben Sie die IP-Adresse Ihrer Kamera in die Adressleiste ein und drücken Sie dann die Eingabetaste, um die Anmeldeseite zu ö nen. Die Standard-IP lautet 192.168.1.13. 2. Geben Sie den Standard-Benutzernamen und das Standard-Passwort (admin/admin) ein, und klicken Sie dann auf Login. IPC305-2M-D Username admin Password Forgot Password?
- Page 27 Kontakt https://www.fs.com/de/contact_us.html Produktgarantie FS garantiert seinen Kunden, dass wir bei Schäden oder fehlerhaften Artikeln, die auf unsere Verarbeitung zurückzuführen sind, eine kostenlose Rückgabe innerhalb von 30 Tagen nach Erhalt der Ware anbieten. Dies gilt nicht für Sonderanfertigungen oder maßgeschneiderte Lösungen.
- Page 28 Introduction Nous vous remercions d'avoir choisi la Caméra Réseau Dôme. Ce guide est conçu pour vous familiariser avec la caméra réseau et décrit comment procéder à son déploiement. IPC305-2M-D/IPC305-5M-D Accessoires Kit de Vis x1 Kit d'Étanchéité x1 Autocollant de Schéma de Perçage x1 Clé...
-
Page 29: Présentation Du Matériel
Présentation du Matériel IPC305-2M-D/IPC305-5M-D N° Dénomination Description Interface Audio Entrée/sortie du signal audio ou fonction GND Interface d'Alarme Entrée/sortie du signal d'alarme ou fonction GND Interface d'Alimentation Connexion à l'alimentation 12V DC Interface Ethernet Connexion au câble Ethernet Insérez la carte Micro SD (achetée séparément) Fente pour Carte Micro SD pour disposer d'un espace de stockage local. -
Page 30: Conditions D'installation
Conditions d'Installation Précautions Veillez à ce que la température de fonctionnement soit maintenue entre -30°C~60°C et que l'humidité relative soit <95%. Veillez à ce que la caméra soit installée dans un endroit bien ventilé, à l'abri des vibrations, de la poussière, des gaz corrosifs et des rayonnements électromagnétiques intenses. - Page 31 Installation Installation de la Carte Micro SD (En Option) Ouvrez le couvercle inférieur en desserrant les vis. Insérez ensuite la carte Micro SD (achetée séparément) dans l'emplacement de la caméra. NOTE : La carte Micro SD ne prend pas en charge le branchement à chaud.
- Page 32 Installation du Kit d'Étanchéité (En Option) Installez le kit d'étanchéité fourni sur le câble Ethernet/câble DC. NOTE : Utilisez la bande étanche autocollante (achetée séparément) pour protéger le câble.
-
Page 33: Installation De La Caméra
Installation de la Caméra Fixation au Plafond L'installation au plafond est similaire à l'installation murale. Cette partie prend le premier comme exemple. 1. Collez l'autocollant du schéma de perçage et faites passer le câble à travers l'ori ce. Percez des ori ces de guidage de 30 mm de profondeur avec une mèche de 6-6,5 mm. - Page 34 3. Branchez les câbles. Faites ensuite passer les vis autotaraudeuses fournies dans les ori ces de guidage et xez les vis au plafond.
- Page 35 Base de l'Objectif Vis de Fixation Objectif 4. Réglez la direction de surveillance de l'objectif. L'objectif peut être tourné horizontalement en tournant la base de l'objectif et verticalement en desserrant les vis de xation (serrer les vis en dernier). ATTENTION : Ne pas faire pivoter la caméra lorsque l'objectif est bloqué, sinon celui-ci risque d'être endommagé.
- Page 36 5. Alignez les ori ces de la base et xez le couvercle du dôme à l'aide de trois vis Torx.
- Page 37 Utilisez un câble Ethernet pour connecter l'interface Ethernet de la caméra au port PoE d'un dispositif PoE, tel qu'un switch PoE ou un NVR PoE.
-
Page 38: Connexion À La Caméra
Adaptateur d'Alimentation Connectez l'interface d'alimentation de la caméra à l'alimentation électrique locale à l'aide de l'adaptateur d'alimentation (acheté séparément). Connexion à la Caméra Avant de commencer, véri ez que Votre caméra fonctionne correctement et est connectée au réseau. Le PC que vous utilisez est équipé de Chrome 45 ou d'une version ultérieure. - Page 39 1. Ouvrez votre navigateur, entrez l'adresse IP de votre caméra dans la barre d'adresse et appuyez sur Enter pour ouvrir la page de connexion. L'adresse IP de défaut est 192.168.1.13. 2. Saisissez le nom d'utilisateur et le mot de passe de défaut (admin/admin), puis cliquez sur Login. IPC305-2M-D Username admin...
-
Page 40: Garantie Du Produit
Garantie du Produit FS garantit à ses clients que tout article endommagé ou défectueux en raison de sa fabrication pourra être retourné gratuitement dans un délai de 30 jours à compter de la date de réception de la marchandise. Cette garantie ne s'applique pas aux articles fabriqués sur mesure ou aux solutions personnalisées. - Page 41 イントロダクション この度は、ドーム型ネットワークカメラをお選び頂き、誠にありがとうございます。このガイドで は、ネットワークカメラの構造を理解し、ネットワークへの導入方法を説明するためのものです。 IPC���-�M-D/IPC���-�M-D アクセサリー ネジキットx� 防水キットx� ドリル用テンプレート・ステッカーx� レンチx� 注: アクセサリー類はイラストと異なる場合があります。...
- Page 42 ハードウェア概要 IPC���-�M-D/IPC���-�M-D 番号 名称 説明 � 音声インタフェース 音声信号の入・出力またはGNDとして機能 � アラームインタフェース アラーム信号の入・出力またはGNDとして機能 � 電源インタフェース DC ��V電源に接続 � イーサネットインタフェース イーサネットケーブルに接続 マイクロSDカード(別途購入)を挿入してローカル � マイクロSDカードスロット ストレージを取得 工場出荷時の設定に戻すには、�� 秒以上押しま す。デバイスの電源を入れてから��分以内に実行 � リセットボタン してください。そうしないと、リセットが失敗し ます。...
- Page 43 インストール要件 注意事項 作業温度が-��℃~��℃に保たれ、相対湿度が��%未満であることを確かめてください。 カメラは、過度の圧力振動、ほこり、腐食性ガス、強い電磁放射を避け、換気の良い場所に保 管してください。 デバイスを平らな場所に置くようにしてください。特に指定がない限り、デバイスを積み重ね ないでください。 テールケーブル、防水ボックス、コルゲートパイプ、PVCパイプのコネクタは完全に保護され ていなければならない。 取り付けの際、保護フィルムはカバーに貼ったままにしてください。 デバイスの使用には、顔、指紋、ナンバープレート、電子メール、電話番号、GPSなどの個人 情報の収集が含まれる場合があります。 屋外での使用に際しては、適切な防水対策を行ってください。 メンテナンス オイルフリーのブラシやゴム製のホコリ取りボールを使って、フロントガラス表面のホコリを やさしく掃除してください。 レンズまたはドームカバーは、レンズクリーニングクロスで中心から外側に向かってやさしく クリーニングしてください。必要に応じて、洗剤に浸した布を使用してください。 ドームカバーを清掃する際は、有機溶剤を使用しないでください。...
- Page 44 取り付け マイクロSDカードの取り付け(オプション) ネジを緩めて底カバーを開けます。次に、Micro SDカード(別途購入)をカメラに挿入します。 注: Micro SDカードはホットプラグ操作をサポートしていません。...
- Page 45 防水キットの取り付け(オプション) 付属の防水キットをイーサネットケーブル/DCケーブルに取り付けます。 注: ケーブル保護のため、自己粘着性防水テープ(別途購入)を併用してください。...
- Page 46 カメラの取り付け 天井取り付け 天井取り付けは壁掛けと同じです。この部分では天井取り付けを例として挙げます。 �. ドリルテンプレートステッカーを貼り付け、ケーブルを穴に通します。Ф�~�.�mmのドリルビ ットで深さ��mmのガイド穴を開けます。 �. 付属の壁プラグをガイド穴に打ち込み、プラグを締めます。...
- Page 47 �. ケーブルを接続します。次に、付属のタッピングネジをガイド穴に通し、ネジを天井に固定しま す。...
- Page 48 レンズベース 固定ネジ レンズ �. レンズの監視方向を調整します。レンズベースを回転させるとレンズが水平に回転し、固定ネジ を緩めると(最後にネジを締める)、レンズが垂直に回転します。 注意: レンズが詰まった状態でカメラを回転させないでください。レンズが破損する恐れ があります。...
- Page 49 �. ベースのネジ穴を合わせて、ドームカバーをトルクスネジ�本で固定します。...
- Page 50 イーサネットケーブルを使用して、カメラのイーサネットインタフェースをPoEスイッチやPoE NVRなどのPoEデバイスのPoEポートに接続します。...
- Page 51 電源アダプター 電源アダプター(別途購入)を使用して、カメラの電源インタフェースをローカル電源に接続します。 カメラのログイン 始める前に、以下のことを確認してください。 カメラは正常に動作し、ネットワークに接続されています。 ご使用のPCにはChrome ��以降がインストールされています。...
- Page 52 以下の手順に従って、ウェブからカメラにログインしてください。 �. ブラウザを開き、アドレスバーにカメラのIPアドレスを入力し、Enterキーを押してログインペ ージを開きます。デフォルトのIPアドレスは���.���.�.��です。 �. デフォルトのユーザー名とパスワード(admin/admin)を入力し、「Login」をクリックします。 IPC305-2M-D Username admin Password Forgot Password? ***** Live View Login Reset 注: �. DHCPはデフォルトで有効になっています。ネットワークでDHCPサーバが使用さ れている場合、カメラにIPアドレスが割り当てられ、ログインするには割り当てられたIP アドレスを使用する必要があります。 �. 初回ログイン時にプラグインのインストールが必要な場合があります。画面の指示に従 ってインストールを完了し、再度ブラウザを開いてログインしてください。 �. デフォルトのパスワードは、初回ログイン時のみのものです。セキュリティを確保する ため、初回ログイン後にパスワードを変更してください。数字、文字、特殊文字の�つの 要素をすべて含む、少なくとも�文字の強力なパスワードを設定することを強くお勧めし ます。 �. パスワードが変更されている場合は、新しいパスワードでログインしてください。...
- Page 53 オンラインリソース ダウンロード https://www.fs.com/jp/products_support.html ヘルプセンター https://www.fs.com/jp/service/fs_support.html お問い合わせ https://www.fs.com/jp/contact_us.html 製品保証 FSでは、弊社の製造技術による破損や不良品については、商品をお受け取りになった日から��日以 内であれば、無料で返品を承ります。ただし、これにはカスタム製品やオーダーメイドは含まれま せん。 保証:この製品は、材料または製造上の欠陥に対して�年間の限定保証を提供します。保証 の詳細については、次のサイトでご確認ください: https://www.fs.com/jp/policies/warranty.htmI 返品 : 返品したい場合は、 返品方法に関する情報が次のサイ トにご覧ください : https://www.fs.com/jp/policies/day_return_policy.html...
-
Page 54: Compliance Information
Compliance Information Note: This equipment has been tested and found to comply with the limits for a Class A digital device, pursuant to part 15 of the FCC Rules. These limits are designed to provide reasonable protection against harmful interference when the equipment is operated in a commercial environment. - Page 55 2014/35/EU, 2011/65/EU und (EU)2015/863 konform ist. Eine Kopie der EU-Konformitätserklärung nden Sie unter www.fs.com/de/company/quality_control.html. FS.COM GmbH déclare par la présente que ce dispositif est conforme à la Directive 2014/30/EU, 2014/35/EU, 2011/65/EU et (EU)2015/863. Une copie de la Déclaration de Conformité de l'UE est disponible à l'adresse suivante https://www.fs.com/fr/company/quality_control.html.
- Page 56 UKCA Hereby, FS.COM Innovation Ltd declares that this device is in compliance with the Directive SI 2016 No. 1091, SI 2016 No. 1101 and SI 2012 NO. 3032. FS.COM INNOVATION LTD Unit 8, Urban Express Park, Union Way, Aston, Birmingham, B6 7FH, United Kingdom...
Need help?
Do you have a question about the IPC305-2M-D and is the answer not in the manual?
Questions and answers