AudioCodes RX-PAD Quick Manual
Meeting room controller
Hide thumbs
Also See for RX-PAD:
- User's and administrator's manual (75 pages) ,
- User manual (19 pages) ,
- Pairing manual (10 pages)
Advertisement
Quick Links
RX-PAD Meeting Room Controller
1. Introduction
Thank you for purchasing AudioCodes RX-PAD Meeting Room
Controller!
RX-PAD is a center-of-room intelligent touch controller that
provides quick and complete access to the AudioCodes RXV81
or RXV200 Meeting Room. It enables capabilities such as one-
click collaboration initiation with an integrated calendar, simple
content sharing and camera adjustments, and much more, all
while retaining a modest footprint on the conference room
table.
RX-PAD leverages plug-and-play simplicity to provide a
productive and familiar Microsoft Teams meeting experience,
requiring only a Power-over-Ethernet (PoE) cable for quick installation.
See
here
for detailed information.
2.
Shipped Items
Make sure you received the following items in the shipped box:
RX-PAD
Ethernet cable
12V 2A Power Adapter (100-240) (can be ordered separately)
For Wi-fi connectivity, you must use a power adapter.
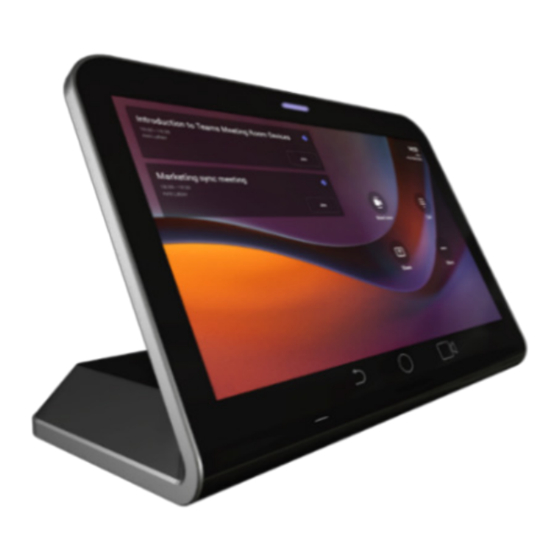
3. Positioning
Position RX-PAD on the table for optimal management. Use this figure as reference.
Quick Guide
Advertisement

Related Manuals for AudioCodes RX-PAD


Summary of Contents for AudioCodes RX-PAD
- Page 1 Make sure you received the following items in the shipped box: RX-PAD Ethernet cable 12V 2A Power Adapter (100-240) (can be ordered separately) For Wi-fi connectivity, you must use a power adapter. 3. Positioning Position RX-PAD on the table for optimal management. Use this figure as reference.
- Page 2 4. Cabling RX-PAD’s interface ports are concealed by a metal plate cover for protection. Prior to cabling RX-PAD, remove the cover by unscrewing the two screws, as shown below: The RX-PAD ports are shown below: Description LAN PoE port HDMI for external video ingest...
- Page 3 Legend: 1 – Four holes for hanging the bracket on screws that are inserted in the wall. 2 – Four notches to be slid into the corresponding RX-PAD slots. 3 – Two clips to secure RX-PAD. Wall-mounting RX-PAD includes the following four stages: Attaching the mounting bracket to the wall.
- Page 4 Remove rubber seals from RX-PAD's mounting grooves: Remove the four rubber seals from RX-PAD’s base as shown here: Figure 1: Removing the rubber seals Connect the Ethernet/Power cables: Feed the Ethernet/Power cable through the mounting bracket's cable duct (from bottom).
- Page 5 Attach RX-PAD to mounting bracket: Holding RX-PAD with both hands, enter its four mounting grooves onto the bracket’s four notches and then slide RX-PAD towards the wall until the “click”: Your RX-PAD is now fully wall-mounted and ready for use!
- Page 6 6. Powering Up RX-PAD receives its power from the Ethernet cable (PoE). After connecting the Ethernet cable to RX-PAD's LAN PoE port, RX-PAD powers up. The device can be powered up using a power adapter (not supplied; can be ordered separately).
- Page 7 Drop-down menu to access RX-PAD app launcher with a single click (not shown in figure). 10. Advanced RX-PAD Functionality Once RX-PAD is paired with the MTRA, on RX-PAD you can scroll down from the top to gain access to additional functionality: Teams –...
-
Page 8: Notice Information
Limited. All other products or trademarks are property of their respective owners. Product specifications are subject to change without notice. FCC Warning Prior to operating RX-PAD and AudioCodes devices for Teams Rooms on Android, refer to the regulatory information documents.
Need help?
Do you have a question about the RX-PAD and is the answer not in the manual?
Questions and answers