AudioCodes Mediant 9000 SBC Hardware Installation Manual
Family of session border controllers sbc
Hide thumbs
Also See for Mediant 9000 SBC:
- Hardware installation manual (40 pages) ,
- Hardware installation manual (35 pages)

Related Manuals for AudioCodes Mediant 9000 SBC


Summary of Contents for AudioCodes Mediant 9000 SBC
- Page 1 Hardware Installation Manual AudioCodes Mediant™ Family of Session Border Controllers (SBC) Mediant 9000 SBC Version 7.0...
-
Page 3: Table Of Contents
Grounding the Device ..................... 37 6.1.2 Preventing Electrostatic Discharge Damage ............37 Replacing Power Supply Modules ................38 6.2.1 Replacing AC Power Supply ................... 38 6.2.2 Replacing 48V DC Power Supply ................38 Troubleshooting Device Failures ................44 Version 7.0 Mediant 9000 SBC... - Page 4 Mediant 9000 SBC A Rescue Options ....................45 Taking a Snapshot ....................45 Viewing Available Snapshots ................. 46 Changing the Default Snapshot ................46 Deleting a Snapshot ....................46 Manual Recovery ....................46 A.5.1 Returning to the Default Snapshot ................47 A.5.2...
- Page 5 Figure A-1: CLI Management Interface ....................45 Figure A-2: Main GRUB Menu ....................... 47 Figure A-3: Rescue Options Menu ......................47 Figure A-4: System Returning to Snapshot State ................47 Figure A-5: Selecting a Snapshot ......................48 Version 7.0 Mediant 9000 SBC...
- Page 6 Mediant 9000 SBC List of Tables Table 1-1: Mediant 9000 SBC Specifications ..................9 Table 2-1: Physical Dimensions ......................11 Table 2-2: Front Panel ........................... 11 Table 2-3: Front-Panel LEDs ......................... 12 Table 2-4: Rear Panel ..........................13 Table 2-5: Rear Panel LEDs ........................14 Table 4-1: AC Power Supply Specifications ..................
- Page 7 Customer Support Customer technical support and services are provided by AudioCodes or by an authorized AudioCodes Service Partner. For more information on how to buy technical support for AudioCodes products and for contact information, please visit our Web site at www.audiocodes.com/support.
- Page 8 41659 AC power cable warning (Japanese). Documentation Feedback AudioCodes continually strives to produce high quality documentation. If you have any comments (suggestions or errors) regarding this document, please fill out the Documentation Feedback form on our Web site at http://www.audiocodes.com/downloads.
-
Page 9: Introduction
1. Introduction Introduction This document provides a hardware description and step-by-step cabling procedures for AudioCodes' carrier-grade Mediant 9000 SBC. Specifications The table below shows the Mediant 9000 SBC specifications. Table 1-1: Mediant 9000 SBC Specifications Resource Specification Chassis Type 1RU system 2 x 10 cores, 2.8 GHz, 25M Cache... - Page 10 Mediant 9000 SBC This page is intentionally left blank. Hardware Installation Manual Document #: LTRT-41659...
-
Page 11: Physical Description
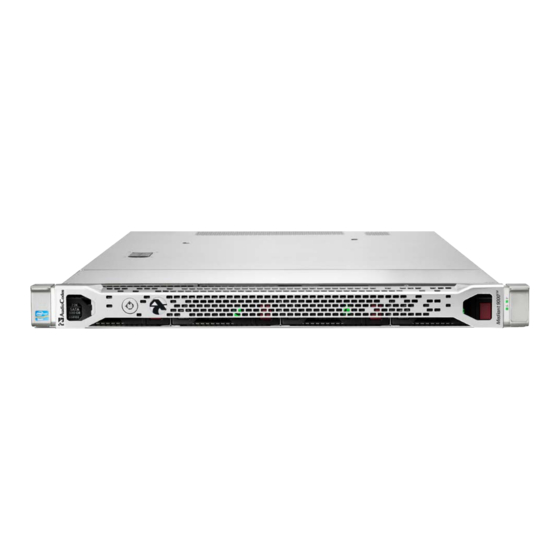
SAS/SATA/SSD drive bay 5 SAS/SATA/SSD drive bay 6 SAS/SATA/SSD drive bay 7 Systems Insight Display DVD-ROM drive (optional) SAS/SATA/SSD drive bay 8 (optional) Front video connector (front video port adapter required) USB connectors (2) Serial number tab Version 7.0 Mediant 9000 SBC... -
Page 12: Front Panel Leds
Mediant 9000 SBC 2.2.1 Front Panel LEDs The front panel LEDs are shown in the figure below and described in the subsequent table. Figure 2-2: Front Panel LEDs Table 2-3: Front-Panel LEDs Item # Description Status • Solid blue = Identification is activated. -
Page 13: Rear Panel
12 GbE ports Video connector Serial connector HP iLO port (see http://www8.hp.com/us/en/products/servers/ilo/) USB connectors (4) Power supply bay 1 (primary and redundant power supply supported) Power supply bay 2 (primary and redundant power supply supported) Version 7.0 Mediant 9000 SBC... -
Page 14: Rear Panel Leds
Mediant 9000 SBC 2.3.1 Rear Panel LEDs The rear panel LEDs are shown in the figure below and described in the subsequent table. Figure 2-4: Rear Panel LEDs Table 2-5: Rear Panel LEDs Item # Description Status • Solid green = Activity exists. -
Page 15: Deploying The Device
You must provide: Screws to secure the slide mounting bracket assemblies in a threaded-hole rack Cage nuts for a round-hole rack Screws that fit a threaded-hole rack The appropriate screwdriver for the screws Version 7.0 Mediant 9000 SBC... -
Page 16: Overview
Mediant 9000 SBC Overview This rack hardware kit supports a variety of products in round-, square-, or threaded-hole racks. Use the legend to identify installation steps appropriate to the type of rack. Note: If you are shipping the server installed in a rack, see the additional instructions located in "Preparing the product for integrated shipping in a rack"... - Page 17 Hardware Installation Manual 3. Deploying the Device ↓ Version 7.0 Mediant 9000 SBC...
- Page 18 Mediant 9000 SBC Warning: To reduce the risk of personal injury or equipment damage, be sure that the rack is adequately stabilized before sliding the inner slides into the slide mounting bracket assemblies. Warning: To reduce the risk of personal injury or damage to the equipment, at least two people are required to lift the server during installation or removal.
-
Page 19: Removing The Rail
Hardware Installation Manual 3. Deploying the Device Removing the Rail When removing the rail from the rack, always remove the front of the rail first. Securing the Cables Version 7.0 Mediant 9000 SBC... -
Page 20: Connecting The Power Cords
Mediant 9000 SBC Connecting the Power Cords After completing all installation and cable management procedures, you can connect the power cords to the facility power source. See Section on page for detailed information. The installation is complete. Preparing the Product for Integrated Shipping in a... -
Page 21: Cabling
To ensure the safety ground, at least one power supply with an appropriately terminated ground lead must be installed at all times. Tip: To ensure the safety ground, at least one power supply with an appropriately terminated ground lead must be installed at all times. Version 7.0 Mediant 9000 SBC... -
Page 22: Connecting To Power
Mediant 9000 SBC Connecting to Power This section shows how to connect the device to the power supply. The device can be connected to an AC or DC power source. You can connect both Power Supply modules (1 and 2), for 1+1 power load-sharing and redundancy. -
Page 23: Figure 4-1: Connecting Ac Power Cords To Ac Electrical Outlets
Turn on the power at the power source (if required). Check that the POWER LED on each Power Supply module (front panel) is lit green. This indicates that the device is receiving power. Version 7.0 Mediant 9000 SBC... -
Page 24: Connecting To Dc Power Source
Mediant 9000 SBC 4.2.2 Connecting to DC Power Source The DC power supply module is shown below: Figure 4-2: DC Power Supply Module The DC power supply specifications are listed in the table below. Table 4-2: DC Power Supply Specifications... - Page 25 To connect the device to the DC power supply: Make sure that the power supply module is partially extracted from the chassis slot. This facilitates cable attachment described hereafter. Remove the blank cover protecting the DC power inlet on the rear panel. Version 7.0 Mediant 9000 SBC...
-
Page 26: Figure 4-3: Removing Blank Cover
Mediant 9000 SBC Figure 4-3: Removing Blank Cover Make sure that the cable is disconnected from the 48V DC power source. Cut the DC power cord wire ends no shorter than 150 cm (59.06 in), and then crimp (using a crimping tool) ring tongues to the power and ground wires from the 48V power source. -
Page 27: Figure 4-7: Attaching Ground Wire
48V DC power source or PDU. Turn on the 48V power source or switch the PDU breaker to the on position to supply 48V to the power supply. Verify that the green power supply LED is on. Version 7.0 Mediant 9000 SBC... -
Page 28: Connecting Display And Keyboard
Mediant 9000 SBC Connecting Display and Keyboard To perform initial configuration, display and keyboard are required. Connect the display to the 15-pin HD D-Sub (HD-15) VGA port on the Mediant 9000. Connect the keyboard to the USB port. -
Page 29: Viewing Network Port Status
GE_6 f4:ce:46:a5:4f:99 DOWN igb rx-zc GE_7 f4:ce:46:a5:4f:9a DOWN igb rx-zc GE_8 f4:ce:46:a5:4f:9b DOWN igb rx-zc GE_9 f4:ce:46:a5:a4:40 DOWN igb rx-zc GE_10 f4:ce:46:a5:a4:41 DOWN igb rx-zc GE_11 f4:ce:46:a5:a4:42 DOWN igb rx-zc GE_12 f4:ce:46:a5:a4:43 DOWN igb rx-zc Version 7.0 Mediant 9000 SBC... - Page 30 Mediant 9000 SBC This page is intentionally left blank. Hardware Installation Manual Document #: LTRT-41659...
-
Page 31: Initial Configuration
> enable At the prompt, type the password again and press ENTER: Password: Admin At the prompt, type the following commands to access the network interface configuration: # configure voip (config-voip)# interface network-if 0 (network-if-0)# Version 7.0 Mediant 9000 SBC... -
Page 32: Figure 5-2: Web Interface
Mediant 9000 SBC Note: Use the Tab key to auto-complete partially entered commands. At the prompt, type the following commands to configure the IP address, prefix length and default gateway: (network-if-0)# ip-address 10.4.212.155 (network-if-0)# prefix-length 16 (network-if-0)# gateway 10.4.0.1 (network-if-0)# exit... -
Page 33: Licensing The Mediant 9000
> System Status menu > Device Information). The serial number is displayed in the 'Serial Number' field. Send the serial number to your AudioCodes representative when requesting the upgraded Software License Key. When you receive the new Software License Key file, check it as follows: Open the file with any text-based program such as Notepad. -
Page 34: Installing Your Upgraded Software License Key
Mediant 9000 SBC 5.2.2 Installing your Upgraded Software License Key The procedure below describes how to install the newly obtained upgraded Software License Key. To install the Software License Key: Open the Software Upgrade Key Status page (Maintenance tab > Software Update menu >... -
Page 35: Installing An Ha System
User's Manual document to set network topology correctly, and configure each accordingly using the Web interface. Upgrading Users can update the Mediant 9000 in order to (for example) implement software fixes. For detailed information, see the User's Manual. Version 7.0 Mediant 9000 SBC... -
Page 36: Hardware Installation Manual
Mediant 9000 SBC This page is intentionally left blank. Hardware Installation Manual Document #: LTRT-41659... -
Page 37: Hardware Maintenance
Attach the ESD wrist strap to your body (typically, the wrist) so that it is in direct contact with your skin. Attach the other end of the wrist strap (e.g., an alligator clip) to a grounded workstation or computer chassis. Version 7.0 Mediant 9000 SBC... -
Page 38: Replacing Power Supply Modules
Mediant 9000 SBC Replacing Power Supply Modules This section shows how to replace the power supply modules. 6.2.1 Replacing AC Power Supply Caution: To prevent improper cooling and thermal damage, do not operate the server unless all bays are populated with either a component or a blank. -
Page 39: Hardware Installation Manual
Remove the power cord from the cable management arm, if installed. Remove the safety cover. Remove the power ring tongues from the terminal block. Remove the ground (earthed) wire from the ground screw and washer. Version 7.0 Mediant 9000 SBC... -
Page 40: Hardware Installation Manual
Mediant 9000 SBC Attach the screws to the terminal block. Note: The minimum nominal thread diameter of a pillar or stud type terminal must be 3.5 mm (0.138 in); the diameter of a screw type terminal must be 4.0 mm (0.157 in). -
Page 41: Hardware Installation Manual
Remove the screws from the terminal block. Note: The minimum nominal thread diameter of a pillar or stud type terminal must be 3.5 mm (0.138 in); the diameter of a screw type terminal must be 4.0 mm (0.157 in). Version 7.0 Mediant 9000 SBC... -
Page 42: Hardware Installation Manual
Mediant 9000 SBC Attach the ground (earthed) wire to the ground screw and washer and tighten to 1.47 N m (13 lb-in) of torque. The ground wire must be connected before the positive or negative lead wires. Hardware Installation Manual... -
Page 43: Hardware Installation Manual
6. Hardware Maintenance Attach the power ring tongues to the terminal block, following the polarity label below the terminal block, and then tighten the screws to 1.47 N m (13 lb-in) of torque. Replace the safety cover. Version 7.0 Mediant 9000 SBC... -
Page 44: Troubleshooting Device Failures
Mediant 9000 SBC Insert the power supply into the power supply bay until it clicks into place. Route the power cord. Use best practices when routing power cords and other cables. A cable management arm is available to help with routing. To obtain a cable management arm, contact an HP authorized reseller. -
Page 45: A Rescue Options
the Software License Key The first 'factory' snapshot is automatically taken when initial installation is performed. Additional snapshots (up to 10) may be taken. The Mediant 9000 SBC can be returned to a snapshot, as described below. To take a snapshot using the CLI: Connect to the CLI interface as described under Section 4.2. -
Page 46: Viewing Available Snapshots
Mediant SW(startup-n-recovery)# delete-system-snapshot pre- production-6.70.037.010-2010-01-08_00-39-58 Manual Recovery Manual recovery is performed on user request. When the Mediant 9000 SBC reboots, a GRUB menu is displayed that allows users to select one of the following rescue options: Return to default snapshot ... -
Page 47: Returning To The Default Snapshot
The system returns to the default snapshot, restoring the software version and the full configuration (see Section A.3). The process can take up to 10 minutes to complete. Figure A-4: System Returning to Snapshot State Version 7.0 Mediant 9000 SBC... -
Page 48: Fixing The Current Installation
Mediant 9000 SBC A.5.2 Fixing the Current Installation To fix the current installation: In the GRUB menu, select Fix current installation and press Enter; the system is repaired while the currently installed software version and its configuration are preserved. -
Page 49: Automatic Recovery
A. Rescue Options Automatic Recovery The Mediant 9000 SBC activates Automatic Recovery when it encounters a severe software malfunction that prevents it from successfully booting for three subsequent attempts. Automatic Recovery returns the system to the ‘default’ snapshot and may take up to 10 minutes to complete. - Page 50 International Headquarters Contact us: www.audiocodes.com/info Website: www.audiocodes.com Document #: LTRT-41659...
Need help?
Do you have a question about the Mediant 9000 SBC and is the answer not in the manual?
Questions and answers