Table of Contents
Advertisement
Quick Links
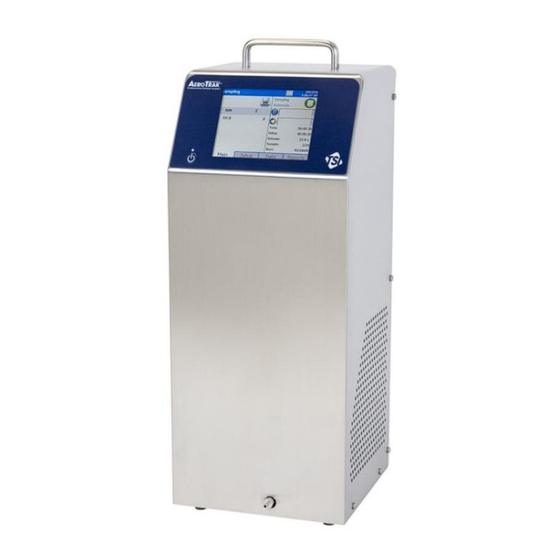
AeroTrak
Cleanroom Condensation
Particle Counter
Model 9001
Quick Start and Troubleshooting Guide
P/N 6010559, Revision E
March 2024
Contents
CPC Principle of Operation .......................................... 2
Unpacking and Setting Up the Unit ............................. 3
Connecting the Fill and Drain Bottles ......................... 3
Direct Inject Water Connection (optional) .................. 4
Connecting Sample Inlet Adaptors ............................. 5
Providing Power and Starting ...................................... 5
Zero Check ..................................................................... 6
Taking Data .................................................................... 7
Maintenance Screen .................................................... 11
Field ........................................................................ 12
Description .............................................................. 12
Powering the Unit Down ............................................. 13
Troubleshooting .......................................................... 14
www.tsi.com
®
Advertisement
Table of Contents

Related Manuals for TSI Instruments AeroTrak 9001


Summary of Contents for TSI Instruments AeroTrak 9001
-
Page 1: Table Of Contents
® AeroTrak Cleanroom Condensation Particle Counter Model 9001 Quick Start and Troubleshooting Guide P/N 6010559, Revision E March 2024 Contents CPC Principle of Operation .......... 2 Unpacking and Setting Up the Unit ......3 Connecting the Fill and Drain Bottles ......3 Direct Inject Water Connection (optional) .... -
Page 2: Cpc Principle Of Operation
CPC Principle of Operation Standard optical particle counters (OPCs) can only detect particles larger than 100 nm (0.1 µm). Detection of smaller particles is done using a condensation particle counter or CPC. CPCs use a working fluid (water in this case) to grow the particle to a size that is detectable by a traditional OPC. -
Page 3: Unpacking And Setting Up The Unit
Unpacking and Setting Up the Unit ▪ After unpacking from the shipping box, set the unit on a stable surface in an upright position. ▪ Remove the sample inlet shipping cap and install either the 1/4” or 1/8” inlet adaptors. Finger-tighten the inlet adaptors, do not use tools. ▪... -
Page 4: Direct Inject Water Connection (Optional)
Direct Inject Water Connection (optional) IMPORTANT NOTICE Before turning the unit ON, make sure that the ultrapure water pressure is regulated down to 12 psi (83 kPa). DO NOT use the instrument with water pressure above 14 psi (97 kPa). AeroTrak™... -
Page 5: Connecting Sample Inlet Adaptors
Connecting Sample Inlet Adaptors Remove the plastic shipping cap on the sample inlet and connect either the 1/8” barbed or 1/4” smooth tubing inlet adaptor. Only tighten the inlet adaptor finger-tight, do not use tools. Connect the zero filter assembly for startup. -
Page 6: Zero Check
▪ The instrument will go through a self-check and the warm-up screen will be displayed. You will need to wait for all the warm-up screen red boxes to turn green before the instrument main screen will be displayed (shown below). ▪... -
Page 7: Taking Data
Taking Data ▪ To take data, go to the “Setup” tab from the initial screen and select “Recipes.” ▪ The easiest way to log data once a minute is by using the default recipe with no Zone. Click on “Edit” to change the sample time and the duration of the sampling. - Page 8 ▪ Save the recipe and exit back to the setup screen. ▪ To setup the instrument to log data using a computer or FMS software, you can query the IP address of the instrument on the setup screen by clicking on the icon “Info” as shown below. ▪...
- Page 9 ▪ To run the instrument, go back to the main screen. Click on the “Run” button as shown below. Instrument should run and log data. The instrument can be stopped whenever you desire. To review and download data, insert a USB thumb drive first and then click on the Data tab.
- Page 10 ▪ Click on “Export As” to save to a file. You can enter the filename as shown below. ▪ To download data selected by Zone and optionally filtered by date, make the choices on the form below and click on “Export” button. ▪...
-
Page 11: Maintenance Screen
▪ To clear any logged data, on the Setup Screen, click on “System” icon and then click on “Clear Samples” as shown below. Maintenance Screen • For access to onboard user maintenance actions, go to the “Setup” tab. • Click on “Device.” Quick Start and Troubleshooting Guide... -
Page 12: Field
• Select “Maintenance." The maintenance screen has a number of useful features as described below. Field Description Prime Wicks Whenever wicks are replaced or the unit is fully shut off for prolonged periods of time (> 1 day), wicks need to be primed. -
Page 13: Powering The Unit Down
Powering the Unit Down ▪ To turn off the instrument, press the power switch and the following screen will appear. ▪ The unit can be powered down by pressing the Turn Off button. You DO NOT need to have the fill and drain bottles connected to the unit after it is completely powered down. -
Page 14: Troubleshooting
Troubleshooting Symptom Possible Cause Corrective Action Counts are too low Instrument is being operated outside Operate instrument within specifications. temperature or relative humidity specifications. Internal parts have been damaged because Return to factory or factory authorized instrument was stored at a temperature service centers for service. - Page 15 Symptom Possible Cause Corrective Action Instrument does not meet Bad wicks Replace wicks. Wicks may be replaced by zero count specification an authorized distributor or end user. The (<1 particle/5 mins) (cont.) procedure for replacing wicks in included in the User Manual if an end user is confident to perform this task.
- Page 16 _____________________ TSI and TSI logo are registered trademarks of TSI Incorporated in the United States and may be protected under other country’s trademark registrations. TSI Incorporated – Visit our website www.tsi.com for more information. Tel: +1 800 680 1220 India Tel: +91 80 67877200 Tel: +44 149 4 459200 China...
Need help?
Do you have a question about the AeroTrak 9001 and is the answer not in the manual?
Questions and answers