
Related Manuals for TSI Instruments SIZER EEPS 3090


Summary of Contents for TSI Instruments SIZER EEPS 3090
- Page 1 ENGINE EXHAUST PARTICLE SIZER™ (EEPS™) SPECTROMETER MODEL 3090/3090AK OPERATION AND SERVICE MANUAL P/N 1980494, REVISION J MARCH 2015...
- Page 3 Product Overview Unpacking and Setting Up ENGINE EXHAUST PARTICLE Quick Start SIZER (EEPS) SPECTROMETER MODEL 3090/3090AK Instrument Operation Software Operation OPERATION AND SERVICE MANUAL General Care, Troubleshooting and Service Appendixes and Index...
- Page 4 M a n u a l H i s t o r y The following is a history of the Model 3090/3090AK Engine Exhaust ™ (EEPS™) Spectrometer Operation and Service Manual, Particle Sizer P/N 1980494. Revision Date January 2004 April 2004 March 2005 March 2006 August 2006...
- Page 5 W a r r a n t y Part Number 1980494 / Revision J / March 2015 Copyright ©TSI Incorporated / 2004–2015 / All rights reserved Address TSI Incorporated / 500 Cardigan Road / Shoreview, MN 55126 / USA Fax No. (651) 490-3824 E-mail Address particle@tsi.com...
- Page 6 Buyer and all users are deemed to have accepted this LIMITATION OF WARRANTY AND LIABILITY, which contains the complete and exclusive limited warranty of Seller. This LIMITATION OF WARRANTY AND LIABILITY may not be amended, modified or its terms waived, except by writing signed by an Officer of Seller.
- Page 7 S a f e t y This section gives instructions to promote safe and proper operation of the Model 3090 Engine Exhaust Particle Sizer™ (EEPS™) Spectrometer. Samples of warnings and information on labels attached to the instrument chassis are also presented. D e s c r i p t i o n o f C a u t i o n S y m b o l The following symbol and an appropriate caution statement are used throughout the manual and on the EEPS spectrometer to draw attention to...
- Page 8 Caution or Warning Symbols The following symbols may accompany cautions and warnings to indicate the nature and consequences of hazards: Warns you that uninsulated voltage within the instrument may have sufficient magnitude to cause electric shock. Therefore, it is dangerous to make any contact with any part inside the instrument.
- Page 9 Caution, No Serviceable Parts Label (back of cabinet) Customer Service Label (back of cabinet) High-Voltage Symbol Label (interior, on power entry module) Ground Symbol Label (interior, bottom, next to ground stud) Safety...
- Page 10 L i f t i n g C a u t i o n The EEPS spectrometer weighs 32 kg (70 lbs). To protect your back when lifting: Get help from another person to move the instrument. The instrument is equipped with handles to allow for two people to safely lift it.
-
Page 11: Table Of Contents
C o n t e n t s Manual History .................... ii Warranty ..................... iii Safety ......................v Description of Caution Symbol .............. v Caution ....................v Warning ....................v Caution or Warning Symbols ............. vi Electrical Safety ..................vi Labels .................... - Page 12 CHAPTER 3 Quick Start ................3-1 How To Perform a Sample Run ............3-2 Step 1—Open a New File ..............3-3 Step 2—Start the Run ..............3-4 Communications Errors ..............3-5 Run Properties ................. 3-5 Viewing Data ..................3-8 CHAPTER 4 LCD Display Operation ............. 4-1 LCD Display Items ................
- Page 13 Concentration Histogram and Total Concentration Popup Menus ................5-44 3D Particle Concentration Popup Menu ........5-47 Status Bar Icons ................5-47 Shortcut Keys ..................5-48 CHAPTER 6 General Care, Troubleshooting and Service ....6-1 Basic Care of the Engine Exhaust Particle Sizer Spectrometer ..6-1 Cleaning the Cyclone ................
- Page 14 APPENDIX E Analog Output ..............E-1 How Calculations are Made ............... E-2 Specifications ..................E-4 APPENDIX F AK-Protocol ............... F-1 Introduction ..................F-1 Interface Specifications ..............F-1 Protocol Specifications ..............F-2 AK Command Overview ..............F-4 Control Commands – (S) ..............F-4 Write Commands –...
- Page 15 5-6 Popup Menu for the Concentration Histogram Window ...... 5-9 5-7 Playback Setup Dialog Box ............... 5-11 5-8 Use the Mouse to Directly View Data Values ........5-13 5-9 Print Preview ..................5-14 5-10 Export Data Options Dialog Box ............. 5-15 5-11 Sample Export File ................
- Page 16 6-11 Unclip the Wiring Harness Retainer..........6-12 6-12 Cleaning Tool .................. 6-12 6-13 Cleaning the Charger Column ............6-13 6-14 Remove the Charger Sheath Flow Tube from the Charger Column ................6-14 6-15 Remove the Column Retaining Screws .......... 6-15 6-16 Disconnect the Electrometer Ribbon Connector ......
- Page 17 6-1 Maintenance Schedule ..............6-2 6-2 Non-Fatal Error Flags ..............6-30 6-3 Fatal Error Flags................6-32 D-1 Signal Connections for RS-232 Configurations ....... D-1 Contents...
- Page 18 (This page intentionally left blank) Model 3090/3090AK Engine Exhaust Particle Sizer Spectrometer...
-
Page 19: About This Manual
A b o u t T h i s M a n u a l P u r p o s e This is an operation and service manual for the Model 3090/3090AK Engine Exhaust Particle Sizer™ (EEPS™) Spectrometer. R e l a t e d P r o d u c t L i t e r a t u r e The following TSI product manual may be of interest. - Page 20 (This page intentionally left blank) xviii Model 3090/3090AK Engine Exhaust Particle Sizer Spectrometer...
-
Page 21: Model 3090 Engine Exhaust Particle Sizer Spectrometer
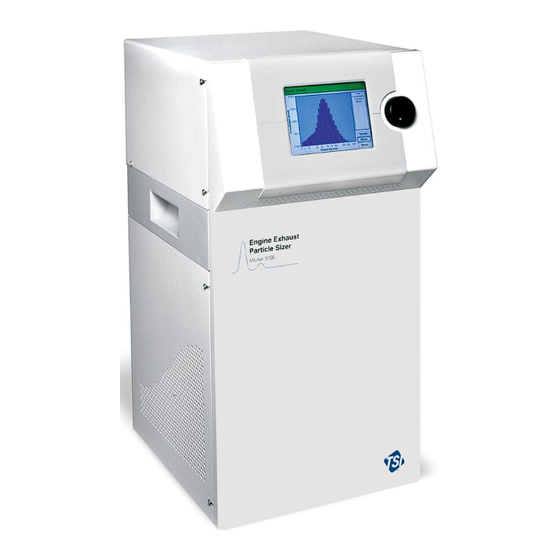
C H A P T E R 1 P r o d u c t O v e r v i e w This chapter contains an introduction to the Model 3090 Engine Exhaust Particle Sizer™ (EEPS™) Spectrometer (U.S. patent No. 7,230,431) and provides a brief explanation of how the system operates. - Page 22 A p p l i c a t i o n s The Model 3090 Engine Exhaust Particle Sizer spectrometer is ideal for analysis of a wide range of engine exhaust situations. Engine tailpipe measurements Engine Dynamometer test cells ...
-
Page 23: Chapter 1 Product Overview
I n s t r u m e n t D e s c r i p t i o n Use the following information to familiarize yourself with the location and function of controls, indicators, and connectors on your Model 3090 Engine Exhaust Particle Sizer Spectrometer. -
Page 24: Back Panel
B a c k P a n e l As shown in Figure 1-3, the back panel of the Model 3090 has power and data connections, an analog and trigger input/output connection, an aerosol inlet, outlet, and a cooling fan. Fan Guard/Filter Inlet/Cyclone Outlet... -
Page 25: Aerosol Inlet/Cyclone
Aerosol Inlet/Cyclone The aerosol inlet is designed for use with the supplied Cyclone (Model 1031083). The cyclone removes large particles outside the instrument measurement range that can cause counting errors. For remote sampling, tubing may be attached to the cyclone inlet. The cyclone is ®... -
Page 26: Analog And Trigger Input/Output
Analog and Trigger Input/Output The Analog and Trigger Input/Output connection is provided to allow the use of various triggers to synchronize the EEPS spectrometer data with another instrument or analog signal. These connections are fully electrically isolated from the rest of the instrument up to 500 volts. Details of the functions of each connection are listed in the table below: Table 1-1 Analog and Trigger Input/Output... -
Page 27: Analog Voltage Out Channels 1-4
Analog Voltage Out Channels 1–4 In addition to RS-232 serial communications for data transfer, particle concentration can be output by the EEPS spectrometer as analog voltages, to be readily integrated with other instruments on common laboratory data acquisition platforms requiring analog inputs. The EEPS spectrometer provides four independently configurable analog channels for this purpose. - Page 28 Particles then enter the sizing region through an annular gap, where they meet a stream of particle free sheath air. The sizing region is formed by the space between two concentric cylinders. The outer cylinder is built from a stack of sensing electrode rings that are electrically insulated from each other.
-
Page 29: Components Of The Eeps System
C H A P T E R 2 U n p a c k i n g a n d S e t t i n g U p Use the information in this chapter to unpack your Model 3090 Engine Exhaust Particle Sizer™... - Page 30 U n p a c k i n g The Engine Exhaust Particle Sizer spectrometer comes assembled with protective coverings on the inlets and electrical connections. To prevent contamination, do not remove the protective covers until you are ready to use the instrument.
-
Page 31: Chapter 2 Unpacking And Setting Up
Figure 2-1 Removing the Shipping Strap If anything is missing or appears to be damaged, contact your TSI representative, or contact TSI Customer Service at 1-800-874-2811 (USA) or 001-(651) 490-2811. Chapter 6 includes instructions on returning the EEPS spectrometer to TSI Incorporated. Unpacking and Setting Up... -
Page 32: Setting Up The Engine Exhaust Particle Sizer Spectrometer
S e t t i n g U p t h e E n g i n e E x h a u s t P a r t i c l e Sizer S p e c t r o m e t e r The following provides information for setting up the Model 3090 Engine Exhaust Particle Sizer (EEPS) spectrometer. -
Page 33: Connecting Power
To Aerosol Inlet on Instrument Union Fitting Connect Cyclone to Union Fitting Aerosol In Removable Base Figure 2-2 Cyclone Assembly Connecting Power 1. Connect the supplied power cord to the receptacle at the back of the instrument. The cord has been supplied with the appropriate connector for your country. -
Page 34: Installing The Engine Exhaust Particle Sizer Software
Installing the Engine Exhaust Particle Sizer Software Install the EEPS software as described below. Computer Requirements To use this software we recommend a personal computer with the following minimum features, components, and software: An SVGA color monitor. ® Windows 7 operating system or newer. - Page 35 The setup program creates a folder (directory) called “Engine Exhaust Particle Sizer” on your hard disk (assuming you accepted the default folder name). The folder contains the required program files and sample data files. The setup program also creates a new item in the Start Menu called “TSI” and an icon on your desktop for the EEPS software.
- Page 36 (This page intentionally left blank) Model 3090/3090AK Engine Exhaust Particle Sizer Spectrometer...
-
Page 37: Eeps Warm-Up Display Screen
C H A P T E R 3 Q u i c k S t a r t Ease of operation is a key feature of the Model 3090 Engine Exhaust Particle Sizer (EEPS) spectrometer. After you are familiar with the components identified in Chapter 1 and have performed the setup steps in... -
Page 38: How To Perform A Sample Run
The Engine Exhaust Particle Sizer desktop appears as shown in Figure 3-2. Figure 3-2 The Engine Exhaust Particle Sizer Desktop H o w T o P e r f o r m a S a m p l e R u n There are two steps to collecting sample data. -
Page 39: Step 1-Open A New File
Step 1—Open a New File Select File|New or or <Ctrl><N> on the toolbar. The dialog box shown in Figure 3-3 opens on your desktop. Figure 3-3 Open a New File Select a filename (and, optionally, a location other than the EEPS folder). The default name is “EEPS1”... -
Page 40: Step 2-Start The Run
Step 2—Start the Run Start the run one of three ways: Select Run|Start Data Collection. Click on the toolbar. Press <F10>. Each time you start a new run, you are shown the run properties you will use. The Run Properties dialog box shown in Figure 3-4 opens on the desktop. -
Page 41: Communications Errors
When the sample finishes, data for the sample is stored in the file, but the windows remain open. To stop data collection before the selected run length time is complete, select Run|Stop Data Collection or on the toolbar. Communications Errors If you get the following error message (Figure 3-5) when you try to start a new sample, there is a communications problem between the computer and instrument (i.e., the cable is not connected) or a connection is already open... - Page 42 Title Enter a descriptive title for the sample. This title will appear as a heading on various windows to identify this sample. The maximum number of characters allowed is 79. Scheduling Run Length (hh:mm). Enter a run length by selecting the number of hours and minutes you want to collect data for this run.
- Page 43 Note that this checkbox always defaults to “off”. If using it for consecutive runs, it must be checked each time. Hide Invalid Values Check this box to have the software hide any invalid data values in its graphs and tables. An invalid data value is one that is received by the instrument under a serious or fatal error condition.
- Page 44 Save Settings to File.../Load Settings to File... Use these two buttons to save the run settings you have set up and recall them for later use. To save the current settings, click the Save These Settings... button and enter a filename (and, if desired, a different directory/folder/drive) and then select Save.
-
Page 45: Sample Data
Figure 3-6 Sample Data 2. To toggle the graph scale between logarithmic and linear display modes, use the toolbar buttons. 3. To toggle the display units between number concentration and dN/dlogDp, use the toolbar buttons. 4. Using the mouse, point to a location in the Run View (contour graph) and click the left mouse button. -
Page 46: Popup Menu For The Histogram Window
5. To view the data at a different time resolution, select a different averaging interval using the drop-down style selector on the toolbar (see figure). Depending on the length of the run, you can select an averaging interval from .1 second to 60 minutes. -
Page 47: Lcd Display Items
C H A P T E R 4 L C D D i s p l a y O p e r a t i o n This chapter provides information on the features and functions of the LCD display and the control knob. Refer to Chapter 5 for detailed operation information of the Engine Exhaust Particle Sizer (EEPS) software program... -
Page 48: Status Bar
Status Bar The Status Bar indicates instrument status. Possible messages include: Warming Up, Normal, etc. Refer to Chapter 6 for a complete list of messages and actions you should take. Menu Options There are three menu options. Menu Option Description Cursor View individual particle channels. -
Page 49: Diagnostics Information
Setting Options Description Chargers Off/On Use this option to turn both chargers on or off. When Off is selected, the status bar displays “Chargers Turned OFF.” Column Heater Off/On Turns the column heater on or off. Turn the heater on when the instrument is in a cool (i.e., air conditioned) environment and sampling from a warm, humid environment to prevent condensation that could cause... -
Page 50: Concentration Display
Pause/Resume Select Pause/Resume to start and stop real-time data display. The button changes from Pause to Resume each time it is selected. You must select Pause, before you can use the Cursor menu item, see below. Concentration Display While running a sample, you can view particle size data using the CURSOR (see above). - Page 51 C H A P T E R 5 S o f t w a r e O p e r a t i o n This chapter provides specific information for the Model 3090 Engine Exhaust Particle Sizer™ (EEPS™) software program including: ...
-
Page 52: Start The Engine Exhaust Particle Sizer Program
S t a r t t h e E n g i n e E x h a u s t P a r t i c l e S i z e r P r o g r a m To start the program, proceed as follows: From the Windows desktop, press the Start menu and select Programs|TSI|Engine Exhaust Particle Sizer. -
Page 53: Open An Existing File
O p e n a n E x i s t i n g F i l e 1. Select File|Open or on the toolbar. 2. When the Open file dialog box appears, it shows the files available in the default file location. The default file location is Program Files/TSI/Engine Exhaust Particle Sizer. -
Page 54: Selecting A Particle Histogram To Display
S e l e c t i n g a P a r t i c l e H i s t o g r a m t o D i s p l a y To select a time at which to display a particle histogram during a run, click on the “contour graph”... -
Page 55: Maximum Concentration
To continue, select an adjacent time window using the arrow keys on the keyboard or use the mouse to point and click at another location on the graph. Maximum Concentration The maximum concentration limits for each channel are plotted as a red line in the Concentration Histogram window. -
Page 56: Minimum Concentration
Minimum Concentration Similarly, when the values shown in the Concentration Histogram window are small, it is useful to note the minimum concentration level defined for a given particle size or channel. The minimum concentration is shown for each channel in this graph as a yellow line. In the graph in Figure 5-4, this minimum concentration level is more apparent in a distribution where the concentration values measured by the instrument are relatively low. -
Page 57: Changing The Time Resolution
Changing the Time Resolution To view data at different time resolutions, select an averaging interval in the average interval drop-down selector on the toolbar (see figure). Depending on the length of the run, you may select averaging intervals from .1 second to 60 minutes. - Page 58 Finally, to select the maximum concentration value, use the drop-down Concentration Scale selector on the toolbar (see below examples for linear and log). Model 3090/3090AK Engine Exhaust Particle Sizer Spectrometer...
-
Page 59: Changing The Weighting In The 2D Histogram
Changing the Weighting in the 2D Histogram To view data in the 2D histogram graph using different weighting, proceed as follows. 1. Open a Model 3090 Engine Exhaust Particle Sizer data file. 2. Make the concentration histogram window active. 3. Right-click the mouse to display the popup menu (Figure 5-6). Figure 5-6 Popup Menu for the Concentration Histogram Window 4. -
Page 60: Using An Alternative Inversion Matrix
U s i n g a n A l t e r n a t i v e I n v e r s i o n M a t r i x Chapter 3 describes how to select an alternate matrix to upload to the instrument before starting a new run. -
Page 61: Matrix File Format
Matrix File Format A matrix file is a file with the extension “.matrix” and consists of a header string followed by 22 rows x 33 columns of floating point values. The header string “TSI 3090/3091 Matrix” identifies it as a matrix file. Values are separated by either a comma or a tab character. -
Page 62: Select A Data Hot Spot
3. If you select Full Speed for Update Rate, the data is played back at full speed in the 3D graph view only. All other views are minimized until playback is complete or you stop playback. 4. If you select an update rate of 2x/second or 1x/second, all views are updated at that rate. -
Page 63: Delete Data
Figure 5-8 Use the Mouse to Directly View Data Values D e l e t e D a t a To redo a run or delete data for a run just taken, on the toolbar select Run|Delete or . A verification message is displayed. You can only delete data for the run you just collected. -
Page 64: Print Information Displayed On The Desktop
P r i n t I n f o r m a t i o n D i s p l a y e d o n t h e D e s k t o p Print the information displayed in the active window on the desktop as follows (a printer must be properly installed): 1. -
Page 65: Export Data To A File
E x p o r t D a t a t o a F i l e Data from a Model 3090 EEPS file can be exported for use in another ® ® program such as Microsoft Excel or Microsoft Access programs. - Page 66 3. Select the type of data you want to export, the data range, the type, averaging interval, and format of the file to which you want to export the data. Refer to Table 5-1 for a description of the parameters. Table 5-1 Export Data Options Parameter...
- Page 67 Parameter Description Time Range and Resolution From/To Starting time in the run to begin exporting data. Use Averaging Interval Just as the averaging interval can be when viewing the data, it can be set for the exported data independently. Display Time as: Format of the time corresponding to each data point in the exported output.
-
Page 68: To Automatically Export Data
Figure 5-11 Sample Export File To Automatically Export Data To export data automatically at the end of the run to a file for use in ® another program (such as Microsoft Excel spreadsheet software): 1. When setting up the properties for the run, select Auto-Export on the Run Settings tab. -
Page 69: Arrange Open Windows/Change Layout
A r r a n g e O p e n W i n d o w s / C h a n g e L a y o u t When several windows are open on the desktop, it is helpful to arrange them for easier viewing. -
Page 70: Desktop Menus
Nearly all menu items are available from both a desktop menu and a popup menu, though a few items are only available in one or the other. This section presents the items of the desktop menus first and then describes the menu items that are available only through the popup menus. - Page 71 Select File|New or or <Ctrl><N> to open a new file and prepare to collect sample data. After you select New, you are prompted to enter a filename. Accept the default filename or enter any filename you chose then select OK. A Run View window opens on the desktop with the filename you entered.
- Page 72 Save As Select File|Save As or to save data to a new filename. (The file contents are duplicated to the new filename. To delete the original filename ® ® later, use Windows Explorer to do so.) After you select Save As, select a drive/directory in the file dialog box. The same filename can be used if you save the file to another drive/directory, but to save the file to the same directory, you must give it a new name.
-
Page 73: Run Menu
The list provides a shortcut to these files so you can bypass the Open command. To open one of the files listed, use the mouse to highlight it and click the left mouse button. The file opens on the desktop. Exit Select File|Exit to end the program. -
Page 74: Playback Menu
Playback Menu The Playback menu lets you display the sample data series, so that many timed samples can be viewed quickly, visually identifying trends or special events from a large list of samples. The playback feature was described earlier in this chapter under “Playback Run.”... -
Page 75: Options/Parameters Of The Concentration Scale Dialog Box
Concentration Scale Select Concentration Scale to open the Scale dialog box (Figure 5-16). Figure 5-16 Concentration Scale Dialog Box Use this dialog box to set options and parameters as described in Table 5-2. Make your changes and select OK. Table 5-2 Options/Parameters of the Concentration Scale Dialog Box Option/Parameter Description... - Page 76 Color Select Format|Color or to change the colors used to display items in the active window. When Format|Color is selected, the Graph Color or Table Color window opens depending on the active window on the desktop (Figure 5-17 shows both). These windows include a preview screen, a drop down list and a color palette.
- Page 77 The items selectable for windows containing graphs are: Window Background Plot Area Background Labels Axis Data View Boundaries Data Hotspot Lines The items selectable for windows containing tables are: Window Background Cell Text ...
- Page 78 Use this dialog to change the color of the following items: Data Highlighted Data Window Background Graph Background Labels Axis Font Style Select the Format|Font|Style… menu to change the style of the text in all graphs or tables.
-
Page 79: View Menu
View Menu The View menu lets you select the view windows you may open on the desktop. A checkmark next to an item indicates the item is already open. If it is not visible, look under the Windows menu to find the item and make it the active window. - Page 80 Particle Table Select the Particle Table menu item when you want the Particle Table window open on the desktop (Figure 5-22). Figure 5-22 Particle Table Window Particle Histogram Select the Particle Histogram menu item when you want the Particle Histogram window open on the desktop (Figure 5-23). Figure 5-23 Particle Histogram Window 5-30...
- Page 81 Total Concentration Select the Total Concentration menu item when you want the Total Concentration window open on the desktop (Figure 5-24). Figure 5-24 Total Concentration Window Software Operation 5-31...
- Page 82 Instrument Status <Ctrl><I> This menu item is available at all times. You do not need to have a data file open in order to view instrument status. When you select the Instrument Status menu item, a dialog window opens detailing the status of the instrument as in Figure 5-25.
-
Page 83: Instrument Status Parameters
Table 5-3 Instrument Status Parameters Parameter Description Sheath Flow Volumetric flow rate of the particle free sheath air flow in liter per minutes. Sample Flow Volumetric flow rate of the sample flow, in liter per minutes. Sample flow plus extraction flow equals the aerosol inlet flow. - Page 84 Parameter Description Electrometers Electrometer Offsets Press this button to open a window which will display the and RMS offsets and RMS values for each of the electrometer channels (see Figure 5-26). Zero the Electrometers Pressing this button will start the process of zeroing the electrometers on the instrument (see Figure 5-27 to Figure 5-29).
- Page 85 When the Zero the Electrometers... button is pressed, the following message box is displayed (Figure 5-27). To continue with the zeroing procedure, select the Yes button. Refer to the "Troubleshooting" section in Chapter 6 which discusses this procedure and some possible reasons for doing a zero on the instrument.
- Page 86 When the zeroing is complete, you will see a message window like this: Figure 5-29 Zero Electrometers Zeroing Complete Figure 5-30 Instrument Status Expanded 5-36 Model 3090/3090AK Engine Exhaust Particle Sizer Spectrometer...
- Page 87 When the instrument status dialog is expanded (>>more button is pressed), a graph showing current particle concentration similar to the instrument front panel is displayed. Control the data displayed in the graph in the following ways: Press the Start Sampling button to begin sampling. The graph will begin updates of current particle concentration once per second.
- Page 88 Weighting symbols. These are used to represent three predefined values: Number(1), Surface(3.1416), and Volume(.5236). Figure 5-31 Analog Out Setup Voltage Select the voltage range for analog outputs. Either 0–5 volts or 0-10 volts. Range Select whether the channel will display the analog voltage response lin/log linearly proportional to concentration (lin) or with a logarithmic (Log) response characteristic.
- Page 89 The Maximum Value is 1e38, minimum is 0.0000. If 0.000, output Weighting will be 0.000. Density The Maximum Value is 1000, minimum is 0.0000. If 0.000, output will be 0.000. Spin Control but values can be entered manually. The Maximum Min/Max Value is 1e38, minimum is 0.000 lin or 0.001 log.
-
Page 90: Window Menu
Window Menu Use the Window menu items (Figure 5-32) to select your window layout, close all windows, and open, close and arrange the windows on your ® desktop. Refer to your Windows documentation, if necessary, for an example of what the cascade, tile horizontal, and tile vertical commands do. -
Page 91: Help Menu
Help Menu The Help menu (Figure 5-33) provides access to information about the program. Figure 5-33 Help Menu Help Manual ® ® Select Help Manual to open a PDF file of this manual. Adobe Acrobat Reader must be installed on your computer to view the manual. The PDF file of the manual is searchable and printable. - Page 92 Menu Item For a description, see ... Concentration Scale ... Format Menu Show Max Concentration Value Below Set Analog Scale Below Analog Input Labels... Below Font... Format Menu Copy View Menu Undo Zoom Format Menu Print File Menu Print Preview File Menu Properties File Menu...
-
Page 93: Particle Table Popup Menu
Analog Input Labels Select Analog Input Labels to open a dialog box (Figure 5-36) that lets you enter new labels for the analog inputs that are displayed in the analog graph in the lower section of the Run View window. Enter any text up to 47 characters. -
Page 94: Concentration Histogram And Total Concentration Popup Menus
Load Density Values... Select Load Density Values to load previously saved density values from a text file. When you select this menu item, a Load Density File dialog box opens. Navigate to the file you want to use and select Open. The density values are read and displayed in the density column of the table. -
Page 95: Weight Menu
Menu Item For a description, see ... Concentration Scale... Format Menu Weight Below View Boundaries Below Graph Type Below Grid Lines Below Color... Format Menu Font... Format Menu Copy View Menu Print File Menu Print Preview File Menu Weight Use the Weight menu to choose how to “weight” the units that are displayed. - Page 96 View Units Description Volume Volume represents the total volume of the particles per unit volume of air sampled (i.e., volume concentration expressed as nm ). The volume concentration calculation assumes that all the particles are perfect spheres. Volume concentration is calculated by: ...
-
Page 97: 3D Particle Concentration Popup Menu
3D Particle Concentration Popup Menu Figure 5-40 3D Particle Concentration Popup Menu Menu Item For a description, see ... Concentration Scale... Format Menu Graph Type Below Color... Format Menu Font... Format Menu Copy View Menu Print File Menu Print Preview File Menu Graph Type Select Graph Type to select the type of graph to display in the active... -
Page 98: Shortcut Keys
Icon/Text Description Matrix Name of the matrix currently configured on the instrument for new Name runs or, the name of the matrix used to calculate the concentration data for the current file. Refer to the description for the Run|Properties dialog. Dilution The current dilution factor. -
Page 99: Basic Care Of The Engine Exhaust Particle Sizer Spectrometer
C H A P T E R 6 G e n e r a l C a r e , T r o u b l e s h o o t i n g a n d S e r v i c e This chapter is written for a service technician with skill in both electronics and mechanics. -
Page 100: Cleaning The Cyclone
Table 6-1 Maintenance Schedule Maintenance Frequency Remove the cyclone cover and clean interior surfaces 100 hours of operation or as needed (especially the wall opposite the inlet nozzle). Check/clean the charger electrodes. 100 hours of operation Clean the column and outer electrode. 500 hours of operation Clean the high voltage column and sensing electrodes. -
Page 101: Cleaning And Replacing Charger Needles
C l e a n i n g a n d R e p l a c i n g C h a r g e r N e e d l e s If you receive an error code (Tables 6-2 and 6-3) identifying a problem with either the positive or negative charger current or voltage, you will need to clean or replace the electrode in the charger head. -
Page 102: Remove Top Panel
Figure 6-1 Remove Top Panel 3. Disconnect the sample inlet tube from the charger column (Figure 6-2). Figure 6-2 Disconnect Sample Inlet Tube Model 3090/3090AK Engine Exhaust Particle Sizer Spectrometer... -
Page 103: Remove The Screws Of The Negative Charger Assembly
4. The negative charger is located closest to the top of the charger column (Figure 6-3). Remove the second set of screws (3) using an Allen wrench (provided in the accessory kit). Loosen all screws ½ turn, then remove each completely and put them aside for reassembly. Figure 6-3 Remove the Screws of the Negative Charger Assembly 5. -
Page 104: Remove The Honeycomb For Reassembly
6. As you lift the charger head, note the honeycomb flow straightener. The “honeycomb” may be dislodged, it may stay inside the charger assembly, or it may stay inside the column. If the honeycomb remains in the charger assembly or inside the column, use a needle nose tweezers to remove it (Figure 6-5). - Page 105 Figure 6-6 The Charger Needle 9. Use a fine-tipped pair of tweezers, to gently grab the contaminated needle and draw the tweezers up, using care not to bend the needle as you do so. Do not use solvents to clean the needle. If the needle bends, use the tweezers to straighten it.
-
Page 106: Hold The Flange With Tweezers
Figure 6-7 Hold the Flange with Tweezers 4. Screw a new charger wire/cone tip (provided in the accessories kit) onto the charger stem. A tweezers or pliers may be needed to hold the flange with holes to keep it from turning. Tighten the charger wire/cone tip so that it is bottomed-out and tight. -
Page 107: Cleaning Or Replacing The Positive Charger Needle
Cleaning or Replacing the Positive Charger Needle W A R N I N G High voltage is accessible in several locations within this instrument. Make sure you unplug the power source to the instrument before performing maintenance procedures. The procedure for cleaning or replacing the positive charger needle is nearly identical to that for the negative charger needle, with the following exceptions: ... -
Page 108: Cleaning The Charger Column
Figure 6-9 Remove the Screws of the Positive Charger Assembly C l e a n i n g t h e C h a r g e r C o l u m n The charger column should be cleaned according to Table 6-1 or when an error code indicates there is a problem. -
Page 109: Basic Charger Column Cleaning Procedure
Basic Charger Column Cleaning Procedure Note: Because of the height of the EEPS spectrometer, it is easiest to work on the instrument when it is on the floor. Protect your back—because of its weight, always use two people to move the instrument. Perform the basic charger column cleaning as follows: 1. -
Page 110: Unclip The Wiring Harness Retainer
Unclip the wiring harness retainer using a flat-blade screwdriver, if needed (Figure 6-11). The charger wiring harness should now be free. Figure 6-11 Unclip the Wiring Harness Retainer Lift the charger head assembly off. It seals with an O-ring, so there will be some resistance as you lift the head assembly. -
Page 111: Cleaning The Charger Column
10. Using the cleaning tool with cloth, clean the inside of the cylinder by slowly inserting the tool into the space between the inner and outer column (Figure 6-13). Rotate the tool (in the direction which will not unwrap the cloth) and slowly push it down. Continue this motion until the cleaning tool has bottomed out at the bottom of the column. -
Page 112: Detailed Charger Column Cleaning Procedure
Detailed Charger Column Cleaning Procedure Note: This procedure is easier to perform on a surface that is approximately waist high. Most of the steps in this procedure can be done by one person, but several steps may require assistance. W A R N I N G High voltage is accessible in several locations within this instrument. -
Page 113: Remove The Column Retaining Screws
8. Remove the two column retaining screws (Figure 6-15). Figure 6-15 Remove the Column Retaining Screws 9. Disconnect the electrometer ribbon connector (Figure 6-16). Use caution. Pull the connector straight out so as not to damage the pin connectors (note the use of an ESD wrist strap). Figure 6-16 Disconnect the Electrometer Ribbon Connector 10. -
Page 114: Disconnect The Pressure Transducer Tube At The Column
Figure 6-17 Disconnect the Sheath Air Hose 11. Disconnect the pressure transducer tube (Figure 6-18). Figure 6-18 Disconnect the Pressure Transducer Tube at the Column 12. The four screws that hold the base of the outer column in place are covered by the heater wrapped around the outer column. -
Page 115: Column Assembly Base Screws
13. Unplug the heater cable connector (red cable) from the contact on the main board. Figure 6-19 Column Assembly Base Screws 14. Use assistance for this step. CAREFULLY lift the outer column straight up and out of the instrument chassis. Take care not to scrape the inner and outer columns together. -
Page 116: Move The Outer Column Assembly To A Clean Work Surface
15. Move the column assembly to a clean work surface as in Figure 6-20. Figure 6-20 Move the Outer Column Assembly to a Clean Work Surface 6-18 Model 3090/3090AK Engine Exhaust Particle Sizer Spectrometer... -
Page 117: Clean The Center Column
16. Although the inner column should not be dirty since the electric field repels all particles, the inner center column can now be cleaned using a soft, dry, lint-free cloth (Figure 6-21). Wipe the column using a clockwise motion, not up and down. If the accumulated particles cannot be removed with the cloth, try using a cloth dampened with acetone. -
Page 118: Clean The Rings Of The Electrometer Assembly
17. Clean the inside rings of the electrometer assembly using a soft, dry, lint-free cloth (Figure 6-22). Wipe the rings using a clockwise motion, not up and down. If the accumulated particles cannot be removed with the cloth, try using a wet cloth (distilled water first; if that does not remove the particulates, try acetone). -
Page 119: Replacing The Filter Cartridges
R e p l a c i n g t h e F i l t e r C a r t r i d g e s W A R N I N G High voltage is accessible in several locations within this instrument. Make sure you unplug the power source before removing the cover or performing maintenance procedures. -
Page 120: Pump Filters
Pump Filters To replace the pump filters, proceed as follows: 1. Locate the blue pump filters; refer to Figure 6-23. 2. Select one filter for removal and mark both ends of the tubing so you can install the new filter with flow in the proper direction. Note the orientation of the filters and direction of flow indicated on the filters. -
Page 121: Replace The Extraction Pump
R e p l a c e t h e E x t r a c t i o n P u m p Remove the left side panel of the instrument (see above) and locate the extraction pump as shown in Figure 6-24. Figure 6-24 Extraction Pump Location (inside back panel) Replace the pump as follows:... -
Page 122: Troubleshooting
T r o u b l e s h o o t i n g Baseline Noise As the instrument becomes dirty, the noise level on all channels may gradually drift up. This can be seen when there is a considerable signal even when sampling filtered air. - Page 123 In this dialog, press the Zero the Electrometers button to start the zeroing. From the Front Panel of the instrument select Menu|User Settings|Zero Electrometers. Preferably, this should be done with a filter on the inlet. However, during the zero measurement, the positive charger is turned off and the negative charger is turned on at full power which generally serves the same function if it is inconvenient to attach a filter inline.
-
Page 124: Noisy Channels
Figure 6-26 Electrometer Offset Values Noisy Channels The most common problem with the EEPS spectrometer is that one or more electrometer channels become dirty or contaminated with material. This causes the channels to indicate a signal even when filtered air is sampled by the instrument. -
Page 125: Advanced Run Settings
If the size distribution looks strange with filtered air, a good way to check if it is caused by a noisy channel is to collect the raw electrometer data. This can be done by selecting View|Instrument Status from the menu. This is a good screen to check on whether any instrument parameters are out of range (indicated by a yellow background for a reading). -
Page 126: Changing Data Export Modes Dialog Box
problem may be that this value will not be stable over time so even if it is reset to zero, it may drift over time. Note: When the Data Type is changed from Concentration to Electrometer Current (and back), a command is sent to the instrument by the software to change this mode. -
Page 127: Errors
Figure 6-30 Raw Electrometer Data After Cleaning Following cleaning, the raw electrometer channels should look more like Figure 6-30 (note different y-axis scale) with data fluctuating somewhere around 10 fA or less at 0.1 second resolution. Another important consideration is that the instrument is properly warmed up for at least 10 minutes after being powered off and back on. -
Page 128: Non-Fatal Error Flags
Error flags in Table 6-3 indicate fatal errors occurred and the associated data points cannot be used. The data points show zero (0) in a graph, but the actual data values are saved in the file. Exported data points for a given time period are set to exactly zero to indicate the invalidity of the data points. - Page 129 Error Code Error Message Suggested Action Sheath Flow Temperature Too Low Check that flowmeter connector did not come loose during shipping. Sheath Flow Temperature Too High The flowmeter is reading outside its valid range of -10°C to Sample Flow Temperature Too Low 70°C.
-
Page 130: Fatal Error Flags
Table 6-3 Fatal Error Flags Error Code Error Message Suggested Action Column Voltage Section 1 Too Low Column Voltage Section 1 Too High Column Voltage Section 2 Too Low Column Voltage Section 2 Too High Column Voltage Section 3 Too Low Column Voltage Section 3 Too High Absolute Pressure Too Low Absolute Pressure Too High... -
Page 131: Technical Contacts
52068 Aachen GERMANY Telephone: +49 241-52303-0 Fax: +49 241-52303-49 E-mail: tsigmbh@tsi.com Web: www.tsiinc.de TSI Instruments Ltd. Stirling Road Cressex Business Park High Wycombe, Bucks HP12 3ST UNITED KINGDOM Telephone: +44 (0) 149 4 459200 Fax: +44 (0) 149 4 459700 E-mail: tsiuk@tsi.com... -
Page 132: Returning The Engine Exhaust Particle Sizer Spectrometer For Service
R e t u r n i n g t h e E n g i n e E x h a u s t P a r t i c l e S i z e r S p e c t r o m e t e r f o r S e r v i c e Before returning the EEPS spectrometer to TSI for service, visit our website at http://rma.tsi.com... -
Page 133: Installing The Shipping Strap
Figure 6-32 Installing the Shipping Strap Follow the instructions below and use the shipping strap from the accessory kit to secure the column for shipping. General Care, Troubleshooting and Service 6-35... - Page 134 Refer to Figure 6-32 and follow the steps below to install the shipping strap. 1. Unplug the instrument from power. Loosen the three screws on each side and the two on the back of the top panel (they do not need to be removed).
- Page 135 A P P E N D I X A S p e c i f i c a t i o n s Model 3090 Engine Exhaust Particle Sizer (EEPS ) spectrometer operating specifications are as follows (specifications are subject to change): 5.6 to 560 nanometers Particle Size Range...
- Page 136 Indoor use. Environmental Conditions Altitude: Up to 2000 m (6500 ft). Ambient Temperature: 0° to 40° C Ambient Humidity: 0 to 90% RH (non- condensing). Over-voltage Category II. Pollution Degree II. Model 3090/3090AK Engine Exhaust Particle Sizer Spectrometer...
-
Page 137: Appendix B Theory Of Operation
A P P E N D I X B T h e o r y o f O p e r a t i o n The Model 3090 Engine Exhaust Particle Sizer (EEPS ) spectrometer builds on a tradition of TSI electrical-based measurements including the Electrical Aerosol Analyzer (EAA 3030) and Electrostatic Classifier (3071, 3080/3081/3085). -
Page 138: Size Distributions
Rather than using a unipolar charger, a very stable and predictable Krypton-85 radioactive bipolar charger was used (3,4). When combined with a Condensation Particle Counter (CPC), the DMA can be stepped through various voltages, to detect different particle sizes (5-9). Using a computer, the voltages can be automatically stepped to generate a particle size distribution. -
Page 139: Charger
Figure B-2 Schematic of EEPS Measurement Column Charger The charging of the aerosol is accomplished through two unipolar diffusion chargers. First, a negative charger puts a negative net charge on the particles to reduce the number of highly positive charged particles and to prevent overcharging in the second charger. -
Page 140: Flow Path
Flow Path After passing through a 1µm cut cyclone, the aerosol enters the charger at 10 L/min and close to atmospheric pressure (see Figure B-3). It then passes through the charging region where it receives a predictable charge. In the charger, 0.6 L/min of clean air is added to the flow to keep the charger electrode clean. -
Page 141: Flow Schematic Of The Eeps Spectrometer
boxes) at the top of any bar in the 2D histogram which has reached or exceeded this value. When a value is exceeded, the bar is clipped at the maximum value, affecting the shape of the distribution. Figure B-3 Flow Schematic of the EEPS Spectrometer Theory of Operation... -
Page 142: Selected References
EEPS, MODEL 3090 CONCENTRATION RANGE Min values are typical RMS noise with filtered inlet air 1.E+07 1.E+06 MIN, 0.1 sec avg 1.E+05 MIN, 1 sec avg MIN, 10 sec avg 1.E+04 1.E+03 1.E+02 1.E+01 1.E+00 1000 Diameter ( nm ) Figure B-4 Graph of Concentration Limits S e l e c t e d R e f e r e n c e s... - Page 143 Hoppel, W.A. [1978] “Determination of the Aerosol Size Distribution from the Mobility Distribution of Charged Fraction of Aerosols.” Journal of Aerosol Sci. 9:41-54. Hussin, A., H.G. Scheibel, K.H. Becker, and J. Porstendörfer [1983] “Bipolar Diffusion Charging of Aerosol Particles I: Experimental Results Within the Diameter Range of 4–30 nm.”...
- Page 144 (This page intentionally left blank) Model 3090/3090AK Engine Exhaust Particle Sizer Spectrometer...
- Page 145 A P P E N D I X C P a r t i c l e S i z e S t a t i s t i c s This appendix gives an explanation of the statistics calculations used by the Engine Exhaust Particle Sizer (EEPS ) software.
- Page 146 The symbols used in the formulas are defined as: c = particle counts per channel n = number weighted concentration per channel s = surface area weighted concentration per channel v = volume weighted concentration per channel m = mass weighted concentration per channel ...
-
Page 147: Pin Connectors
A P P E N D I X D S e r i a l C o m m a n d s This section is for advanced users that need to communicate with the Model 3090 for advanced calibration, troubleshooting or diagnostics. Due to the high data rate required, the actual particle count data from the instrument is sent as binary data, so it is not possible to use text-based serial commands to retrieve size distribution data from the instrument. -
Page 148: Serial Protocol
S e r i a l P r o t o c o l Baud Rate: 38,400 Data Bits: Parity: None Stop Bits: Handshaking: None S e r i a l C o m m a n d s To communicate with the Model 3090 requires a terminal program. The ®... - Page 149 3. Enter the communications (COM) port. 4. Enter the port settings described below and click OK. Serial Commands...
- Page 150 5. Under the settings tab, pick the ASCII Setup button and check the boxes shown below. 6. Now select File|Save As and save the file to the desktop for easy access. 7. Close the program and start it again from the desktop. It should automatically open a connection to the instrument.
-
Page 151: Command Summary
C o m m a n d S u m m a r y The firmware commands are be divided into the following categories: READ Commands SET Commands HELP Commands READ commands are used to read parameters from the instrument (flow rates, voltages, etc.). -
Page 152: Set Commands
Read Column Heater Read Analog Input RPCB Read PCB Revision Read Model Name Read EEPROM Default Settings Read Export Mode Read Data Simulation Read Instrument Matrix Read Instrument Matrix Name RAO,x Read Analog Out, 8 cmd types Read Debug Mode SET Commands SPID Set PID Control Parameter... -
Page 153: Detailed Command Description
D e t a i l e d C o m m a n d D e s c r i p t i o n READ Commands Read Data Record RDR,0 Unpolled mode OFF (stop streaming binary data) RDR,1 Unpolled mode ON (start streaming binary data) RDR,2 Unpolled mode ON (start streaming binary data... - Page 154 Read Flow Read Flow (numbers + text) RF,# Read Flow (numbers only) RF,S Read Flow Setpoint (numbers + text) RF,S,# Read Flow Setpoint (numbers only) Read Analyzer Voltage Analyzer Voltage (numbers + text) RAV,# Analyzer Voltage (numbers only) Read Charger Read Charger Current and Voltage (numbers + text) Return: 'CHx' [0<=CHx<=1023]...
- Page 155 Charger Flow Temperature high Extraction Flow Temperature low Extraction Flow Temperature high Analyzer Voltage Upper Section low Analyzer Voltage Upper Section high Analyzer Voltage Middle Section low Analyzer Voltage Middle Section high Analyzer Voltage Lower Section low Analyzer Voltage Lower Section high Not used Not used Positive Charger Current low...
- Page 156 Read Instrument Status Read Status (numbers + text) RIS,# Read Status (numbers) Bit No. Device Positive_Charger Negative_Charger Analyzer high voltage Analyzer high voltage offset Sheath Flow Sample Flow Extraction Flow Cabinet fan Trigger Channel 1 Trigger Channel 2 Instrument in Warm-up Mode Zero Electrometer Mode not used not used...
- Page 157 RPCB Read PCB Revision RPCB Main PCB Rev x [-<=x<=Z] High Voltage PCB Rev x [<<=x<=È] x [H<=x<=ƒ] Electrometer PCB Rev RPCB,# Read PCB Revision (numbers only) Read Model Number Read Model Number Read EEPROM Read default values. Read Export Mode Read Export Mode (numbers + text) REM,# Read Export Mode (numbers only)
-
Page 158: Set Commands
Read Analog Out RAO,R Read Voltage range [0=0-5V, 1=0-10V] RAO,L,C Read Lin/Log mode [0=Lin, 1=Log] RAO,N,C Read Normalize mode [0=Off, 1=On] RAO,A,C Read Averaging time, 1-10 [Sec] RAO,D0,C Read Minimum Diameter [nm] RAO,D1,C Read Maximum Diameter [nm] RAO,D,C Read Density, >= 0 RAO,M,C Read Multiplier, >= 0 RAO,E,C... - Page 159 Set Flow SF,1,x Sheath Flow Setpoint in L/min [0<=x<=50] SF,1,x Sheath Flow Control [ON, OFF, OPEN] SF,2,x Sample Flow Setpoint in L/min [0<=x<=20] SF,2,x Sample Flow Control [ON, OFF, OPEN] SF,3,x Charger Flow Setpoint in L/min [0<=x<=2] SF,3,x Charger Flow Control [ON, OFF, OPEN] SF,4,x...
- Page 160 SPCB Set PCB Revision SPCB,1,x Main PCB Rev [-<=x<=Z] SPCB,2,x High Voltage PCB Rev [-<=x<=Z] SPCB,3,x Electrometer PCB Rev [-<=x<=Z] Set EEPROM SEE,DEFAULT Write default values to Main PCB EEPROM. SEE,CLEAR Clear Main PCB EEPROM. Set Export Mode SEM,x Set Export Mode [0<=x<=9] SEM,0 NUMBER_DENSITY_IN_VARIABLE_NUM_CONCEN_XFR STORE_RAW_ADC_BITS_IN_VARIABLE_RAW_DATA_XFR...
- Page 161 SELM Set Electrometer Parameter SELM,RESET Reset all electrometers Wait 30 seconds after a reset to take data SELM,ZERO Initiate countdown to zero the electrometer. The countdown is updated every second and takes 45 seconds to complete. On completion the new offset and covariance values are written to the DSP and an OK will be returned SELM,STOP...
- Page 162 SDM,14 Dump Sheath Flow Temperature [Bit] SDM,15 Dump Sample Flow Temperature [Bit] SDM,16 Dump Charger Flow Temperature [Bit] SDM,17 Dump Extraction Flow Temperature [Bit] SDM,18 Dump Positive Charger Current [nA] SDM,19 Dump Positive Charger Voltage [V] SDM,20 Dump Negative Charger Current [nA] SDM,21 Dump Negative Charger Voltage [V] SDM,22...
- Page 163 A P P E N D I X E A n a l o g O u t p u t Engine Exhaust Particle Sizer™ (EEPS™) Model 3090 spectrometers (manufactured approximately August 2006 and later) come standard with four configurable analog outputs. These analog outputs offer users a convenient way to incorporate particle emission measurements into the dynamometer host data collection system.
-
Page 164: How Calculations Are Made
An example of the setting screen is shown below. Figure E-1 Analog Out Screen H o w C a l c u l a t i o n s a r e M a d e The calculations for determining the output voltages for any choice of setting are based on the formulas shown below. - Page 165 Where: dN = Particle number concentration = Particle Density K = Weighting Constant m ax = summation of channels or partial channels within the overall size m in limits specified = Particle diameter size channel limits = Particle diameter range (that can be less than one channel width) ...
-
Page 166: Specifications
S p e c i f i c a t i o n s Analog Output 4 channels; 500 V isolation Resolution 14 bit Update rate 1 Hz Output full scale Configurable; 0-5 V and 0–10 V Averaging time Adjustable; 1–10 seconds Connector type Model 3090/3090AK Engine Exhaust Particle Sizer Spectrometer... -
Page 167: Introduction
A P P E N D I X F A K - P r o t o c o l I n t r o d u c t i o n The AK-SAMT interface is a standardized communication interface for the integration of engine emissions testing equipment into automated emissions testing systems. -
Page 168: Protocol Specifications
Protocol Specifications The AK-Protocol is a text-based only protocol. Each telegram begins with STX (Start of Text) in the first byte. The “don't care” byte can be any ASCII character. The next four bytes represent the command. A blank comes next, followed by K and the channel number. - Page 169 AK-Protocol Command Types Code Type AK-SAMT Definition Type “Einstellbefehle” EXXX Write Command “Abfragen” AXXX Read Command “Steuerbefehle“ Control Command SXXX Acknowledgement Telegram Acknowledgement Description AK-SAMT Definition ???? Analyzer does not understand the instruction sent “Busy” XXXX E BS Analyzer is busy with another function XXXX = Function Code (continued on next page)
-
Page 170: Ak Command Overview
A K C o m m a n d O v e r v i e w This is an overview of the available AK commands for the instrument. Detailed descriptions of the individual commands follow on the next pages. Control Commands –... -
Page 171: Appendix F Ak-Protocol
C o m m a n d D e t a i l s Control Commands Set Stand-by Mode Command Response Description STBY K0 STBY E Set instrument to stand by-mode (turn pumps and chargers OFF) Set Measurement Mode Command Response Description SMEA K0... -
Page 172: Read Commands
Zero Electrometer Command Response Description EELM K0 ZERO EELM E Initiate zeroing of electrometer. Instrument will respond with “BS” (busy) for 45 seconds. After completion, the new offset and covariance values are written to the DSP. Note: The command is only executed if the instrument has finished the warm-up count. - Page 173 Command Response Description APH4 E B17 B18 B19…B32 APH4 K0 Non-Normalized Particle Size Histogram (dN) Particle concentration for upper 16 particle size bins averaged over one second per size bin. BX = Particle concentration of size bin X Range: 0 to 9.9999E9 [#/cm³] Format: Float Example: B32 = 1.2345E5...
- Page 174 Read Total Mass and Particle Concentration Command Response Description ATPM K0 ATPM E PM Total particle mass for all particle size bins measured over 1 second. PM = Particle Mass Range: 0 to 9.9999E9 [µg/m³] Format: Float Example: PM = 1.2345E6 ATPC K0 ATPC E PC Total particle concentration for all particle size...
- Page 175 Read Instrument Status Command Response Description ASTZ E S0 S1 S2…S11 ASTZ K0 Read current instrument status SX = 0: Feature OFF SX = 1: Feature ON Format: Text : Positive Charger : Negative Charger : Analyzer high voltage : Analyzer high voltage offset : Sheath Flow : Sample Flow : Extraction Flow...
- Page 176 Read Instrument Error Command Response Description AERR E S0 S1 S2…S63 AERR K0 Read current instrument error conditions. If no error is detected the command returns SX = 0: No Error SX = 1: Error Detected Format: Text Possible Error Conditions : Sheath Flow Rate low : Sheath Flow Rate high : Sample Flow Rate low...
- Page 177 Command Response Description AERR E S0 S1 S2…S63 AERR K0 S40 : CELM Gain Readback Error (cont.) S41 : Missed DSP Interrupt S42 : DSP Command Code Timeout Error S43 : DSP Reset Timeout Error S44 : COM1 Xmit Buffer Overflow Error S45 : Flowmeter EEPROM Error S46 : Not used S47 : Not used...
-
Page 178: Particle Size Bin Numbers
P a r t i c l e S i z e B i n N u m b e r s Particle Size Bin Number Particle Size Midpoints [nm] 6.04 6.98 8.06 9.31 10.75 12.41 14.33 16.55 19.11 22.07 25.48 29.43 33.98... -
Page 179: Index
I n d e x charger column controls, 5-33 cleaning, 6-10, 6-13 analyzer voltages, 5-33 3D graph, 5-29 charger flow, 5-33 column heater, 5-33 charger head assembly screws, 6-11 flow control, 5-33 charger needle, 6-7 neg. charger, 5-33 cleaning, 6-3, 6-9 pos. -
Page 180: Export Data Options
electrometer current, 5-16 error messages (continued) graph of concentration limits, B-6 electrometer offsets and RMS, 5-34 sheath flow temperature too graph type, 5-45, 5-46, 5-47 electrometers, 5-34 low, 6-31 grid lines, 5-45, 5-46 electrometer offsets and RMS, 5-34 errors, 6-29 more or less buttons, 5-34 Excel, 5-17 zero the electrometers, 5-34... - Page 181 matrix file format, 5-11 particle table, 5-30 READ commands (continued) matrix name, 5-48 particle table popup menu, 5-43 read firmware version, D-7 max, 5-25 pause/resume, 4-4 read flow, D-8 max concentration, 5-25 pin connectors, D-1 setpoint, D-8 maximum concentration, 5-5 playback menu, 5-24 read instrument error, D-8 measurement column, B-3...
- Page 182 SET commands (continued) weight options, 5-45 set column heater, D-13 mass, 5-46 table color dialog box, 5-26 set data simulation, D-14 number, 5-45 taking sample run, 3-2 set debug mode, D-15 surface, 5-45 technical contacts, 6-33 set digital analog converter, D-13 volume, 5-46 text, 5-17 set EEPROM, D-14...
-
Page 183: Reader's Comments
R e a d e r ’ s C o m m e n t s Please help us improve our manuals by completing and returning this questionnaire to the address listed in the “About This Manual” section. Feel free to attach a separate sheet of comments. Manual Title Model 3090 Engine Exhaust Particle Sizer Spectrometer... - Page 185 TSI Incorporated – Visit our website www.tsi.com for more information. Tel: +1 800 874 2811 India Tel: +91 80 67877200 Tel: +44 149 4 459200 China Tel: +86 10 8219 7688 France Tel: +33 1 41 19 21 99 Singapore Tel: +65 6595 6388 Germany Tel: +49 241 523030...
Need help?
Do you have a question about the SIZER EEPS 3090 and is the answer not in the manual?
Questions and answers