Table of Contents
Advertisement
Quick Links
Advertisement
Table of Contents

Summary of Contents for AGP SCS7
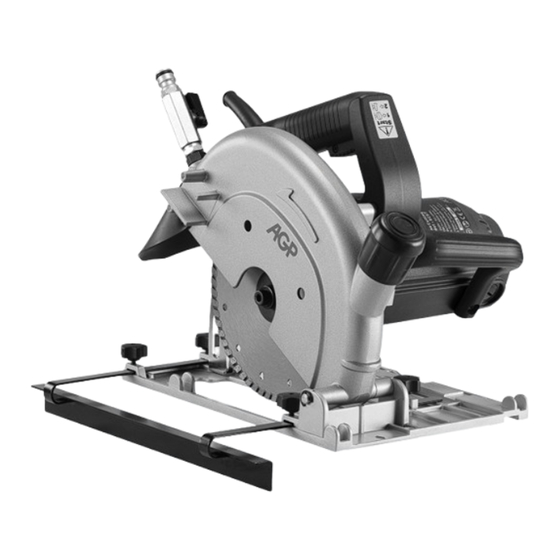
- Page 1 Stone Cutting Circular Saw SCS7 Instruction Manual...
-
Page 2: Specifications
SPECIFICATIONS Model SCS7 Voltage 220-240 V~50 /60 Hz, or 110-120 V~50/60 Hz (See Machine Nameplate) Power 1800 W (220 V), 1680 W (110 V) No Load min 5800 Arbor 22.23 mm (7/8") Max. Blade Diameter 180 mm Max. Cutting Depth... - Page 3 GENERAL SAFETY INSTRUCTIONS WARNING! Read all safety warnings and all instructions. Failure to follow the warnings and instructions may result in electric shock, fire and/or serious injury. Save all warnings and instructions for future reference. The term “power tool” in the warnings refers to your mainsoperated (corded) power tool or battery-operated (cordless) power tool.
- Page 4 Remove any adjusting key or wrench before turning the power tool on. A wrench or a key left attached to a rotating part of the power tool may result in personal injury. Do not overreach. Keep proper footing and balance at all times. This enables better control of the power tool in unexpected situations.
-
Page 5: Specific Safety Rules
Symbols used in this manual ..always wear a dust mask. V……..volts A……..amperes ..always wear hearing protection Hz……..hertz W……..watt ..wear safety-approved hard hat ~………..alternating current ………..no load speed ..Keep hands clear – pinching hazard. …..revolutions or reciprocation per minute ..DANGER! Keep hands away from cutting ..warning of general danger area and the blade. -
Page 6: Electrical Connection
completely before putting the saw down 15. Never operate the tool in an area with flammable solids, liquids, or gases. Sparks from the commutator/ carbon brushes could cause a fire or explosion. 16. There are certain applications for which this tool was designed. The manufacturer strongly recommends that this tool NOT be modified and/or used for any application other than for which it was designed. -
Page 7: Carton Contents
UNPACKING Carefully remove the tool and all loose items from the shipping container. Retain all packing materials until after you have inspected and satisfactorily operated the machine. NOTE: An appropriate diamond blade must be mounted to the machine before operating. Refer to the section of this manual: “INSTALLING THE BLADE”... -
Page 8: Water Feed System
HOW TO USE THE SIGHTING NOTCH To aid in free-hand cutting, a sighting notch is located at the front of the base plate. This mark corresponds to the blade's cutting line. Sighting notch VACUUM DUST COLLECTION Vacuum Port Cap There is a vacuum port provided on the blade cover to collect dust when operating. -
Page 9: Parallel Guide
PARALLEL GUIDE The Parallel Guide allows straight cuts to a desired distance from the edge. To mount, insert the Parallel Guide into the slot in the Base Plate and tighten the Thumb Knobs at the desired position. Parallel guide STARTING AND STOPPING TOOL Make sure that the power circuit voltage is the same as that shown on the specification plate of the machine and that switch is “OFF”... -
Page 10: Maintenance
CAUTION: Take care not to cut in a curved line. This will likely shatter the diamond blades causing a severe hazard. When the cut is finished, allow the coasting blade to come to a full stop before setting down. NOTE: Only operate the machine forwards relative to itself and never backwards. If you cut backwards there is the danger that the machine might be accelerated out of the cutting groove (recoil) and cause serious injury. - Page 11 If the replacement of the power supply cord is necessary, this has to be done by the manufacturer or their agent in order to avoid a safety hazard. WARNING: All repairs must be entrusted to an authorized service center. Incorrectly performed repairs could lead to injury or death.
-
Page 12: Exploded View
EXPLODED VIEW... -
Page 13: Parts List
PARTS LIST Parts Name Q'TY Parts Name Q'TY SOCKET CAP SCREW (M8x20xP1.25) WAVE SPRING WASHER (Ø29.5) FLAT WASHER (Ø8xØ20x3) PANHEAD TAPPING SCREW (M5x60) OUTER FLANGE MOTOR HOUSING INNER FLANGE (Ø22.2) FLAT WASHER (Ø5xØ12x1) FLAT HEAD MACHINE SCREW (M4x8xP0.7) PANHEAD MACHINE SCREW (M5x30xP0.8) BEARING COVER PLATE PANHEAD MACHINE SCREW (M5x50xP0.8) SPINDLE... - Page 14 WIRING...
- Page 15 Noise/vibration information Measured in accordance with EN 60745-2-22 Model no. : SCS7 Noise level: Sound pressure level(L ): 95.5 dB(A) Sound power level(L ): 106.5 dB(A) K= 3.0 dB =6.1 m/s K = 1.5 m/s Vibration level: The vibration emission level has been measured in accordance with a standardised test given in EN 60745; it...


Need help?
Do you have a question about the SCS7 and is the answer not in the manual?
Questions and answers