Table of Contents
Advertisement
Quick Links
Advertisement
Table of Contents

Subscribe to Our Youtube Channel
Related Manuals for FS RS3110


Summary of Contents for FS RS3110
- Page 1 RS3110 USER MANUAL...
-
Page 2: Table Of Contents
1.7 Connect Peripheral Devices ............6 1.8 Open the Display and the Server .............6 2. Description of the System Structure ............8 2.1 RS3110 Mechanical Features ............8 2.2 Schematic diagram of server back window I/O ......10 3. System Description of the System Structure ........12 3.1Motherboard Structure Diagram ........... - Page 3 RS3110 USER MANUAL 6.2 The System Started for the First Time ..........37 6.3 Other Problems and Solutions ............39 6.3.1 Prepare the System for Diagnostic procedures ....39 6.3.2 Verify the System Indicator Light ........39 6.4 Concrete Issue ................39 6.4.1 The Power Light Is Not lit ............39 6.4.2 The Screen Does not Display Characters ......
-
Page 4: Preparation For Use
RS3110 USER MANUAL 1.1 Abstract The main task of this chapter is to describe how to perform some basic preparatory work. These tasks include: Checking the shipping packaging; Selecting an appropriate location for placing the server; Checking the power settings switch;Inspecting the power cables;... - Page 5 RS3110 USER MANUAL The server can work reliably in a normal office environment. Select an environment that meets the following conditions: Clean and low in dust Meet the specific Well-ventilated and far away from the heat source environmental Stay away from environments that may encounter...
-
Page 6: The Server Is Installed On The Rack
RS3110 USER MANUAL 1.4 The Server Is Installed on the Rack All rack-type servers are compatible with a 19-inch standard rack, installation procedures are described in the shelf Installation Guide. 1.5 Check the Power Cord If the supplied AC power cord does not match the model of the place where the server is used, do not continue, replace it with a compliant power cord. -
Page 7: Add Equipment
RS3110 USER MANUAL 1.6 Add Equipment Before adding the expansion device in your server, verify that the server is not connected to power. When you add drives, expansion cards, and memory, or make any internal changes to your server, restore the server chassis. - Page 8 RS3110 USER MANUAL when the hard disk receives an access signal. If the fault occurs, record the error message displayed on the screen and hear the sound code. See the System troubleshooting chapter. www.fs.com...
-
Page 9: Description Of The System Structure
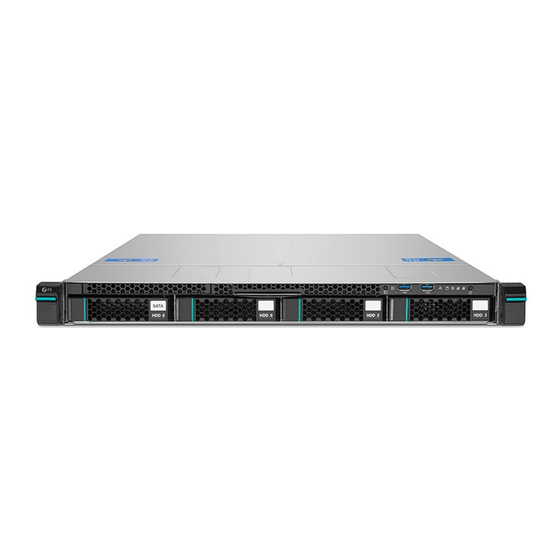
RS3110 USER MANUAL 2.1 RS3110 Mechanical Features RS3110 Enlarged view of the disk position front panel and indicator/control panel: ID key USB3.0 2, 3 warning light hard disk light system status light Network Port Indicator boot key System indicator: green... - Page 10 RS3110 USER MANUAL resounding The network connection is Network 2 green working. Indicator flashing Network 2 has data green transmission system status blue flashing The server is powered on light warning light yellow flashing Fan failure/power supply failure/high internal Description of control panel keys and interfaces: boot key Press to turn on the power when it is energized;...
-
Page 11: Schematic Diagram Of Server Back Window I/O
RS3110 USER MANUAL Weight (minimum Approx. 10kg configuration) 2.2 Schematic diagram of server back window I/O Figure 2-1 Server Rear Window I/O Schematic www.fs.com... - Page 12 RS3110 USER MANUAL Rear window IO description: Serial port for COM interface devices IPMI interface, IPMI2.0 interface, can be connected to the IPMI network cable, through this interface monitoring and management server (computer) USB2.0/3.0 USB2.0/3.0 interface, can be connected to USB keyboard and...
-
Page 13: System Description Of The System Structure
RS3110 USER MANUAL 3.1Motherboard Structure Diagram 3.2 CPU 3.1.1 CPU Overview Intel ® Single socket H4 (LGA 1151) supports Intel® Xeon® processor E-2100/2200, Intel® 8th/9th Gen. Core™ i3/I5/I7/I9 series, Intel® Celeron® and Intel® Pentium® 3.1.2 CPU Installation Steps Installation Steps: 1. -
Page 14: Memory
RS3110 USER MANUAL 3.2 Memory 3.2.1 Memory Summary The server has 4 RAM slots, and the capacity can be expanded up to 512GB; It supports DDR4 2666MT/s ECC unbuffered memory, and one CPU supports dual-channel read technology. 3.3 Video Controller The motherboard integrates the AST2500 display chip, which is connected to the monitor via the VGA connector. -
Page 15: Network Controller
RS3110 USER MANUAL 3.5 Network Controller Two integrated high-performance Gigabit NICs (Intel® I210 GbE chips) provide highspeed network connectivity. 3.6 Keyboard and Mouse Keyboard and mouse controllers support USB-compatible keyboards and mice. 3.7 Optical Drives and Floppy Drives The server is configured with an optional SATA optical drive, an optional USB optical drive and a floppy drive emulation disk. - Page 16 RS3110 USER MANUAL Red Hat Enterprise Linux* 7U1 64bit Red Hat Enterprise Linux* 7U2 64bit Red Hat Enterprise Linux* 7U3 64bit Red Hat Enterprise Linux* 7U4 64bit Red Hat Enterprise Linux* 7U5 64bit www.fs.com...
-
Page 17: Integrated Raid Configuration
RS3110 USER MANUAL This chapter introduces the use of the motherboard integrated SATA RAID controller to create RAID1, RAID0, and RAID10, after the creation of RAID1, the capacity of the hard disk is only half of the total capacity, and the hard disk forms a backup, which greatly improves reliability. After RAID0 is created, the read and write speed of the hard disk is increased, the reliability is reduced, and the available capacity is equal to the total capacity. - Page 18 RS3110 USER MANUAL 4.2.1.1.1 To create an array, select the Create RAID Volume option. The following menu will appear: Use the <↑> and <↓> keys to move the cursor up and down. In the **RAID Level** section, select the desired RAID level to create, with options including RAID0, RAID1, and RAID5. After selecting the RAID level and the disks for the array, press the **Create Volume** option and follow the prompts to choose 'Y' to create the array.
- Page 19 RS3110 USER MANUAL Once inside, select the array you want to delete, then press ‘DEL’ and choose ‘Y’ to delete the array. The screen will look like this: www.fs.com...
-
Page 20: Operating System Installation Instructions
RS3110 USER MANUAL This chapter describes the manual installation and driver installation of the Windows Server 2016 operating system. 5.1 Microsoft Windows Server 2016 Installation Installations This guide is suitable for the manual installation of the Microsoft Windows 2008 Server R2 SP1 operating system. -
Page 21: Installation Steps
RS3110 USER MANUAL If you do not need to load the RAID drive during the installation of the operating system on your server, you can directly start the installation. 5.1.2 Installation Steps: 1. Set the optical drive as the first boot device in the BIOS and insert the Windows 2016 Server installation disc. - Page 22 RS3110 USER MANUAL 2. Click to start the installation: 4. You need to select "Delete" to delete all partitions and install a new system, press "Next" www.fs.com...
- Page 23 RS3110 USER MANUAL 5. Select "Custom: install windows only(advanced), press the "Enter" key. 6. Select "I accept the license terms", press "Next". www.fs.com...
- Page 24 RS3110 USER MANUAL 7. Select "Datacenter Evaluation (Desktop experience)", press "Next" to install windows. After the installation, you have to install the driver, copy the driver to the USB flash drive, then install Chipset, follow the prompts until the driver is installed, as shown in the following figure.
-
Page 25: Redhat Enterpise Linux 6.8 Installation Instructions
RS3110 USER MANUAL 5.2 Redhat Enterpise Linux 6.8 Installation Instructions This guide applies to the manual installation of the Red Hat Enterprise Linux AS 6.0 U8 operating system. 5.2.1 Preparations: If your server needs to load the RAID driver when installing the operating system, please prepare a USB flash drive and the random driver CD. - Page 26 RS3110 USER MANUAL 3. Go to the following screen and click Next 4.The system enters the following screen, click Next www.fs.com...
- Page 27 RS3110 USER MANUAL 5. Select the system language, the default is English, click Next, see the figure below. 6. Select the keyboard type, default, click Next, see the following figure www.fs.com...
- Page 28 RS3110 USER MANUAL 7. Select the device type, default, click Next, see the following figure 8. Select the time zone and choose Chongqing as follows www.fs.com...
- Page 29 RS3110 USER MANUAL 9. Set the password for the Root user, click Next after setting, see the figure below. 10. Click on the box Use Anyway, see below www.fs.com...
- Page 30 RS3110 USER MANUAL 11. Select the type of installation, mainly on the disk operation, select the custom system partition, you can choose the last item see below (if you need to install on the array card, the driver installation method refer to the corresponding RAID controller driver installation instructions) 12.
- Page 31 RS3110 USER MANUAL 13. Click on the Format button in the prompt box, see below 14. Click the prompt box Write change to disk www.fs.com...
- Page 32 RS3110 USER MANUAL 15. The default choice is to click Next, see the picture below. 16. Select the type of system to be installed, here choose the desktop version, see the following figure (or you can choose the installation package according to demand)
- Page 33 RS3110 USER MANUAL 17. System installation is in progress, just wait, see the following picture 18. After the installation is complete, click Reboot, see the picture below. www.fs.com...
- Page 34 RS3110 USER MANUAL 19. Click Forward on the welcome page, see below. 20.By default, click Forward, see below. 21. By default, click Forward, see below. www.fs.com...
- Page 35 RS3110 USER MANUAL 22. By default, click Forward, see below. 23. Create a username and password for Forward, see below www.fs.com...
- Page 36 RS3110 USER MANUAL 24. To set the time and date, click 25.Setup is complete, click Finish, enter the system, see the following figure www.fs.com...
- Page 37 RS3110 USER MANUAL 25. Enter your username/password to enter the system, so the system installation is complete,see the following figure www.fs.com...
-
Page 38: System Troubleshooting
RS3110 USER MANUAL 6.1 Introduction to System Reset This chapter helps you check and resolve problems that you may encounter while using the Powerleader server system. <Ctrl>+<Alt>+<Del> ( Depending on Hot start: Clear the system memory and remount the operating system. - Page 39 RS3110 USER MANUAL Whether the configuration set by SSU is correct Whether the operating system is mounted correctly (see the operating system- related documentation) . Whether the server is turned on by pressing the system power button on the front panel...
-
Page 40: Other Problems And Solutions
RS3110 USER MANUAL 6.3 Other Problems and Solutions 6.3.1 Prepare the System for Diagnostic procedures Turn off the device before unplugging the cable: Turn off the external device that is connected to the system before disconnecting the external cable from the system. Failure may result in damage to the system or external devices. -
Page 41: The Screen Does Not Display Characters
RS3110 USER MANUAL 6.4.2 The Screen Does not Display Characters Check the following items: Whether the keyboard is working properly. Check to see if the "Num Lock" light is on. Whether the cable of the monitor is plugged in and whether the power is on. Many monitors now automatically turn off when not working, while when activated require a period of warm-up. -
Page 42: The Working Led Of The Hard D Rive Is Not Lit
RS3110 USER MANUAL Whether a short circuit is caused by a squeeze cable or the power connector incorrectly plugged into the power connector connector interface. If the connection is correct and there is AC power in the wall outlet, contact a technical support person or authorized dealer for assistance.
Need help?
Do you have a question about the RS3110 and is the answer not in the manual?
Questions and answers