Advertisement
Quick Links
Installation guide for :
- SPH-EVO950DAB-D7
- SPH-EVO950DAB-C-D7
Fiat Ducato X290 - model year '14 onwards
Open dash only
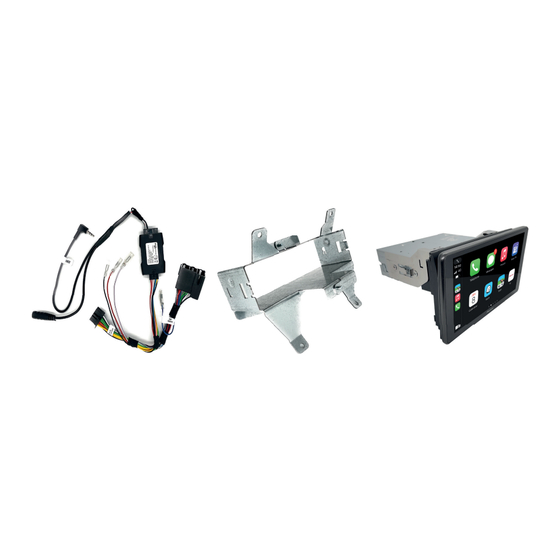
Interface
Pre-assembled SPH-EVO950DAB unit with
Depending on the kit, the interface may look different
Ducato installation kit and bracket
Original dashboard setup
Locate the two support bars left and right
Remove the storage pockets
in the dashboard
Cut the support bars in line with the dash
Dashboard after cutting
Pioneer installation manual - Fiat Ducato X290 SPH-EVO950DAB - v1.01
Advertisement

Related Manuals for Pioneer SPH-EVO950DAB-D7


Summary of Contents for Pioneer SPH-EVO950DAB-D7
- Page 1 Original dashboard setup Locate the two support bars left and right Remove the storage pockets in the dashboard Cut the support bars in line with the dash Dashboard after cutting Pioneer installation manual - Fiat Ducato X290 SPH-EVO950DAB - v1.01...
- Page 2 Black - Optional GND supply 5 - Pioneer head unit main power connector 6 - Remote output for optional external amplifi er 7 - Speed pulse wire - See step 9/10 Pioneer installation manual - Fiat Ducato X290 SPH-EVO950DAB - v1.01...
- Page 3 Open the black connector and Insert the pink cable pin (speedpulse) slide the cables out to the open position fi fty six (56) Pioneer installation manual - Fiat Ducato X290 SPH-EVO950DAB - v1.01...
- Page 4 To take out the head unit for service purposes, airvents need to be removed and clip system needs to be pushed with fl at head screwdriver in order to release the system from the dashboard. Pioneer installation manual - Fiat Ducato X290 SPH-EVO950DAB - v1.01...
Need help?
Do you have a question about the SPH-EVO950DAB-D7 and is the answer not in the manual?
Questions and answers