
Related Manuals for Cuppone Michelangelo LLKML435


Summary of Contents for Cuppone Michelangelo LLKML435
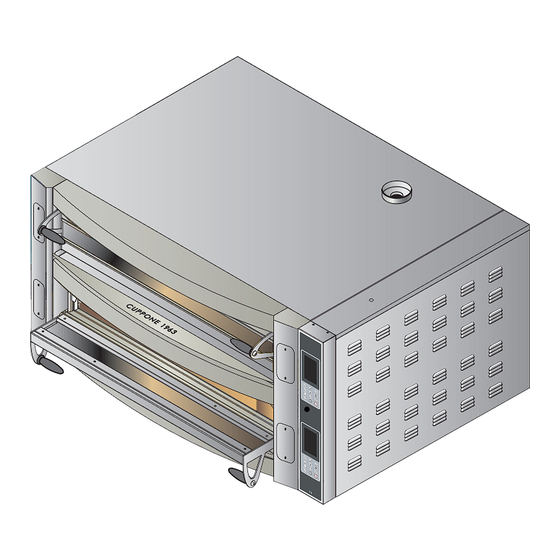
- Page 1 Michelangelo OVEN Pre-installation and installation manual LLKML435 LLKML635 LLKML635L LLKML935 Ed. 0121 - 70702520 REV06 Michelangelo - Pre-installation...
-
Page 2: Table Of Contents
Electrical connection ...................27 Pre-testing and final inspection ............36 Checking the operation and first start-up ........36 CUPPONE 1963 Error messages mod. CD ................37 Cuppone F.lli S.r.l. Warnings mod. TS ..................37 Via Sile, 36 Error messages mod. TS ................37 31057 Silea (TV) - ITALY... -
Page 3: Checks Before Purchasing
CHECKS BEFORE PURCHASING Before purchasing the oven and before its installation, check and agree with the owner that, on installation, all the following conditions are met; they are indispensable for the correct and safe installation, operation and maintenance of the oven. Check with the owner if in the place of installation there are the tools to handle the oven easily Fig. - Page 4 Checks before purchasing Survey the installation room to make sure it is • it is possible to maintain a minimum distance between Inform the owner about the necessary electrical adequate. the oven and the walls, other equipment, objects arrangements (activities to be carried out by a combustible materials In case of hot or cold qualified electrician)
- Page 5 Checks before purchasing Evacuation tube, Ø150 mm [Ø5.91 in.] (NOT supplied) Max 35°C Max 95°F Min 5°C Max 70% Min 41°F not supplied not supplied Fig. 2 min. 1000 mm. [40 in.] min. 500 mm extraction [19,7 in.] system draught The minimum side distance is 50 mm switch [1.97 in.], However we recommend you...
-
Page 6: Oven Technical Data
OVEN TECHNICAL DATA Electrical data Average Customer panel prot. Oven type Supply V Power kW Absorption A Cable type consumption kWh single-phase 230V 25.2 H07RN-F 3G4 2x32 three-phase 400V H07RN-F 5G1 4x16 three-phase 230V 14.6 H07RN-F 4G1,5 3x16 three-phase 208V 16.1 15/4 SOOW CABLE 3x16... -
Page 7: Michelangelo Ml 435 Oven Technical Data
Michelangelo ML 435 | single oven technical data 1202 [47,5] 1140 [44,884] 19 [0,748] 1183 [46,6] 1106,5 [43,562] 70 [2,756] 903 [35,551] 669 [26,4] 1183 [46,575] 949 [37,364] 157,5 [6,202] 1202 [47,5] 1183 [46,6] 19 [0,748] 406,5 [16,004] ML 435 single oven weight 169 kg - 372,5 lb 70 [2,756] weight of packaging +... - Page 8 Michelangelo ML 435 | double oven technical data 1202 [47,323] 1140 [44,884] 1106,5 [43,562] 19 [0,748] 1183 [46,575] 70 [2,756] 903 [35,551] 669 [26,4] 1183 [46,575] 949 [37,364] 157,5 [6,202] 1202 [47,323] 19 [0,748] 1183 [46,575] 406,5 [16,004] ML 435 double oven weight 302 kg - 665,7 lb 70 [2,756] weight of packaging +...
- Page 9 Michelangelo ML 435 | triple oven technical data 1202 [47,323] 1140 [44,884] 1106,5 [43,562] 19 [0,748] 1183 [46,575] 70 [2,756] 903 [35,551] 669 [26,4] 1183 [46,575] 949 [37,364] 157,5 [6,202] 1202 [47,323] 19 [0,748] 1183 [46,575] 406,5 [16,004] 70 [2,756] Ed.
- Page 10 Michelangelo ML 435 | capacity oven technical data PIZZA PIZZA TRAY Ø 35 cm [Ø 13.78 in.] Ø 50 cm [Ø 19,69 in.] 60x40 cm [23,62x15,75 in.] Ø PIZZAS PRODUCTIVITY PER HOUR BATCH E S 44-48 pizzas 11-12 Ø 35 cm [Ø 13.78 in.] 11-12 pizzas 11-12 Ø...
-
Page 11: Michelangelo Ml 635 Oven Technical Data
Michelangelo ML 635 | single oven technical data 1202 [47,323] 1498 [58,978] 19 [0,748] 1183 [46,575] 1465 [57,657] 70 [2,756] 1027 [40,427] 903 [35,551] 1307 [51,459] 157,5 [6,202] 1183 [46,575] 1202 [47,323] 19 [0,748] 1183 [46,575] 406,5 [16,004] ML 635 single oven weight 218 kg - 480,6 lb 70 [2,756] weight of packaging +... - Page 12 Michelangelo ML 635 | double oven technical data 1498 [58,978] 1202 [47,323] 19 [0,748] 1465 [57,657] 1183 [46,575] 70 [2,756] 1027 [40,427] 903 [35,551] 1183 [46,575] 1307 [51,459] 157,5 [6,202] 1202 [47,323] 19 [0,748] 1183 [46,575] 406,5 [16,004] ML 635 double oven weight 380 kg - 837,7 lb 70 [2,756] weight of packaging +...
- Page 13 Michelangelo ML 635 | triple oven technical data 1202 [47,323] 1498 [58,978] 1465 [57,657] 19 [0,748] 1183 [46,575] 70 [2,756] 1027 [40,427] 903 [35,551] 1183 [46,575] 1307 [51,459] 157,5 [6,202] 1202 [47,323] 19 [0,748] 1183 [46,575] 406,5 [16,004] 70 [2,756] Ed.
- Page 14 Michelangelo ML 635 | capacity oven technical data TRAY 60x40 cm [23,62x15,75 in.] PIZZA Ø 35 cm [Ø 13.78 in.] PIZZA Ø 50 cm [Ø 19,69 in.] Ø PIZZAS PRODUCTIVITY PER HOUR BATCH ES 66-72 pizzas 11-12 Ø 35 cm [Ø 13.78 in.] 22-24 pizzas 11-12 Ø...
-
Page 15: Michelangelo Ml 635L Oven Technical Data
Michelangelo ML 635L | single oven technical data 1140 [44,884] 1560 [61,417] 19 [0,748] 1541 [60,669] 1106,5 [43,562] 70 [2,756] 1261 [49,6] 669 [26,333] 1541 [60,669] 157,5 [6,202] 949 [37,356] 1560 [61,417] 19 [0,748] 1541 [60,669] 545,5 [21,476] ML 635L single oven weight 70 [2,756] 212 kg - 467,3 lb weight of packaging +... - Page 16 Michelangelo ML 635L | double oven technical data 1140 [44,884] 1560 [61,417] 1106,5 [43,562] 19 [0,748] 1541 [60,669] 70 [2,756] 669 [26,333] 1261 [49,6] 157,5 [6,202] 1541 [60,669] 949 [37,356] 1560 [61,417] 19 [0,748] 1541 [60,669] 545,5 [21,476] ML 635L double oven weight 70 [2,756] 378 kg - 833,3 lb weight of packaging +...
- Page 17 Michelangelo ML 635L | triple oven technical data 1560 [61,417] 1140 [44,884] 19 [0,748] 1541 [60,669] 1106,5 [43,562] 70 [2,756] 669 [26,333] 1261 [49,6] 949 [37,356] 157,5 [6,202] 1541 [60,669] 1560 [61,417] 19 [0,748] 1541 [60,669] 545,5 [21,476] 70 [2,756] Ed.
- Page 18 Michelangelo ML 635L | capacity oven technical data PIZZA Ø 35 cm [Ø 13.78 in.] PIZZA Ø 50 cm [Ø 19,69 in.] PRODUCTIVITY Ø PIZZAS BATCH E S PER HOUR 66-72 pizzas 11-12 Ø 35 cm [Ø 13.78 in.] 22-24 pizzas 11-12 Ø...
-
Page 19: Michelangelo Ml 935 Oven Technical Data
Michelangelo ML 935 | single oven technical data 1560 [61,417] 1498 [58,978] 1464,5 [57,657] 19 [0,748] 1541 [60,669] 70 [2,756] 1261 [49,646] 1027 [40,427] 157,5 [6,202] 1541 [60,669] 1307 [51,459] 1560 [61,417] 19 [0,748] 1541 [60,669] 545,5 [21,476] ML 935 single oven weight 70 [2,756] 283 kg - 623,9 lb weight of packaging +... - Page 20 Michelangelo ML 935 | double oven technical data ML935/2 1560 [61,417] 1498 [58,978] 19 [0,748] 1541 [60,669] 1464,5 [57,657] 70 [2,756] 1027 [40,427] 1261 [49,646] 1541 [60,669] 1307 [51,459] 157,5 [6,202] 1560 [61,417] 19 [0,748] 1541 [60,669] 545,5 [21,476] ML 935 double oven weight 473 kg - 1042,7 lb 70 [2,756] weight of packaging +...
- Page 21 Michelangelo ML 935 | triple oven technical data 1498 [58,978] 1560 [61,417] 1541 [60,669] 1464,5 [57,657] 19 [0,748] 70 [2,756] 1027 [40,427] 1261 [49,646] 1307 [51,459] 157,5 [6,202] 1541 [60,669] 1560 [61,417] 19 [0,748] 1541 [60,669] 545,5 [21,476] 70 [2,756] Ed.
- Page 22 Michelangelo ML 935 | capacity oven technical data BAKING-TIN PIZZA PIZZA 60x40 cm [23,62x15,75 in.] Ø 35 cm [Ø 13.78 in.] Ø 50 cm [Ø 19,69 in.] Ø PIZZAS PRODUCTIVITY PER HOUR BATCH ES Ø 35 cm [Ø 13.78 in.] 99-108 pizzas 11-12 Ø...
-
Page 23: Installation
INSTALLATION Symbols used in the manual and on Safety instructions • Before performing any maintenance, replacing components or carrying out any routine/ the labels applied to the machine • Read this guide carefully before installing the extraordinary cleaning, disconnect the electricity appliance, and keep it with care in an accessible supply. -
Page 24: Transport
Installation Transport Fig. 5 Fitted with personal protection equipment, transport the appliance to the installation location. Use a suitable vehicle capable of withstanding the weight of the same. Model single double ML 435 169 kg - 372,5 lb 302 kg - 665,7 lb ML 635 218 kg - 480,6 lb 380 kg - 837,7 lb... -
Page 25: Positioning
Positioning Fig. 8 Fig. 8 The positioning room must comply with the instructions pro- min. vided on page and 5. Comply with the measure- 1000 mm. ments shown in the figure. [40 in.] min. Fig. 9 500 mm The oven must be placed on a base, built by the Manufacturer [19,7 in.] or by yourself that: •... -
Page 26: Serial Number Plate Reading
Installation Serial number plate reading Model Year of production Voltage The serial number is on the right hand side of the appliance. It provides important technical information that is vital in case of a request for maintenance or repair of the appliance: please do not remove, damage or modify it. -
Page 27: Electrical Connection
Installation Electrical connection Fig. 12 The electrical connection must be carried out exclusively by qualified personnel after reading the safety warnings at the beginning of the manual. Before installing the appliance, check that systems comply with the regulations in force in the country where it is going to be used and with the specifications... - Page 28 Installation • must be connected to an omnipolar circuit breaker allowing complete disconnection in overvoltage III category conditions. The Manufacturer accepts no liability for failure to comply with the above. If required, the cable can be replaced by the Dealer or its technical service or by a person with similar qualifica- tions to prevent any risk.
- Page 29 AC 230 mod. CD Abbreviation Description CTRL Oven control board CTRL.SF Chimney adding board Fuses Safety contactor BF09-MC09 Top res. half power BF09-MC09 Top res. full power BF09-MC09 Bottom res. half power BF09-MC09 Bottom res. full power BF09-MC09 Cooking chamber lights Board cooling fan motor Chimney opening motor RA1,2,3...
- Page 30 AC 3 230 mod. CD Abbreviation Description CTRL Oven control board CTRL.SF Chimney adding board Fuses Safety contactor BF09-MC09 Top res. half power BF09-MC09 Top res. full power BF09-MC09 Bottom res. half power BF09-MC09 Bottom res. full power BF09-MC09 Cooking chamber lights Board cooling fan motor Chimney opening motor RA1,2,3...
- Page 31 AC 3 N400 mod. CD Θ Abbreviation Description CTRL Oven control board CTRL.SF Chimney adding board Fuses Safety contactor BF09-MC09 Top res. half power BF09-MC09 Top res. full power BF09-MC09 Bottom res. half power BF09-MC09 Bottom res. full power BF09-MC09 Cooking chamber lights Board cooling fan motor Chimney opening motor...
- Page 32 Installation AC 230 mod. TS Θ Abbreviation Description CTRL.B Oven control board Motor start capacitor Noise filter Fuses Digital input for remote ignition Contactor BF09-MC09 Cooking chamber lights Board cooling fan motor Chimney opening motor PW.B Power board RA1,2,3 Top heating elements RB1,2,3 Bottom heating elements Safety thermostat...
- Page 33 Installation AC 3 N400 mod. TS Θ Abbreviation Description CTRL.B Oven control board Motor start capacitor Noise filter Fuses Digital input for remote ignition Contactor BF09-MC09 Cooking chamber lights Board cooling fan motor Chimney opening motor PW.B Power board RA1,2,3 Top heating elements RB1,2,3 Bottom heating elements...
- Page 34 AC 3 230 mod. TS Θ Abbreviation Description CTRL Oven control board CTRL.SF Chimney adding board Fuses Safety contactor BF09-MC09 Top res. half power BF09-MC09 Top res. full power BF09-MC09 Bottom res. half power BF09-MC09 Bottom res. full power BF09-MC09 Cooking chamber lights Board cooling fan motor Chimney opening motor...
- Page 35 AC 3 208 mod. DG Abbreviation Description CTRL Oven control board CTRL.SF Chimney adding board Fuses Safety contactor BF09-MC09 Top res. half power BF09-MC09 Top res. full power BF09-MC09 Bottom res. half power BF09-MC09 Bottom res. full power BF09-MC09 Cooking chamber lights Board cooling fan motor Chimney opening motor RA1,2,3...
-
Page 36: Pre-Testing And Final Inspection
Installation Pre-testing and final inspection √ Positioning checks Reference chapter on page... The oven is checked and tested in the Manufacturer’s plant Is the installation room adequate and compliant with regulations? (correct before being delivered to the customer. ventilation, maximum/minimum temperature, etc.) The “production process check sheet”... -
Page 37: Error Messages Mod. Cd
Installation Error messages mod. CD Error messages mod. TS Displayed Displayed Oven behaviour Solution Oven behaviour Solution code code The heater thermocouple is disconnected or faulty The alarm shows the oven configuration is wrong. No oven function works The board and cold coupling temperature probe is faulty Contact Contact The alarm shows there is no communication between the... -
Page 38: Procedures
PROCEDURES Firmware update To access the Touch board, unscrew the screws , remove the panel and insert the USB stick into the appropriate socket 27/04/2018 13:00 27/04/2018 13:00 27/04/2018 13:00 Parametri Test I/0 Data e ora Lingua Gestione HACCP Firmware Programmi update Versioni... - Page 39 27/04/2018 13:00 27/04/2018 13:00 27/04/2018 13:00 PLEASE WAIT UPDATE STARTING v0 . 2 UPDATE FOUND PLEASE WAIT Parametri Test I/0 Parametri Test I/0 Parametri Test I/0 ERASE IN PROGRESS Aggiornamento pronto Aggiornamento pronto Aggiornamento pronto WRITE IN PROGRESS START STOP START Aggiornamento pronto Aggiornamento pronto...
-
Page 40: Maintenance Hour Counter Reset
Maintenance hour counter reset A pop-up is displayed periodically warning about the need for oven maintenance. Touch the “WARNING” screen to continue with the Parametri operation. 27/04/2018 27/04/2018 13:00 13:00 27/04/2018 13:00 Data e ora Data e ora Lingua Lingua Imposta password Data e ora Lingua... - Page 41 27/04/2018 13:00 27/04/2018 27/04/2018 13:00 13:00 27/04/2018 13:00 27/04/2018 13:00 27/04/2018 Orev di Lavoro Orev di Lavoro 27/04/2018 Data e ora Lingua Ore da ultima manutenzione Ore da ultima manutenzione Data e ora Data e ora Lingua Lingua Data e ora Lingua Data e ora Lingua...
- Page 42 Notes...
- Page 43 Ed. 0121 - 70702520 REV06 Michelangelo - Pre-installation...
- Page 44 Linda Lewis Kitchens Ltd T/A LLK 3-5 Belgrave Industrial Estate Honeywell Lane Oldham, OL8 2JP 0161 633 5797 www.llkpizzapros.co.uk sales@llkpizzapros.co.uk...
Need help?
Do you have a question about the Michelangelo LLKML435 and is the answer not in the manual?
Questions and answers