
Related Manuals for Indesit IT60V9KMB/UK


Summary of Contents for Indesit IT60V9KMB/UK
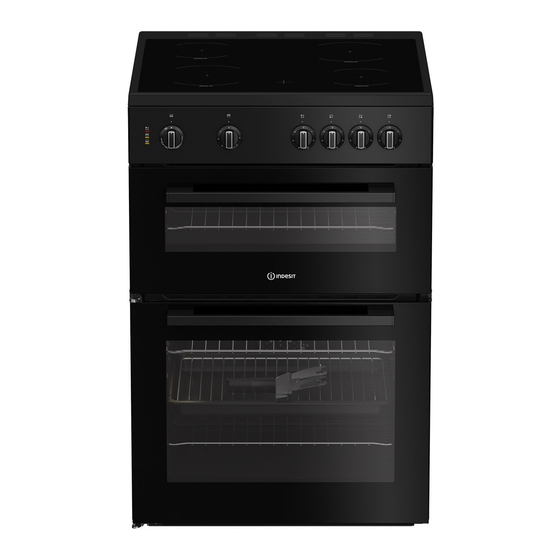
- Page 1 Free-standing double cookers User Manual IT60V9KMB/UK 285306181/ EN/ R.AA/ 22/08/2024 11:15 7734986421...
- Page 2 Welcome! Dear Customer, Thank you for choosing the Indesit product. We want your product, manufactured with high quality and technology, to offer you the best efficiency. Therefore, carefully read this manual and any other documentation provided before using the product.
-
Page 3: Table Of Contents
Using the bottom section of the Table of Contents oven ..........1 Safety Instructions......Using the upper section of the Intended Use........oven ..........Child, Vulnerable Person and Pet 8 General Information About Baking . 24 Safety ..........General warnings about cooking Electrical Safety...... -
Page 4: Safety Instructions
1 Safety Instructions • This section includes the Intended Use safety instructions necessary • This product is designed to be to prevent the risk of personal used at home. It is not suitable injury or material damage. for commercial use. •... -
Page 5: Electrical Safety
• Children should not play with • When the door is open, do not the product. Cleaning and user put any heavy objects on it or maintenance should not be allow children to sit on it. You performed by children unless may cause the oven to tip over there is someone overseeing or damage the door hinges. - Page 6 which the product is connec- Otherwise, cable insulation ted, in compliance with the may melt and cause fire as a electrical regulations and sep- result of short circuit. arating all poles from the net- • Use original cable only. Do not work.
-
Page 7: Transportation Safety
of electric shock. Unplug the • Do not place items on the ap- product or turn off the fuse pliance. Carry the appliance from the fuse box. vertically. • When you need to transport If your product has a power the product, wrap it with cable and plug: bubble wrap packaging mater-... -
Page 8: Safety Of Use
• The product should be placed tact between the product and directly on a clean, flat and these utility lines. Otherwise hard surface. It should not be the hose/pipe may be crushed. placed on a plinth or bed plate. • If there is a socket behind the Products must not be placed place where the product will be on cardboard or plastic plates. -
Page 9: Temperature Warnings
• CAUTION: If the hob surface is Temperature Warn- cracked, disconnect the ings product from the mains to • CAUTION: When the product is avoid the risk of electric shock. in use, the product and its ac- • CAUTION: If the hob glass sur- cessible parts will be hot. -
Page 10: Cooking Safety
detailed information, refer to since it can ignite when it the section "Usage of ac- comes into contact with hot cessories". surfaces. • Close the oven door after • Food residues in the cooking pushing the accessories com- area., such as oil, can ignite. pletely into the cooking space, Clean these residues before otherwise they may hit the... -
Page 11: Maintenance And Cleaning Safety
greaseproof paper that hang the food oil and other compon- from accessories or contain- ents that drip onto the oven ers. Do not use greaseproof bottom can create heavy paper at oven temperatures smoke and lead to flames. higher than the maximum us- •... -
Page 12: Ective And Disposing Of The Waste Product
2 Environmental Instructions 2.1 Waste Directive wastes, take it to the packaging material collection points designated by the local 2.1.1 Compliance with the WEEE Dir- authorities. ective and Disposing of the 2.3 Recommendations for Energy Waste Product Saving This product complies with EU WEEE Dir- According to EU 66/2014, information on ective (2012/19/EU). -
Page 13: Product Introduction
3.1 Product Introduction ** Varies depending on the model. Your product may not be equipped with a lamp, or the type and loca- tion of the lamp may differ from the illustration. Bottom cooking section Wire shelves Fan motor (behind the steel plate) Shelf positions Hob section Lamp... -
Page 14: Oven Operating Functions
1 2 3 1 Active hob warning lamp 2 Thermostat lamp - Upper cooking section 3 Thermostat lamp - Bottom cooking 4 Function knob - Bottom cooking sec- section tion 5 Function knob - Upper cooking sec- 6 Hob control knobs tion If there are knob(s) controlling your panel. -
Page 15: Use Of Product Accessories
the product model, the supplied accessory varies. All accessories described in the user’s manual may not be available in your product. The trays inside your appliance 3.5 Use of Product Accessories may be deformed with the effect of the heat. This has no effect on the Cooking shelves functionality. - Page 16 section must be on the front. For better Proper placement of the wire grill and tray cooking, the wire grill must be secured on on the telescopic rails-On models with the wire shelf’s stopping point. It must not wire shelves and telescopic models pass over the stopping point to contact Thanks to telescopic rails, trays or the wire with the rear wall of the oven.
-
Page 17: Technical Specifications
3.6 Technical Specifications General specifications Product external dimensions (height/width/depth) (mm) min. 900- max. 925 /600 /600 Voltage/Frequency 220-240 V ~ 50 Hz Cable type and section used/suitable for use in the min. H05VV-FG 3 x 4 mm2 product Fuse (min.) 32 A Total power consumption (kW) Oven type (Upper cooking section) -
Page 18: Installation
4 Installation • It can be used with cabinets on either General warnings side but in order to have a minimum dis- • Refer to the nearest Authorised Service tance of 400mm above hotplate level al- Agent for installation of the product. low a side clearance of 65mm between Make sure that the electric and gas in- the appliance and any wall, partition or... - Page 19 Warning: In order to prevent tipping of the appliance, this stabilizing means must be installed. Refer to the instructions for in- stallation. If your product has 2 safety chains; Fasten hook (1) by using a proper peg to the kitchen wall (6) and connect safety chain (3) to the hook via the locking mech- anism (2).
-
Page 20: Electrical Connection
The fixed ventilation opening can include The cooker may be located in a kitchen, kit- openings for existing airbricks, extraction chen/diner or a bed-sitting room, but not in hood ducting opening dimension etc. a room containing a bath or a shower. The cooker must not be installed in a bed-sit- Total gas consumption Min. -
Page 21: Placing The Product
• Power cable plug must be within easy reach after installation (do not route it above the hob). Do not use extension or multi sockets in power connection. • and must use the appropriate socket out- let/line and plug for oven. In case of the product's power limits are out of current carrying capability of plug and socket outlet/line, the product must be connec-... -
Page 22: How To Use The Hob
2. Remove all accessories from the oven Before using the accessories: provided with the product. Clean the accessories you remove from the oven with detergent water and a soft clean- 3. Operate the product for 30 minutes and ing sponge. then, turn it off. -
Page 23: Operation Of The Hobs
• Energy is wasted if the pot diameter is too small. • Use pots and pans with flat bases only. These provide easier heat transfer. Recommended cooking pots/pans sizes Cooking zone diameter - mm Pot diameter - cm 12 – 14 14 –... -
Page 24: Using The Bottom Section Of The Oven
7.2 Using the bottom section of the 7.3 Using the upper section of the oven oven Turning on the oven There is a switch on the door. This switch prevents the grill from oper- ating if the lid is CLOSED as a safety measure. -
Page 25: General Warnings About Baking In The Oven
8.2 General Warnings About Baking in 8.2.1 Pastries and oven food the Oven General Information • While opening the oven door during or • We recommend using the accessories of after baking, hot-burning steam may the product for a good cooking perform- emerge. - Page 26 • If the inside of the cake is cooked well, • If the pastry is browned on the surface but outside is sticky, use less liquid, de- but the bottom is not cooked, make sure crease the temperature and increase the that the amount of sauce you will use for cooking time.
-
Page 27: Meat, Fish And Poultry
Suggestions for cooking with two trays Food Accessory to be used Shelf position Temperature (°C) Baking time (min) (ap- prox.) 1-Standard tray * Small cakes 1 - 3 30 … 45 3-Pastry tray * 1-Standard tray * Cookie 1 - 3 25 …... -
Page 28: Grill
8.2.3 Grill The key points of the grill • Prepare foods of similar thickness and Red meat, fish and poultry meat quickly weight as much as possible for the grill. turns brown when grilled, holds a beautiful • Place the pieces to be grilled on the wire crust and does not dry out. -
Page 29: Test Foods
8.2.4 Test foods Cooking table for the upper cooking sec- tion • Foods in this cooking table are prepared according to the EN 60350-1 standard to facilitate testing of the product for con- trol institutes. Food Accessory to be used Shelf position Temperature level Baking time (min) (approx.) -
Page 30: Maintenance And Cleaning
Maintenance and Cleaning General Cleaning Information zones, clean any overflown fluids imme- diately after cooling down the hob by General warnings turning it off. • Wait for the product to cool before clean- Inox - stainless surfaces ing the product. Hot surfaces may cause •... -
Page 31: Cleaning Accessories
• The catalytic walls have a light matte and • Ensure that the joints of the components porous surface. The catalytic walls of the of the product are not left damp and with oven should not be cleaned. detergent. Otherwise, corrosion may oc- •... -
Page 32: Cleaning The Inside Of The Oven (Cooking Area)
Cleaning the inside of the oven For stubborn dirt, clean the product using dishwashing detergent, warm water and a (cooking area) soft cloth or sponge and dry it with a dry Follow the cleaning steps described in the cloth. "General Cleaning Information" section ac- cording to the surface types in your oven. -
Page 33: Cleaning The Oven Lamp
Removing the upper oven door 8. Pull the removed door upwards to re- lease it from the right and left hinges 1. Open the oven door. and remove it. 2. Open the clips in the front door hinge socket on the right and left by pushing To reattach the door, the proced- them downwards as shown in the fig- ures applied when removing it must... -
Page 34: Troubleshooting
2. Remove the glass cover by turning it 2. Remove the wire shelves according to counter clockwise. the description. 3. If your oven lamp is type (A) shown in 3. Lift the lamp's protective glass cover the figure below, rotate the oven lamp with a screwdriver. - Page 35 Oven light is not on. • Oven lamp may be faulty. >>> Replace oven's lamp. • No electricity. >>> Ensure the mains is operational and check the fuses in the fuse box. Change the fuses if necessary or reactivate them. EN / 35...
Need help?
Do you have a question about the IT60V9KMB/UK and is the answer not in the manual?
Questions and answers
I have indesit it60v9kmb/uk cooker, can't find out how you turn grill on.
To turn on the grill on an Indesit IT60V9KMB/UK cooker:
1. Open the grill door.
2. If preheating is required, set the grill to position 4 and let it heat for about 5 minutes.
3. Select the desired grilling temperature by turning the top oven control knob clockwise.
4. The temperature light will turn on, indicating the grill is heating.
This answer is automatically generated